What Are Paint Stir Attachments for Drills? Types, Uses and How to Choose
Hand-stirring paint is slow and uneven, especially when you are prepping for primer and multiple coats. Paint stir attachments for drills turn that chore into a 30-second task, but the wrong blade can whip air into the mix.
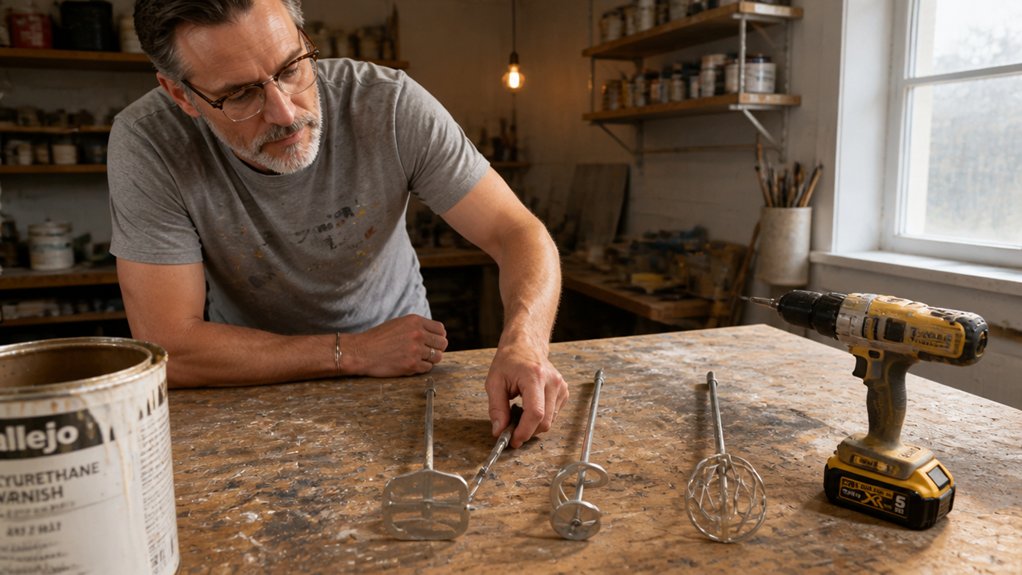
You will see three main types: open paddles for stains, closed-wing stirrers for wall paint, and spiral mixers for joint compound. Match the blade to the material, keep latex around 600 RPM, and slow down for varnish.
This guide covers the types, uses, and how to choose so your next repaint starts smooth.
Quick Answer
- Paint mixer paddles suit thin materials like stains and low-viscosity glazes.
- Closed-wing stirrers handle latex or emulsion wall paints efficiently.
- Mortar mixers with thick spiral blades manage concrete and thick pastes.
- Match stirrer blade material to solvent type, like stainless for high-VOC paints.
- Use medium drill speeds (500–700 RPM) for latex to prevent splatter.
Paint Mixer vs. Stirrer vs. Mortar Mixer: Which Do You Need?
Pick the tool by the thickness of what you pour from the can. A paint mixer has an open paddle that moves stains and low viscosity glazes without bogging down.
A paint stirrer uses a closed wing design to stir latex or emulsion wall paint and keep air out. Use it when a topcoat has to flow out and leave a clean wet edge.
A mortar mixer has thick spiral blades and handles joint compound, concrete, and other thick pastes. That extra torque helps on small batches, but it is too much tool for most finish work.
Match the tool to the product first, then check the can label for VOC limits and drying time versus cure time. For glazes and low viscosity resins, the open paddle of a paint mixer gives you control near a wet edge and helps avoid lap marks. Silicone offers corrosion-proof and non-reactive properties suitable for contamination-sensitive mixing, making it a safe choice for clear finishes.
For latex or emulsion, use a stirrer and keep brush strokes smooth as you work toward a wet edge. When you move to a topcoat in gloss, satin, or matte, stir slowly and check the sheen on a test panel before the full coat.
For joint compound or concrete, a mortar mixer saves time, but wear eye protection and keep a drop cloth close. I once used a stirrer for epoxy, and it whipped in air and made a foamy mess that no amount of sanding grit could fix.
If you finish furniture, keep a separate stirrer for varnish and polyurethane so you do not cross contaminate clear coats. Tape off edges with painter’s tape and add primer or topcoat only after the previous coat has reached the right drying time.
Buy the tool that fits the cans you open most often. A mixer for primer and high build products, a stirrer for wall paint, and a mortar mixer for patching jobs will cover most home projects.
What Does a Paint Stir Attachment Actually Do?
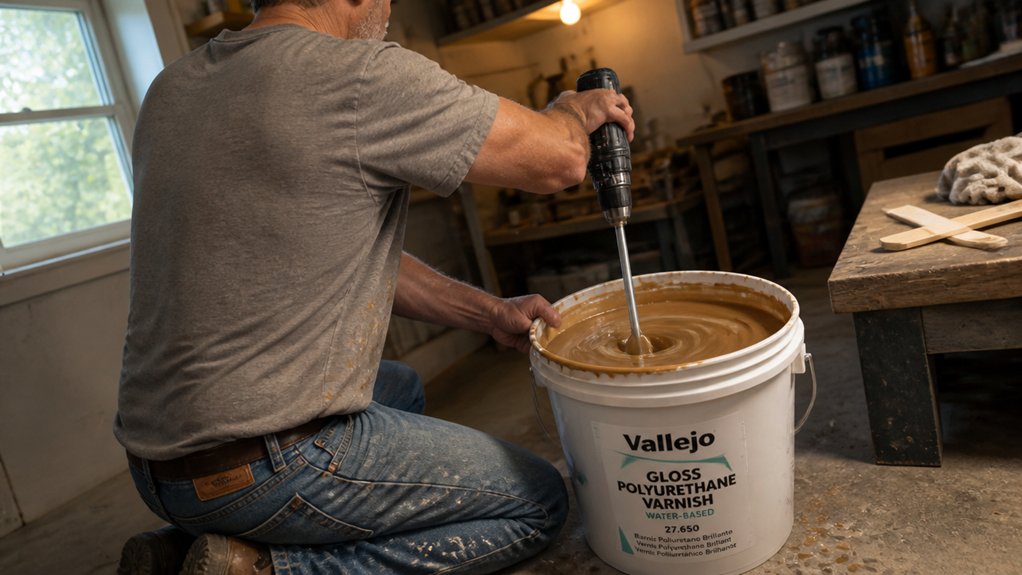
When you put a stir attachment in a drill and pull the trigger, the blade spins and the paint moves. The real work is the drill’s torque at the chuck, which lets the motor carry the load.
That torque turns a paddle that pulls paint from the bottom and sides and folds it into the center without splashing. On a gallon of primer or topcoat, this cuts a 5 minute hand stir down to about 30 seconds of easy swirling.
A good mix gives you an even blend for satin, gloss, or matte sheen, and it helps the paint lay down without bubbles. Lay a drop cloth and tape off trim with painter’s tape before you start, because one splash can ruin a floor or a shirt.
A good mix ensures even sheen and fewer bubbles, but protect floors and clothes before one splash ruins them.
For stain, varnish, or polyurethane, run the drill at a slower speed and keep dust from your final sanding grit out of the bucket. Helix and spiral designs prevent air bubbles for uniform color and texture. A uniform mix also helps you keep a wet edge, avoid lap marks, and get the drying time and cure time the label calls for.
Paint labeled low VOC can settle in the bucket, so stir it thoroughly before you pour. An even mix also helps a topcoat level out so brush strokes fade and the finish looks clean.
For most gallon buckets, a 4 inch cage paddle at medium speed does the job. Check the mix for even color and texture before you pour, and wipe the paddle before it drips.
How Do Blade Design and Material Affect Paint Mixing?
Blade shape matters, and so does the material. A strong steel blade resists bending when you stir a five gallon bucket of thick resin, while stainless steel handles paints with high VOC solvents.
Polypropylene works for light DIY mixing, but it can wobble above 1,500 RPM. Match the blade shape to the viscosity of your primer or topcoat, then check the metal before you start.
For a matte, satin, or gloss topcoat, a stiff steel blade keeps the mix smooth and helps avoid uneven sheen. Cheap plastic may mix a thin stain, varnish, or polyurethane, but it may fail before the job is done.
Spend a few extra dollars on steel, and you will feel the difference when your wrists are not aching. Keep a drop cloth under the bucket and a roll of painter’s tape nearby so the rest of the job stays clean. Vortex mixing at 3,200 RPM works best for smaller containers under 100 mL, unlike the bucket-scale stirring described here.
Will the Shank Fit Your Drill: and What Speed Should You Use?
Before you buy a shiny new stir attachment, check your drill chuck, the three jaws at the front that hold bits. Most stirrers have a quarter inch hex shank, and that fits a standard 3/8 inch chuck without trouble.
A half inch shank will not fit a small drill, so check the maximum chuck opening and measure the shank before you buy. Use a ruler or caliper and write the size down so you do not guess at the store.
Speed matters when you mix primer, latex paint, or a topcoat, and it matters even more with thick material. Keep latex paint around 500 to 700 RPM in a medium range.
> Keep latex paint in the 500–700 RPM medium range; thick material needs even slower, steadier speed.
Thick joint compound needs a little more speed, but too much will throw splatter and heat up the motor. I have burned out a motor that way, so start slow and watch the mix.
Thin material can handle more speed, while heavy material needs a slow, steady stir. Put down a drop cloth and use painter’s tape on nearby trim before you start, because splatter can land on a wet edge, dry into bumps, and leave marks that look like brush strokes or lap marks in the topcoat.
Stir stain, varnish, and polyurethane slowly so you do not whip air bubbles into the finish. Air bubbles can show up as small flaws in a gloss, satin, or matte sheen once the coating dries.
Stirring blends separated ingredients, and it does not change drying time or cure time. Low VOC paint may separate in the can, so stir it gently and check the label for the maker’s mix directions.
If you sand between coats, use the grit the label recommends, such as 220 grit, and wipe off dust before the next coat. Match the shank to your chuck, choose a speed that suits the material, and keep your drop cloth and painter’s tape ready. For heavily separated or thick materials, a low-speed, high-torque motor runs smoother with less noise, making the stirring process easier on both the drill and your hands.
Frequently Asked Questions
Can I Mix Epoxy Resin With a Paint Stir Attachment?
Yes, you can mix epoxy resin with a paint stir attachment, but choose the right paddle and control speed. Use a laminar flow epoxy mixing paddle, not a turbo mixer, and run your drill at the lowest speed that keeps the resin moving, about 300 to 500 rpm.
Scrape the bucket walls and paddle halfway through the mix to catch unmixed resin. This reduces bubble entrapment and helps maintain accurate resin mixing ratios.
Watch heat generation because epoxy exotherms and fast mixing shortens pot life. Control torque with a variable speed drill and keep the shaft steady.
For critical pours, consider vacuum degassing after mixing.
How Do I Clean the Stirrer After Using It?
To clean the stirrer after using it, wipe off excess coating and rinse it before the product sets. For water-based finishes, wash with warm soapy water and a stiff nylon brush, then dry it immediately with a rag.
For oil-based paints, varnishes, or stains, soak the stirrer in the proper solvent for about 10 minutes, then scrub with a wire brush and rinse clean. This simple paint mixing stick cleanup prevents hardened residue from contaminating your next batch.
If any film remains, repeat the solvent soak and inspect the edges and corners. Store the stirrer dry and clean so it is ready for the next mixing job.
Will a Paint Stirrer Work in a Cordless Drill?
Yes, a paint stirrer will work in a cordless drill for most paint mixing jobs. Watch your drill’s torque and battery life, especially with thick paints that can drain power fast.
Use a mixing paddle sized for your container and keep the drill on low to medium speed. Pulse the trigger in short bursts and mix a gallon for about one to two minutes until the color is uniform.
Thick products like exterior enamel may need slower speed and a fully charged battery. If the drill bogs down or smells hot, stop and mix smaller batches at a steady medium speed.
What Is the Maximum Container Size for a Paint Mixer?
The maximum container size for a paint mixer is generally 5 gallons for thick coatings, but your drill torque and paddle immersion depth set the true limit. For most latex and oil-based paints, a 5-gallon bucket works well when the mixing paddle stays fully submerged and you start at low speed.
A practical tip is to wrap tape on the paddle shaft at the depth for a 5-gallon bucket, then keep that mark just below the paint surface while mixing. If the drill bogs down or the vortex pulls air, step down to a smaller container or use a lower-viscosity product.
Can I Use One Stirrer for Both Paint and Mortar?
You should not use one stirrer for both paint and mortar. Paint residue left on a mixing paddle can contaminate mortar and weaken its bond.
Mortar grit also wears the paddle, which can scratch or streak future paint jobs. Keep separate stirrers for each material and label them with tape so they never get swapped.
If you need a quick field check, mix a small batch of mortar with the paint paddle and let it cure for 24 hours. Any flaking or poor set means the paddle is not clean enough for mortar work.
Rounding Up
Paint stir attachments for drills are basic stirrers for most home jobs or heavier mortar mixers for tough twists. Check the blade against your bucket’s depth before you start.
Write down your drill’s speed and keep it below 600 RPM, the drill speed limit. Compare a basic paint stirrer at about eight bucks with a mortar mixer at forty-plus.
Test a decent 12-inch helix for cans, and ask whether the job needs the heavier back-saving twist. A basic paint stirrer handles most home jobs, while a mortar mixer runs forty-plus for heavy work.
Related topic: mortar mixing.