What Are Paint Thinners? Types, Uses and How to Choose

If your oil-based paint is dragging, paint thinners can help, but only the right type.
What Are Paint Thinners? They are solvents like mineral spirits, naphtha, and turpentine that adjust flow, drying time, and leveling for varnish, enamel, and polyurethane.
This guide covers types, uses, and how to choose, plus ratios, safety, and cleanup so you avoid a sticky mess that never cures.
Match the thinner to the label and test a small batch before adding it to your whole project.
Keep reading for the simple rules that protect your finish.
Quick Answer
- Paint thinners are solvents that adjust paint viscosity for easier application and proper finish.
- Mineral spirits suit oil paints and varnishes, offering a longer wet edge for leveling.
- Naphtha dries fast for enamels, reducing dust settling on gloss or satin sheens.
- Turpentine prioritizes control for art oils; acetone cuts epoxies but needs ventilation.
- Always test a small batch on scrap wood, matching thinner to manufacturer label ratios.
What Exactly Is Paint Thinner and What’s Inside It?
Paint thinner is a family of solvents that make thick paint easier to spread. Each product has its own mix, and that mix controls which paint, stain, varnish, or polyurethane it can thin and clean.
Paint thinner is a family of solvents that make thick paint easier to spread, each with its own mix.
Solvent polarity tells you whether a thinner will mix with a coating. Mineral spirits work with oil based paint and many clear finishes, while water based latex needs water or a product made for latex.
Most paint thinners contain volatile organic compounds, called VOCs, and they evaporate fast with a strong odor. Turpentine, acetone, and naphtha behave in different ways, so check the label before you open the can.
Work with ventilation and wear gloves, and put down a drop cloth before you pour anything. Thin primer or topcoat only when the label allows it, and use the thinner the manufacturer names.
A bad thinner match can leave a gummy mess, slow the drying time, or upset the cure time of a finish. It can also cause brush strokes, lap marks, or a poor wet edge while you work.
Use painter’s tape to protect edges, and choose the sanding grit that matches the surface and finish. If a label gives a thinning ratio, follow it and test the mix on scrap wood first.
Sheen depends on the product, so choose a gloss, satin, or matte finish made for the job. Match the thinner to the coating it is made for and read the label before you start. Some thinners are specifically formulated to protect pigment integrity and clean brushes gently, as seen with low-odor artist-grade mineral spirits.
7 Paint Thinner Types and Their Uses
There is no universal paint thinner that works on every finish, so match the thinner to the product on the label. Check the primer, topcoat, stain, varnish, or polyurethane can before you buy anything.
Mineral spirits are a good choice for oil paint and varnish, and they give you enough working time to keep a wet edge on larger pieces. Naphtha suits enamel and dries quickly, which helps when you want less dust to settle on a gloss or satin sheen.
Turpentine is useful for art oils and fine finishes where control matters more than speed. Acetone cuts epoxies and resins quickly, but it has high VOC levels and needs outdoor use with good airflow.
Lacquer thinner, often a blend of solvents, strips tough lacquer and cleans tools well. Xylene evaporates slowly, so it gives synthetic enamel more open time and helps reduce lap marks and heavy brush strokes.
Odorless mineral spirits are my first choice for stain because the low odor is easier to work with in a shop. Low odor products can still have VOC content, so read the label and keep ventilation and a drop cloth in place. Slow evaporation in odorless mineral spirits allows more working time for larger projects.
The wrong thinner can change drying time, cure time, and how the topcoat flows, so test a small area before you commit. It can also affect sheen, brush strokes, and how well you keep a wet edge on a gloss, satin, or matte finish.
Work through the sanding grit your finish schedule calls for, then tape off edges with painter’s tape and set out a drop cloth before you open the can. A few dollars spent on the right thinner will save you from ruining a whole project.
Top Uses for Paint Thinner

Paint thinner can rescue a thick, partly used can of oil based paint and keep it usable for the next job. Stir in a small amount, check the label for the correct ratio, and aim for a consistency that lets brush strokes flow out and keeps a wet edge without lap marks.
It also removes dried oil based paint, primer, stain, varnish, and polyurethane from brushes, rollers, and small tools. Keep a drop cloth down, wear gloves, and work in a ventilated area because paint thinner has strong VOC fumes.
When you spray paint, a small amount of thinner can adjust viscosity so the paint flows through the sprayer and lays down a smoother topcoat. That helps the final sheen look even, whether you choose gloss, satin, or matte, and the label will give the thinning ratio and drying time. For best results, pair this step with a formula that includes a built-in primer, which improves adhesion and coverage on surfaces like wood, metal, and fiberglass.
Before you start, use painter’s tape on edges and a drop cloth under the work area. Test the spray pattern and follow the label for VOC limits and drying time, then clean up before the thinner evaporates.
Thinning Stored Paint
Stored paint often thickens because solvent evaporates from the can over months. Paint thinner brings that old paint back into usable condition when the problem is settled pigment and lost solvent.
Stirring alone will not dissolve the hard layer that forms at the bottom. Add mineral spirits slowly, starting with about 4 parts paint to 1 part thinner, then stir with a clean stick.
Check the mix for lumps as you stir and stop before it gets thin. A little patience here saves more cans than a heavy pour ever will.
I have rescued several cans of primer, stain, and oil paint this way, and you can save yours too. Keep the work area safe with a drop cloth and good ventilation because thinner carries strong VOC fumes.
Test the thinned paint on scrap wood before you use it on a topcoat or finish. Brush out a small section and watch for brush strokes, lap marks, and a wet edge that holds long enough to blend.
Too much thinner weakens the binder and leaves you with tinted water that will not form a film. On a project with a gloss, satin, or matte sheen, that mistake shows fast and can mean sanding the whole surface back.
Use the right sanding grit when you prep between coats, and respect both drying time and cure time on the label. A thin coat that flows well is better than a thick coat that never hardens.
For a clear wood finish, do not thin varnish or polyurethane unless the product label allows it. Those products are balanced for film build and sheen, so wrong thinner can cause clouding, poor adhesion, or a rough finish.
Start with a small amount of thinner and adjust in tiny steps. Protect edges with painter’s tape when you test, and keep the can sealed between uses to slow solvent loss. Avoid adding too much of any additive, as excess may affect color intensity or drying time.
Cleaning Application Tools
I usually forget to rinse a brush until paint dries hard, so I keep a can of thinner close by. For cleaning application tools, thinner cuts through dried oil based paint fast.
For brush restoration, soak the bristles for 10 to 15 minutes in a jar of mineral spirits. Comb out residue with a wire brush from the ferrule to the tip. For brushes with heavy buildup, a liquid soak cleaner can offer a heavy-duty restoration alternative.
Swish the brush in fresh thinner, then wash it with soapy water. Hang the brush to dry, and never let it stand on its bristles.
This routine saves about $15 per brush. If you skip it, you will buy new brushes often.
Keep a quart of thinner handy for tools used with primer, stain, varnish, and polyurethane. Before a topcoat, set a drop cloth and use painter’s tape to protect edges that will get a gloss, satin, or matte sheen.
Check the label for VOC content and for drying time versus cure time. A light pass with the right sanding grit and a wet edge help prevent lap marks, and clean brush strokes keep the finish even.
Adjusting Spray Viscosity
Cleaning brushes is one job, and getting paint to flow through a spray gun is another. You will see the wrong thinner quickly when you spray.
You need enough thinner to break paint into a fine mist, and too much thinner lets the coat sag on vertical panels. Aim for a mix that sprays evenly and still holds its shape.
Solvent speed controls how long the film stays wet after it hits the panel. Lacquer thinner evaporates fast and helps a thin coat set before it runs, while mineral spirits evaporate slowly and give more leveling time.
Slow solvents can still cause drips when you spray a door or cabinet side. Test on a scrap panel before you commit a whole batch to the gun.
Mix too thick and you get orange peel; mix too thin and you paint puddles. Both problems cost you sanding time and extra topcoat.
Start with the thinner ratio from the product maker, then add thinner in small amounts and check the spray pattern. Keep notes on the ratio, tip size, and room temperature so you can repeat a good result.
Your gun tip size sets the flow you can get, just as the room temperature changes how fast the solvent leaves the film. Spray a test panel, then adjust the mix to match the tip and room temperature.
Check the VOC limits for your area before you open a strong solvent. Use good ventilation and keep the spray area clear of ignition sources.
A primer can seal the surface, but it will not save a topcoat mix that is too thin for the gun. Sand the primer with the grit your product calls for, then clean off the dust before you spray color.
Drying time is when you can handle or sand the film, while cure time is when the finish hardens fully. Respect both times before you stack parts or mask off for the next step.
Gloss, satin, and matte sheen levels all show spray flaws in different ways. A slick gloss finish shows orange peel, and a matte finish can hide small lap marks better.
The same test panel method works for stain, varnish, and polyurethane when you move from spray work to brush work. A test panel shows how the finish levels before you touch the project.
Keep a wet edge with a brush, and watch for brush strokes near the edges. Work in small sections so the finish levels before it sets.
Lay a drop cloth and use painter’s tape to protect nearby surfaces before you spray. Cover tools and finished parts that should stay clean.
You will know the mix is right when the finish dries smooth with an even sheen and no runs. Check the panel under good light before you spray the final topcoat. Many airless sprayers handle thick latex without thinning, and models rated at 3000 PSI or higher deliver the finer atomization that keeps a properly mixed coat flowing smoothly.
Which Thinner Should You Pick for Your Paint?
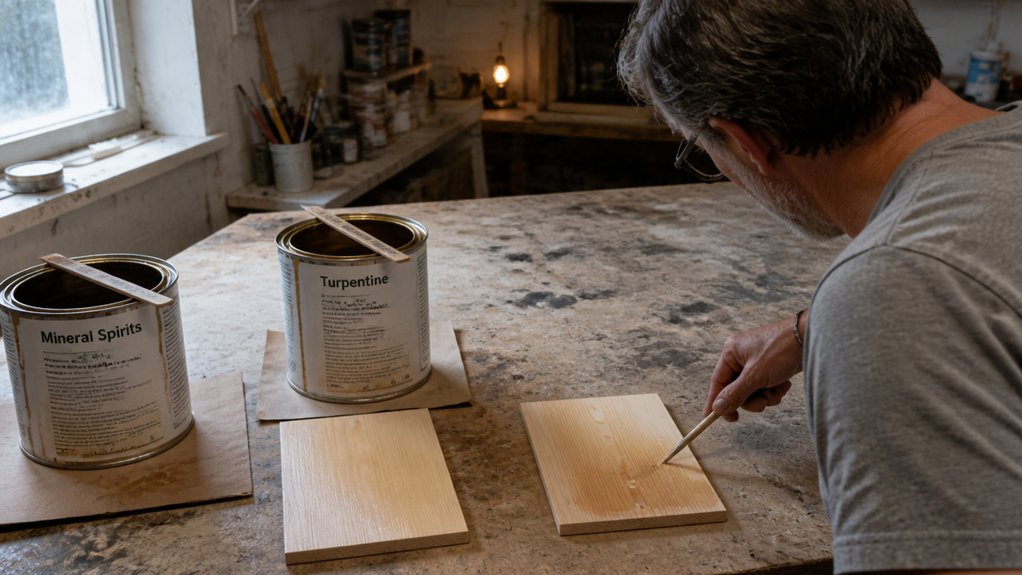
Match the thinner to the paint before you open the can. If you add the wrong thinner to an oil based enamel, varnish, or polyurethane, you can ruin the finish before you ever pick up a brush.
Read the label and use the manufacturer’s recommended thinner for that product. Mix a small test batch first, because a 3 to 1 ratio that works for one brand can turn another brand into a runny mess.
Use that test batch to check how the paint flows, levels, and holds a wet edge. Watch for lap marks and brush strokes, and note the drying time and cure time before you thin the whole gallon.
Sand with the sanding grit listed on the primer or topcoat label, and keep your drop cloth and painter’s tape ready. If you are brushing a stain or varnish, test the sheen on scrap wood so you know whether you want gloss, satin, or matte.
Work in a ventilated area with solvent resistant gloves and a respirator. These solvents can harm your lungs and skin, and many products carry VOCs that build up indoors. Choose a respirator with NIOSH approval for organic vapors to ensure adequate protection against paint thinner fumes.
Matching Thinner to Paint
Start with the label. It tells you which thinner belongs with the paint and helps you avoid a failed finish.
If the label says oil based, use mineral spirits or turpentine. For lacquer, use lacquer thinner and follow the label for primer, topcoat, and sanding grit between coats.
Match the thinner’s drying time to your project pace. Naphtha dries fast for enamel and helps it flow, while mineral spirits give you a longer wet edge so brush strokes and lap marks level out.
Check shelf life before you use an old can. Cloudy or stale solvent can leave residue or fail to thin paint evenly.
A low flash point means more fire risk, so keep solvent containers sealed and away from heat. Open windows and run a fan to keep VOC levels down.
The thinner you choose can affect sheen, including gloss, satin, and matte. It also changes drying time and cure time, the point when the finish hardens fully, so read the label before you mix.
For stains, varnish, or polyurethane, use the thinner named on that product’s label. Set a drop cloth and use painter’s tape when you test a solvent near a finished edge.
For art applications, seek out 100% pure gum spirits distilled from pine resin rather than sulfate-pulp alternatives to preserve color clarity and finish integrity.
Testing Before Full Mixing
Read the label and narrow your solvent choices before you open the can. Then mix a small test batch in a clean cup.
Start with about a quarter cup of paint and a few drops of thinner. Stir it well, then brush it on scrap wood or cardboard.
Look for smooth flow with no drips or drag, and watch the wet edge and brush strokes. Adjust slowly, adding thinner drop by drop, because you cannot take thinner back out of the paint.
Use fresh thinner for the test. Old solvent loses strength and can give you a false result.
Thinner affects how a topcoat levels and how the finish holds a wet edge, so a test batch tells you more than a guess. A bad mix can leave brush strokes, lap marks, or a patchy sheen, and it can change gloss, satin, or matte topcoats in different ways.
Check the label for the thinner type and VOC limits before you mix. Test on a scrap board sanded with the same grit as your project.
Let the test patch dry and note the drying time, then keep it for a day or two to check cure time. The same method works for primer, stain, varnish, and polyurethane when the label allows thinning.
Pour the test mixture into a labeled jar and save it for cleaning brushes later. Work over a drop cloth, and use painter’s tape to label the jar if needed.
Test first to save your paint and your money. For precise small batches, use a cup with printed ratio scales to avoid guessing at the correct proportions.
Safety and Ventilation Checks
Fumes can catch you off guard, and that is why I do safety checks before I open a can of thinner or pour a stain. I learned this the hard way when I mistook a headache for dehydration.
Ventilation comes first because stain, varnish, and polyurethane release VOCs, the solvent vapors that can irritate your lungs, while they dry. Set up your space before you mix a topcoat or worry about sheen.
I run through four checks before I start any finishing job. They take a few minutes and keep your lungs out of trouble.
Open doors and windows to create cross ventilation. Moving air carries solvent vapor out of the room and keeps it from pooling.
Set a box fan in a window and blow air outward to raise the ventilation rate. Stagnant air lets fumes build up while you work.
Wear a respirator rated for organic vapors whenever you use thinner, stain, varnish, or polyurethane. Choose cartridges made for solvent vapor and check the fit before you start. For maximum protection, select a full-face model with a secure facepiece seal to prevent leaks that let air bypass the filter.
Keep pilot lights, sparks, and static away from your work area. Thinners and solvent fumes can flash with an ignition source nearby.
Those four checks are simple, and they matter more than any shortcut with sanding grit or brush strokes. Once the air is moving and your respirator fits well, you can focus on a wet edge, lap marks, and a clean topcoat.
Check the label for drying time and cure time so you know how long to keep ventilation running. Fumes can linger after the surface feels dry, especially with varnish or polyurethane.
Use a drop cloth and painter’s tape to keep your workspace clean, and keep them away from ignition sources. A tidy area also helps you spot spills before they become a fire risk.
Run these checks and you are a careful painter with a safer workspace. Then you can move on to primer, gloss, satin, or matte finishes.
Mix Ratios and Test Before You Paint
Measure your thinner before you pour it into the paint. Start with a small test batch at a 3:1 ratio, three parts paint to one part thinner.
Keep the main can unthinned until that batch sprays and lays out the way you want. If you are spraying a topcoat over primer, decide the sheen first, whether gloss, satin, or matte.
Check the label for VOC limits before you add thinner. Use a drop cloth and painter’s tape to protect the area before you open stain, varnish, or polyurethane.
For brush or roller work, use 4:1 and expect a mix that flows like honey and moves slowly. For a standard spray gun, use 3:1 and mix to whole milk consistency so it sprays without runs.
For HVLP or detail work, use 2:1 and expect a skim milk consistency that dries fast. Write the ratio and product on the jar lid, and track drying time and cure time as the weather changes.
Choose a sanding grit that matches the coat you are working on, and wipe off dust before the next pass. On brush or roller coats, keep a wet edge and watch for lap marks and brush strokes.
Test each batch on scrap wood before you touch the project. If it sags, add thinner a few drops at a time; if it spatters, you have thinned it too far.
Pour leftovers into a sealed jar and label it for proper paint disposal. Check local rules for thinner recycling before you rinse anything down the drain.
Safety: Fumes, Skin Hazards, and Disposal
Open a window or work outside when you use paint thinner, stain, varnish, or polyurethane, because the fumes can hit your lungs hard. A high VOC primer or topcoat needs more airflow than a low VOC water based product, so set up your work area before you open the can.
Your skin loses oils fast when solvents touch it, so wear nitrile gloves and splash goggles while you pour and wipe. Latex gloves break down around these products, and regular glasses leave your eyes open to splashes.
Keep a fire extinguisher within reach when you work with flammable finishes, and lay a drop cloth with painter’s tape to contain drips. Sanding between coats raises dust, so match the sanding grit to the job and wear a dust mask.
Rags soaked with oil based stain, varnish, or polyurethane can heat up and catch fire, so soak them in water and seal them in a metal can. Check the label for drying time and cure time, and keep those rags out of the trash bin.
Set up airflow before you open the can, and keep the area clear while the finish dries. A gloss, satin, or matte sheen changes how the finish looks, but the solvent in the can still sets the safety rules.
Work in small sections to keep a wet edge, and watch for lap marks and brush strokes as you lay down the finish. Stop when fumes build up, even if the wet edge is still open, and take a break in fresh air.
Frequently Asked Questions
Can Paint Thinner Be Used to Clean Brushes?
Yes, paint thinner can clean brushes after oil-based paints, stains, and varnishes. Dip only the bristles, work solvent through the brush, and wipe residue onto a rag before it dries.
For oil-based enamel, swirl the brush in thinner for about 30 seconds, then wash with warm soapy water and comb straight. A related brush cleaner may be gentler on natural bristles, but thinner handles heavy solvent cleanup.
Fumes are the real concern, so wear gloves and work in a ventilated space with air pulling away. Never soak brushes overnight, and store them dry and shaped for the next finish.
What Happens if I Use the Wrong Thinner?
Using the wrong thinner can ruin a DIY paint job by causing film damage and poor curing. A thinner with the wrong evaporation rate makes the coating skin over too fast or stay wet too long, which leads to wrinkling, peeling, or weak adhesion.
As a practical check, brush a test panel and let it dry for 24 hours before you commit to the whole project. If the film stays soft or wrinkles, switch to the maker’s recommended reducer instead of guessing.
You will save sanding time too, because a failed film often needs 120 grit to strip back to a sound surface. Keep the correct thinner on hand and mix only what you need for the day.
How Long Does Paint Thinner Take to Dry?
Paint thinner typically takes 15 to 60 minutes to dry to the touch, though full evaporation can take several hours depending on the paint solvent. Fast solvents like acetone flash off in minutes, while mineral spirits can linger for hours in cool, poorly ventilated spaces.
Good airflow is the biggest practical lever, so set up a fan and crack a window before you start. If you are wiping down a project before varnishing, give mineral spirits at least 30 minutes with moving air, then sand lightly with 220 grit only if the surface feels raised.
Can I Mix Different Brands of Paint Thinner?
You should not mix different brands of paint thinner unless their labels list the same solvents and ratios.
Brand mixing risks unpredictable results because solvent compatibility varies, and a mismatched solvent blend can turn a clean finish cloudy or gummy. Keep one manufacturer’s thinner for your specific paint, and test a small batch first.
As a practical rule, add thinner in small increments and check drying time on scrap; if the label calls for 10 percent and the batch stays tacky after 30 minutes, stop and use the correct reducer. Otherwise you will likely ruin consistency and your project.
Is Odorless Mineral Spirits Safer Than Regular?
Odorless mineral spirits are not safer than regular mineral spirits, just less smelly. Treat odorless paint thinner with the same ventilation and skin protection as regular solvent.
Set up cross ventilation: open a window and use a box fan pulling air out, not blowing into the room. For a typical brush-cleaning session, stay ventilated and wear nitrile gloves; prolonged use calls for a NIOSH-approved organic vapor respirator.
Don’t let a faint odor fool you into skipping precautions. Store rags flat outdoors to dry, then dispose according to local rules, because solvent fumes still accumulate.
Rounding Up
Paint thinners are products that come in types matched to paint and use, and testing your mix first helps you choose the right type for the job. Test a small mix before you start today so a wrong choice does not ruin a project faster.
Read the label before you act, and respect the fumes while you work with the paint. Compare thinner cost to the job: cheap thinner means cloudy finishes, but premium thinner for clean-up is dumb, so match the paint to the thinner.
Related topic: paint clean-up.