What Are Plastic Paints? Types, Uses and How to Choose

Plastic paint is not one product, and the wrong can means wasted money and a finish that peels. If you are wondering what plastic paints are, this guide covers types, uses, and how to choose the right coating for your project.
You will see how surface prep, primer choice, sheen, and cure time affect bonding on slick plastics. We will compare all in one sprays, primer and topcoat systems, and flexible acrylic formulas without the guesswork.
By the end, you will know which option fits outdoor furniture, PVC, ABS, or tricky polyethylene and how to avoid a failed coat.
Quick Answer
- Plastic paints use flexible resins that bond to slick, non-porous surfaces unlike standard wall paints.
- Types include all-in-one sprays, separate primer-topcoat systems, and specialized elastic or high-heat coatings.
- Rigid plastics like PVC, ABS, and fiberglass paint easily; polypropylene and polyethylene need dedicated primers or etching.
- Clean with soap and water, scuff with 220-grit sandpaper, and apply thin coats for optimal adhesion.
- Gloss or semi-gloss acrylic topcoats resist moisture and UV damage, lasting longer outdoors than matte finishes.
What Makes Plastic Paint Different From Regular Formulas?
Plastic paint uses different resins that bite into the slick surface. Standard wall paint expects a porous surface it can soak into, so it beads up on plastic and leaves a weak coat.
For a patio chair, clean it, scuff it with 400 grit sandpaper, and wipe off the dust. Use a plastic primer if the label calls for it, then apply a thin topcoat made for plastic. Fusion paints chemically bond to plastic with etching and no primer needed.
Plastic paint lays down a thinner, more flexible film that moves with the chair as it heats and cools. That flexibility helps stop cracks, while thick wall paint can chip when the plastic flexes.
Plastic paint bends with the chair as it heats and cools, so it resists cracks where thick wall paint chips.
Make light spray passes and keep a wet edge to avoid lap marks and edge pooling. If you use a brush, work with smooth brush strokes and watch for goop collecting at corners.
Choose the sheen for the job, such as gloss, satin, or matte, and check the VOC level if fumes matter to you. Follow the label for drying time and cure time before you put the chair back outside.
Lay a drop cloth and use painter’s tape to protect nearby surfaces. Save stain, varnish, and polyurethane for wood projects, and use plastic paint for the patio chair.
Which Plastics Accept Paint Without Primer? (And Which Don’t)
Some rigid plastics take paint without primer. Plastics with low surface energy, such as polyethylene and polypropylene, usually need help.
PVC, ABS, polystyrene, and fiberglass are the easy rigid plastics when you prep them right. Scuff PVC and ABS lightly with 320 grit sandpaper, wipe off the dust, then apply your topcoat.
Fiberglass is ready after a solvent wipe, and a thin coat helps you keep a wet edge and avoid brush strokes. Polystyrene paints fine if you avoid harsh thinners and keep the first coat thin.
Use a matte or satin sheen for an easy finish, or build coats slowly if you want gloss. Polyethylene and polypropylene will resist paint unless you etch the surface or use a primer made for them.
Flexible vinyl will flex and flake, so leave it unpainted or use a coating made for flexible surfaces. For any plastic, mask edges with painter’s tape and cover the floor with a drop cloth before you start.
Check the label for VOC limits and follow the drying time and cure time before you handle the piece. A light scuff gives the paint something to grip, and two thin coats beat one heavy coat.
Let each coat flash off, watch for lap marks, and keep your brush strokes moving in one direction. That prep and patience save you a recoat. For flexible items, specialized flexible paints that remain rubbery are typically acrylic-urethane blends and cost about 30% more than standard options.
The 3 Main Types of Plastic Paint and When to Use Each

You will see three main choices for plastic paint, and each one fits a different job. Pick the product by the surface and by how long the finish needs to last.
An all in one spray paint mixes primer and color in one can. It works well for quick touch ups, but primer adhesion is only fair and the coat stays thin.
Check the VOC level when you work indoors, and use painter’s tape and a drop cloth to protect the area. Sand slick plastic with 220 grit paper first so the primer has something to bite.
A system with a separate primer and topcoat gives you better grip and control. This is my choice for outdoor furniture because the primer can grip tough plastics like polypropylene.
Pick the sheen before you buy: gloss, satin, or matte. The topcoat sets that sheen, and the extra film thickness helps prevent peeling.
Apply the topcoat in thin coats, and follow the drying time before each coat and the cure time before hard use. If you brush, keep a wet edge to avoid lap marks and brush strokes.
Acrylic paint works well on UPVC windows and doors because it flexes with thermal expansion. Acrylic-based formulas flex with wood movement and are preferred for expanding outdoor materials. Stain, varnish, and polyurethane are for wood, so keep them out of this plastic paint job.
How to Prep Plastic Surfaces for a Paint Job That Lasts
Good prep decides whether your plastic paint job holds up for years, so set aside time for it. Cover nearby surfaces with a drop cloth and mask edges with painter’s tape before you start.
Clean the plastic with a degreaser, then sand it with 220 grit paper to give the surface tooth. Wipe off the dust and test a small area with your primer to make sure it bonds well.
Choose a primer made for plastic and check the label for VOC content and the drying time before you apply your topcoat. For slick surfaces like laminate or epoxy, a bonding primer with stain blocking resins grips without sanding. Use thin coats, keep a wet edge, and watch for lap marks and brush strokes as you work.
Let the topcoat dry through its full cure time, since a tack free finish can still be soft inside. Pick a sheen that suits the job, such as matte, satin, or gloss, and enjoy a finish that lasts through rainy seasons.
Clean & Degrease
Skipping the scrub is the fastest way to watch paint peel off plastic in sheets.
I have done it, regretted it, and repainted the part, so trust me on this.
You are removing dust, and you are also stripping the invisible oil based residue that keeps primer from bonding.
That greasy film is a common cause of adhesion failure.
I use five steps before any spray can touches plastic.
Start with warm water and dish soap, since harsh degreasers can attack the plastic.
For stubborn spots, use isopropyl alcohol at 70% or higher on a cloth that does not leave lint.
Rinse twice because soap residue can cause a later failure.
Dry the surface right away because water spots can trap contaminants.
Do a finger test, and if the surface feels slick, clean it again.
Clean plastic should hold water in a thin sheet.
If you do this step well, sanding will work better and your primer and topcoat will have a fair chance to bond.
For especially tough buildup, a citrus-based degreaser can help, but always test it on a small area first since some formulas may strip plastic sealants.
Sanding for Adhesion
Sanding is the step many people want to skip because it is dusty and slow. That step decides whether your topcoat holds up for years or peels in a month.
Sanding creates small scratches, or microgrooves, that give the primer and topcoat a surface to grip. Choose sanding grit to match the surface and the finish you want.
For most jobs, sand with 220 grit, then wipe the surface with a tack cloth to remove dust. The surface must be dry and clean before you apply primer.
Use 120 grit for heavy scratches and mold release, and use 320 grit for a light scuff before the final coat. Use 400 grit when you want a very smooth surface for a gloss or satin sheen.
Stain, varnish, and polyurethane all need a clean surface with enough texture for the finish to bond. I skipped sanding once, and I still see the regret in that faded chair.
For example, washable, reusable foam blocks allow you to rinse and dry them between stages, keeping the abrasive surface fresh for repeated coats.
Check Compatibility
Plastic can look the same on the surface and still act very differently under a primer or topcoat. Check the can label for the compatibility chart and any VOC limits before you buy a primer or topcoat.
That chart is a quick first check, and it helps you match the plastic type to the right product. Test the coating on a hidden corner first, then let it dry and check adhesion with a tape pull or a fingernail scratch.
Scuff glossy plastic with the sanding grit your paint maker recommends, because a light sanding gives the primer a surface it can grip. For polypropylene and other low surface energy plastics, use a primer made for that material or the topcoat may fail.
Clean the surface with the solvent your coating maker recommends and give it enough drying time before you apply the primer. Keep painter’s tape and a drop cloth handy, and watch the wet edge as you spray or brush so you do not leave lap marks.
Check adhesion again after the coating has reached cure time, since a finish that passes too early can still peel later. Take thirty seconds to read the label before you open the can. For surfaces with heavy corrosion or rust bleed-through, use a converter that bonds directly to rust without sanding required and transforms iron oxide into an inert, paintable barrier.
Why UV Resistance and Sheen Decide Outdoor Durability
Sunlight breaks down paint color, so a topcoat with strong UV resistance keeps red trim from turning pink in one season. Use an exterior primer first, then apply the topcoat as the label says so it bonds well and lasts.
Sheen changes how the finish sheds water: gloss and semi gloss form a tighter surface that resists rain, while matte and flat paint leave a more open film. For garden furniture and trim, choose gloss or semi gloss and keep matte and satin finishes for sheltered spots.
Set out a drop cloth and painter’s tape, scuff the wood with the right sanding grit, and wipe off the dust before you start. Keep a wet edge while brushing to avoid lap marks and brush strokes, and let the finish reach full drying time and cure time before use.
If you use a stain, varnish, or polyurethane finish, read the label for VOC limits and recoat times. A topcoat with strong UV resistance and a gloss or semi gloss sheen on exposed wood helps you keep the color for years and repaint less often. UV-stable pigments and acrylic binders in these formulations retain roughly 90% of their hue after five years of exposure.
UV Resistance Levels
UV rays act like tiny invisible sandblasters on paint, so sheen is your first line of defense. A higher gloss reflects more sunlight, which slows UV fade and helps keep chalking low.
Check the label before you trust any outdoor claim, then pick a topcoat that fits the job. For garden chairs and window frames, a semi gloss, satin, or gloss acrylic is cheap insurance against sun damage.
Glossy finishes hold up to UV better than flat or matte finishes. UV fade shows up as dull, washed out color after one season.
Low quality paint can chalk faster and leave white powder on your hands. Premium pigments usually last longer, so ask what is in the can before you buy.
Test a hidden spot first and watch how the coating handles sun and weather. A small test patch will show weak formulas fast.
Start with a primer on bare wood, then sand with the right sanding grit so the topcoat can bond. Keep a wet edge as you work and watch for lap marks and heavy brush strokes.
Drying time and cure time are different, so give the finish enough time before you use the piece. Use a drop cloth and painter’s tape to protect nearby surfaces, and check the VOC level if fumes matter to you.
For stain, varnish, or polyurethane on outdoor wood, read the can for UV blockers and recoat schedules. Good prep and a sensible sheen will do more for your paint job than a fancy label. If you need extreme heat protection, consider a product like VHT FLAMEPROOF coating that withstands up to 2000°F for engines or exhausts.
Sheen & Moisture Protection
Sheen protects paint from moisture and sun. A high gloss finish forms a tighter moisture barrier than a flat or matte coating, so it resists water penetration better on outdoor plastic.
Rain and humidity hit outdoor plastic every day. For chairs, gutters, and trim in exposed spots, choose gloss; use satin in shaded areas.
| Finish | Moisture resistance | UV performance |
|---|---|---|
| Flat or matte | Poor, absorbs water | Medium, chalky fade |
| Satin | Good, slight barrier | Strong, balanced |
| High gloss | Excellent, seals tight | Best, reflects UV rays |
A primer helps the topcoat bond, especially on plastic that has been scuffed with 220 grit sandpaper. Wipe off dust, lay a drop cloth, and use painter’s tape to protect nearby surfaces.
Keep a wet edge while you paint to avoid lap marks and heavy brush strokes. Follow the label for drying time and cure time, and choose a low VOC product when you can.
Gloss shows scratches and surface flaws more than satin, so weigh appearance against protection. Satin can fail after two winters in wet conditions, while gloss often holds for four years or more. For maximum longevity, look for formulas that retain 80-90% gloss after 1,000 hours of sun exposure.
On wood trim, a stain or varnish can add color, but polyurethane gives a clear topcoat. Test a small area first so you know how the finish looks and how it holds up.
For plastic in direct sun, use high gloss every time. It gives the best moisture and UV protection for the longest service life.
The Best Way to Apply Paint to Curved or Textured Plastic
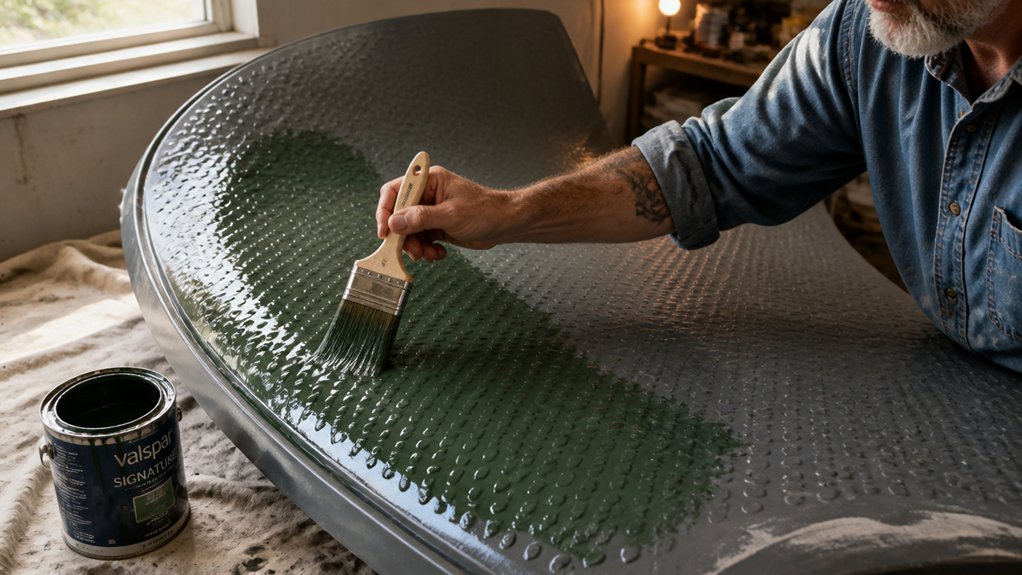
A spray can gives you even coverage on curved or textured plastic, and it reaches recesses that a brush can miss. Brush strokes can catch on ridges and leave lap marks, so spray works better for this job.
Set up a drop cloth and use painter’s tape to mask areas you want to keep clean. Use a dedicated plastic primer first, especially on textured parts, so the topcoat can bond and resist peeling.
Choose a primer with low VOC and work in a ventilated space. For deep texture, scuff the surface first with 220 grit sandpaper to give the primer a grip.
Hold the can 8 to 10 inches from the part, because a closer pass can cause drips. Apply thin, fast coats and overlap each pass to keep a wet edge and avoid lap marks.
Three light passes work better than one heavy coat, and they help you control the final sheen. Let each coat dry for 30 minutes before you add the next one.
Mist curves from alternating angles so every side gets paint. Pick a topcoat in gloss, satin, or matte to match the part, and check that the label says it is made for plastic.
Drying time tells you when you can recoat, and cure time tells you when the paint is fully hard. Check the label for the recoat window and the full cure time.
Stain, varnish, and polyurethane are wood finishes, so check the label before you use them on plastic. Let the final topcoat cure before you handle the part or put it back into use.
How to Pick the Best Plastic Paint for Your Project Type
Pick the right plastic paint by checking the plastic first. Shiny polyethylene garden chairs need a specialist plastic spray, because standard paint will bead up and fail.
For rigid PVC or ABS, such as window frames or car trim, you have more options. Clean the surface, scuff it with 220 grit sandpaper, and wipe off the dust before you apply primer.
A spray that combines primer and paint saves time. It still bonds less firmly than a separate primer and topcoat, so use the separate system for outdoor pieces or parts that get heavy use.
Set up a drop cloth, mask edges with painter’s tape, and check the VOC level if you work indoors. Keep a wet edge and use even passes to avoid lap marks and brush strokes, then check the matte, satin, or gloss sheen after the topcoat dries.
Drying time and cure time are different, and the “dry in one hour” label does not mean the paint is hard. Full cure can take several days, so test adhesion with a light scratch after that cure time.
Frequently Asked Questions
How Long Does Plastic Paint Take to Fully Cure?
Plastic paint takes about 5 to 7 days to fully cure, though it is dry to the touch in roughly an hour. For reliable paint curing time, control temperature, coating thickness, and humidity, since high humidity can slow the process significantly.
As a practical rule, apply two thin coats rather than one heavy coat, and keep each coat under 3 mils wet thickness. Wait the full 7 days before sanding, buffing, or stress-testing the paint; it should be fully hardened by then.
A fan and gentle warmth help, but avoid direct high heat that can skin over the paint.
Can Plastic Paint Be Removed Once Applied?
Yes, plastic paint can be removed once applied, but it requires patience and the right method. Roughly 85% of removal failures come from poor surface prep, so treat removal as reversing adhesion rather than simply dissolving color.
Use a gel chemical stripper and let it dwell 20 to 30 minutes before scraping with a plastic putty knife. Then sand the residue with 80-grit paper, clean the dust, and test a small finish coat before full recoating.
This approach also works for plastic coating removal on trim, doors, and furniture when you work carefully. Success depends on breaking adhesion during application, so removal is never easy, but good prep makes it manageable.
Is Plastic Paint Safe for Use on Children’s Toys?
Plastic paint is safe for use on children’s toys when you select water-based, non-toxic products and confirm full cure. As a finisher, I check labels for plastic toxicity warnings and avoid any paint that stays tacky or smells strong after the stated recoat window.
For a practical example, apply two thin coats, let each coat dry 2 to 4 hours, then allow 7 days of full cure before handing toys to kids. Search for toy-safe paint or child-safe plastic paint, and keep the piece away from little mouths until that cure time passes.
If the surface feels soft or transfers color, wait longer; a fully cured film gives the extra assurance parents want.
How Much Does It Cost to Paint Plastic Furniture?
Painting plastic furniture typically costs £40 or more total once you include spray or specialist paint and prep supplies. You’re looking at £10 to £25 for spray or specialist paint, but prep costs like primer and sandpaper add up.
Skip that prep and the finish quality suffers, so budget for it from the start. For a durable result, scuff the surface with 220 grit sandpaper and apply two thin coats, letting each coat dry about 20 to 30 minutes before recoating.
Search plastic furniture spray paint options to compare products.
Can Plastic Paint Be Used on Car Interiors?
Yes, plastic paint can be used on car interiors if you pick an interior-grade product and prep correctly. I have watched cheap paint flake off dashboards when the plastic was not scuffed and cleaned.
For a durable job, sand the panel with 600-grit paper, then wipe it with a prep spray until no residue remains. Apply two thin coats and let each tack for 15 to 20 minutes before the next pass.
Skip this prep and you are buying a peeling mess. This is basic interior plastic refinishing, not a quick spray-and-go job.
Rounding Up
Plastic paints are not magic; they are patience in a can, and choosing types and uses depends on matching the paint to the flex. Check the plastic’s flex before you decide to skip primer, because peeling is the price on flexible plastics.
Compare a two-part epoxy for high-traffic stuff and a solid acrylic urethane for outdoor furniture. Write down your prep steps and confirm UV resistance so you avoid chalky, faded messes.
Pay for decent sheen and match the paint to the flex. Next, read about primer selection for flexible plastics.