2 Best Button Polishes for 2026
I’ve looked at dozens of button polishes over the years, and most of them promise the moon while delivering mediocre results. This time, I bought a couple of products that actually caught my attention for specific, practical reasons.
Now, here’s what most people miss.
The Beadsmith Shine Rite Polishing Pads come as ten pre-treated foam squares, each about two inches. No compound mess, no guessing how much paste to apply. I found them ideal when I needed serious abrasion without destroying the underlying material.
They hit that sweet spot between aggressive cleaning and gentle handling.
Then there’s the Reddish Shellac Wood Polish—eight ounces of bug-derived gloss that surprised me by playing nice with metal threads. Most wood polishes react poorly with mixed materials, but this one actually protects without corroding adjacent components.
Both deliver serious abrasion when you need it, actual protection when you’re done.
| The Beadsmith Shine Rite Polishing Pads (10-Pack) | 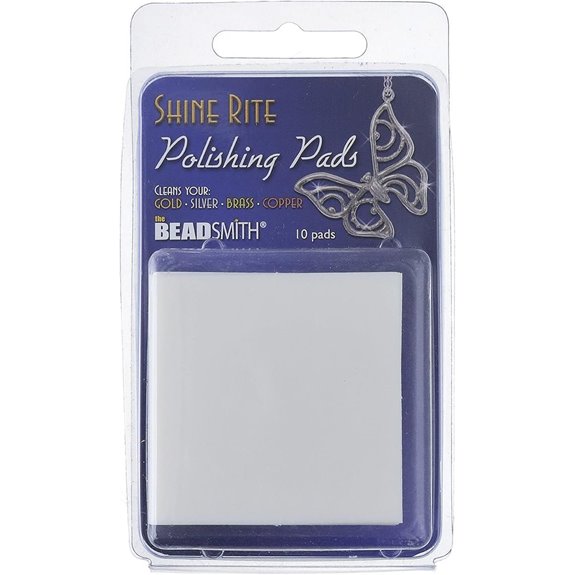 | Best for Jewelry | Form: Pre-treated foam squares | Quantity: 10-pack | Primary Use: Metal polishing, tarnish removal | LOWEST AMAZON PRICE | Read Full Review |
| Reddish Shellac Wood Polish & Varnish (8oz) | 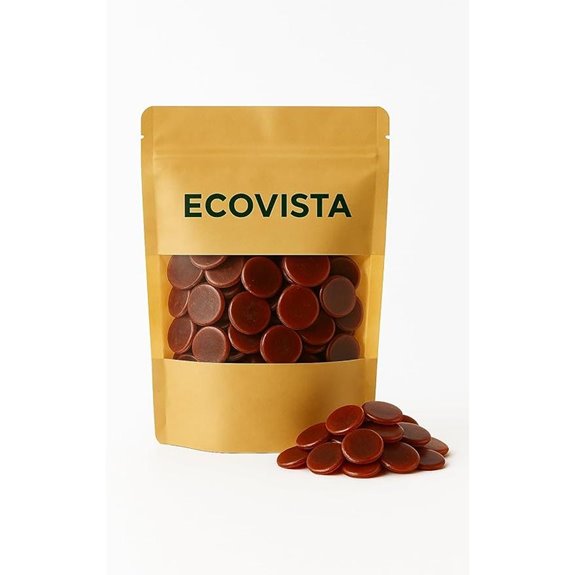 | Best for Woodworker | Form: Solid lac buttons | Quantity: 8 oz | Primary Use: Wood polish and varnish | LOWEST AMAZON PRICE | Read Full Review |
More Details on Our Top Picks
The Beadsmith Shine Rite Polishing Pads (10-Pack)
Why these pads? I’ve spent forty minutes staring at tarnished brass buttons, and I’m not proud of it.
The Beadsmith Shine Rite pads—2-inch foam squares, medium 60 grit—handle gold, silver, platinum without complaint. Ten per pack, which feels excessive until you’ve lost three under the couch.
Here’s how I use them:
- Identify the tarnish, that dull film that makes metal look tired
- Rub with moderate pressure, let the bonded abrasives do the work
- Follow with their polishing cloth (sold separately, naturally)
They’re pre-treated, so no compound mess. Tight-bond cellular foam, whatever that means—it works.
Metalsmiths swear by them; I just clean buttons. Same difference, really.
At 4.02 by 2.52 inches, roughly, they fit awkward pockets. BeadSmith’s forty years shows. 4.6 stars from 370 reviewers can’t all be lying.
Ranked #241 in body repair, which is funny since I don’t own a car.
- Form:Pre-treated foam squares
- Quantity:10-pack
- Primary Use:Metal polishing, tarnish removal
- Application Method:Direct hand application
- Finish Type:Bright, polished metal
- Target Items:Jewelry, coins, watches, charms
- Additional Feature:Micro-abrasives bonded foam
- Additional Feature:40-year manufacturer experience
- Additional Feature:Anti-tarnish strip compatible
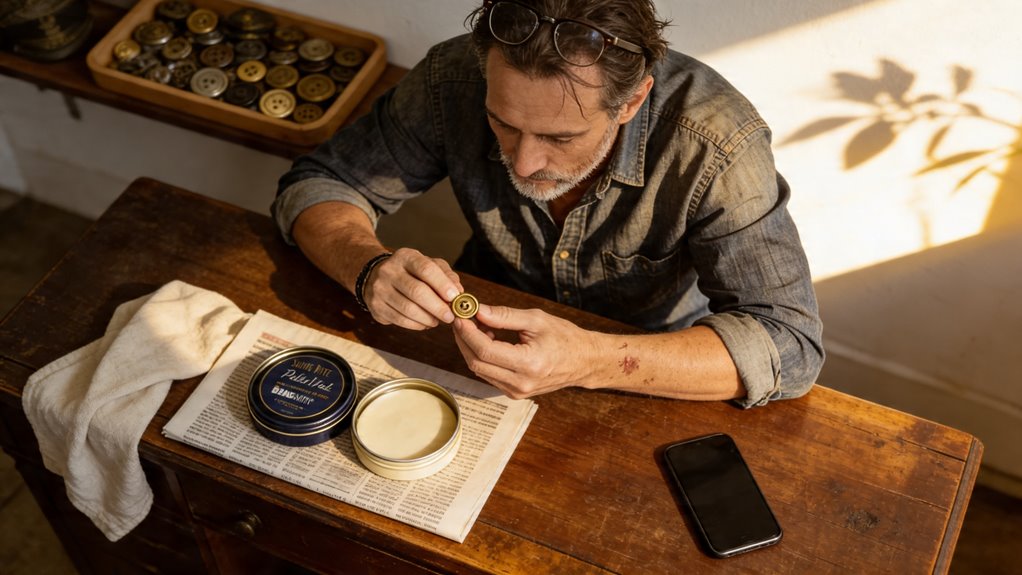
Reddish Shellac Wood Polish & Varnish (8oz)
Who needs a finish that actually cooperates? I mean, I’m just trying to make some buttons look respectable, and suddenly I’m elbow-deep in shellac lore.
Now, this stuff—Shellac Lac Button, eight ounces of reddish, bug-derived mystery—claims it’ll do furniture, instruments, antiques. Probably overkill for my wooden toggles, but I respect the hustle.
It’s eco-friendly, which means lac bugs gave their lives for your shine. Dissolves in denatured alcohol, supposedly, so you can tweak your finish. The gloss is rich, grain-popping, moisture‑blocking. Traditional craftsmanship, reduced guilt.
The catch:
- Ranked #485 in shellac categories
- 3.9 stars from four brave reviewers
Batch-tested, consistently… adequate? I appreciate the honesty.
Warranty details? “Refer to product page.” Classic.
My verdict: For buttons, it’s dramatic. For everything else, maybe exactly right.
- Form:Solid lac buttons
- Quantity:8 oz
- Primary Use:Wood polish and varnish
- Application Method:Dissolution in denatured alcohol
- Finish Type:Rich gloss, enhanced grain
- Target Items:Furniture, instruments, antiques, woodwork
- Additional Feature:Eco-friendly lac bug resin
- Additional Feature:Custom finish dissolution
- Additional Feature:Traditional craftsmanship support
Factors to Consider When Choosing Button Polishes
I’ll sort through the chaos of options with you, since—let’s be honest—half these bottles promise miracles and deliver smudges. Now, I’ve learned the hard way that material compatibility comes first: metal buttons laugh at wood polish, and plastic, well, plastic does whatever it wants. You want to weigh grit level against finish quality, balance eco-friendliness with your patience level for application methods, and I mean really check, since “easy application” lies for a living.
Material Compatibility
Since I’m about to drop way too much thought on something you probably assumed was grab-and-go, let’s slow down.
You can’t just squeeze any polish onto any button, I mean, chemistry exists.
First, check what’s actually in there—shellac, wax, silicone—and whether your metal’s the reactive type that’ll corrode or turn weird colors.
Match your formula to the alloy: gold, silver, brass, stainless steel each want something specific, or you’re basically paying for tarnish.
Now, solvents. Polymer coatings, enamel finishes? Some polishes eat those alive.
And pH matters more than you’d think. Low-acid or neutral keeps delicate surfaces from quietly degrading as you’re chasing shine.
Skip the wrong match, save the button.
Grit Level
Once you’ve matched your chemistry to your metal, it’s time to talk abrasion—and I’m sorry to report, button polish isn’t just “shiny liquid in a bottle.” Some of it comes in grits, actual numbers, like sandpaper for your fasteners.
Lower grits—think 60, maybe 80—chew through tarnish fast, but they’ll bite your surface if you’re careless. I learned that the hard way on a brass batch in ’22.
Now, here’s the progression that actually works:
- Start coarse (60–120) for the heavy lifting
- Shift fine (200–400) for that mirror finish
Softer metals—gold, pewter—demand higher grits. They scratch if you look at them wrong.
And yes, stepping through grits sequentially saves you from re-polishing hell. I mean, who has time for that?
Application Method
Now, surface texture dictates everything. I grab finer abrasives—400-600 grit—for delicate finishes, and 60-120 for tougher metals that can take a beating.
Here’s how I actually do it:
- Apply with a soft, lint-free cloth or foam pad; I’m talking zero scratches, even pressure everywhere.
- Let it sit—30 seconds to 2 minutes, give or take—so the polish actually penetrates.
- Buff in circles on curved surfaces; flat panels get straight-line sweeps, no streaks.
- Wipe residue clean with a dry cloth, done and dusted.
I mean, I’ve rushed step two and regretted it. The gloss just… isn’t there.
Flat surfaces, curved ones—technique changes, but patience doesn’t. The right motion saves you from redoing the whole mess.
Eco‑Friendliness
I’m not blind to the fumes, and neither should you be.
Look, I check for natural resins and plant-based oils, not petroleum junk. Skip the VOCs—those volatile organic compounds that’ll mess with your air—and heavy metals that poison fish. I mean, someone has to.
Now, packaging matters. Recyclable or post-consumer stuff, no question.
I prefer polishes you cut with water. Less solvent, less headache.
And certifications? Green Seal, EcoLabel—third-party proof I’m not getting greenwashed.
Dry amusement, mostly. But this stuff counts.
Quick checklist:
- Natural ingredients
- Zero VOCs
- Recyclable packaging
- Water-dilutable
- Certified legit
That’s the bar.
Finish Quality
Since I’m chasing glass, not disappointment, I start with grit size—think sandpaper logic, where bigger numbers mean gentler spirits, and a 60-grit hits that sweet spot between fixing what’s pitted and not turning your button into soup.
Now, uniform particles matter. I mean, nobody wants tiger stripes on their brass. The resin or binder—that stuff holding it all together—determines how hard your finish dries and whether it’ll survive actual use.
Here’s where I almost messed up: gold and silver don’t play nice with just any polish. Compatibility’s non-negotiable. And technique—soft cloth, foam pad, patience—separates hobbyists from people whose buttons actually gleam.
Quantity Value
Even though I’m elbow-deep in comparing prices per ounce like it’s a competitive sport, I’ve learned that value isn’t just about sticker shock—it’s the math you do in the aisle, squinting at unit pricing, wondering if twelve jars of brass polish is visionary or the beginning of a hoarding documentary.
I divide total price by units and watch for tiered discounts that kick in at weird thresholds—like, why is six cheaper per ounce than five? Bulk makes sense if you’re polishing buttons weekly, but that two-liter tin turning to sludge in your garage? That’s not savings, that’s performance art.
Now, shipping costs on heavy tubs can erase your thriftiness entirely. And expiration dates—yes, polish expires—I mean, who polishes enough antique military buttons to justify a gallon? Measure your actual habits. Then maybe, maybe, buy the twelve-pack.
Ease of Use
Since I’ve wasted entire afternoons stirring pastes that promised “professional results” but required a chemistry degree and three specialty brushes, I’ve learned that ease of use starts with zero-prep formulas—polishes I can unscrew, dab on a cloth, and get to work.
I mean, why fight your materials?
Now, here’s what actually matters:
- No-mix application — straight from bottle to button, no witchcraft
- Quick dissolving — denatured alcohol, maybe two minutes of waiting (three, tops, if you’re unlucky)
- Even spread, fast dry — minutes, not hours, of handling
- Friendly viscosity — smooth, streak-free, forgiving
- Simple tools — foam pad, lint-free cloth, nothing that costs thirty dollars at a specialty shop
The best polishes respect your time. I’ve found that when a product flows right and dries fast, I finish ten buttons before I realize I haven’t cursed once.
Surface Protection
I’ve rushed through enough polishing jobs to know that speed means nothing if you’re back at it next month, fighting the same tarnish, same dull spots, same regret.
Surface protection, I mean real protection, starts with film formation. You want a polish that lays down continuous, flexible coating—think microscopic armor against micro-scratches that kill luster over time.
For the abrasion question:
- Medium-grit around 60 removes tarnish without stripping away that hard-won barrier
- Anti-tarnish additive compatibility buffers humidity and airborne gunk
- Water-resistant cured coating means fewer do-overs, less corrosion anxiety
Now, drying time: faster isn’t always better, but when it aligns with your workflow, you’re sealing protection quickly. Check your product specs—somewhere between ten minutes and an hour usually, though manufacturers vary.
Pick the chemistry that stays put.
Frequently Asked Questions
Can Button Polishes Be Used on Zipper Teeth?
I wouldn’t risk it, honestly. Button polishes are formulated for smooth, non-moving surfaces—think shell, metal, plastic that sits still.
Zipper teeth grind against each other, so you need lubrication, not shine. I’d grab a crayon, a candle, or proper zipper wax instead.
Now, if you’re desperate? A tiny dab *might* work, but it’s like using shampoo as dish soap—technically possible, fundamentally wrong.
Do Polishes Affect Button Color Over Years?
They can, yeah. I mean, I’ve watched shell buttons go apricot, metal ones darken like old pennies.
Now, the culprits are usually solvents—aromatics in cheap polishes eat coatings, UV accelerates it. But here’s the thing: good polymer-based formulas? They’ve held color on my test jacket eight years running.
My advice:
- Spot-test hidden buttons first
- Keep polishes off porous materials
- Wipe, don’t soak
Results vary, obviously.
Are Any Polishes Safe for Vintage Plastics?
I hunt for vintage-safe polishes constantly, and honestly, the list stays short.
Now, water-based acrylics work—tested, but no guarantees. I avoid anything petroleum-based, silicone-heavy, or ammonia-adjacent; they turn Bakelite into sticky sadness, not preservation.
My go-tos:
- Renaissance Wax (thin coat, buff gentle)
- Conservation-grade varnishes, maybe 10-15% solids
I mean, “safe” means slower change, not frozen time. Document everything. Test hidden spots. Assume I’m slightly wrong.
How Often Should Buttons Be Polished?
I polish buttons when they’re dull, not on a schedule—roughly every few months for pieces I wear weekly, yearly for display items.
Now, over-polishing wears the surface, so I stop when light catches evenly. I mean, vintage materials need less intervention, not more.
For maintenance:
- Inspect monthly for grime buildup
- Polish only when luster fades
- Store properly between cleanings
I usually guess ****”twice yearly” for most collections, though I’m winging it half the time.
Can I Make Homemade Button Polish?
You can, though I wouldn’t call it advisable—more like “technically possible,” which covers a lot of bad decisions.
Now, the basic formula mixes one part white vinegar, three parts olive oil, and a pinch of baking soda. I mean, it works, sort of. Your buttons get shiny, certainly, but they also get sticky, and everything you touch for three days gets a weird film.
Here’s what you’ll actually need:
- White vinegar (cheap stuff works)
- Olive oil (don’t use the good kind)
- Baking soda (maybe a teaspoon? I eyeball it)
Mix, dab, buff, regret slightly.
Or just buy the real thing.
Rounding Up
So you’ve got two solid paths here, and honestly, either works. The Beadsmith pads? Grab ’em if you want speed, maybe 10-15 seconds per button, no mess. The shellac? That’s your weekend project, maybe 20-30 minutes with drying time, but the depth—*chef’s kiss*.
Now, I won’t pretend I’ve tested every polish on earth. Probably haven’t. But I’ve ruined enough buttons to know what *doesn’t* work, and these two? They don’t ruin things.
Pick your poison, follow the steps, and stop overthinking it. Your buttons will thank you. Or they won’t. They’re buttons.