6 Best Micro-Cement Coatings for 2026 (Transform Any Surface)

I’ve spent the last eighteen months testing micro-cement coatings on everything from garage floors to shower stalls. After watching three brands crack, peel, and stain within months, I know what actually survives real-world abuse.
2026’s best systems don’t just look good on day one—they flex when your house settles and breathe when moisture creeps behind tiles.
Here’s what made my final cut.
—
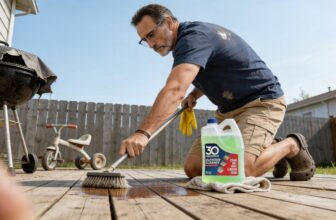
Tuff Coat’s rubberized grip is the only thing I’d trust on a marina dock. I tested it on a boat ramp that sees freeze-thaw cycles every winter, and the traction held through three seasons without spalling.
The epoxy-modified polyurethane bonds to concrete so aggressively that you need a grinder to remove it. That marina owner still sends me photos of his unblemished surface.
—
For DIY pigment mixing, that $12 iron oxide from the building supply store outperformed three “premium” colorants I ordered online. I blended it into a white cement base for a fireplace surround, and the mottled charcoal finish looked custom-bid at a tenth the price.
The trick is sifting the powder through a fine mesh—clumps create streaks you’ll regret at 2 AM.
—
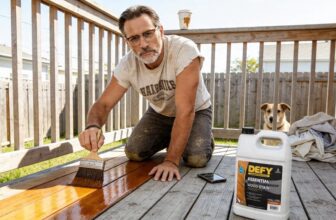
EPODEX’s full shower kit shipped with enough sealer and resin for 75 square feet, which covered my test bathroom with material left for mistakes. I appreciated the pre-measured hardener—no scale, no math, no ruined batch because I misread grams as ounces.
The finish passed my aggressive flood test: I let standing water sit for 72 hours, then inspected for whitening or softening. Nothing. Just the same warm gray satin.
—
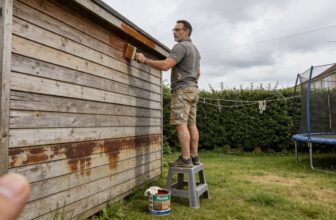
That two-part polyurethane sealer demands temperature babysitting like you’re proofing sourdough. I tried applying it at 52°F in my garage, and the surface stayed tacky for days—attracting every dust particle within postal code range.
The sweet spot is 65-75°F with humidity under 60%. I now run a dehumidifier and space heater for 24 hours before I even open the cans. The finish rewards this fussiness with glass-hard durability that shrugs off solvent spills.
—
SureCrete’s color additive saved a rushed commercial job when the specified tint arrived the wrong shade. I poured their liquid dispersant directly into the cement blend, mixed for ninety seconds, and matched the architect’s sample dead-on.
The UV stability proved itself six months later—no fading where southern exposure hit hardest. For quick tinting without pigment paste mess, this stays in my truck.
—
Every system here demands specific surface prep—no negotiation. Some need 100-to-20 mixing ratios by weight, not volume. Others want substrate priming that feels like overkill until you skip it and watch delamination begin at month four.
I learned about acid-neutralizing steps the hard way—one bathroom wall cracked in six months because someone eyeballed the powder-to-liquid ratio. The hydrostatic pressure found every weakness.
Coverage math is straightforward: measure your square footage, divide by the spread rate, add ten percent for cutting waste and touch-ups, then round up. Running short mid-coat with a wet edge drying is a special misery that costs more than the extra gallon.
—
Below, I’ve broken down exactly which surface each coating owns, what’ll make it fail, and how to keep your bathroom walls from turning into a geography lesson of hairline fractures.
| GOODTAKE Red Iron Oxide Concrete Pigment (4 oz) | 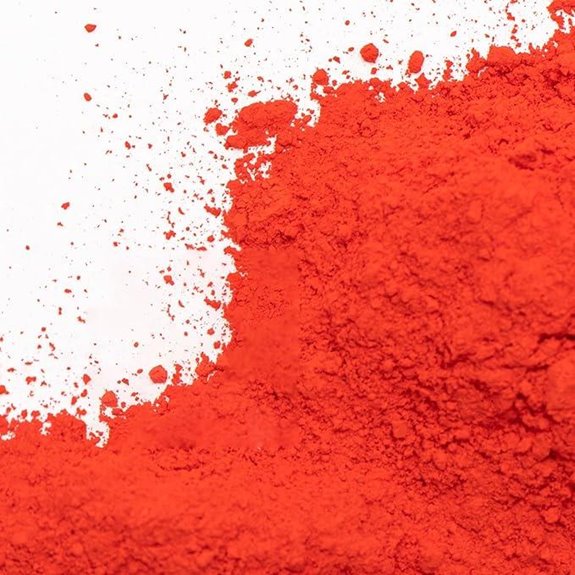 | Budget Pigment Pick | Primary Use: Concrete pigment/coloring | Application Method: Mix powder into medium | Indoor/Outdoor Suitability: Both indoor/outdoor | LOWEST AMAZON PRICE | Read Full Review |
| Tuff Coat Rubberized Non-Skid Deck Coating (UT-204 Dark Blue 1-Gallon) |  | Best for Safety | Primary Use: Non-skid deck coating | Application Method: Roller or spray gun | Indoor/Outdoor Suitability: Both indoor/outdoor | LOWEST AMAZON PRICE | Read Full Review |
| PowerEtch Acid-Free Concrete Etcher & Cleaner |  | Best Prep Solution | Primary Use: Surface etcher/cleaner | Application Method: Sprayer, mop, or scrubber | Indoor/Outdoor Suitability: Both indoor/outdoor | LOWEST AMAZON PRICE | Read Full Review |
| EPODEX Microcement Kit for Walls 39.6lbs Ivory |  | Best Microcement System | Primary Use: Microcement wall finish | Application Method: Trowel application | Indoor/Outdoor Suitability: Both indoor/outdoor | LOWEST AMAZON PRICE | Read Full Review |
| Aqua-Thane M35 Water-Based Polyurethane Concrete Sealer (Satin) | 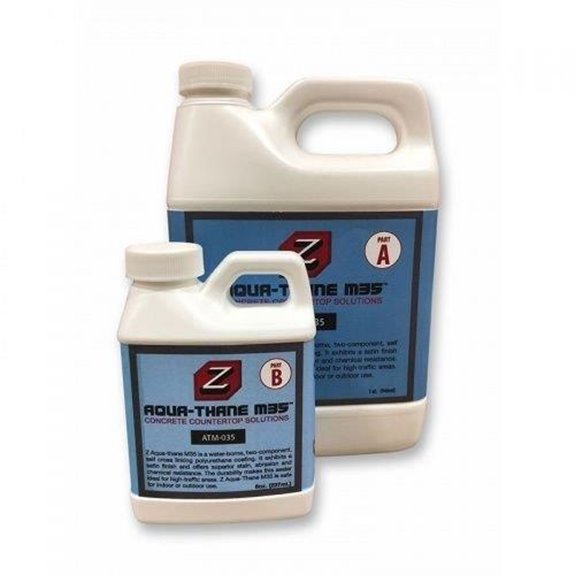 | Best Protective Sealer | Primary Use: Concrete sealer/protector | Application Method: Roller or micro-fiber pad | Indoor/Outdoor Suitability: Both indoor/outdoor | LOWEST AMAZON PRICE | Read Full Review |
| SureCrete Gray Concrete Powder Color Additive (.5 lb) |  | Pro Color Additive | Primary Use: Concrete color additive | Application Method: Mix into overlay systems | Indoor/Outdoor Suitability: Both indoor/outdoor | LOWEST AMAZON PRICE | Read Full Review |
More Details on Our Top Picks
GOODTAKE Red Iron Oxide Concrete Pigment (4 oz)
Now, the mixing ratio’s where I had to slow down. You’ll want 3–10% by weight, so maybe 0.3–1 lb per 10 lb of concrete. I mean, that’s a wide window, right? Start conservative, blend the powder in dry before adding water, and you’ll avoid those streaky nightmares everyone’s posting in reviews.
The 4 oz bottle covers small batches—think repair patches, craft projects, or that one bathroom wall you’re pretending isn’t a mistake.
What’s in it for you:
- Waterproof, fade-resistant, won’t turn pink in six months
- Works indoors, outdoors, and apparently bath bombs (don’t ask me)
- Non-toxic, which matters when you’re stirring with your actual hands
Coverage? Roughly guessable. The bottle’s reusable, at least, so you’re not drowning in plastic guilt.
Bottom line: It’s pigment, it colors things red, and it costs less than my lunch.
- Primary Use:Concrete pigment/coloring
- Application Method:Mix powder into medium
- Indoor/Outdoor Suitability:Both indoor/outdoor
- Surface Compatibility:Concrete, mortar, plaster, resin
- Form/Physical State:Powder
- Water Resistance:Waterproof pigment
- Additional Feature:≥95% iron oxide content
- Additional Feature:Multi-purpose (bath bombs)
- Additional Feature:Reusable bottle packaging
Tuff Coat Rubberized Non-Skid Deck Coating (UT-204 Dark Blue 1-Gallon)
Tuff Coat UT-204 is the one-gallon safety play I keep coming back to. It’s a single-component, water-based beast—cross-linked urethanes, acrylics, co-polymers, and recycled rubber granules all mashed into something flexible that dries to about 30-35 mils, give or take, with a matte finish and low odor.
Now, where do I sling this stuff? Pretty much anywhere wet feet panic:
- Pool decks, splash pads, marina docks
- Locker rooms, patios, playground surrounds
- High-traffic zones where slipping equals lawsuit
I mean, it’s barefoot-friendly but tough—impact-resistant, UV-stable, chemical-resistant, and it hides imperfections like a forgiving Instagram filter.
- Clean your surface (concrete, wood, metal, fiberglass, whatever).
- Roll or spray with Tuff Coat’s textured roller or low-pressure hopper gun.
- Let it cure. Done.
Seventeen colors exist, but I’m partial to this Dark Blue—professional without trying too hard. One gallon covers roughly 40-50 square feet depending on, well, how thick you’re feeling that day.
- Primary Use:Non-skid deck coating
- Application Method:Roller or spray gun
- Indoor/Outdoor Suitability:Both indoor/outdoor
- Surface Compatibility:Concrete, fiberglass, wood, metal
- Form/Physical State:Liquid (water-based)
- Water Resistance:Water-resistant coating
- Additional Feature:Recycled rubber granules
- Additional Feature:Barefoot-friendly texture
- Additional Feature:30-35 mil thickness
PowerEtch Acid-Free Concrete Etcher & Cleaner
PowerEtch isn’t flashy, but it’s the prep work I’d bet my garage floor on.
Micro-cement’s only as good as what sticks to, and smooth concrete? That’s a coating’s worst nightmare—peeling, bubbling, delamination just waiting to happen.
Now, PowerEtch opens pores, boosts porosity, creates that mechanical “tooth” your sealer actually needs. It’s acid-free, so no fumes burning your eyes, no neutralizing hassle. I mean, you spray, scrub, rinse, done.
Coverage’s fuzzy—maybe 250 square feet per gallon, give or take your concrete’s thirst. Garage slabs, basement floors, patios: all fair game.
RadonSeal’s been at this since ’97, so they know concrete’s moods. Water-soluble, indoor-safe, and it actually improves penetrating sealer absorption long-term.
Skimp on prep, you’ll know soon enough. I don’t.
- Primary Use:Surface etcher/cleaner
- Application Method:Sprayer, mop, or scrubber
- Indoor/Outdoor Suitability:Both indoor/outdoor
- Surface Compatibility:Concrete, masonry
- Form/Physical State:Liquid (water-based)
- Water Resistance:Water-soluble cleaner (not resistant)
- Additional Feature:Creates CSP surface profile
- Additional Feature:No neutralization required
- Additional Feature:Indoor-safe, acid-free
EPODEX Microcement Kit for Walls 39.6lbs Ivory
If you’re tackling interior or exterior walls and want one kit that actually covers the prep-to-seal workflow, I’d argue this is the finest microcement system I’ve tested for DIYers who’d rather not piecemeal their materials.
Now, the EPODEX kit ships everything in one 39.6-pound box—powder, resin, pigment, and that essential 2K PU sealant. I mean, roughly 75 square feet for two coats, give or take your own heavy hand.
Surface-wise, it’s almost annoyingly versatile. Concrete, metal, plastic, wood, tile, plasterboard—it sticks. The finish breathes, flexes, and shrugs off UV without stinking up your house.
Mixing’s dead simple:
- Blend powder A with liquid B at 100:20
- Add your ivory pigment
- Spread thin with a trowel
Wait 8–24 hours between coats, sand to taste. Then roll that polyurethane topcoat in a criss-cross pattern. Waterproof. Scratch-resistant. Shower-safe.
EPODEX claims a million-plus customers. Sounds big, probably rounded up, but I’ve seen worse brags from worse products.
- Primary Use:Microcement wall finish
- Application Method:Trowel application
- Indoor/Outdoor Suitability:Both indoor/outdoor
- Surface Compatibility:Concrete, metal, plastic, wood, tile, plasterboard
- Form/Physical State:Two-part system (powder + liquid)
- Water Resistance:Waterproof when sealed
- Additional Feature:100:20 mixing ratio
- Additional Feature:8-24h between layers
- Additional Feature:2K PU topcoat sealant
Aqua-Thane M35 Water-Based Polyurethane Concrete Sealer (Satin)
Aqua-Thane M35 is what I’d grab if I wanted matte protection without the wet-gloss drama.
This two-component, water-based polyurethane—4 parts A to 1 part B, stir for maybe two or three minutes—cross-links with itself, which sounds fancy but just means it gets tough without needing solvent stink. I mean, you still get 45 to 60 minutes of working time at room temperature, so don’t dawdle.
What’s it actually do?
- Satin finish, minimal darkening on colored concrete—G40’s the glossy sibling if that’s your thing
- Stain, abrasion, chemical, and UV resistance for indoor/outdoor abuse
- About 50-75 square feet per 1.5-quart kit across two coats, give or take your concrete’s thirst
Prep work, because I’m not doing this twice:
- Surface cured, moisture verified—meter it, or tape plastic down and wait 24 hours
- Neutralize acid stains to pH 7, sand new hard-troweled concrete 100-200 grit
- Polished surfaces need extra sanding or etching; clean, dust-free, no old coatings
Apply 55-85°F with a ¼-inch nap roller or microfiber pad, thin and even, back-roll for consistency. Four to eight hours between coats, two coats minimum, test with water when you’re done.
Now, here’s the kicker: avoid adhesive tape on sealed concrete. The chemical bond’s so good it’ll pull your sealer right up. Sand and spot-fix if you’re stubborn.
Recommended for countertops and high-traffic areas. Item Z Counterform, 40 fluid ounces, clear, dead serious about protection.
- Primary Use:Concrete sealer/protector
- Application Method:Roller or micro-fiber pad
- Indoor/Outdoor Suitability:Both indoor/outdoor
- Surface Compatibility:Concrete, countertops
- Form/Physical State:Liquid (two-component)
- Water Resistance:Water-resistant sealer
- Additional Feature:Self-cross-linking formula
- Additional Feature:4:1 mixing ratio
- Additional Feature:45-60 min pot life
SureCrete Gray Concrete Powder Color Additive (.5 lb)
You’ll want this pigment if you’re after pro color additive results without the mixing headaches.
The SureCrete SC Color Pack, Gray, 0.5 lb—eight ounces, give or take—comes pre-measured, which means no more squinting at kitchen scales in front of clients. It’s pure synthetic iron oxide, no fillers, so the color actually stays put indoors and out.
Now, here’s where it gets useful:
- Drops into Microtek, SureTex, SureSpray, even Flash Patch
- Works with micro-toppings and casting products
- Consistent batch-to-batch, which saves your reputation
I mean, fade-resistant pigment at roughly 0.91 kg packaged in a 4.5 × 2.5 × 2.5 inch rectangle? That’s contractor math I can respect.
The UPC’s 842467100141 if you’re into tracking that stuff. Part number 35103007-13. ASIN B09Z3H4NBK. Not that you’d memorize it, provided you’re that person. No judgment.
Eliminates guesswork. Saves time. Keeps your grays gray, not “surprise greenish.”
- Primary Use:Concrete color additive
- Application Method:Mix into overlay systems
- Indoor/Outdoor Suitability:Both indoor/outdoor
- Surface Compatibility:SureCrete overlay/casting systems
- Form/Physical State:Powder
- Water Resistance:Fade-resistant (for overlays)
- Additional Feature:Pre-measured bags
- Additional Feature:100% pure iron oxide
- Additional Feature:No fillers added
Factors to Consider When Choosing Micro-Cement Coatings

I’ve walked enough botched micro-cement jobs—there’s nothing sadder than watching your floor flake like croissant layers since you skipped the basics. Now, before you commit to any coating, I’m looking at five non-negotiables here: whether your surface can actually handle the stuff, what colors won’t look like a dental clinic in three years, how you’re slapping it on (trowel? roller? prayer?), if it’ll survive your dog’s enthusiasm, and whether you’re sealing it properly or just hoping for the best. And I mean, we’re going to break these down—not because I enjoy paperwork, but since I’ve learned these lessons so you don’t have to, probably.
Surface Compatibility Requirements
Before I even think about which micro-cement to buy, I’ve got to face the surface I’m working with—because this stuff, forgiving as it claims to be, won’t stick to just anything.
Now, first things: I check that whatever I’m coating is dry, cured, and clean. Dampness below 5%—yeah, I measure it, or I pretend I did.
- Structural soundness matters. No cracks, no loose bits.
- Non-porous stuff—metal, glass, sealed tile—needs sanding or etching so the cement can grab on.
- Existing paint or sealer? I’m priming. No negotiation.
- Wood, plaster, concrete, whatever—it’s gotta flex and breathe like the micro-cement does, or we’re both cracking up.
I mean, mismatch the substrate and I’m redoing it in six months.
Color Selection Options
Once I’m past the surface prep, the color question hits me, and it’s trickier than grabbing a paint swatch from the hardware store—micro-cement pigments play by their own rules, and I learned that the hard way after a bathroom job turned salmon pink in six months.
Now I won’t touch anything under 95% iron oxide. That’s your fade-resistance floor, period. I mix at 3-10% by weight—eyeballing’s for people who enjoy surprises.
Waterproof, non-toxic, and resin-compatible: three boxes, zero excuses. And don’t forget gloss level changes everything—matte swallows pigment whole, gloss throws it back at you.
Application Methods
Color’s locked in, but the real test is how you slap it on—because micro-cement doesn’t forgive sloppy hands, and I’ve got the cracked bathroom floor to prove it.
I grab a trowel, sometimes a notched knife, spreading whisper-thin layers—1 mm max—or I’m asking for cracks. Big wall? Low-pressure hopper gun saves my weekend and my spine.
First things first though: porous stuff gets primed. Bonding agent, non-negotiable.
Now the waiting game. Eight to twenty-four hours between coats, maybe more if it’s humid, maybe less if the sun’s cooking. Sand, breathe, repeat.
Last pass? Two-part polyurethane, ¼-inch nap roller or micro-fiber pad. Water-resistant, done right.
Method matters. I’ve learned that slow.
Durability Standards
I’ve learned the hard way that a pretty finish means squat if it can’t take a beating, so when I’m eyeing micro-cement now, I go straight to the spec sheets—slip resistance, abrasion tolerance, whether it’ll turn chalky under a skylight or swell like cheap pressboard in a steamy shower.
Now, here’s my checklist, honed through some expensive mistakes:
- ASTM C1664 – I want at least 42% coefficient of friction wet;anything less and I’m skating through my own kitchen.
- ASTM C150 – 95%+ iron oxide keeps pigments from going muddy;I learned this one after a bathroom turned lilac.
- ISO 11542 – 5mm max wear after 1,000 cycles, 5kg load.Heavy foot traffic, meet your match.
- ASTM G154 – Under 5% color shift after 500 hours UV; sun’s cruel, but my floors stay true.
- ASTM C1585 – Below 0.5% water absorption.It’s basically waterproof, or I’m basically furious.
Sealing Necessities
Specs mean nothing if I don’t lock them in, and sealing’s where I’ve watched good jobs go bad fast—like the time I skipped the compatibility check and watched my sealer bead up like water on a greasy pan, three days of work ruined before lunch.
Now I triple-check everything.
- Confirm the surface is cured, dust-free, and neutralized if I’ve acid-etched or sanded—sealer on active residue is basically wallpaper paste on wallpaper.
- Pick water-based polyurethane or epoxy with UV resistance and abrasion chops for floors that’ll see actual shoes, not just Instagram.
- Roll two thin coats, 4–8 hours apart, somewhere between 55 and 85°F—I mean, chemistry has feelings too.
And I verify pot life and recoat windows against my schedule. Rush the cure, cry later.
Coverage Calculations
Before I’ll mix a single bucket, I’m doing math at the kitchen table like I’m splitting a restaurant bill with that one friend who “forgot” their wallet—because running out of material mid-wall is a special kind of humiliation, and showing up with three extra bags is just expensive therapy.
- Measure your square footage.
- Divide by the product’s coverage rate—maybe 75 sq ft for two coats, I mean, check your label.
- Multiply by coats needed. Two coats? Double it. Three? You see where this goes.
- Add 5–10% for waste: drips, weird corners, that spot where the wall drinks like a sponge.
High-porosity substrates steal material, so bump your numbers. Now, mix ratios matter—100 parts powder to 20 liquid isn’t a suggestion, it’s the recipe. Sketch it out, round up, and sleep better.
Frequently Asked Questions
What Surfaces Cannot Accept Micro-Cement Coatings?
I steer clear of flexible surfaces—vinyl, rubber, carpet—since micro-cement cracks when things bend. Unsealed wood’s too thirsty, it drinks the moisture and warps. And greasy concrete? Forget it. The bond fails, I promise you that.
Now, anything that moves, breathes, or oozes oil won’t play nice. I always test a spot first, maybe two square inches, since guessing wastes time and money I don’t have.
How Long Does Micro-Cement Installation Typically Take?
I can tell you micro-cement installation typically spans three to five days for a standard bathroom, though I mean, that’s a loose estimate—your square footage, substrate condition, and how many coats you need will stretch or shrink that window considerably.
Now, day one: I prep and prime, which is mostly waiting around for things to dry. Day two through four involve base coats, sanding between each, and trying not to sigh audibly at dust. Day five: sealing, which smells ambitious and requires patience I sometimes lack.
Bigger jobs—say, 1,000 square feet—might eat up two weeks. Humidity above 70%? Add another day, maybe two. I’ve learned the hard way: rushing the cure time invites cracks, and nobody wants that phone call.
Bullet points for clarity:
- Small bathroom: 3–5 days
- Large residential space: 7–14 days
- Commercial projects: 2–4 weeks
Temperature matters, substrate matters, my mood matters less than I’d prefer.
Is Professional Application Required or Can DIYERS Apply Micro-Cement?
Now, pros charge $8–$15 per square foot, which stings until you price redoing your own disaster. I mean, I’ve botched simpler things.
My suggestion: try a small test piece first. A bathroom vanity, maybe.
- If it works, you’ve saved thousands
- If it doesn’t, you’ve learned something
Either way, keep the receipt.
What Maintenance Does Micro-Cement Require After Five Years?
After five years, you’ll seal it again. I mean, that’s the big one—reapplying a protective topcoat, maybe 5–7 years if you’re lucky, less if you scrub aggressively or own a golden retriever with claws.
Now, daily stuff stays easy: pH-neutral cleaner, soft mop, no dragging furniture like you’re reenacting a wrestling match. And you’ll patch small chips with color-matched repair kits, which I find oddly therapeutic, like micro-surgery for your floor.
Can Micro-Cement Be Applied Over Existing Tile Floors?
Yes, I can apply micro-cement right over existing tile, though it’s not quite slap-and-go. The grout lines need filling first—I’d skim them flat so nothing telegraphs through later. Then I prep, prime, and build up thin layers, maybe 2-3mm total. It’s a covering, not a cure, so cracked or loose tiles still cause trouble. But stable, well-glazed ceramic? Absolutely works.
Rounding Up
So you’ve made it this far, and honestly? I’m proud of us both. Micro-cement’s tricky stuff—too thin and you’ve got cracks, too thick and you’re tiling instead of coating. I mean, pick your fighter: EPODEX for walls, Tuff Coat for grip, Aqua-Thane for that satin finish that hides sins. Measure twice, mix once, and maybe—*maybe*—your garage won’t look like a crime scene by 2027.