What Are Liquid Rubber Coatings? Types, Uses and How to Choose
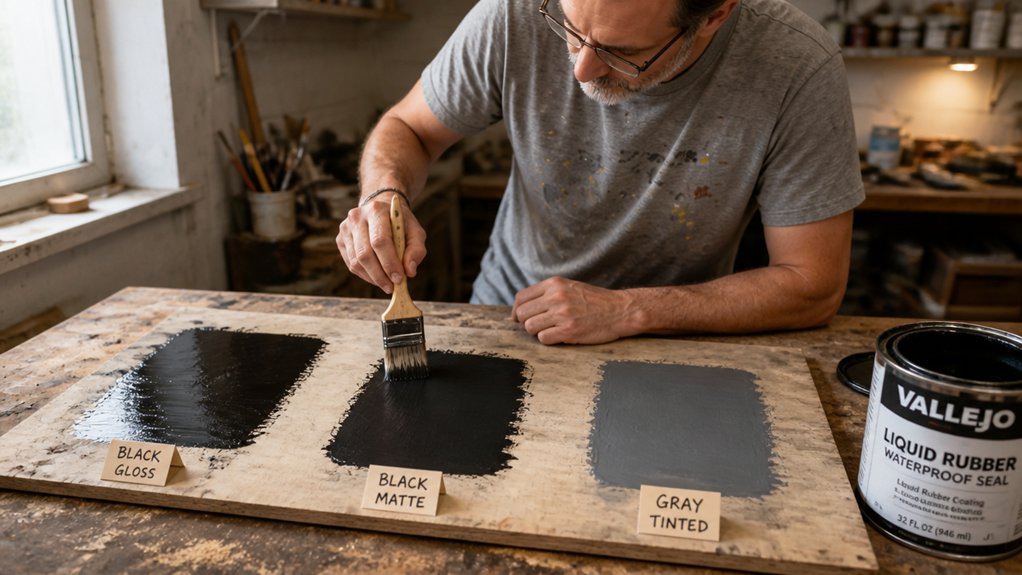
What are liquid rubber coatings, and why does the wrong one peel early? This guide covers their types, uses, and how to choose a formula for sun, foot traffic, and movement.
Surface prep matters most, because dirty or damp surfaces can fail before the cure time is done. Match the primer, UV exposure, and traffic, then check the next sections for a simple product choice.
That quick match saves wasted coats, drying time, and a recoat in two years. Read on to get the details before you buy.
Quick Answer
- Liquid rubber coatings form seamless, elastic membranes that bridge cracks and replace sheet waterproofing.
- Main types include silicone, polyurethane, and water-based; each suits different UV, traffic, and substrate needs.
- Choose coatings by surface, weather exposure, movement, and abrasion; wrong selection causes early failure.
- Proper surface prep—cleaning, sanding, priming—is critical; plan twice as long on prep as application.
- Apply in two to three thin coats, maintaining a wet edge; match rollers, brushes, or sprayers to job size.
Why Liquid Rubber Outperforms Traditional Waterproofing
Sheet membranes, tar paper, and caulk lines all leave seams, and seams are where water gets in. Those overlaps fail early, so you end up fixing the same spot again.
Liquid rubber cures into one continuous membrane that wraps corners, pipes, and valleys. It stays elastic, so it can bridge small cracks as the foundation moves.
In practice, one coat covers odd shapes without lots of cutting and fitting. Repairs are quick: clean the area, apply more coating, and let it cure.
Before you start, mask edges with painter’s tape and set out a drop cloth. Keep a wet edge while you roll or brush, and lay off brush strokes in one direction so lap marks do not show.
On dusty or porous concrete, use the primer the maker recommends before the topcoat. Check the drying time before a second coat, and wait for full cure before you test the membrane.
Scuff slick or glossy areas with 80 grit sandpaper, then wipe off the dust. Check the VOC rating if you work in a closed space, and set up a fan for airflow.
Some products dry to a matte or satin sheen, so check the label before you buy. Liquid rubber gives you a continuous barrier, and it often takes about 20 percent less effort to install. High-quality coatings typically show elongation at break between 200% and 300%, which keeps the membrane intact as foundations shift.
7 Liquid Rubber Types and the Job Each One Does Best
Liquid rubber products differ a lot, and the wrong choice can waste time and money. Picking one without checking the job is like wearing snow boots to the beach: it works, but you will regret it.
I am breaking down the 7 main types, starting with the three most common choices. Polyurethane suits roofs and gives a tough film much like a good varnish topcoat, silicone handles hot sunny spots, and waterborne products appeal to people who want lower VOC levels and easier cleanup.
Treat the prep like any topcoat job: lay a drop cloth, use painter’s tape, and get the surface clean and dry. Check the label for drying time and cure time, because a product that feels dry can still need more time before you walk on it or add a second coat.
On porous surfaces, use the maker’s primer first so the topcoat bonds well and you avoid lap marks. Silicone can leave a gloss or satin sheen and works where sun exposure beats up the surface, though it can be slippery when wet.
For a matte look, check the product data before you buy. Keep a wet edge as you apply it, watch your brush strokes, and match the sanding grit to the surface before you start; you will know which product fits your job by the end.
For maximum crack resistance, look for 1500%–1800% elongation ratings that bridge up to 1/8-inch gaps and stop moisture from penetrating the substrate.
Polyurethane Roofing Systems
Two polyurethane liquid rubber systems dominate roofing work: aromatic and aliphatic. For most flat roofs, I choose aromatic because it is tougher, cheaper, and cures into a flexible, seamless membrane that handles foot traffic.
These polyurethane rubbers stretch and bridge cracks without tearing. They also give good abrasion resistance for decks and walkable areas.
Aliphatic costs about 15 to 20 percent more per gallon, but it resists yellowing and handles sunlight better. That matters if color fade bothers you, and it can help the gloss or satin sheen hold up longer.
Both systems go on in two coats and usually reach 20 to 30 mils dry film. Treat the second coat as the topcoat and keep a wet edge so you do not leave lap marks.
Check the VOC limits before you buy, and use the maker’s primer if the roof surface calls for it. Drying time and cure time are different, so keep traffic off the roof until it cures.
Use painter’s tape and drop cloths to protect edges and nearby surfaces. Pick aromatic for durability on a budget when color fade does not matter to you.
For high-heat areas like exhaust stacks or metal flashing near equipment, consider a spray coating with ceramic heat resistance similar to VHT FLAMEPROOF, which withstands up to 2000°F.
Silicone for UV Exposure
The afternoon sun hits a black roof, and that is when liquid silicone rubber earns its keep. Constant UV exposure breaks down many roof coatings in a few seasons, while silicone holds its flexibility.
I have seen silicone last for decades on roofs that face south, and it stays elastic when cheaper coatings turn chalky. That elasticity stops sun stress from opening cracks, even when the surface reaches 200°F.
Lighter silicone topcoats reflect heat and can lower cooling costs, which helps in a hot attic. The cured film has a matte or satin sheen, and a low VOC formula keeps the smell down while it dries.
Prep matters as much as the coating, so cover walls and skylights with a drop cloth and mask edges with painter’s tape. Check the data sheet for primer needs, then apply the silicone topcoat at the recommended thickness.
Keep a wet edge as you work, and avoid lap marks by laying off brush strokes in one direction before the coating starts to set. Watch drying time and cure time closely, because silicone can skin over before you finish a large roof.
If your roof gets baked in July, use silicone and do the prep right. That gives you a flexible roof coating that can hold up for years. High solar reflectivity depends on specific climate needs, so confirm the topcoat’s reflectivity rating matches your regional heat load before choosing a silicone formula.
Water-Based Safe Options
Silicone holds up to sun and water, yet it is not the friendliest product to keep in your garage. For indoor spaces, I reach for coatings made with water.
These coatings cut out harsh solvents, so you get water based safety without the headache of fumes. Lower VOC levels mean your basement will not smell like a chemical plant for a week.
Start with a clean surface and scuff glossy concrete with 120 grit sandpaper so the first coat can grab. Lay a drop cloth and use painter’s tape to protect edges and trim.
Cut in corners with a brush, then roll the flat areas to blend brush strokes and keep a wet edge. This helps prevent lap marks and gives you a smooth, even film.
Cleanup takes soap and water. You can skip toxic thinners.
Allow the recommended drying time before the topcoat. Wait for full cure time before heavy use or washing.
Water based coatings work well on concrete walls and bathroom floors. They often come in satin or matte sheen, so pick the look you want before you buy.
They do not flex as much as polyurethane, so do not bridge wide cracks with them. For average damp spots and small surface flaws, they are a solid choice.
If you want a safe, breathable fix, choose a water based product and read the label for VOC content. Keep solvent stain and varnish for projects that need their harder film.
For maximum crack spanning ability, look for options like Elastolock rubber membrane technology that flexes 800% without cracking.
Primary Applications: Roofs, Decks, Metal, and Industrial Tanks
Liquid rubber earns its keep where water, weather, and wear beat up ordinary materials. The big four jobs are roofs, decks, metal, and industrial tanks.
On flat roofs, it lays down a seamless membrane that handles ponding water and thermal movement. It also works well for expansion joint sealing where rigid materials crack, and UV resistant grades are available for sunny roofs.
For decks, a flexible topcoat can add abrasion resistance and protection from freeze and thaw cycles. Choose a satin or matte sheen for a slip resistant surface that hides scuffs better than gloss, and check compatibility with any existing stain, varnish, or polyurethane before you coat.
On metal, start with a primer made for the substrate, then apply the liquid rubber topcoat, which flexes and resists corrosion and flaking. Treat it like paint for surface prep and application: check the VOC content and follow the label for drying time and cure time.
Industrial tanks benefit from chemical resistant linings, and some formulations support underwater repair without draining the vessel. Prep matters: use the right sanding grit, keep a wet edge to avoid lap marks and brush strokes, and set out painter’s tape and a drop cloth before you start. For faster, smoother application on large surfaces, an airless sprayer with a 3000 PSI rating can handle thick coatings without thinning and reduce overspray.
Surface Prep That Determines Success or Failure
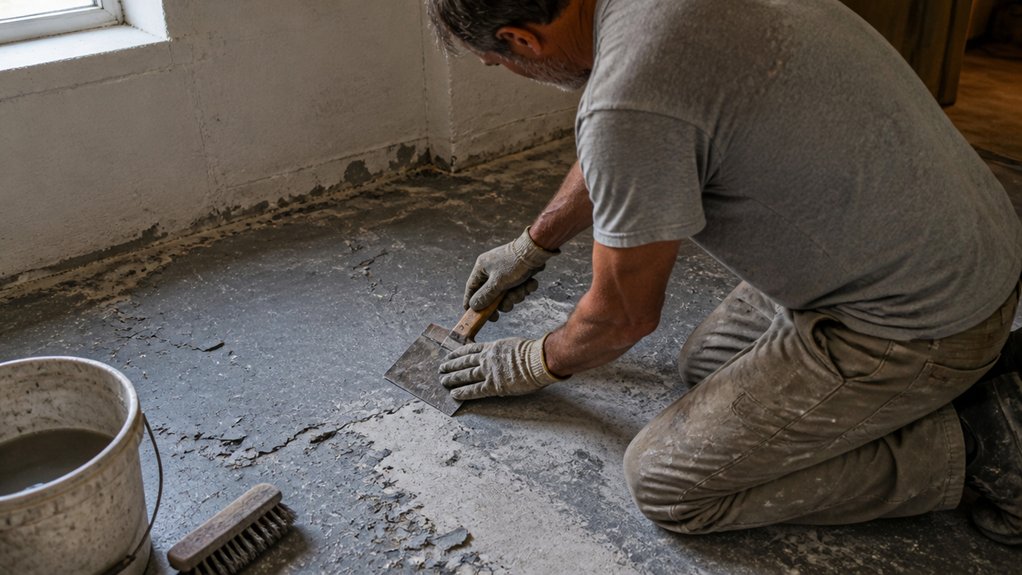
Surface prep decides whether a waterproof coating holds or fails. If you skip it, you pay for a coating that will fail later, often sooner than you expect.
Test the slab for dampness before you open a can. A plastic sheet test or a moisture meter gives you a real reading, and a damp slab will reject the coating like a cat rejects a bath.
Route hairline cracks into a V shape. This gives the coating room to flex and grip so it does not peel away.
Clean the dust out of the routed cracks before you fill or coat them. Scuff porous concrete with the right sanding grit and remove the dust so the primer can bite.
Clean away grease, dust, old paint, and loose material. Use a drop cloth and painter’s tape to protect nearby surfaces, and tape off wood trim you plan to stain, varnish, or finish with polyurethane.
Prime porous concrete and let the primer reach the recommended drying time. Check the product data sheet for the difference between drying time and cure time before you apply the topcoat.
Apply the coating with steady brush strokes and keep a wet edge so you avoid lap marks. Choose a matte, satin, or gloss sheen only if the product offers those options, and follow the VOC limits for your space.
Thirty minutes of cleaning and prep now saves you a leaky basement and a hole in your wallet later. Do the prep before you open the can, and fix any weak spots while the surface is still bare. On metal surfaces, scrape off loose rust and degrease thoroughly before applying a converter that chemically turns iron oxide into a stable black phosphate layer.
How to Apply: Methods, Coats, and Curing at Different Temperatures
Surface prep sets up the finish, so keep your drop cloth and painter’s tape in place before you open the can. Apply the coating in thin layers and let each one dry before you add the next.
Thin coats are the rule, and I lay down two or three thin layers to prevent bubbles and sagging. Use tools that match the job: short nap rollers on flat areas, brushes in corners, and a sprayer on large roofs.
A brush also helps you keep a wet edge and avoid lap marks and heavy brush strokes. For wood, use the right sanding grit before primer, then choose the topcoat sheen you want, whether gloss, satin, or matte.
If you are using stain, varnish, or polyurethane, follow the same thin coat habit and let each layer dry before you recoat. Check the label for VOC limits and ventilation needs, especially in a closed shop.
Humidity above 85% is a good reason to wait because a tacky surface can ruin the finish. At 15°C, I wait up to 24 hours between coats, while at 30°C the surface can dry in minutes.
Below 15°C, I skip the job because the coating may never set right. Remember that drying time and cure time are different, and a 1 mm coat needs about 48 hours to cure.
Trust the schedule and keep the coats even, then you get a finish that lasts. Clean your tools and tape while the last coat settles, and check the surface before you call the job done. Deep wells prevent splatter compared to shallow ones, which is critical when working with liquid rubber coatings on uneven surfaces.
Choosing Liquid Rubber by Substrate, UV Exposure, and Traffic Level
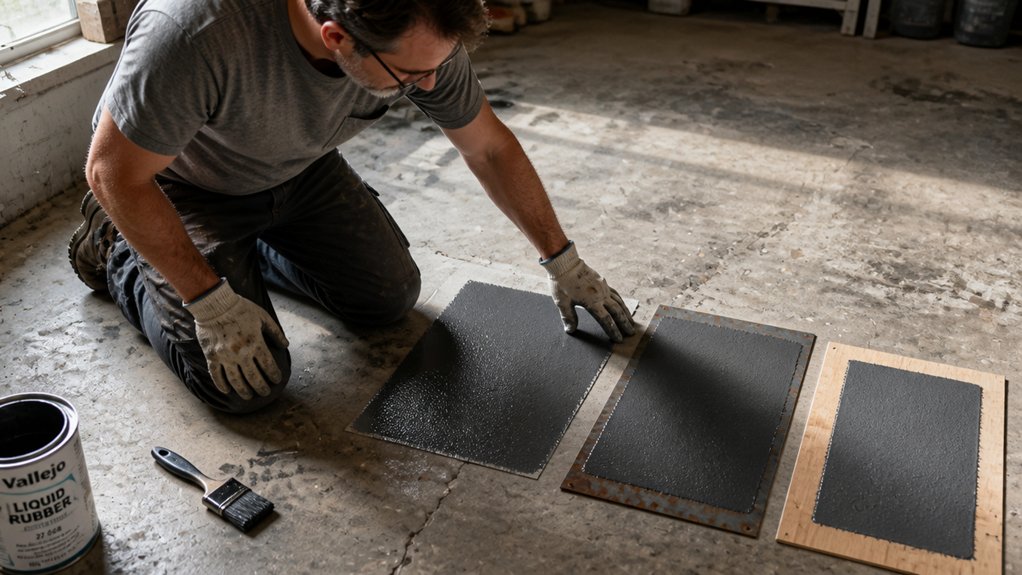
Pick the coating by what you are covering, how much sun it gets, and how much foot traffic it takes. A wrong choice will fail even if your prep is perfect.
On concrete, the surface is porous, so start with a primer and use a polyurethane base coat. On metal, remove rust with a rust converter first, then apply a flexible silicone topcoat in areas with heavy UV.
Silicone holds up best in sun and resists yellowing and cracking better than acrylic. If people walk on the surface, such as a deck, polyurethane takes abrasion better. A water-based acrylic option with a waterproof, no-primer formulation can work on porous stone but lacks the abrasion tolerance needed for heavy foot traffic.
Read the data sheet for climate behavior, VOC level, drying time, and cure time, and note the recommended sheen for your area. Check the primer and topcoat schedule the same way you check a stain and varnish schedule, and plan around freezing and thawing cycles or extreme heat.
Set a drop cloth and use painter’s tape at edges before you open the can. Sand to the grit the maker specifies, keep a wet edge to avoid lap marks, and choose a satin or matte sheen if you want less glare than gloss and fewer visible brush strokes.
Skipping these checks raises your maintenance costs over time. A cheap coating that does not match the job can need recoating every two years.
Spend a little more now and match the membrane to the surface. That is how you keep the job dry and reduce return trips.
5 Costly Errors in Product Selection and Application
I’ve seen two mistakes ruin more coating jobs than anything else: picking the wrong product for the surface and skipping surface preparation. Put a silicone coating on a high traffic deck and it will wear through fast, because silicone handles UV and heat well but does not stand up to abrasion.
Skip the primer on porous concrete and the topcoat may blister or peel within one season. Both mistakes are common, and together they cause most of the callbacks I hear about, so check these two points before you open a bucket. For porous or tricky substrates, a high-build bonding primer like INSL-X Stix lays down 20-mil wet layers to ensure superior adhesion and fill.
Start with the surface and the traffic it gets, then pick a coating that matches both. For a deck, choose a product with good abrasion resistance, and pick the sheen you need, whether that is gloss, satin, or matte.
On porous concrete, apply the correct primer before the topcoat, and follow the label for drying time and cure time. If you sand between coats, use the right sanding grit, keep a wet edge, and watch for lap marks and brush strokes.
The same approach applies to wood finishing with stain, varnish, or polyurethane: match the product to the wood and the wear it will see, and do the prep first. Set out a drop cloth and painter’s tape, check the VOC level, and give the finish the full drying time and cure time before you call the job done.
Choosing the Wrong Chemistry
Choosing the wrong liquid rubber chemistry wastes money. You may pay for a topcoat you do not need, or get a coating that fails within months.
Match the coating to the surface, the weather, and the movement the surface sees. Check UV exposure, traffic wear, and primer compatibility before you lay out a drop cloth or tape off edges.
Silicone handles sun well, while polyurethane breaks down under strong UV over time. If your roof bakes in the sun, use silicone and avoid recoating too soon.
Flexible polyurethane stands up to foot traffic on decks, while epoxy coatings can crack under that movement. Choose by the abuse the surface gets and the sheen you want, from gloss to satin or matte.
A primer that does not match the coating can turn a membrane that should last five years into a failure in one year. Verify the primer with the same brand, and follow the data sheet for drying time and cure time.
Scuff the surface with the right sanding grit and remove dust before primer. Plan your wet edge to avoid lap marks and brush strokes, and check VOC limits before you open the can.
If liquid rubber meets wood trim or a painted door, protect it with painter’s tape and a drop cloth. Keep stain, varnish, and polyurethane off the rubber surface unless the coating data sheet says they are compatible.
When you are unsure, call the coating maker’s tech line before you buy. That call can save you from a failed topcoat and a weekend spent fixing it.
Skipping Surface Preparation
You can spread the best liquid rubber over a dirty wall and watch it peel off like a bad sunburn. That is what skipping prep costs you, and I have paid that bill before.
Grease, dust, and loose paint will ruin the bond for your coating. Wash the surface, scrape off loose material, and let it dry completely before you open the can.
Lay a drop cloth and use painter’s tape to protect edges, then sand rough spots with the sanding grit your primer recommends. Vacuum and wipe away the dust so the primer can grip.
On concrete, use a masonry primer before the topcoat. On metal, degrease the surface before you apply primer.
Drying time is when you can recoat the film, while cure time is when it reaches full hardness. Do not trust a “touch dry in an hour” label when the air is humid.
Cold weather below 15°C can slow the cure for days, and hot sun can cure the surface too fast and trap solvents. Check the VOC level and the label directions before you choose a gloss, satin, or matte sheen.
Plan to spend twice as long on prep as you plan to spend on coating. With stain, varnish, or polyurethane, keep a wet edge and work in one direction to avoid lap marks and visible brush strokes.
Prep the surface now, then read the label before you open the topcoat. A little extra sanding and tack cloth work will save you a second can of finish.
Frequently Asked Questions
Can Liquid Rubber Be Applied Over Old Coatings?
Yes, you can apply liquid rubber over old coatings when the existing film is sound, clean, and tested for adhesion. Scuff sand a small test patch with 120 grit, wipe off dust, and press a strip of tape firmly before coating to confirm the old finish holds.
If the tape pulls paint or coating loose, remove the weak material first, sand the edges smooth, and repair those areas with an elastomeric coating before recoating. For a dependable bond, apply two thin coats rather than one heavy coat, allowing the first coat to dry according to the label’s recoat time.
How Long Does Liquid Rubber Waterproofing Last?
Liquid rubber waterproofing typically lasts 10 to 25 years, but that range is not a guarantee. Climate impact and surface preparation dictate the real lifespan, so treat the upper number as best case.
For a typical deck or flat roof, apply two coats at the maker’s wet mil thickness and let the first coat dry 4 to 6 hours before recoating. Do not skip prep: clean and sand bare spots with 80 grit, then prime as directed because that is the biggest factor in how long your membrane holds up.
This rubberized waterproof coating rewards careful application.
Is Liquid Rubber Safe for Drinking Water Tanks?
Liquid rubber is safe for drinking water tanks only when the exact product carries a potable water certification, such as NSF/ANSI 61. A generic “food safe” claim is not enough, since most liquid rubbers are not certified for tank interiors.
Before buying, ask the supplier for the certificate and match the product name and code on the label to that document. That quick check is the practical step you can take today.
For application, follow the certified maker’s written system, usually two coats at the stated wet film thickness, and let it cure fully, often seven days at 70°F, before filling. Search for a potable water tank coating with a current certificate, not a hardware store general purpose rubber.
Can Liquid Rubber Be Painted Over After Curing?
Yes, cured liquid rubber can be painted over once it is fully cured and you choose a compatible topcoat. I treat it like any flexible coating: clean off dust and oils, then scuff the surface with 220-grit paper so the paint has a mechanical bite.
Use a flexible primer or a coating made for rubber and test a small patch first, because adhesion can vary by formula. For a practical test, paint a 6-inch square, let it dry 24 hours, then try a gentle pull with tape.
If the tape pulls clean, proceed with thin coats rather than one heavy layer. A search for rubberized coating paint compatibility can help you find the right product.
What Is the Shelf Life of Liquid Rubber Coatings?
The shelf life of liquid rubber coatings is typically 6 to 12 months unopened, though it varies by product. Always check the label date before buying, and write the purchase date on the can with a marker so you can track it.
Once opened, seal the lid tightly and store the can in a cool, dry spot away from freezing temperatures. This simple routine also supports its storage life.
A practical tip: if the coating has thickened, try stirring in a small amount of the manufacturer’s recommended thinner, but discard it if you see clumps or a sour smell.
Rounding Up
Liquid rubber coatings are not magic, they are smarter than most alternatives, and you choose their types for roof, deck, or tank uses by UV, traffic, and substrate. Check your prep first because prep beats product every time.
Write down whether the job is a roof, deck, or tank, then compare products by UV, traffic, and substrate. Do not chase the priciest can; choose the right one and apply it thick.
Skip the guesswork and measure twice before you start. Read about liquid rubber coating types for the roof, deck, and tank use.