How to Apply Elastomeric Wall Coatings: Step-by-Step Guide

Applying elastomeric wall coatings can feel risky. You know the payoff is a flexible, waterproof barrier, but one mistake means peeling and cracking down the road.
That is why this guide focuses on the fundamentals: surface prep, primer, and proper rolling technique. We will cover the exact wet mil thickness, the temperature and humidity limits, and the full cure times you need to protect your home.
By the end, you will know exactly how to apply it once and do it right. Let’s walk through the steps from a clean power wash to the final back-rolled coat.
Quick Answer
- Power-wash substrate, fill all cracks, and verify zero moisture before coating.
- Prime chalky, porous, or bare block surfaces with a compatible bonding primer.
- Apply only when temperature is above 50°F and relative humidity stays under 90%.
- Stir coating mechanically for three minutes, then roll with a 3/8-inch nap.
- Back-roll while wet to push elastomeric into surface and crush pinholes.
Why Surface Prep Is Non-Negotiable Before Elastomeric Coatings
You can’t skip surface prep on an elastomeric coating job without risking peeling and wasted money. I’ve made that mistake once, and it cost me a full recoat, so learn from me.
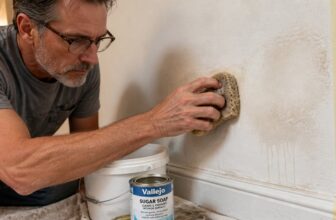
Start with a clean substrate. Power-wash off dirt, dust, and loose paint, then let it dry completely. If you see chalky residue, apply a primer to lock it down before the topcoat.
Start clean: power-wash dirt and chalk, then prime before topcoat. Skip that, and peeling follows.
I skipped that primer step one time, and the coating peeled within months. Don’t repeat that. Cracks are next, and even hairline ones matter.
Fill them with a compatible caulk or patching compound. Elastomeric paint flexes with temperature changes, but it won’t bridge gaps. Leave cracks open, and water seeps in, destroying the bond. Bone-dry substrates are required for proper adhesion, so verify zero moisture before you proceed.
Use a sanding grit around 80 to smooth patched areas before painting. This also helps the coating grip. Keep a wet edge as you roll, so you don’t get lap marks or brush strokes.
Prep takes half a day, but it saves you a full recoat. Grab your drop cloth, painter’s tape, and a low-VOC primer, and do it right the first time.
What Temperature, Humidity, and Weather Are Safe for Elastomeric Application?
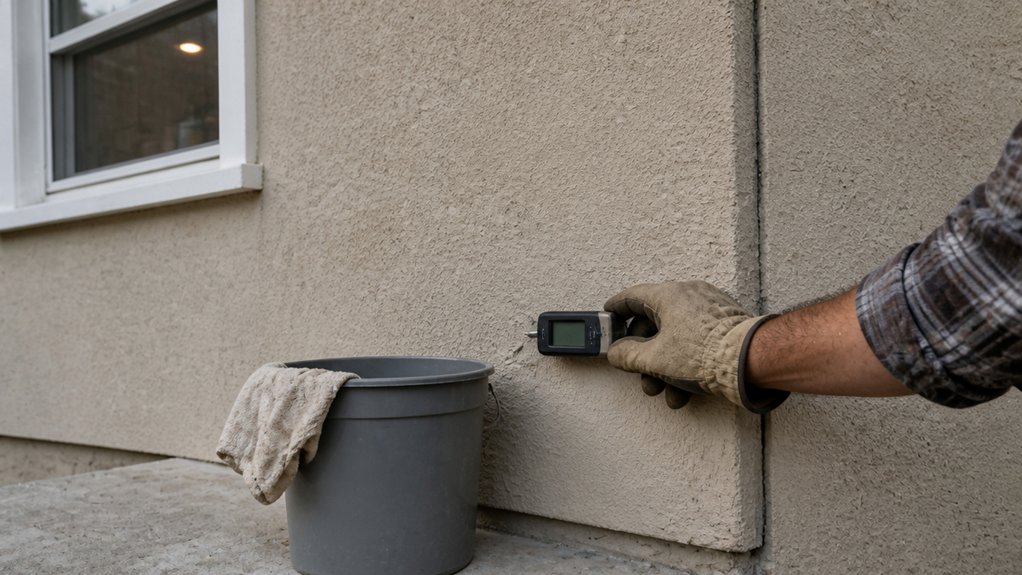
Check the surface temperature before you open the pail. If it’s below 50°F and not rising, the elastomeric won’t cure properly and you’ll end up with a sticky, failed coating.
Keep an eye on the dew point, too. If it’s within 5°F of the air temperature, moisture will sneak into the film and ruin the bond before it sets.
Humidity matters just as much as heat. Stay under 90% relative humidity, and don’t start if rain is forecast within 24 hours.
Wait for a dry, rising forecast instead. You’ll save yourself from patching cracks and re-coating later.
Think of it like laying down a topcoat over a fresh stain. Rushing the job means the sheen goes uneven and the cure time gets stretched.
Give the surface a clean, dry window and a warm afternoon. That’s when the elastomeric flows out smooth and grips tight.
Use a drop cloth and painter’s tape to protect trim while you work. And keep a wet edge as you roll, so lap marks don’t show in the final film.
These water-based formulas also demand full cure times of 24 to 72 hours before any foot traffic or rain exposure.
Ideal Temperature Limits
Most people don’t realize that elastomeric coatings are pickier about weather than a cat is about its litter box. You absolutely cannot rush this, so start by checking the air temperature first.
It needs to be at least 50°F and climbing, but that’s only half the story. The surface warmth matters just as much, maybe more.
If the substrate is colder than the air around it, you’re setting yourself up for failure. I’ve learned this the hard way, and it’s a mistake you can avoid.
The coating won’t cure properly in a cold snap, leaving you with a tacky mess that never dries right. Baking heat above 90°F makes it skin over too fast, trapping dampness underneath like a wet sponge under a topcoat.
You want a comfortable window, think of a spring morning with mild air and steady warmth. That’s your sweet spot for both the air and the surface reading.
Don’t gamble with borderline temps, because your warranty isn’t worth the risk of a failed job. Check both readings with a reliable thermometer, and give the coating time to dry and cure before you recoat. Also, for the material to remain supple through freeze-thaw cycles, your coating should maintain 200–300% elongation at break, so the cured film can flex with the substrate instead of cracking.
Keep a drop cloth handy and use painter’s tape for clean edges, just like you would with primer or a satin finish. And remember, drying time is not cure time, so wait the full window before walking on it or applying a second coat.
Humidity and Dew Point
Humidity matters more than temperature when you’re coating a surface. If the air is thick with moisture, your paint or elastomeric coating won’t cure right, no matter how warm it feels.
I check the dew point before I mix anything. Dew point tells you when moisture will condense on your surface, and that film of water ruins adhesion fast.
Keep relative humidity under 90%, but I aim for 75% or less to stay safe. You also need to test the substrate itself, not just the air, with a moisture meter.
Anything over 6% moisture in the wall or wood means trouble, so stop and wait. If rain is forecast within 12 to 24 hours, put your brushes down and clean up.
That dampness will seep into your primer or topcoat and cause blistering or peeling later. I also watch for a clammy feel on the surface, because that’s a sure sign to walk away.
Use a wet edge when you do paint, and keep your drying time vs cure time in mind before touching up. A drop cloth and painter’s tape won’t help if the wall itself is wet.
Check the dew point, measure the surface, and trust that damp feeling. Your finish will last longer, and you won’t waste a coat of varnish or polyurethane.
For a quick scan without leaving pinholes, a pinless moisture meter can sense damp pockets up to several inches deep and help confirm trouble zones before you commit to coating.
When Do You Need a Primer on Masonry, Block, or Painted Walls?

You don’t always need a primer, but skipping it on bare, thirsty block is a mistake. That surface acts like a sponge and will soak up your topcoat, leaving a patchy, uneven finish.
The real trigger is how porous the wall is and what’s already on it. Start by running a quick adhesion test: press a strip of painter’s tape onto the wall, pull it off fast, and see if any paint flakes or chalky residue comes with it.
If the existing coating fails that test, or if you’re dealing with fresh masonry that drinks up water, grab a manufacturer-specific primer. It evens out the surface and stops the topcoat from drying unevenly, which prevents blotchy spots and brush strokes. Look for a high-solids formula that functions as both primer and sealer to lock down porous surfaces and reduce topcoat absorption.
For painted walls, the same test applies. A sound, glossy finish might only need a light sanding with 120 grit to create tooth, then you can topcoat directly. But a chalky or flaking surface needs a bonding primer first, or your new paint will peel right off.
Remember to check the drying time versus cure time on your primer label. Most latex primers dry in an hour, but they need a full 24 hours to cure before you sand or apply a satin or matte topcoat. Rushing that step ruins the adhesion.
Lay down a drop cloth and use a quality brush to keep lap marks in check. When you do use primer, treat it like a base coat, not a shortcut. It saves you from repainting a failed job, which costs more time and paint than the primer ever will.
Assessing Existing Coatings
You can tell if a wall is ready for a heavy elastomeric coating by testing it, not guessing. I start with the ASTM D 3359 crosshatch adhesion test, scoring the paint, pressing tape over it, and pulling it off.
If big chunks peel away, the coating is unstable and needs a primer, no debate. Next, I check compatibility by pressing a wet sponge on the surface; bubbling means it’s water-sensitive.
Then I rub a dark cloth across the wall, and chalk on the rag tells me the old paint is breaking down. That’s a primer’s job, not elastomeric’s, so don’t skip this step.
Skipping these checks means your new topcoat might delaminate within a year, leaving you with peeling patches and wasted labor. A cheap primer fix now saves a costly mess later, and it keeps your drying time and cure time predictable.
Use a drop cloth and painter’s tape to protect the trim, and watch your wet edge to avoid lap marks. Sanding with a medium grit, like 120, between coats helps the primer and finish bond.
For unstable surfaces, a water-based latex primer like Kilz 2 All-Purpose seals masonry and blocks tannin bleed in one pass, ensuring the elastomeric topcoat adheres without delamination risks.
Primer Selection Factors
Primer resin type comes first: acrylic for most masonry, epoxy for stubborn stains or high moisture spots.
Surface alkalinity matters too. Fresh block is caustic, so a high pH resistant primer prevents burn through.
Check your adhesion test results. If the old paint peeled, use a bonding primer instead of a basic sealer.
Heavy chalk calls for a penetrating primer. A film forming primer will just sit on the chalk and lift later.
You can skip primer on sound, painted walls with zero chalk. That is wasted money.
On bare block or questionable paint, primer is insurance. My rule: when in doubt, prime it out.
For stubborn stains like oil or tannins on masonry, choose an oil-based or shellac-based primer, such as Zinsser B-I-N, which permanently blocks water and smoke damage.
Surface Porosity Conditions
Porosity decides how well your primer and topcoat stick to masonry, block, or painted walls. If the surface drinks water like a thirsty dog, you have high porosity, and that means the substrate is pulling moisture out of your paint before it can bind.
That’s when a primer becomes your main move, not a nice extra. It fills the pores and seals the surface so your topcoat goes on even and doesn’t disappear into the wall.
Bare block is the worst offender, soaking up elastomeric coating like a sponge. I always hit it with a block filler primer first, using a stiff brush or a roller with a thick nap to work it into the texture. High-build formulas bridge hairline cracks and smooth the surface, which cuts down on the topcoat needed.
That step stops you from burning through gallons of topcoat and ending up with a patchy, blotchy finish. For new masonry, prime it without overthinking, because fresh concrete and mortar are naturally thirsty and uneven.
For old painted walls, do a quick adhesion test by pressing painter’s tape onto the surface and pulling it off fast. If paint comes away, or if the wall feels chalky or shows flaking, prime it to lock down the old coating.
Smooth, sealed surfaces like glossy enamel or factory-finished metal can skip the primer, because there’s no open pore for the topcoat to grab onto. Just scuff it lightly with 220 grit sanding paper and wipe off the dust before painting.
When you’re unsure, prime anyway, because the cost of one primer coat is far less than the labor of recoating twice. Choose a primer with low VOCs for indoor work, and remember that drying time is not the same as cure time, so wait the full 30 days before heavy scrubbing.
A good primer also evens out sheen, so your satin or matte topcoat looks uniform instead of flashing in patches. Keep a wet edge while rolling to avoid lap marks, and brush out any drips before they set.
How Do You Mix Multiple Pails for a Consistent Elastomeric Color?

Color drift between pails can leave your finished wall looking patchy, and it happens because pigment settles differently in each bucket. The boxing method solves this completely, and you should do it before opening your first pail.
I learned this the hard way after a garage project that still embarrasses me. Uneven tint is classic pail aging, and you are fighting a losing battle without this step.
Open all your pails at once and pour them into one large, clean container, or alternate them into a fifth bucket. Stir for a full three minutes with a mechanical paddle, not a stick, so the pigment fully suspends and the sheen stays consistent.
Then refill your original pails, mixing as you pour each one. This keeps the wet edge uniform across the entire wall.
It takes ten minutes now, but it saves you from repainting later. Use a drop cloth and painter’s tape when you roll, and keep your topcoat moving in one direction to avoid lap marks and brush strokes.
Drying time is short, but cure time matters, so wait two weeks before any light sanding with fine grit if you need to touch up. The cost of boxing is near zero, while a bad batch means a blotchy wall that screams amateur.
Trust the ritual, and your satin or matte finish will look like one continuous coat. VOCs are higher in some elastomerics, so ventilate the space well while you work.
For thorough pigment suspension, consider a mechanical paint shaker that uses orbital motion to break up settled solids in under ten seconds.
Roller, Spray, or Brush: Best Application Methods for Elastomeric Coatings
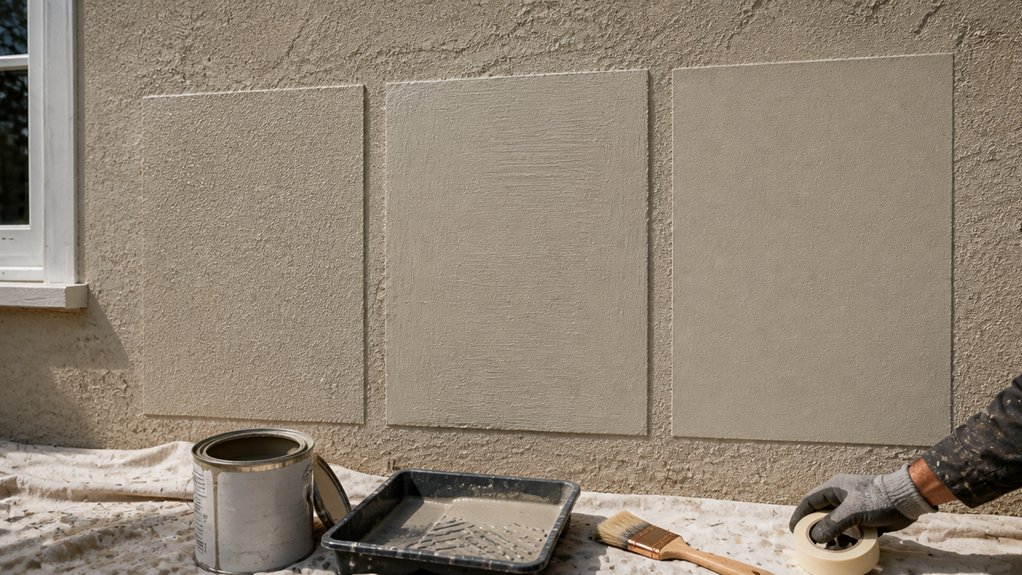
Roller is your best bet for most walls, and spray wins on big open areas. Brush is for touch-ups and tight spots, not for covering a whole surface.
For rolling, use a 3/8-inch nap and load it fully with paint. A dry roller leaves thin patches and lap marks that are a pain to fix later.
Spraying works great on large, flat expanses like garages or exterior stucco. You need heavy-duty equipment, a cross-coat pass, and a wet edge to keep the finish even.
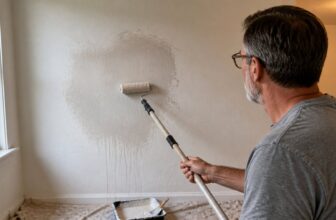
Always follow spray with a back roll using a roller while the coating is still wet. This crushes pinholes, pushes the elastomeric into the surface, and boosts adhesion.
Skip the brush for anything beyond corners, edges, or around windows and doors. Use a nylon brush only, and keep your strokes smooth to avoid visible brush strokes.
Painting a full wall with a brush will take forever and wear you out. You will also get inconsistent thickness and more drying time issues.
Match the method to the surface: roll most flat areas, spray the big open walls, and keep a brush handy for the details. Lay down a drop cloth and tape off trim before you start.
Remember to check the drying time versus cure time on the label, and use a low-VOC elastomeric if you are sensitive to fumes. Primer matters too, especially on bare concrete or old coating.
You do not need sanding grit for most elastomeric jobs, but a quick scuff on glossy spots helps the topcoat grab. Use a satin or matte sheen for exterior walls to hide roller marks.
Work in sections and keep a wet edge so the coating levels out and cures evenly. That is the whole secret, and it works every time. A high-density microfiber or polyester cover resists shedding fibers into the fresh coating.
Wet Mil Thickness and Coverage: How Thick Should You Apply?

You need to hit about 24 wet mils on a primed surface, which dries down to 12 dry mils. That thickness gives you the waterproofing without sagging or runs.
I check my work with a notched wet mil gauge after each pass. I measure in three spots per section and adjust my roller pressure right away if a reading is off.
Coverage rate is your lazy insurance policy, usually around 75 square feet per gallon for this material. Track it as you go, and re-coat any thin spots immediately, not later.
A wet edge keeps brush strokes and lap marks from showing, so work in one continuous section while the coating is still wet. Drying time is short, but full cure takes longer, so don’t rush a second coat or you’ll pull up the first.
Use a drop cloth and painter’s tape to protect edges, and stick with a satin sheen for a surface that hides imperfections and cleans up well. Low-VOC primers and topcoats are worth the extra dollar for indoor air quality.
If you lay it on too thick, you invite sagging; too thin, you lose the seal. Keep your roller pressure even and your readings consistent, and the coating will do its job.
How Long Should You Wait Before Recoating Over Elastomerics?

Wait one full year before recoating over elastomeric paint. That is my honest verdict after years of hands-on work, and here is why.
These thick, rubbery films keep flexing and curing long after they feel dry to the touch. Let them breathe through a full cycle of seasons before you add another layer.
This is not about patience alone; it is about physics. If you recoat too soon, you are putting fresh paint over a layer that is still releasing solvents and shifting shape.
That traps moisture and ruins adhesion, which leads to peeling, blistering, or a blotchy mess. Your exact waiting time depends on what topcoat you plan to use.
Check this quick breakdown for the minimum wait times:
| Topcoat Type | Minimum Wait | Key Note |
|---|---|---|
| Elastomeric (again) | 2–4 weeks | Same chemistry, easier bond |
| Acrylic latex | 12 months | Needs full cure, avoid trapping dampness |
| Solvent-based | 12+ months | Risky; topcoat compatibility drops |
For most jobs, that year mark is your safe zone. If you push earlier, you risk ruining the whole surface.
Before you paint, always sand the old elastomeric film with 80 to 120 grit to knock down the gloss and give the new coat something to grip. Wipe off the dust with a damp rag, and use painter’s tape to protect trim and edges.
Lay down a drop cloth to catch drips, and work in sections to keep a wet edge so you avoid lap marks and brush strokes. Use a high-quality acrylic latex topcoat with a satin or matte sheen for better breathability.
Check the label for drying time versus cure time; dry means touchable, cure means fully hardened. Solvent-based finishes like varnish or polyurethane are riskier here, so stick with water-based products if you can.
If you must go solvent-based, wait at least 12 months and test a small patch first. Your best bet is simple: wait the year, prep the surface, and then apply a fresh coat with a roller or brush.
That gives you a bond that lasts and a finish that looks even.
Frequently Asked Questions
Can Elastomeric Coatings Be Applied Over Previously Painted Surfaces?
Yes, elastomeric coatings can be applied over previously painted surfaces, but only after a thorough check. I never skip the adhesion test first, because it reveals whether the old paint will hold the new film or fail.
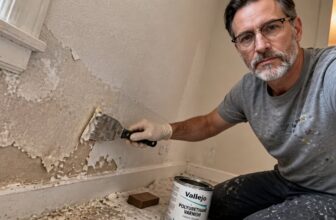
Scrape a small area with a putty knife, then press on high-tack tape and pull fast. If paint flakes off, you need a bonding primer; if it stays, you can proceed directly.
For sound surfaces, wash with a degreaser and rinse well, then patch any cracks with a flexible caulk. Surface prep is the entire game here, so don’t rush it.
On weathered paint, lightly sand with 80 grit to create tooth, then wipe dust. Two coats of elastomeric at 12 mils wet each will outperform one thick pass, and let each dry 24 hours between applications.
This topcoat’s flexibility is its key benefit, but it won’t save a loose base layer. Check for chalky residue too, which means power washing is mandatory before you start.
How Do I Repair Cracks Before Applying the Coating?
To repair cracks before applying the coating, you must first clean the joint, widen it if needed, fill it with a flexible patching compound, and let it cure completely. Start by scraping away loose debris and wiping the area with a damp cloth, then use a utility knife to create a V-shaped groove that gives the filler more grip.
Allow the patching material to dry for at least 24 hours, or longer if the manufacturer’s label suggests it. Once cured, sand the patch flush with 120 grit paper, then wipe off the dust with a tack cloth.
For hairline cracks, choose an acrylic or elastomeric filler that can flex with temperature changes. If the crack is structural or wider than 1/8 inch, apply a second coat of filler after the first shrinks, and always check the surface moisture before you seal it.
Finally, verify the patch is fully dry by touching it lightly; it should feel cool but not damp. A quick test with a moisture meter can help, and this crack repair process works for both interior drywall and exterior stucco surfaces.
What Happens if Dew Forms Before the Coating Cures?
If dew forms before the coating cures, it causes dew damage that compromises the finish. This leads to adhesion loss, discoloration, and a weaker film, which can ruin the surface’s integrity.
To avoid this, wait the full 24 hours before exposing the coating to overnight moisture. Better yet, schedule your application so the cure window falls on a dry forecast, or use a dehumidifier in enclosed spaces.
A related issue is `blushing`, a milky haze that appears when moisture gets trapped. If you spot it early, lightly sand with 320 grit and recoat, but only after the surface is completely dry. Trust the cure time; patience saves you from stripping and starting over.
Can Elastomeric Coatings Be Applied in Multiple Coats?
Yes, elastomeric coatings can be applied in multiple coats, and doing so is often necessary for proper waterproofing. Each additional layer boosts the total film thickness, which directly improves crack bridging and long-term durability.
For best results, wait at least 24 hours between coats, or until the first layer is fully dry to the touch. Applying a second coat too soon can trap moisture and cause peeling, so be patient and check the manufacturer’s recoat window.
Dry time is your biggest ally here, and using a moisture meter on the surface helps confirm readiness before you reload your roller. A typical two-coat system gives you around 20 to 30 mils of dry film thickness, which is ample for most stucco or concrete walls.
If you’re working in cooler or humid weather, extend that drying interval to 48 hours. Also, back-roll each coat thoroughly to avoid pinholes, and lightly sand any glossy spots with 80 grit only if you waited too long between layers.
How Long Must Elastomeric Coatings Cure Before Rain Exposure?
Elastomeric coatings typically need a 12 to 24 hour dry window before rain exposure, though this is only a baseline estimate.
Actual cure time hinges on humidity, temperature, and the applied film thickness, so a thick coat in damp air can easily double that window.
Check the forecast for at least two consecutive dry days before you start, and avoid rolling if rain is predicted within 36 hours.
A simple trick is to press your thumb into the coating; if it leaves a dent, it’s still too soft for any moisture.
Also, note that lighter shades and lower humidity speed up solvent evaporation, while cooler mornings slow it down.
For a reliable measure, use a moisture meter on the substrate, or wait until the surface feels tack-free and firm, which beats guessing.
Search for “elastomeric rain delay” if you need more specifics, but remember that a fast-dry additive can shorten the window by a few hours.
When in doubt, wait the full 48 hours, since washout from an early storm means stripping and recoating the entire wall.
Rounding Up
Applying elastomeric wall coatings starts with full prep and ends with patient dry time. You cannot skip cleaning, crack repair, or priming, and you cannot rush the cure between coats.
Measure wet mil thickness with a gauge while rolling, because guessing leaves you with a thin, failing film. Use a 3/4-inch nap roller for a 10-mil coat, and compare that to spraying before you start.
Check your local humidity and temperature before each pass, and write down your dry times on the can. Ask your supplier for a sample board to test adhesion on your specific substrate.
The article’s $1.50 per square foot cost measured a decade of protection, so budget for that. Next, read about repairing stucco cracks before coating.