How to Apply Fire-Retardant Intumescent Paints: Step-by-Step Guide

Fire-retardant intumescent paints only work if the surface prep is right, and getting that wrong means wasted money and unsafe results. If you are tackling a steel beam or garage door, the primer and dry film thickness matter just as much as the topcoat sheen.
The tricky part is balancing drying time, cure time, and environmental conditions like dew point before you even pick up a sprayer. You also need to know how thin to apply each coat, since thick layers can bubble or sag.
This guide breaks down the full step by step process, from blasting steel to logging your final mil thickness. Keep reading to get the exact sequence that avoids peeling and adhesion failures.
Quick Answer
- Surface preparation: blast steel to Sa 2.5, maintain 3°C above dew point.
- Mix components slowly for 3–5 minutes, rest 5 minutes, then skim foam.
- Apply two or three thin coats using airless spray with 0.021–0.027 inch tip.
- Measure wet film thickness after each pass; respect over-coating windows.
- Log batch numbers, temperatures, humidity, and film thickness daily for traceability.
Prep First: Why Primer and Surface Blasting Matter for Intumescent Paint
Skipping proper surface prep for intumescent paint is like building a sandcastle on a wet sponge: it looks fine for a while, then collapses when the fire inspector shows up. You need abrasive media to blast steel to Sa 2.5, which wipes away mill scale and rust.
That roughened profile gives your epoxy zinc primer the tooth it needs to grip. Without it, you’ll fail an adhesion test faster than I spill coffee on my coveralls.
I’ve learned this the hard way, so cheap prep isn’t a hack, it’s a gamble. Do it right, and your primer bonds like a stubborn barnacle; skip it, and you’re buying rework, not savings.
Blast clean, prime without delay, and test adhesion. That’s your insurance policy.
Blast clean, prime without delay, and test adhesion. That’s your insurance policy against costly rework.
Watch your wet edge when rolling on the primer, because a dry lap mark will show up as a thin spot later. Use a 60 to 80 grit sanding pass on any touched-up areas before the topcoat, and keep your drying time separate from full cure time.
If you’re working indoors, throw down a drop cloth and check the VOC level on your can so you don’t fog up the shop. A satin or matte finish hides minor surface flaws better than gloss, but for fire protection, the coating thickness matters more than sheen. Before you commit to a product, match application tools to the primer’s consistency, spraying thin coats for large areas and brushing thicker layers for detailed corners.
Mixing Two-Pack Intumescent Coating: Avoid Aeration and Soft Spots

Two-pack intumescent coating needs slow, careful mixing, not fast blending. If you whip it like a milkshake, you trap air that turns into soft spots once the paint cures.
Use a mechanical paddle on a low speed, and stir for three to five minutes. This keeps bubbles out and makes sure the hardener blends evenly, so you get a solid, uniform film like a smooth topcoat.
| Mixing Step | What I Do | Why It Matters |
|---|---|---|
| Base Prep | Break up settled solids | Even pigment and consistent color |
| Add Hardener | Pour slowly, scrape sides | Avoids under‑cured clumps that never dry |
| Stir Time | 3–5 minutes, low speed | Limits aeration and soft spots |
| Rest | Let it sit 5 minutes | Bubbles rise and pop before you brush |
Before you start, check the room temperature and humidity, because both affect how the coating flows and cures.
If it’s too hot or humid, the wet edge dries fast, and you’ll see lap marks or brush strokes in the final finish.
Always work with a drop cloth and painter’s tape to protect the floor and trim, just like you would with varnish or polyurethane.
Write down the batch number from each can in a job log, because that record saves you if the inspector flags a section later.
Use a primer that matches the coating system, and don’t skip the recommended drying time before you roll on the intumescent coat.
Cure time is longer than drying time, so wait the full period before you add a topcoat or walk on the surface.
Keep the paddle fully submerged while stirring, and scrape the bottom and sides of the pail twice during the mix.
That simple habit stops unmixed base from hiding in the corners, which would leave a soft, sticky patch that never hardens.
If you see foam on the surface after resting, skim it off with a clean stick before you apply the coating.
A few bubbles left behind become weak points, like small craters that fail under heat, so take the extra minute to remove them.
Remember that ideal conditions require temperatures between 50–90°F and humidity under 80% to ensure the coating flows and cures without defects.
Temperature, Humidity, and Dew Point: When Can You Spray Intumescent?
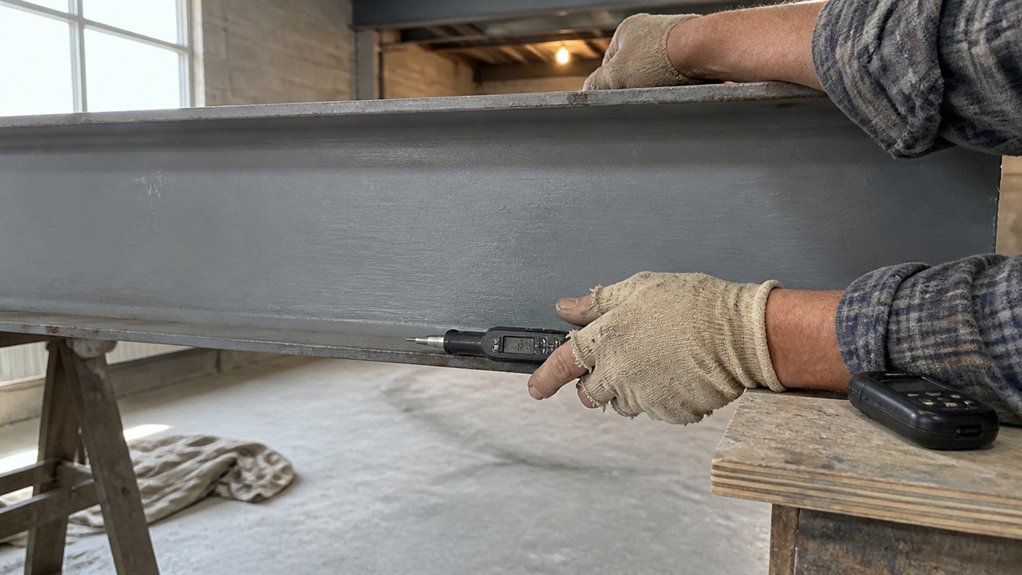
Spraying intumescent paint isn’t something you can rush. I treat the weather like part of the job, checking it before I even mix a batch. My dew point meter is the first tool I grab, because it tells me if moisture is about to wreck the coating.
Steel needs to sit at least 3°C above the dew point, or you’ll get condensation under the paint. That thin layer of water will ruin adhesion and cause blistering later. I also check the surface temperature with an infrared gun, not just the air. Most water-borne intumescents demand the substrate stay between 10°C and 50°C, no exceptions.
Humidity is another hard stop for me. If relative humidity climbs past 85%, I pack up and wait, because the paint won’t dry properly. Even the primer and topcoat need stable conditions, so I look at the forecast for drying time, not just spraying time.
A good rule is to only start when conditions hold steady for several hours after the last coat. I’ve learned the hard way that a sudden drop in temperature or a fog roll-in can leave you with a soft, sticky film that never cures. You also want to avoid painting in direct sun, since that can heat the steel past 50°C and make the paint skin over too fast.
Before any of that, I make sure the surface is clean and dry, then apply a compatible primer if the spec calls for it. The intumescent itself goes on with a brush, roller, or airless spray, depending on the profile. I always keep a wet edge when rolling, so I don’t leave lap marks that dry darker.
After the intumescent cures, I finish with a topcoat to protect it from scratches and UV. A satin or matte sheen works well for most indoor steel, while gloss is easier to wipe down in industrial areas. Just remember drying time isn’t the same as cure time, so read the can and wait the full period before handling.
VOCs matter too, so I use low-VOC products and keep the area ventilated. A drop cloth and painter’s tape keep the mess off surrounding surfaces, and sanding between coats with 120 grit helps the next layer bond. Follow these steps, and you’ll get a smooth, even fireproof coat every time.
For penetrations like pipes or cables that run through the steel, you’ll want a firestop sealant that’s tested alongside the intumescent system to maintain the full rating.
Choose Your Applicator: Airless Spray vs. Brush and Roller for Film Thickness

Airless spray is the fastest way to apply intumescent coatings because it lays down thick, even films in a fraction of the time. For the sprayer, choose a tip size between 0.021 and 0.027 inches; anything smaller clogs on the heavy solids, and anything larger wastes material. A 1200W unit hits the sweet spot for most DIYers needing consistent pressure without overheating.
Airless spray lays down thick, even films fastest—just keep your tip between 0.021 and 0.027 inches.
Brush and roller still matter when you need precision over speed. Use a brush for touch-ups, tight corners, or small beams, but know that you will work hard to build up each mil of thickness.
Rollers leave a texture, so sand between coats with 120-grit if you want a smooth finish. That extra step also helps the next coat bond properly, and it hides lap marks before they set.
Cleanup is non-negotiable. Intumescent dries like concrete inside your sprayer if you slack off, so flush the pump and hose immediately with the right solvent. Keep a drop cloth and painter’s tape handy, because overspray drifts farther than you expect.
Check the drying time versus cure time on the can before you recoat; a dry surface can still be soft underneath. For small jobs, a brush keeps the wet edge easy to manage, and you avoid the VOC mist that spray creates.
Spray big open spans, brush the details, and you will save both time and frustration. Sand between coats when the finish matters, and always test your spray pattern on scrap wood before touching the beam.
Coats and Over-Coating Windows: Calculating Dry Film Thickness for Intumescent
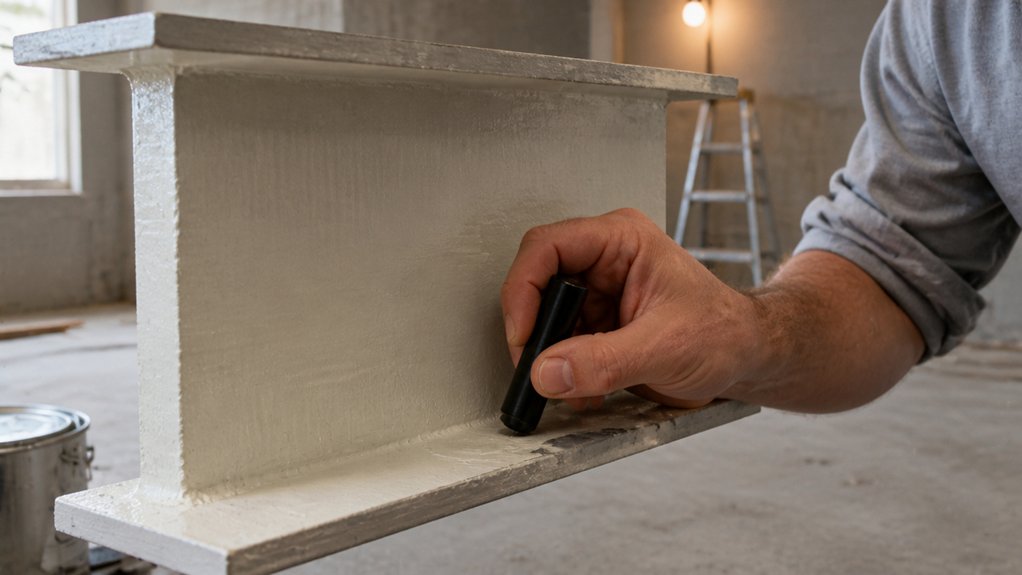
Check the manufacturer’s spec sheet to find the dry film thickness (DFT) per coat and the total you need. One thick pass will sag and fail, so plan on two or three thin coats to hit the target.
Measure wet film thickness with a gauge after each pass, since it catches problems before they dry. Let each coat dry fully between passes, because rushing traps solvent and ruins the cure. Respect the over coating window: too soon lifts the paint, too late hurts adhesion. Add up the cured coat thicknesses for total DFT, not wet readings, because wet numbers shrink as the solvent leaves. Match the gauge’s measurement range to the thickest coating expected, since exceeding a probe’s limit produces erratic readings.
A dry film gauge is your friend here, so trust it over your eyes. Keep the coats even and watch for brush strokes or lap marks, just like when you lay down a topcoat with a roller. You want a smooth build, not a globby mess, and a clean edge to avoid drips on your drop cloth or painter’s tape.
If you’re working near wood trim, mask it off and check the sheen after the final coat, since intumescent often dries flat and matte. Use low-VOC products when you can, and remember drying time is not the same as full cure time. Sand lightly between coats with fine grit, like 220, to knock off dust nibs before the next layer.
Daily QC for Intumescent: Logging Conditions, Thickness, and Batch Numbers
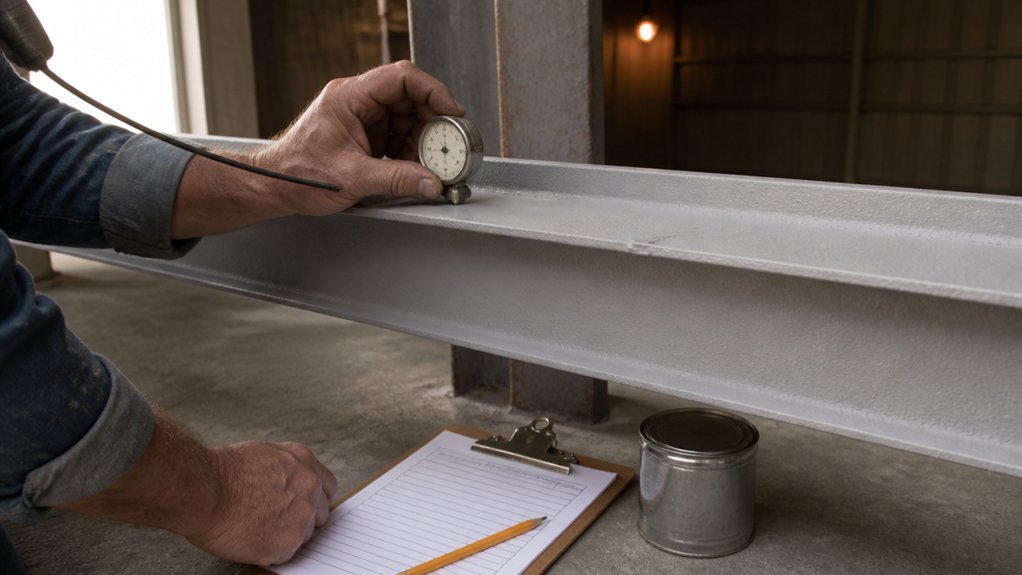
Logging film thickness and batch numbers is only half the job. The other half is proving the weather didn’t mess up your work.
Your daily log isn’t just paperwork; it’s your alibi. I track air and steel temps every two hours, plus relative humidity.
If the dew point creeps within 3°C of the steel, I stop and wait. No exceptions, because a damp surface can ruin adhesion and cure.
For batch traceability, write down every can’s number on the log. If a coating fails later, you can trace it back to the exact mix and spot it was applied to.
I also check dry film thickness after each coat, not just the final pass. Catching a thin spot early beats grinding cured intumescent with a sander. Use a gauge with fine increments to catch those thin spots before they become problems.
Keep it simple: a dated spreadsheet, a dew point chart, and your thickness gauge. That log is your proof the fire rating is real.
My rule is plain: if it’s not logged, it didn’t happen. Your inspector will agree, and so will your peace of mind.
Before you start, lay down a drop cloth and make sure the surface is clean and dry, like you would before any primer or topcoat.
Record the ambient conditions, and remember that drying time and full cure time are different, so note both if the spec asks.
Use a wet edge to avoid lap marks, and keep brush strokes even. This is the same care you’d give a satin or matte finish on wood.
Repairing Intumescent Film: Touch-Ups That Preserve Fire Rating

Every repair job starts with a confession: your intumescent film’s worst enemy isn’t fire, it’s the forklift that kissed the column last Tuesday. Don’t panic, you can patch that wound without losing the fire rating, but you’ll need a steady hand and some patience.
First, check the damage depth with a scraper or your fingernail. Scratches under 0.5mm are surface work, so sand lightly with 220 grit, wipe off the dust, and recoat with the same primer and topcoat. Anything deeper means stripping back to bare steel and starting the full system, because a thin patch over a deep gouge will bubble and fail under heat. For stubborn buildup on the steel before you recoat, use a carbide scraper that stays sharp up to ten times longer than standard steel.
Use the exact same manufacturer’s intumescent system, no substitutions. Mixing brands changes expansion rates, and the film won’t swell uniformly, which leaves weak spots. Check the label on your original can or order sheet before you buy touch-up material.
Mind the dry film thickness, a thicker patch doesn’t mean better protection. Heavy layers trap air and crack like mud in a drought, so apply in thin coats and let each dry to the touch before the next. Keep wet edge control by working in one pass, and don’t let brush strokes show, they can trap heat unevenly.
After the final coat dries, test adhesion with a strip of painter’s tape pressed down hard, then pull it off at a sharp angle. If any film peels, you didn’t prep right, so sand back to a feather edge and start over. Wait the full cure time, not just drying time, before you repaint over it.
Touch-up work isn’t glamorous, but it’s non-negotiable for a fire rating. Run film integrity checks with a thickness gauge and a visual scan before you roll on the final satin or matte topcoat. Fix it right once with proper primer and sanding grit, or you’ll redo it twice with a drop cloth and a foul mood.
Frequently Asked Questions
Can Intumescent Paint Be Applied Over Galvanized Steel?
Yes, intumescent paint can be applied over galvanized steel, but the galvanized adhesion requires specific preparation to work reliably. You cannot simply brush it on bare zinc, as the surface is too slick for a strong mechanical bond.
Start by sweeping the galvanized surface with a light abrasive blast, using a fine grit like aluminum oxide, to create a slight profile. Follow that with a dedicated etch primer or a specific zinc-compatible sealer, then apply your intumescent base coat.
For best results, aim for a dry film thickness of 300 microns for the intumescent layer, and allow 24 hours between coats at 70°F. Always test a small patch first, since galvanized age and weather exposure alter adhesion. This method also works with passivated or weathered galvanizing, so do not skip the etch step.
What Happens if Primer Dries Beyond Its Overcoating Window?
If primer dries beyond its overcoating window, you risk primer adhesion failure and film delamination when you apply the intumescent topcoat. This happens because the primer’s surface becomes too slick or too hard for the next coat to mechanically bite into.
To fix this, you must re-prepare the substrate by scuff-sanding with 120 grit paper, then wipe down with a tack cloth and reapply a fresh tie coat. This restores a proper anchor profile and guarantees bonding.
Check the manufacturer’s data sheet for the exact overcoating window; most waterborne primers give you 24 hours, while solvent-based ones may stretch to 7 days. If you miss that, treat it like a failed coating system and start over, never just lay on the intumescent.
For a quick field test, press your thumb firmly into the primer; if it feels hard and leaves no mark after 30 seconds, you’re likely beyond the safe recoat time. Related term: intercoat adhesion. Always sand and reprime rather than gamble on a delamination risk.
How Long Must Intumescent Paint Cure Before Fire Testing?
Intumescent paint must cure for the full manufacturer’s specified duration, often 3 to 7 days, before fire testing. You cannot shortcut this drying phase, as the chemical reaction that creates the expanding char layer needs complete film formation.
I will always run an adhesion test first to verify the film’s integrity before any furnace exposure. This crosshatch or pull-off check confirms the coating is tightly bonded, so a failure isn’t due to poor surface prep.
For a quick field tip, check the solvent rub test on a spare panel after 48 hours, if the coating softens, give it another full day. Remember that humidity and temperature extend the cure, so aim for 20°C and under 60% RH.
The related term to search is “fireproofing coating drying schedule,” which helps you match generic advice to your specific product. Never rely on touch-dry time, that only signals surface set, not internal crosslinking.
Can Damaged Intumescent Film Be Repaired Without Recoating Entire Section?
Yes, damaged intumescent film can be repaired without recoating the entire section, provided you use a localized patch technique that matches the original dry film thickness. I’ll feather the damaged edges with 120 grit sandpaper, then apply a primer compatible with the existing intumescent system before spot-coating the repair area.
After the repair coat dries, usually 24 hours at 20°C, I’ll blend the patch by lightly sanding the transition zone and applying a final thin finish coat over just that feathered area. This method works only if the substrate is still intact and the film hasn’t delaminated; otherwise, you must strip and recoat the whole bay.
Always verify the patch meets the fire rating by checking the manufacturer’s data sheet for minimum DFT and overcoating windows. For a durable match, use the same product brand and batch number if possible, and avoid mixing solvent-borne and water-borne intumescents. If unsure, test adhesion with a crosshatch tape pull before closing the job.
Does Intumescent Paint Require a Topcoat for Outdoor Exposure?
Yes, intumescent paint requires a topcoat for outdoor exposure, and that is non-negotiable. Without it, rain and UV rays will quickly degrade the intumescent layer, causing it to swell prematurely or lose adhesion.
Dampness compromises the fireproofing chemistry, and moisture trapped under the film can rust the steel substrate. A quality acrylic or polyurethane topcoat adds a weatherproof barrier, and you should apply two coats at 50 to 75 microns dry film thickness each.
For best results, lightly sand the cured intumescent with 120 grit, then apply the first topcoat within 24 hours to avoid contamination. This also simplifies long-term maintenance, as recoatings become straightforward. The topcoat is your sacrificial shield, protecting both the fire protection and the steel’s structural longevity.
Rounding Up
Apply fire-retardant intumescent paints by preparing the substrate through blasting, priming, mixing, spraying, logging, and verifying, because the coating only performs if every step is exact.
Check your dew point before you mix anything, because moisture on steel will make the paint fail faster than any fire will.
Write down your ambient temperature, humidity, and surface temperature for each batch, then compare them against the product’s allowed range before you spray.
Test your dry film thickness on a small test piece right after spraying, and log the number, since the intumescent layer needs a precise build to swell correctly.
Ask your supplier for the specific cure time and recoat window for your batch, since these paints punish shortcuts with poor adhesion.
Read next: intumescent paint thickness measurement methods.