How to Apply Ready-Mixed Wallpaper Pastes: Step-by-Step Guide
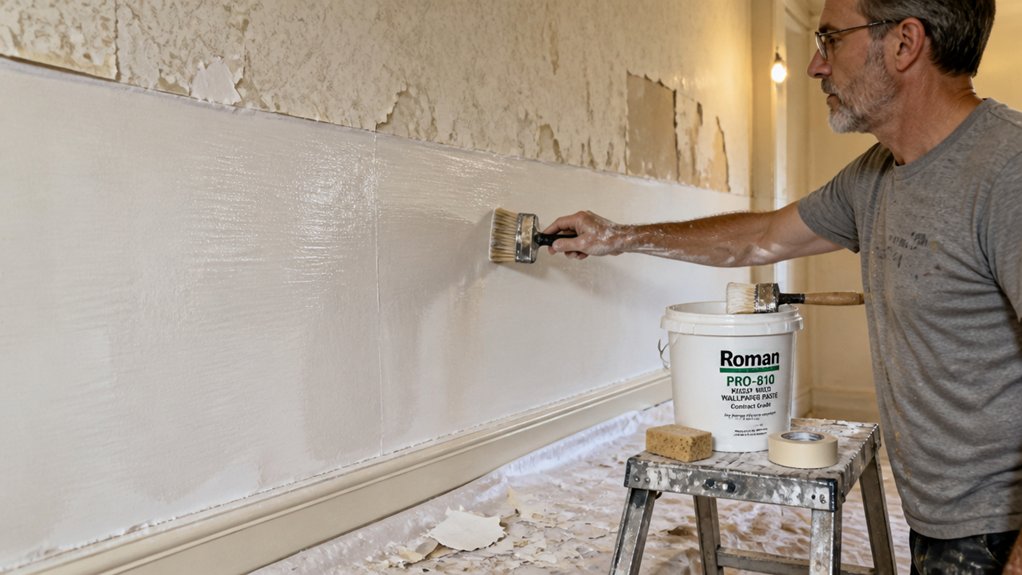
Ready-mixed wallpaper paste changes the game because you paste the wall, not the paper. That simple switch saves you from soggy, torn strips and a frustrating afternoon.
For a clean start, your surface needs to be flat and free of dust, so sand old paint with 120 grit and wipe it down. Use a short-pile roller to spread the paste evenly, covering about an inch past your strip’s width to keep a wet edge.
Work one length at a time to keep the adhesive fresh and the job manageable.
This guide covers the full sequence, including how to handle corners and trim for a crisp finish. You will learn the exact rolling technique and how to avoid bubbles before they start.
Stick with the steps here and your wallpaper will sit flat with no peeling or gaps. Next, we will break down the tools you need and the first coat in detail.
Quick Answer
- Apply ready-mixed paste with a short-pile roller, covering one inch beyond sheet edges.
- Paste only one wallpaper length at a time to keep adhesive wet and workable.
- Match adhesive weight to wallpaper type; heavy vinyl needs thicker, stickier paste.
- Smooth from center outward, pressing bubbles flat; never pull or stretch paper.
- Wipe excess paste immediately with damp sponge; dried paste damages print.
Prep Your Walls and Choose the Right Wallpaper Paste
Most wallpaper projects fail before the paste ever touches the wall because people skip the prep work. I have made that mistake three times myself.
Your wall needs to be dry, clean, and flat before anything else. New plaster gets a coat of primer, and old paint gets sanded down with 120 grit paper.
Think of it like inviting a guest over for coffee, you would not leave dirty dishes on the counter. Check your wallpaper grain direction before cutting, because light will catch each seam differently.
Check your wallpaper grain before cutting—light catches each seam differently, like dirty dishes left out.
Do not rely on that old tub of paste in your garage. Expired adhesive loses its grip, so check the shelf life and buy fresh if needed.
Choose a ready-mixed paste with fungicide protection, since it is thicker, sticks better, and resists mold behind the paper. Cheap paste will fail, and you will pay twice in time and frustration. Match your adhesive to the wallpaper weight, since heavy vinyl may slide when paired with unsuitable paste, while lightweight papers may need diluted adhesive.
Use a brush to lay on a wet edge of paste, covering the wall evenly without overlaps that show later. Work from top to bottom, smoothing out air bubbles as you go.
After the paper is up, keep the room ventilated and let the paste dry slowly. Drying time is not the same as cure time, so wait a full day before trimming or painting edges.
The right prep and paste make the job smooth, so do not skip the boring part. Sand, prime, check the grain, and buy good adhesive, then the paper will stay put for years.
Measure and Cut Your Wallpaper Lengths With Margin

To avoid a wallpaper strip that comes up short at the baseboard, measure the wall height in three different spots and use the tallest measurement. Add an extra 5 to 6 centimeters to that number for trimming, depending on the total height as shown in the table below.
| Wall Height | Add Margin |
|---|---|
| 240 cm | +5 cm |
| 260 cm | +5 cm |
| 280 cm | +6 cm |
| 300 cm | +6 cm |
That buffer gives you room to cut a clean, straight edge at the top and bottom, even if the floor or ceiling is slightly uneven.
For patterned wallpaper, check the repeat distance, like 64 cm, and lay the next strip edge to edge against the previous one before cutting.
Mark the top of each length with a pencil letter T so you hang it in the correct direction.
Draw a plumb line with a level 50 cm from the corner to make sure your first strip hangs straight, because walls are rarely true.
Cut each strip slightly generous, then trim the excess with a sharp knife against a straightedge after the strip is pasted and smoothed.
Use a drop cloth to catch paste drips, and keep a damp sponge handy to wipe any paste off the face of the wallpaper before it dries.
That little extra margin saves you from frustration over a crooked baseboard or a gap that shows raw wall.
Measure like a pessimist, cut with a fresh blade, and you will get a clean, professional finish without needing a second trip to the store.
After hanging, use a seam roller to press the edges flat, but avoid rolling over the paste lines until the adhesive is tacky.
For stubborn lifted edges, consider a water-based, clear-drying seam adhesive that wipes clean with soap and water while wet.
Apply Paste to the Wall and Hang the First Length at a Corner

Since your lengths are cut and the plumb line is marked, it’s time to get the paste on the wall. I use a short-pile roller to spread adhesive evenly, covering about an inch wider than the sheet on each side.
Only paste one length at a time so the adhesive stays wet and workable. Line that first sheet up with your vertical pencil mark, but let it overlap the corner by about 20mm to hide any crooked framing.
Paste one length at a time to keep it wet, and overlap the corner by 20mm to hide crooked framing.
Smooth from the center out toward the edges, pressing out air bubbles like you’re deflating a balloon. Work top to bottom, but never pull or stretch the paper, or it will shrink back and leave gaps.
Keep your hands dry and wipe off any paste that gets on the face with a damp sponge right away. Dried paste on the surface will show up as shiny spots once the topcoat goes on, so catch it while it’s wet.
A wet edge is your friend here; if the paste dries before you hang the sheet, you’ll get poor adhesion and visible lap marks. Use a drop cloth to protect the floor, and keep a painter’s tape roll handy to mark your plumb lines on the next wall.
You don’t need a high-gloss finish to make this work, just a flat, even coat of adhesive. Take your time, keep the paper relaxed, and the first length will sit straight and tight. For this job, a smooth HDPE surface on your pasting table resists warping and dampness, making cleanup and paste spreading much easier.
Smooth, Trim, and Clean Up Your Wallpaper Without Detergents

Once the first length hangs straight and smooth, you can trim the excess and clean the face without any spray cleaner. Detergents will ruin the ink faster than anything, so stick to clean water on a damp sponge.
Use a wide blade for edge trimming and press firmly into the ceiling and baseboard corners. Wipe off excess paste right away, because dried paste will pull the print off when you scrub.
For joint sealing, run a seam roller gently down each butt edge to lock the seam flat. Rinse your sponge often, since dirty water leaves streaks that show up after the wall dries.
This method keeps the topcoat sheen even and avoids lap marks later. You do not need primer, topcoat, or VOC-heavy products here, just a sharp knife and a straightedge. Using a high-density brush for smoothing helps press bubbles flat and keeps seams tight without scratching delicate surfaces.
Keep a wet edge as you work, and let the wall dry fully before you touch it again. Drying time is short, but cure time matters if you plan to paint over the paper later.
Use a drop cloth to catch crumbs and dust, and painter’s tape only if you need a guide on tricky corners. Sanding grit is not part of this job, so leave the sandpaper in the drawer.
That is the whole process, no chemicals and no fuss. You get a clean wall and a quiet sense of victory.
Frequently Asked Questions
Can I Use Ready-Mixed Paste on Vinyl Wallpaper?
Yes, you can use ready-mixed paste on vinyl wallpaper, but only if you first confirm the paste is rated for heavy vinyl. Standard ready-mixed options are often too thin for commercial-grade vinyl, so check the label for “heavyweight” or “washable” coverage.
Don’t skip priming the substrate, as bare plaster or drywall will suck moisture out and cause peeling. Apply a universal primer and let it dry for at least 4 hours before pasting.
I’d also brush a test patch behind a door or under a light switch plate. Wait 10 minutes, then check for bubbling or slipping. For a safer bond, consider a cellulose-based paste, which grips better on non-porous vinyl.
How Long Should Paste Dry Before Hanging Wallpaper?
You should not wait for the paste to dry before hanging wallpaper. With ready-mixed paste, the drying time is minimal and you hang the paper immediately.
The paste consistency is key: a thick, even coat adheres instantly. You smooth the wallpaper on whilst it is still wet, so the adhesive grabs the backing rather than skinned-over paste.
As a practical rule, book the pasted drop for about 5 minutes before hanging so the paper relaxes and the paste tacks up slightly. This wallpaper adhesive tip keeps seams tight and avoids bubbles. Work one drop at a time and keep the paste fresh.
What Temperature Is Ideal for Wallpapering a Room?
The ideal room temperature for wallpapering a room is between 18 and 21°C, which keeps the adhesive workable. If the room dips below this range, cold drafts will make the paste thicken, so it grips the wall poorly and can fail to bond.
You should avoid a high-moisture environment too, as this softens the adhesive and slows drying. Close all doors and windows to stabilize the climate, and keep the heat on for at least 24 hours after hanging.
For a concrete tip, give heavy vinyl wallpapers a full 48 hours to dry before you trim any edges with a sharp knife. This prevents pulling the paper loose. Using a thermometer in the room is a simple way to monitor the steady temperature you need.
Can Leftover Paste Be Stored for Future Use?
Yes, leftover paste can be stored for future use, provided you check its shelf life first. Most water based pastes last a few weeks when sealed airtight in a cool, dry spot.
I recommend using it within two to three weeks, but always stir well and test on scrap wood before applying to your project. Avoid freezing the paste, as ice crystals will permanently break the binder and ruin the consistency.
For a quick fix, add a teaspoon of water and mix thoroughly to revive a slightly thickened batch, but don’t expect it to perform like fresh. Sealed tight means pressing out all air before closing the lid, then storing the tub upside down to create a vacuum seal. If in doubt, buy fresh paste for critical work; the cost is far lower than redoing a finish. Coat count and drying times suffer with old material, so trust your nose for any sour odor.
How Do I Fix Bubbles Appearing After Paste Dries?
To fix bubbles appearing after paste dries, slice each blister with a sharp utility knife, inject fresh paste underneath, and smooth it flat. Use a putty knife to press the repair level, then sand with 120-grit once fully cured, which typically takes 24 hours.
After drying, inspect for any remaining voids and apply a thin skim coat over the entire patched area to blend texture. For prevention, always apply thicker coats of joint compound or spackle, as thin layers trap air and shrink unevenly.
Wipe the surface with a damp sponge before sanding to remove dust, and consider using a premixed lightweight filler that resists bubbling better than powder mixes. If bubbles persist, check your paste’s shelf life; expired product often causes gassing.
Rounding Up
Applying ready mixed wallpaper paste starts with measuring the wall and cutting your strips, then brushing the paste evenly onto the paper.
Check the paste’s coverage time on the label before you start, and test a small offcut to see how it slides.
Keep a damp sponge within reach, and wipe any paste off the surface before it dries.
Use a sharp utility knife to trim corners, and press lightly to avoid tearing the wet paper.
Measure each drop twice, and compare your strip lengths before pasting.
The article gives no statistic, so rely on your own trial runs to gauge soak time.
Next, read about hanging wallpaper around windows and doors for a clean finish.