How to Apply White Spirits: Step-by-Step Guide
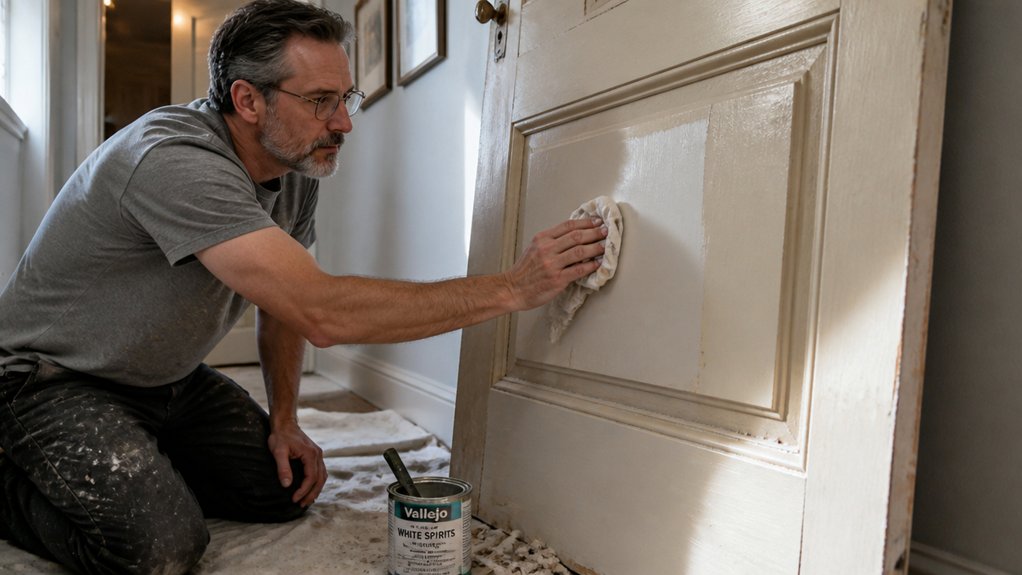
White spirits are the unsung hero of any oil based paint job, but they wreck a finish fast if you use them wrong. You do not need a workshop or pro skills to get this right, just a ventilated spot and a little patience.
This guide covers thinning, brush care, and safe rags, so your paint keeps its sheen and your space stays safe. Start by opening windows and setting up a fan, since fumes pool low and linger.
Then we move to mixing ratios and clean up step by step. By the end, you will handle solvent like someone who has done it for years.
Quick Answer
- Ventilate the workspace with cross-breeze or extraction fan to disperse low-hanging VOC fumes.
- Wear nitrile gloves, sealed safety glasses, and an organic vapor respirator for splash protection.
- Thin oil-based paints gradually, never exceeding 40% white spirits by volume.
- Soak brushes in white spirits for 20 minutes, then rinse with warm soapy water and dry flat.
- Dab fresh spills with a solvent-wetted cloth from edges inward; air-dry solvent rags flat for 48 hours.
Why White Spirits Works for Oil-Based Paints
A paintbrush caked in dried enamel is a sad, brittle monument to procrastination, but white spirits sidesteps that tragedy entirely. It works on oil-based paints by physically unlinking the long molecule chains that bind the paint together.
That is why it dissolves fresh gloss and alkyd varnishes so effortlessly, yet leaves cured films largely untouched. You are not stripping the surface; you are reviving the brush.
White spirits offers slow evaporation control, which is its real superpower. It hangs around just long enough to penetrate, soften, and lift the mess without flashing off in your face.
Slow evaporation is the real superpower—just enough time to penetrate, soften, and lift the mess without flashing off.
That steady drying curve makes it forgiving, ideal for thinning enamel without over-thinning. You can work large areas without the paint tacking up mid-stroke, so your wet edge stays open for a smooth, even sheen.
For under ten bucks a litre, it is the cheap, reliable kick your neglected brushes need. If it is oil-based paint, this is your solvent. Low-odor formulas also make it safe for interior touch-ups and brush cleaning without overwhelming fumes.
Prep Your Space and Gear First
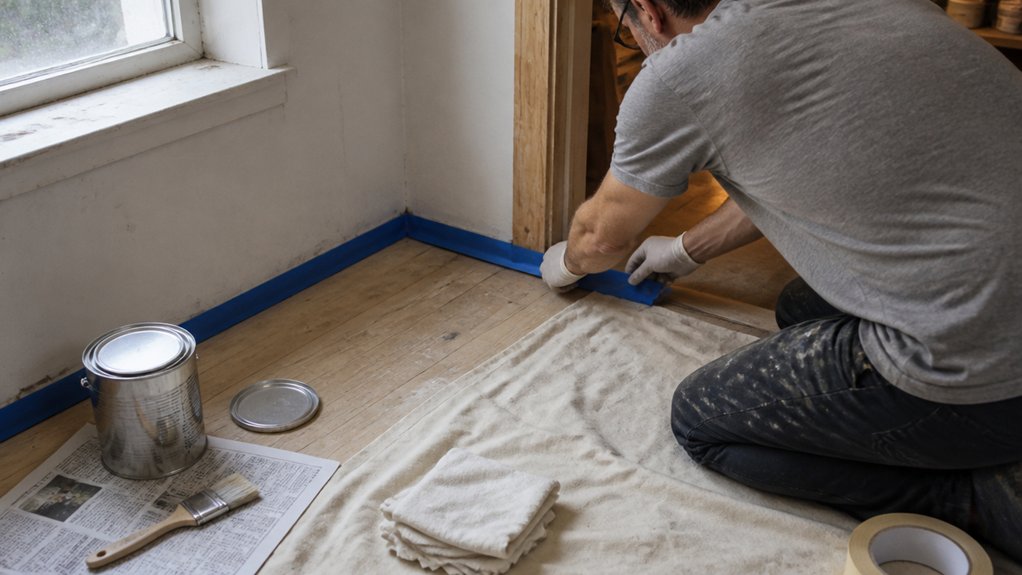
Set up your ventilation and gear before you open that can of white spirits. This solvent is flammable and tough on your skin, so treat it with real respect.
Open your windows and put a fan in the frame to pull fumes outside. At minimum, put on nitrile gloves and safety glasses, since white spirits can irritate your skin and eyes.
Prep your space like you would for any finishing job. Lay down a drop cloth to catch drips, and keep painter’s tape handy if you need to mask off edges.
Think of the solvent as the volatile worker it is, not a casual cleaner. Good airflow keeps the VOC load down, which matters more than you might think in a small room.
Protect your lungs first, then your hands and face. Your eyebrows will stay intact, and you will be ready to move on to sanding and your primer coat without a headache. Opt for powder-free nitrile gloves to avoid dusty residue that can irritate skin or contaminate surfaces.
Ventilation Requirements
White spirits can have a flash point as low as 21°C, so you’re handling a liquid that can ignite with one careless mistake. Let’s clear up the biggest ventilation myth: opening a single window is not enough.
You need a cross-breeze, meaning two openings, or an extraction fan pulling the fumes out. Indoor air quality drops fast with this stuff, and those vapors hang low and pool in corners.
I learned that the hard way, squinting through a haze I created myself while brushing on a coat of varnish. Crack a window opposite your work area and point a fan outward, that’s a solid start.
If you’re in a garage, keep the door partially up to let the heavier fumes escape at floor level. This isn’t overkill; it’s the difference between a throbbing headache and a clean finish with no lap marks.
Move air aggressively or take your project outside, especially if you’re using a primer or topcoat with high VOCs. Your lungs will thank you, and you’ll avoid the dizzy fog that ruins both your focus and your paint job. Remember, vapors can cause dizziness above 200 parts per million, so monitor your exposure in tight spaces.
Personal Protective Gear
Ventilation’s handled, so now let’s talk about the gear that keeps your skin and lungs safe. Nitrile gloves that fit snug stop solvent splash and stain from soaking in.
Safety glasses are cheap and fine for splashes; grab a pair that seals around the eyes. Keep all PPE in a dry, sealed bag away from solvent cans, so they stay clean and smell-free.
Before each session, run a quick glove check: stretch the fingers, look for pinholes, and toss them if they feel tacky. A leaky glove lets thinner or polyurethane touch your skin, which ruins your afternoon fast.
For longer jobs, a half-face respirator with organic vapor cartridges costs about twenty bucks and beats breathing in high-VOC fumes. Full-face respirators with P3 or P100 filters offer even better protection by sealing around the entire face. Don’t skip it for quick wipes either, because short bursts of solvent still add up.
Paint and finishing work always leaves a wet edge of risk, whether you’re wiping tack cloth or sanding between coats. Gear’s cheap, but dermatitis or a headache isn’t, so suit up before you open the can.
Flammable Material Safety
Before you open that can of white spirits, check your workspace. These vapors catch fire at an alarmingly low flash point, so one wrong move can end badly. Treat this like any solvent-based product: clear the area of heat sources, pilot lights, and anything that can spark before you start. I keep my cans far from heaters and electrical panels, and you should too.
Open windows and doors to get air moving, because solvent vapors hang low near the floor. Keep a metal, sealed container for waste and unused thinner, since plastic can degrade and leak over time. Spread any solvent-soaked rags flat to dry before you toss them, because piled rags can self-combust. Label every container clearly, so nobody mistakes it for water or a drink.
For storage, pick a cool, dry spot out of kids’ reach, and never put it near a breaker box or outlet. I learned that the hard way with a near miss that singed my eyebrows. Think of white spirits like a grumpy cat: respect its limits, and you’ll finish the job without a fire scene. Some solvents are restricted in California due to their combustible nature and VOC regulations.
Paint and polyurethane projects often need thinning, but keep your stirring stick and mixing cup away from any flame. A drop cloth catches spills, but it won’t stop vapors, so keep the room aired out while the topcoat cures. Wet edge and drying time matter less than safety, but both remind you to work calmly and clean up promptly.
Thin Oil-Based Paints and Varnishes
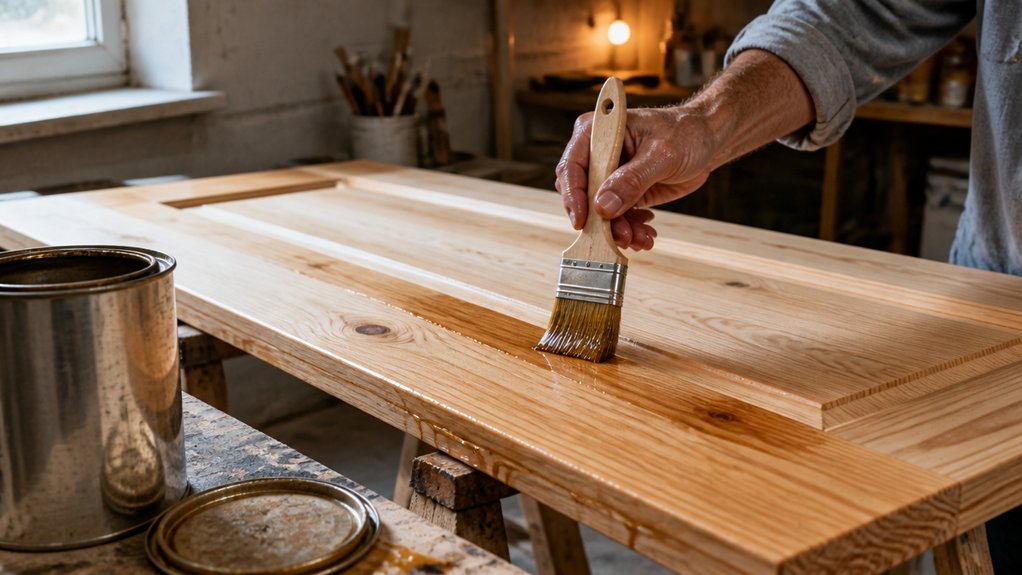
Thinning oil-based paint with white spirits comes down to three simple habits. First, respect the ratio limit and never exceed 40% spirits by volume, because past that point your gloss turns into watery wash that won’t cover. I learned this the hard way on a trim job where the finish sagged and ran, so trust the number.
Add the white spirits gradually instead of dumping it all at once. Pour in a small splash, stir well, check the flow, then repeat until you get a spray-ready consistency or a smooth brushable texture that levels without lap marks. This step-by-step approach keeps you from overshooting and ruining a batch.
This method shines when you restore old enamel that has thickened after years in the shed. A few measured pours of white spirits bring back the original flow and coverage, so you can avoid buying a fresh can entirely. Stir slowly and test the mix on scrap wood first to confirm it dries with the sheen you expect, whether satin, gloss, or matte. Remember that adding too much thinner can affect color intensity or drying time, so stick to the 40% ceiling.
Always work with proper ventilation because white spirits are high in VOCs. Use a drop cloth and painter’s tape to protect your surfaces, and remember that thinning affects drying time, not just viscosity. Full cure still takes days even if the surface feels dry to the touch.
Measure carefully, mix in stages, and you can restore or adjust paint without drama. Just keep those pours modest and you’ll get a clean, even finish every time.
Clean Brushes and Tools With White Spirits
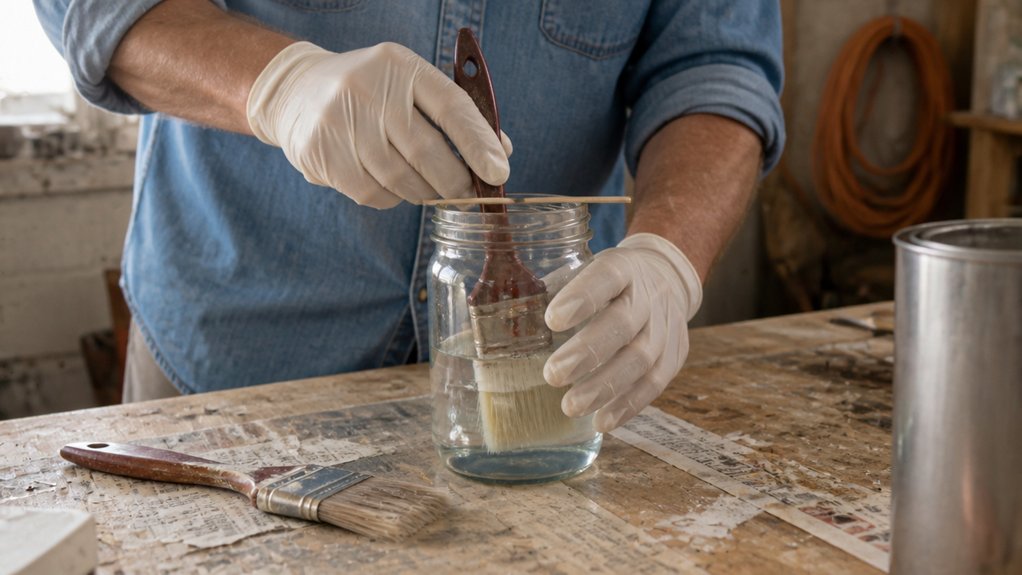
Clean your brushes with white spirits and you will save money and keep a smooth finish. I soak my brushes in white spirits until the paint softens, which takes about ten minutes for stubborn enamel.
Once the paint bleeds out, rinse the brush with mild soap and warm water. Then lay it flat on a rack to air dry.
Skipping that final rinse leaves soap residue that stiffens bristles like old varnish. Always dry brushes with the ferrule up so water does not seep into the handle and loosen the glue.
Work the spirits into the base of the bristles with your fingers, not just the tips. That clears dried primer or topcoat that hides near the heel and causes streaks in your next satin or gloss coat.
For oil-based polyurethane or stain, white spirits cut the gum better than water. If you used water-based paint, switch to warm soapy water instead, and never mix the two solvents in one jar. Check the brush for leftover flakes before you store it. A quick second dip in clean spirits removes those tiny chips that later show up as lap marks or brush strokes on a fresh wet edge.
Remember that drying time is a few hours, but cure time for varnish is several days. Store the cleaned brush in its original sleeve or wrap it in paper to keep the shape.
Use a drop cloth under your work area and painter’s tape on edges, because spills happen even to pros. Keep white spirits in a metal can with a lid, and work in a ventilated space to avoid strong VOC fumes. For heavily hardened brushes, consider a heavy-duty soak cleaner like Krud Kutter to restore stiff bristles before rinsing.
Soaking Brushes Thoroughly
Soaking brushes is where most people get impatient, so let’s be direct: you don’t just dunk a brush and walk away. You commit to the process.
I pour enough white spirits to fully submerge the brush fibers, about a half-inch above the ferrule, and let it sit for twenty minutes. That’s the sweet spot for oil-based enamel, and the solvent breaks down the paint’s grip.
You’ll see the spirits clouding as they work, which tells you the varnish or topcoat is releasing. Don’t rush this part, because rushing means you’ll be re-soaking later and wasting both solvent and patience.
Slow evaporation matters too, so I always cap the jar between agitations to keep the spirits working longer. Give the brush a gentle swirl every five minutes, but don’t scrub yet.
Your goal here is saturation, not friction, and the wet edge of the paint film softens evenly when you let the soak do the heavy lifting. Soak thoroughly, and the rest gets easier, whether you’re cleaning after a satin polyurethane or a gloss enamel.
Trust the soak, and you’ll avoid brush strokes in your next coat.
For heavily crusted residue, a pre-soak scrape of the excess paint can help the solvent reach deeper into the bristles, as stiff brushes may need that step before a longer soak.
Final Rinse and Drying
Once the soak has done its job, the real test begins. I rinse each brush under warm, soapy water to chase off any lingering solvent.
That final rinse matters more than you think, because leftover white spirits dull bristles over time. Then I pick my drying methods, but here is the trick: speed is not your friend, patience is.
First, shake the brush gently to flick off excess water. Reshape the bristles with your fingers before they dry crooked, so the edge stays true for your next primer or topcoat.
Second, lay brushes flat on a towel, side by side, never standing upright. Standing them lets water seep into the ferrule and loosen the glue, which ruins the brush and leaves you fighting lap marks later.
Third, air dry overnight. Skip any heat source like a radiator, because it warps bristles and makes the brush fight you on your next coat of varnish or polyurethane. Closed-loop water systems cut usage by seventy percent if you are cleaning multiple tools, making the rinse step more efficient.
I have ruined a few good brushes rushing this step, so do not repeat my mistake. Dry them slow, and they will reward you with years of clean lines and even sheen on satin or gloss finishes.
Remove Fresh Paint Spills Easily
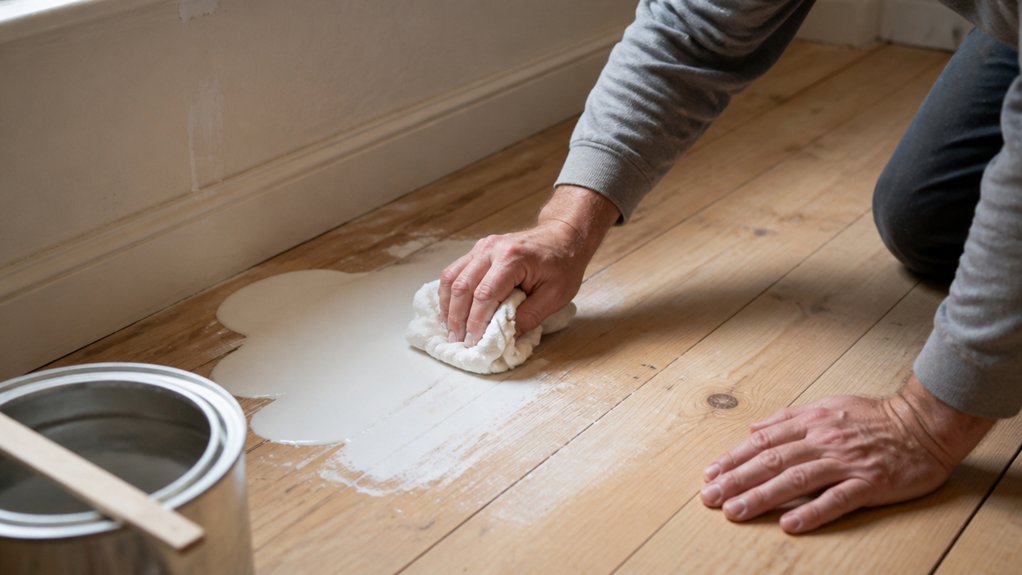
Fresh paint spills give you about five minutes to act before they set for good.
Grab white spirits and a lint-free cloth right away, and dab the spill instead of rubbing it.
Pouring solvent straight onto the mess only spreads the paint, so wet the cloth first and work from the edges inward.
For prevention, set your can on a drop cloth and don’t overfill the tray or bucket; that’s dull but cheaper than a stained floor.
If the drip is large, sprinkle kitty litter or another absorbent powder over it to pull up the excess paint.
Let the powder sit for a minute, then brush it off and apply white spirits to the remaining residue.
Wait for the solvent to soften the paint, then agitate gently with a stiff brush and wipe clean.
Repeat if needed, but avoid scrubbing hard or you’ll grind the paint into the grain or tile.
This works on oil-based paints and most topcoats like varnish or polyurethane, but check the label for water-based latex.
For latex, use warm soapy water instead of spirits, and blot with a rag until the stain lifts.
Work fast, keep your wet edge moving, and you’ll often skip the need for primer or a full recoat.
A clean spill is a quick fix; a dried one means sanding, spot priming, and matching the sheen.
Using a wax-free non-woven cloth can help trap paint particles without leaving residue behind.
Neutralize Residues and Dispose of Rags Safely
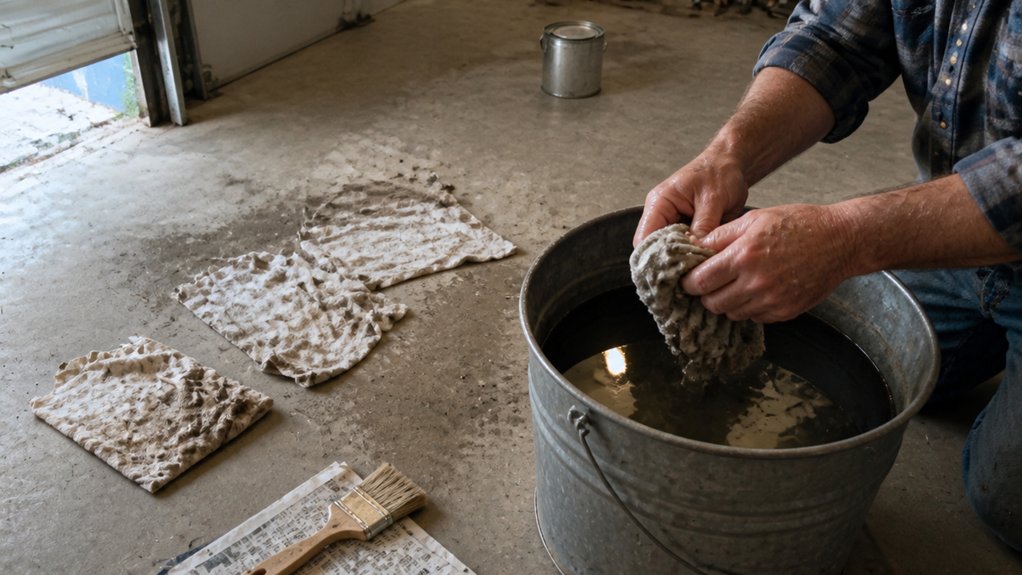
Neutralizing a paint spill isn’t the end of the job. Rags soaked in solvent and leftover finish can catch fire on their own as they dry, so you must handle them with care.
Spread the rags flat on concrete or gravel outdoors, keeping each one separated so air can reach every surface. A crumpled rag can heat up and ignite, especially on a hot summer day, so never wad them up.
Let the rags air-dry for a full 24 to 48 hours until they feel stiff and crisp. After that, seal them in a metal can with a tight-fitting lid to stop any lingering fumes from building up.
Take the sealed can to a hazardous waste drop-off site, not your regular trash bin. Throwing solvent-soaked rags in the garbage risks a fire in the truck, the landfill, or your neighbor’s curiosity about smoke.
This routine also keeps your workspace ready for the next coat of primer, stain, or varnish. Dry rags mean no surprise drips on your fresh topcoat, and no chance of a wet rag spoiling your satin sheen or leaving brush strokes in your polyurethane.
Treat solvent waste like a loaded matchbox, and you’ll sleep fire-safe. Clean drips, dry rags, and zero surprises is the painter’s way.
Frequently Asked Questions
Can I Use White Spirits on Latex Paint?
Yes, you can technically use white spirits on latex paint, but you should avoid it because the paint is water-based and solvents like mineral spirits won’t thin or clean it effectively. You’ll simply waste product and time, as the solvent will sit on top of the paint film without dissolving it.
Instead, use warm soapy water for cleanup or thinning, since latex paint responds perfectly to water-based methods. If you need to remove dried latex paint from a brush, soak it in warm, soapy water for 10 to 15 minutes, then comb out the residue with a stiff brush. Solvent exposure is also unnecessary, as white spirits carry toxicity risks and heavy fumes that water lacks.
For stubborn drips on glass or trim, try a lacquer thinner only as a last resort, but test on a hidden spot first. Stick with water for every wet-stage task, and you’ll save effort and protect your health.
Does White Spirits Expire or Lose Effectiveness?
White spirits don’t truly expire, but oxidation weakens their solvency over time.
Sealed, cool, and dark storage keeps them effective for several years, often up to a decade.
Check the smell: a sharp, sour note means the solvent has degraded, so don’t risk using it on a finish.
For a quick test, brush some onto a glass surface and see if it evaporates cleanly without leaving a film.
If it feels greasy or lingers, replace it with fresh mineral turpentine, a common synonym, for stripping varnish or cleaning brushes.
Store your can upright with the lid wrapped in cling film before closing; this blocks air exchange better than a bare lid.
When it reeks of rancid solvent, take it to a household hazardous waste drop off, never pour it down the drain.
Use a 320 grit sanding wipe-down with fresh spirits before your final topcoat to ensure proper adhesion.
Can I Mix White Spirits With Paint Thinner?
Yes, you can mix white spirits with paint thinner, as both are petroleum solvents that blend without harmful chemical reactions. Keep your solvent ratios conservative, starting with one part thinner to three parts white spirits to avoid over-thinning your finish.
Ventilation becomes even more critical once combined, since the mixture intensifies fumes and evaporation rates dramatically. Open every window and door, and use a fan to pull air across your workspace before you even open the cans.
For a practical tip, test the blend on scrap wood first, then apply one thin coat to your project; expect a faster drying time of about 15 to 20 minutes compared to pure white spirits. This mix works well for cleaning brushes, but avoid it on shellac or lacquer, where mineral spirits or denatured alcohol are better suited.
What Is the Difference Between White Spirits and Turpentine?
The main difference between white spirits and turpentine is that turpentine is a stronger, faster-dissolving solvent, while white spirits are a milder, safer option for thinning and cleanup.
Turpentine penetrates finishes aggressively, making it roughly 10% stronger, and it evaporates quicker, which speeds up drying but increases skin irritation and fumes. White spirits, also called mineral spirits, clean brushes more gently and pose fewer health risks, so I use them for everyday varnish thinning and tool maintenance.
For a practical tip, when you need a fast-drying first coat on bare wood, use turpentine to cut your oil-based primer, but switch to white spirits for subsequent coats to control viscosity without rushing. If you accidentally leave a brush out, white spirits will revive it overnight, whereas turpentine might leave a tacky residue.
Always work in a ventilated area and wear nitrile gloves, since both solvents strip natural oils from your hands, but turpentine does it far quicker.
Can White Spirits Damage Plastic Brush Handles?
Yes, white spirits can damage plastic brush handles by softening or warping them, especially on cheaper tools. The solvent penetrates certain polymers, causing them to swell, lose rigidity, or become sticky over time.
I recommend testing your brush by touching the handle with a drop of white spirit on a cotton swab. If the surface turns tacky or dull, keep the liquid away and wipe any spills with a dry cloth immediately.
For practical handle protection, avoid soaking brushes in a jar where the solvent sits against the plastic for more than a few minutes. Instead, clean the bristles in a shallow tray, then rinse with mineral turpentine as a safer alternative for sensitive handles.
A quick tip: after cleaning, hang brushes by the ferrule to dry, which keeps residual solvent away from the handle. This habit extends brush life, so check your handles today and adjust your cleaning method before damage starts.
Rounding Up
Applying white spirits starts by thinning stubborn paint or rescuing a crusty brush, as the article explains. Grab a metal tin, crack a window, and work in a ventilated space to keep fumes manageable.
Check that your rags are laid flat to dry before you leave them. Toss them in a proper metal container afterward so you won’t burn the house down.
Expect to mess up once, probably twice, and that’s fine. Write down the ratio you used for thinning so you can repeat it next time.
Compare a cheap white spirits brand against the article’s fifteen-dollar friend to see if it meets your needs. Test the product on a scrap surface before committing to your main project.
Read next about brush cleaning techniques.