Art Brush for Painting: How to Choose and Use It

Stuck in the brush aisle with a wall of options? The right art brush for painting depends on your paint and the marks you want to make, not on the price or the fancy handle.
For acrylics on canvas, a $6 to $12 synthetic round is a smart start. This guide covers how to choose and use an art brush for painting, from broad flats for big areas to pointed rounds for fine lines.
You will also pick up simple habits for loading, steady strokes, and blending wet edges before they dry. Read on, and you will know exactly which brush belongs in your hand for your next project.
Quick Answer
- Match bristles to paint: synthetic brushes suit acrylics, while natural bristles work well with oil paints and finishes.
- Choose a shape for the mark: flats cover broad areas, angled brushes cut in, and rounds handle details and lines.
- Select a size for the task and a balanced, comfortable handle that suits your reach and working space.
- Dip only the lower third of the bristles, tap off excess paint, and use steady strokes with even pressure.
- Test the brush on scrap material first; overlap strokes while wet and lift cleanly to prevent drips and tails.
Choose an Art Brush for Your Painting Medium
Match the brush to the paint first. A beautiful brush can’t rescue the wrong bristles.
Start with the paint itself. Choose bristles made for that type of paint, because the fibers either hold up or fall apart.
Synthetic nylon or polyester bristles work best with acrylic paint, which thins with water. These fibers resist water, and they clean up easily with soap and warm water.
Natural bristles suit oil paint and oil finishes such as alkyd enamel and varnish. They hold a good load of paint and lay it down smoothly with fewer brush strokes showing.
For oil paint and finishes like varnish, natural bristles hold more paint and leave a smoother finish with fewer visible strokes.
Check the label before you buy. A synthetic round brush in the $6 to $12 range works well on canvas with acrylics.
For oils on wood panels, pick a natural bristle flat brush. It holds paint well and spreads it evenly across the surface.
Some brushes have flagged tips, which are split bristle ends. Those split ends release paint evenly and help you avoid heavy lines.
A ferrule is the metal band that holds the bristles to the handle. A sturdy ferrule keeps the bristles from loosening during a long painting session.
Avoid brushes that shed. Loose hairs can land in wet paint and stay there as specks after it dries.
Before you buy, tug a few bristles gently. If more than a few come loose, put the brush back on the shelf.
The right brush also helps you keep a wet edge, so the paint blends without leaving lap marks. A brush that matches the medium lets you work across a whole panel before the paint starts to set.
Drying time tells you when paint feels dry to the touch. Cure time is when the finish reaches full hardness, which can take days for varnish or polyurethane.
Lay down a drop cloth and run painter’s tape along trim before you open the paint. Then choose a brush that fits both the job and your budget.
Match Art Brush Bristles to Paint Consistency
Match your brush bristles to the thickness of your paint. Soft bristles work best with thin, runny paint on smooth, blended surfaces.
Firm bristles handle thick paint and rough texture better. Use this rule whenever you start a new project.
Soft brushes suit liquid paint, such as washes and thin acrylic. They leave fewer brush strokes and lap marks on the finish.
Keep your pressure light, since even soft bristles leave marks when you scrub. A gentle touch gives you a smoother coat.
Thick paint needs a firmer brush. Firm bristles push heavy acrylic or oil into a raised, textured layer called impasto without folding flat.
Before you paint, check the bristles by bending them gently and letting go. Good bristles spring back into shape.
A brush that stays bent or splays out will leave a messy finish. This simple test tells you more than a fancy label does.
Test every paint on a scrap board first. Paint from different brands can behave differently, so a test shows you how it flows.
If the brush drags or pulls, ease your pressure or switch to another brush. Keep a wet edge by working into the paint before it starts to dry.
Drying time and cure time are different, so wait for the paint to dry before you add a second coat. Give a varnish, polyurethane, or other topcoat longer to cure before you handle the piece.
Match soft bristles to fluid paint and firm bristles to thick paint. Then keep your pressure light and let the paint do the work.
Pick an Art Brush Shape for Each Stroke
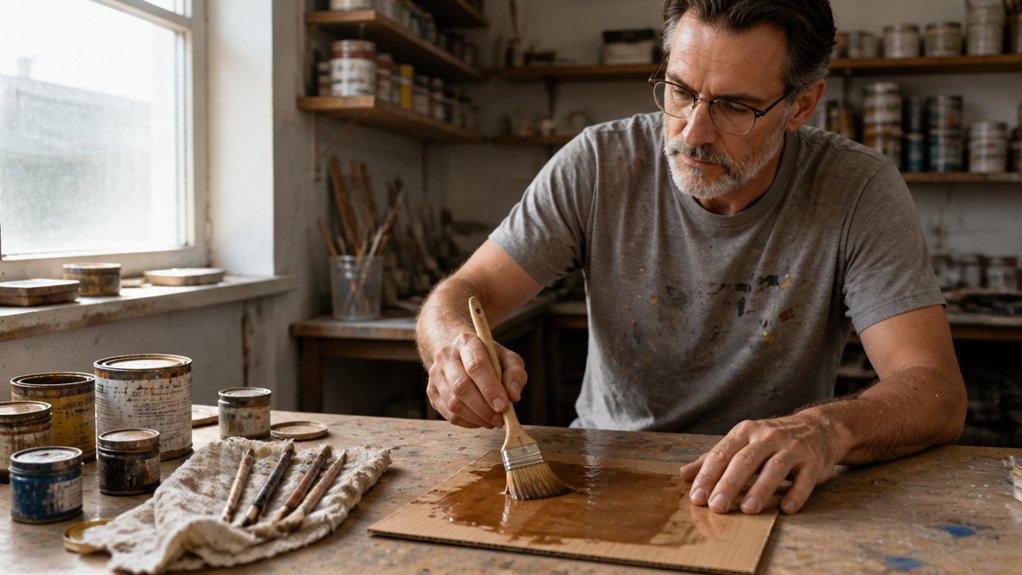
Pick a brush shape that matches the mark you want to make. The right shape lets you control each stroke with less trouble.
Flat brushes make bold sweeps across walls, ceilings, and large panels. The wide, square edge lays down a broad band of paint, which keeps your wet edge moving and helps you avoid lap marks.
Angled brushes handle crisp lines and curves. The slanted tip gives you a sharp edge for cutting in along painter’s tape, window sashes, and trim.
Round brushes help with fine details. Use one for lettering, small trim work, or touching up a stain on a wood project.
Test each brush on a scrap board before you start on the real surface. Watch how the paint flows and where the bristle marks show up.
Match Shape to Stroke
Choose a brush shape based on the path your stroke needs to take and the edge control you want. A brush that looks good in the jar may still fight you on the wall or the board.
For broad, straight sweeps, reach for a flat brush. Its square end lays down even passes and helps you cover a wash without leaving lap marks.
When a line bends around a form, an angled brush turns with your wrist. A round brush tapers to a point, which suits flowing brush strokes like the curve of a leaf or a line of wood grain.
Use a filbert when you want a soft shift in direction without the boxy edge of a flat. A fan brush works well for blending a boundary between two colors while keeping the wet edge open.
Test each shape on scrap paper or a spare board before you start the real surface. Brushes don’t reveal their habits until paint is on them, so the test shows how the bristles load, release paint, and hold a line.
Mask the trim with painter’s tape and spread a drop cloth before you test. Then let practice handle the rest of the learning.
Choose Brushes by Mark
A flat brush is my first pick for broad, even blocks of color. A round brush gives me fine lines and details from its pointed tip.
I choose the mark before I choose the tool. Otherwise, my painting looks like it lost an argument with a fence.
- A filbert brush has a rounded tip that makes soft edges. Its strokes start wide and taper narrow, which works well for petals, clouds, and a forgiving tree line.
- A fan brush can blend wet color or flick out dry brush texture. I use it sparingly because it can turn one pine into a small forest.
For crisp curves, I reach for an angled brush. For thick, broken strokes, I use a palette knife to add texture without pretending to be a surgeon.
Keep a wet edge by working one section at a time. This prevents lap marks where dry paint meets fresh paint.
Lay a drop cloth under your work and mask off edges with painter’s tape. That keeps your brush strokes clean along trim and baseboards.
Test a patch on scrap board or a hidden spot first. Then trust your eye.
Choose Art Brush Sizes for Detail or Coverage
Match the brush size to the mark you want to make. A small round brush handles fine details like trim edges and tight corners.
A wide wash brush covers large areas with even brush strokes. Switch between them as the work changes, starting with the round brush for details and moving to the wash brush for broad sections.
Work in long, steady strokes to keep a wet edge and avoid lap marks. Lay down a drop cloth and use painter’s tape on trim so your detail work stays clean.
If a brush feels hard to control or too short to reach comfortably, go down a size or choose one with a longer handle. A brush that fits your hand keeps your wrist relaxed and your lines steady.
Match Brush Size to Detail
Match your brush size to the job. Use a wide brush for broad areas, and switch to a smaller one for edges and detail.
Choose your brush tip based on the smallest mark you need to make. A 6 mm round handles highlights, and a 10 mm round gives you room to paint lines without each one turning into a limp, drippy noodle.
Brush width should suit the size of the feature you paint. A narrow trim board needs a narrow brush, and a wide door panel needs a wide one.
For tiny edge work, steady your hand by resting your little finger on the surface. Then use a pointed round to control the line.
Test your strokes on scrap paper before you start the real piece. Paint spreads more than most people expect, so a test shows you how much space each line needs.
If your marks look blunt, step down one brush size and test again. Going down one size usually gives you a sharper mark without slowing you down.
Keep a wet edge as you move across a panel so each stroke blends into the last. Lap marks appear when the paint dries before you overlap it, so work steadily from one section to the next.
Choose Larger Brushes for Coverage
Use a larger flat or wash brush for broad washes and big background areas. A small detail brush needs many more strokes to cover the same space, and each pass leaves another chance for lap marks.
A brush 2 to 4 inches wide covers more surface with every stroke. You can fill a canvas or a large color block in fewer passes, and the result looks smoother.
Load the bristles evenly so the paint flows out without streaks. Keep the surface wet as you work, and join each new stroke to the wet paint before it dries.
Pick the width that fits the area. A watercolor wash brush works well for skies and soft gradients.
A wide flat brush handles backgrounds with ease. On a small panel, a 1 inch brush gives you good control, while a 3 inch brush covers a larger panel much faster.
Check that the brush holds enough paint without dripping. Test it on a scrap of cardboard before you start so you catch any problem early.
A large brush is wasted on a small postcard, and cleaning it takes longer than the job itself. Spread a drop cloth under your work and use painter’s tape to mark off edges so the brush stays on the surface you want to paint.
Clean the brush well after each session so the bristles stay soft and ready for the next coat. A smooth, wide stroke also helps when you apply a topcoat, because even coverage gives a consistent sheen.
Size up for broad areas and keep your small brushes for detail work.
Balance Control and Reach
Choose a brush that feels balanced in your hand. A brush that’s too heavy or too long tires your wrist before the project is done.
I test a medium round on watercolor paper. It handles fine details, and it lays a modest wash without strain.
For broad coverage, I switch to a wash brush about one inch wide. It carries paint across open areas with few brush strokes, and it keeps a wet edge moving so you avoid lap marks.
For lettering, I pick a rigger. This long, narrow brush holds fluid paint and draws steady lines.
Keep a small round for fine marks. Keep a wash brush for open areas, so each tool has one clear job.
Pick a handle that rests comfortably in your palm. A short handle steadies close work, and a long handle suits easel painting.
Rinse your brushes right after you finish. Paint that dries in the ferrule bends the bristles out of shape.
Reshape the bristles while they’re still damp. Smooth them to a point or a flat edge, then let them dry flat.
Store brushes away from your paint and finishing supplies. Clean brushes last longer, and a stray bristle is less likely to end up in your polyurethane or topcoat.
Lay a drop cloth under your work area and use painter’s tape on the edges. Drying time is short, but a varnish can take weeks to cure, so protect the surface until it has fully cured.
Use Bristle Stiffness to Shape Texture
Choose bristle stiffness based on the surface and texture you want. Soft bristles spread paint smoothly and leave few brush strokes, which makes them right for furniture, doors, and other smooth surfaces.
Stiff bristles hold thick paint and push it into raised ridges, so they work well on textured walls and with impasto, which is paint laid on in thick layers.
Before you buy, press the bristles against your palm and watch how they bend and spring back. A good brush returns to its shape quickly, which helps you keep a clean edge as you work.
A brush that stays splayed or bent will leave uneven coverage and lap marks. Spend your money on the bristles, since a fancy handle does little for the finish.
A basic brush costs $10 to $20, and a good one can last through many projects. Clean the brush as soon as you finish, using water for latex paint or mineral spirits for oil paint.
Stiff bristles handle rough work with less wear. Any brush lasts longer when you rinse it right away and let it dry with the bristles hanging free.
For furniture, load a soft brush lightly and work thin coats over primer. Sand lightly between coats with fine sanding grit, and choose a satin or matte sheen to hide small flaws.
Match softness to smooth surfaces and stiffness to textured ones. That rule will get you a good finish on most projects.
Try Wash, Mop, Rigger, and Bright Brushes

Each brush makes a different kind of mark, so match the brush to the job.
A wash brush lays down broad, even color across a large area.
Test it on scrap paper first to see how much water and paint it releases before you flood a sky.
A mop brush holds more water, so it softens clouds and blends a cheek without leaving hard edges.
Keep the wet edge moving as you work so the color flows into the next section without lap marks.
A rigger has long, thin hairs that draw steady lines for branches, rigging, or lettering.
Use a light touch and long strokes, because short strokes make its line wobble.
A bright has short, stiff bristles that push thick paint into compact brush strokes for a small panel or a bold mark.
Brights suit opaque paints like acrylic and gouache, but they can’t replace a soft wash brush for watercolor.
For watercolor, start with a wash brush about an inch wide.
Add a mop brush when you blend often.
The right brush makes the work easier and the marks cleaner.
Find a Comfortable Brush Handle
A balanced handle matters more than a fancy shape, especially when you paint for more than ten minutes. A sore hand can turn a long session into a frustrating one, so I check palm comfort before I buy.
Three handle shapes show up most often, and each suits a different kind of work. The table below shows where each one works best.
| Handle | Feel | Best for |
|---|---|---|
| Rattail | Slim, like a pencil | Fine control |
| Fluted | Squared and steady | General use |
| Beavertail | Thick, fills the palm | Longer sessions |
I test grip balance by holding the brush the way I would hold it while painting. I hold it for a minute and notice where my fingers and palm press.
A good handle should not feel heavy at the tip. It should also let my fingers relax instead of squeezing to keep control.
Pick a short handle for cramped spaces, such as the corner of a cabinet or a tight trim job. Choose a longer handle when you need reach, like when you cut in a high wall from a step stool.
A student brush in the $8 to $20 range is usually comfortable enough for most home projects. Paying more for fancy wood will not fix a handle that does not fit your hand.
If you can, hold the brush for a full minute before you buy it. Your hand gives a better answer than any label on the package.
Choose the shape that rests naturally in your hand. A comfortable brush helps you keep smooth brush strokes and clean wet edges on your topcoat from start to finish.
Make Clean Strokes With an Art Brush

Clean strokes start with a brush that suits the paint and the mark you want to make. A soft brush with medium stiffness works well for smooth paint like latex enamel or a satin finish.
Choose a brush that suits your paint and the mark you want; medium-soft bristles work well with smooth finishes.
A stiffer brush works better when you need crisp edges or thick color. Its firm bristles push heavy paint and hold a sharp line.
A round brush handles detail work like small corners and trim. An angled brush gives you clean curves and straight trim lines along window frames and baseboards.
Load the brush by dipping only the lower third of the bristles into the paint. Tap the brush lightly on the side of the can to shake off the extra.
Keep the paint on the bristles so it stays in the brush and doesn’t puddle or drip.
Pull the brush in one direction for each stroke. Keep your wrist loose and your pressure even from start to finish.
For a straight edge, guide the narrow side of the brush slowly along the line. Run painter’s tape along the line for extra control.
Lift the brush cleanly at the end of each stroke so you leave no tail.
When you paint a large area, work in short sections and overlap each stroke while the paint is still wet. Keeping a wet edge blends the seams so lap marks stay hidden.
Wipe away stray paint right away. Dried drips leave bumps that show through the sheen of a satin or gloss topcoat.
If brush marks remain, switch to a brush with softer filaments or thin the paint as the label directs. Pressing harder on the brush only makes the marks worse.
Load the brush lightly, follow the shape of the surface, and practice on a scrap board or a piece of primed cardboard first. Practice builds the wrist control that makes clean strokes possible on the real project.
Frequently Asked Questions
How Should I Clean an Art Brush After Painting?
To clean an art brush after painting, rinse it right away with warm, soapy water for water-based paints or the recommended solvent for oil paints. Work the soap into the bristles until the rinse water runs clear.
Rinse thoroughly so no pigment hides near the ferrule, since trapped paint there causes splaying. For oils, wipe excess paint onto a rag, swish the brush in solvent, then finish with soap and water.
Reshape the damp tip gently with your fingers, then lay it flat to dry for at least 4 hours. Never let water soak into the handle joint, since it can loosen the glue.
What Is the Best Way to Store Art Brushes?
The best way to store art brushes is to clean them thoroughly, reshape the bristles, and keep them upright with the bristles facing up. Rinse each brush with mild soap and warm water until the water runs clear, then gently press out excess moisture with a lint-free cloth.
Let brushes dry for at least four hours at room temperature, away from direct heat. Store them in a ceramic jar or a brush holder so the bristles never touch the bottom.
For shape, wrap a paper towel around the damp bristles and secure it with a rubber band overnight. This habit protects your investment and keeps every stroke sharp.
How Can I Prevent New Brushes From Shedding Bristles?
To prevent new brushes from shedding bristles, condition them before the first real use. Swirl the brush in warm water with a few drops of mild dish soap, then rinse until the water runs clear.
Gently pull the bristles with your fingers to dislodge loose strands, and check that the ferrule is crimped tightly. Stray hairs usually come out within the first few minutes, so a quick tug test saves frustration on the job.
Dry the brush flat for at least 4 hours before painting. Return any brush with loose bristles, since a quality brush should hold nearly every hair during cleaning.
When Should I Replace an Art Brush?
You should replace an art brush when its bristles splay, shed, or lose their spring.
Loose ferrules and bristles that wiggle at the base mean the tool is finished.
A quick test helps: dampen the brush, then press the tip flat on paper.
If it does not snap back to a clean point, retire it.
To extend brush lifespan, rinse out solvent-based paint within 30 minutes and lay the brush flat to dry for 24 hours.
Don’t fight damaged tools, since ragged bristles leave streaks that cost more than a new brush.
Can I Use the Same Brush for Different Paint Colors?
Yes, you can use the same brush for different paint colors if you clean it thoroughly between shades. Switching colors works, but avoiding color contamination takes a little discipline.
After each session, rinse the bristles in warm water for latex or in mineral spirits for oil-based paint, then work soap or solvent into the base of the ferrule. Wipe the brush dry with a clean rag and let it air dry for at least 30 minutes.
Before you return to your project, test the brush on scrap cardboard and look for any streaks of the old color. When moving from dark to light shades, give it an extra rinse, since even trace pigment can tint a fresh coat.
Rounding Up
You choose an art brush for painting by matching it to your paint, not by picking the prettiest one on the rack. Start with a medium round for marks, then add a flat for washes or a rigger for lines.
Check your paint type today: soft bristles suit thin watercolor, while firmer bristles handle thick acrylic or oil. Write down which brushes you own and what each one does well.
Rinse every brush after each session, because a brush is a tool, not a tiny broom with expensive feelings. Buy one brush first, then build slowly and deliberately.
Next topic to read: choosing paint for beginners.
References
- https://www.consumerreports.org/painting/how-to-pick-a-paintbrush/
- https://www.dickblick.com/learning-resources/buying-guides/brush-shape-differences
- https://www.purdy.com/en/painting-resources/painting-faqs/how-to-choose-a-paintbrush
- https://www.artsy.net/article/artsy-editorial-10-types-paintbrushes-artist