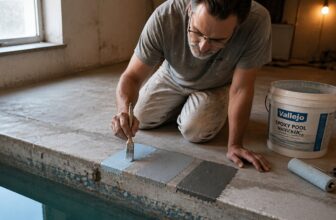
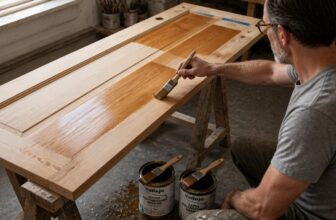
What Are Mineral Paints? Types, Uses and How to Choose
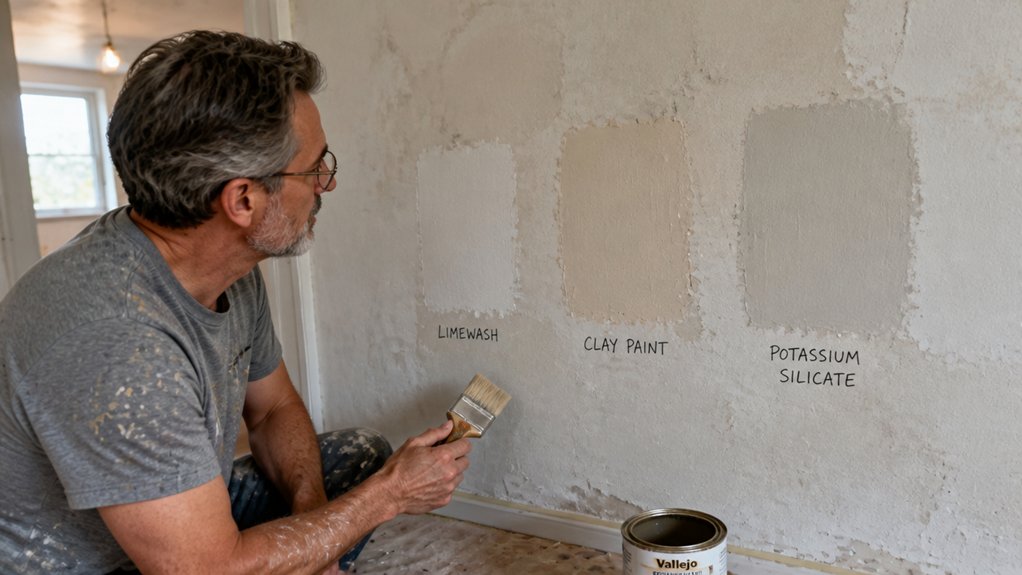
If your masonry paint keeps peeling, mineral paint offers a different approach. This guide on what mineral paints are, their types, uses, and how to choose will help you pick the right one.
These plastic free coatings use silicate or lime binders that bond to concrete, brick, or render and stay breathable. You get five types, long service life, and no peeling when surface prep and cure time are right.
Read on to match the right type to your wall and your patience.
Quick Answer
- Mineral paints use lime or potassium silicate binders that chemically bond to masonry surfaces.
- Three main types: pure silicate, dispersion silicate blends, and sol silicate for varied DIY needs.
- Surface prep requires removing laitance, dust, and moisture; dampness above 15% blocks bonding.
- They last 20–30 years, resist fading, and allow moisture vapor to escape without peeling.
- Inorganic pigments limit color palette but ensure UV stability and a matte, breathable finish.
What Are Mineral Paints? The Chemistry Behind the Coating
Mineral paint gets its name from the binder. Lime and potassium silicate are common binders, and they react with a mineral surface to form a hard bond.
That bond grows stronger as the silicate in the paint reacts with the surface. For best results, mix the binder at the correct ratio and follow the maker’s directions for the primer and topcoat.
In lime paints, the lime needs to take in carbon dioxide and set through the full film. If the lime stays soft below the surface, the finish can chalk or wear early, so watch drying time and cure time.
Silicates wrap pigment particles in the binder so color stays in the film. Prep the surface well, use painter’s tape and a drop cloth, and sand with the right sanding grit before you start.
For a matte, satin, or gloss sheen, apply with steady brush strokes and keep a wet edge to avoid lap marks. Check the VOC label and test a small area first, especially if you plan to stain, varnish, or add polyurethane on nearby wood. These coatings typically require a full cure time of 21 days before the film fully cross-links and hardens for maximum durability.
The 5 Mineral Paint Types and Their Binders
Mineral paints bind to walls in three main ways, and the binder is the glue that holds the paint together. That binder tells you whether you get a pure silicate paint that is caustic and tricky to apply, a dispersion blend with acrylics that is friendlier for many DIYers, or a sol silicate paint that uses colloidal silica and is easier to handle.
The five mineral paint types use these three key binders, so check the label before you open the bucket. Set up a drop cloth and painter’s tape, then sand the wall with the right sanding grit and apply a primer made for the topcoat.
Mineral paints often come in a matte, satin, or gloss sheen, and low VOC formulas can help with indoor air, but you still need to watch your wet edge and brush strokes to avoid lap marks. Plan for drying time and cure time, and keep stain, varnish, and polyurethane for wood projects where they belong. Because silicate-based paints can last fifteen to twenty years with gradual fading instead of peeling, they suit masonry surfaces that must release trapped moisture.
Pure Silicate Binders
Pure silicate paint is a mineral coating made with liquid glass. It bonds to mineral surfaces through a reaction called silicification.
That bond gives it a long service life, often many decades. You apply it as a topcoat over concrete, brick, or lime render, and it breathes well while holding its color.
Check the manufacturer’s primer advice before you start. Set up a drop cloth and use painter’s tape to protect edges and trim.
The high pH makes the wet paint caustic. Wear gloves and goggles, and keep your work area calm and organized.
Work with a wet edge to avoid lap marks. Keep brush strokes moving in one direction, and plan your drying time and cure time before you recoat.
Pure silicate paint has low VOC content and usually dries to a matte or satin sheen. Gloss levels vary by product, so read the label and test a small area first.
Sanding grit matters on old mineral surfaces. Use the grit your product data sheet recommends, then dust off the wall before you apply the topcoat.
This paint is for mineral surfaces such as concrete, brick, and lime render. It offers strong breathability and color stability, but it asks for careful prep and steady hands.
Keep stain, varnish, and polyurethane away from this mineral coating system. They belong on wood projects, and they can interfere with how silicate paint bonds and breathes.
If you can handle the prep and safety steps, pure silicate paint is a durable choice for the right wall. Use it on the right surface and follow the label.
Unlike acrylic alternatives, alkali resistance must withstand pH 13 or higher due to cement composition, a standard silicate binders inherently exceed.
Dispersion Silicate Blends
Pure silicate systems can be caustic and fussy, so many people want the mineral look with easier handling. Dispersion silicate blends mix silicate with acrylic stabilization in one component, which makes them ready to brush and more forgiving on site.
They keep tiny silicate particles suspended in water, so the coating can sink into masonry and build a mineral finish without the burn risk of a strong silicate solution. The acrylic adds flexibility and helps reduce crazing on walls that are sound but not perfect.
These blends are zero VOC and still let the wall breathe, though they pass vapor a little more slowly than pure silicate systems. On masonry they often last 15 to 25 years, which makes them a good fit for careful DIY work. Full cure and peak bond strength typically take 24 hours at room temperature, so plan for a full day before assessing the final result.
Apply them to sound mineral walls after the surface is clean and repaired, and use painter’s tape and a drop cloth to protect nearby trim and floors. Keep a wet edge as you brush or roll to avoid lap marks and heavy brush strokes.
Drying time can feel quick, but cure time matters before you judge the final sheen or add a topcoat. A matte or satin sheen suits most masonry, and a primer made for the wall can help with suction and stain blocking before coating.
Choose these blends for easy, safe application on sound mineral walls. You give up some years of service life for a simpler job, and many clients accept that trade.
Sol-Silicate Innovations
Sol silicate paints are a newer choice in mineral paints. I think they are a smart compromise for many jobs.
Colloidal silica is tiny glass particles suspended in water, and it gets mixed into the silicate binder. That mix reduces the harsh chemical bite while keeping a hard, breathable finish.
What sold me is storage stability. Pure silicates can gel on the shelf, but these stay liquid for months, even after you open the can.
The recoat window is also easier to live with. You can wait a day or a week and the next coat still bonds well.
That helps DIY painters who are working around a day job or family schedule. You can set up a drop cloth and painter’s tape, then come back without racing a timer.
The tradeoff is some longevity. Expect about 20 to 30 years instead of the 100 years you hear about with pure silicates.
For a topcoat, you can choose gloss, satin, or matte to set the sheen. Check the VOC label and follow the maker’s drying time and cure time, because those numbers tell you when to sand with what grit or apply the next coat.
Use good brush strokes and keep a wet edge to avoid lap marks. A primer may be needed on some surfaces, so read the data sheet before you start.
If you want mineral paint performance without a steep learning curve, sol silicate is a solid pick. Just do not tell my old pure silicate brushes.
Substrate Rules: Which Surfaces Bond With Mineral Paint
Low VOC mineral paint bonds best to clean, sound surfaces with tooth. Skip vapor permeable primers, which let moisture pass, because they can block the chemical grip the paint needs.
Skip vapor-permeable primers—they block the chemical grip low VOC mineral paint needs on clean, sound surfaces.
Sand or pressure wash off laitance, the chalky layer on masonry, along with dust and old finishes such as stain, varnish, or polyurethane. Lay a drop cloth and use painter’s tape to protect nearby edges while you prep.
Test the surface for dampness before you coat, since moisture kills the silicate reaction mineral paint relies on. Scuff fiber cement with 80 to 120 grit sandpaper so the topcoat has tooth.
Follow the label for drying time before the next coat and cure time before you judge hardness, and keep a wet edge to avoid lap marks and brush strokes. A matte or satin sheen can look uneven on a slick surface, so test a small area first.
I have painted over aged brick with zero issues, but slick tile with a gloss finish is a no go. Respect the surface, and it will respect you back. A double-stitched canvas drop cloth can handle the sanding dust and paint splatters from this prep work without tearing or leaking through.
Durability, Breathability, Fade: The Real Trade-Offs
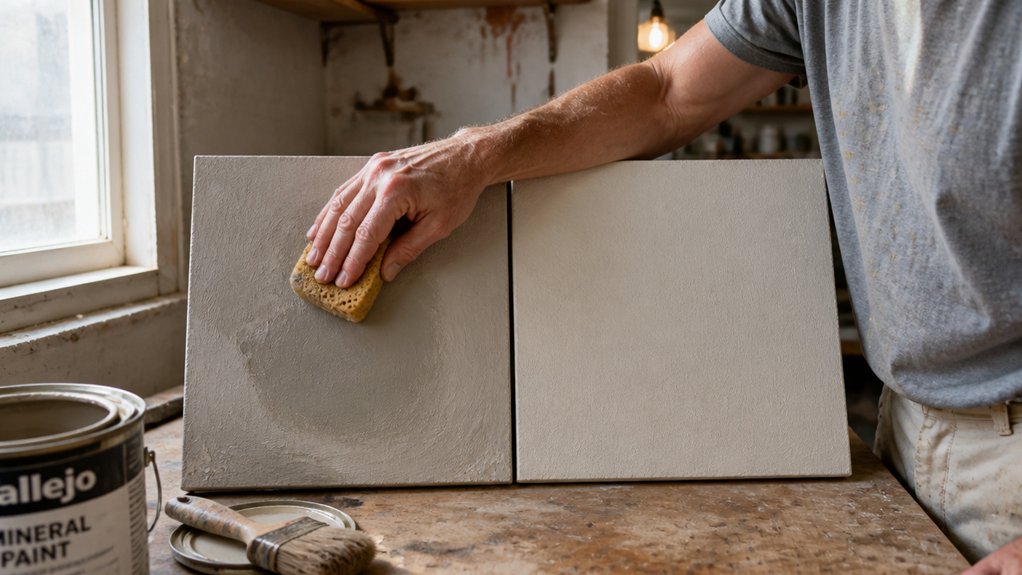
Mineral paint can last a long time on the right wall, but a claim of a century is not a promise for every job. The result depends on how you handle service life, dampness, and pigment fade.
On a dry masonry wall with sound prep, the finish can hold up well and still let moisture escape. On wood, use a primer and a topcoat made for that surface, and test a small area before you finish the whole job.
Damp walls shorten paint life, so fix leaks and let new masonry dry before you coat it. Use a breathable primer when the surface needs one, and check the label for drying time and cure time as separate steps.
Recoating too soon can trap moisture and leave lap marks, so keep a wet edge and work in steady sections. Sand rough wood with the sanding grit your primer calls for, then wipe off the dust before you apply the first coat.
Lay a drop cloth and use painter’s tape to protect edges before you open the can. Sheen changes how a finish looks and wears; gloss is easy to clean, while satin and matte hide uneven patches better.
Check the VOC level if you are working indoors, and ventilate the room even when the label says low VOC. If you use stain, varnish, or polyurethane nearby, keep those products off the mineral paint unless the label allows it. For especially damp areas, choose a primer with EPA-registered antimicrobial properties to actively kill existing mold and mildew before you topcoat.
Brush strokes show more on some surfaces, so load the brush evenly and finish each section before it sets. Follow the label for the number of coats, and do not rush the cure time before you judge the final color.
Service Life Realities
If you want a paint that can outlast your mortgage, mineral paint is a strong choice for stone and lime render. It forms a chemical bond with mineral surfaces and can shrug off sun and salt for decades.
That performance depends on the surface. A dusty, painted, or repaired wall will fail before the coating does.
Abrasion resistance is moderate. Blowing sand will slowly etch the surface, so choose a matte sheen on exposed walls.
On clean masonry, a mineral topcoat can last 20 to 30 years. Sloppy prep cuts that life in half.
Set out drop cloths and mask trim with painter’s tape before you open the can. Mix the paint well and work in small sections to keep a wet edge.
Lap marks show less on rough stone than brush strokes do. Respect drying time and cure time because the surface may feel dry in hours while full cure takes longer.
Fade resistance is excellent. The inorganic pigments hold up under UV light, so the color stays put whether you choose gloss, satin, or matte sheen.
Mineral paint has low VOC levels and works well on breathable masonry. On wood, use a stain blocking primer, then a varnish or polyurethane topcoat if you need a hard finish. To maintain that hard finish, you need to ensure the topcoat offers weather resistance against rain and temperature swings.
Repair costs stay low. A single coat refreshes most damage after you clean the wall and spot prime bare patches.
For wood prep, sand with 120 grit, then 180 grit, and remove dust before you coat. Test stain on a scrap first if you plan to change the color.
Choose mineral paint for stone or lime render. For wood, use a finish made for wood.
Moisture Management Balance
Damp walls are hard on paint. Mineral paints handle moisture in a way that suits old masonry.
Many acrylic paints trap water under a tight film. Mineral coatings let water vapor move through the wall, which painters call moisture vapor drive.
That outward movement lets dampness escape before it causes trouble inside the structure. The porous mineral surface also uses capillary action, which works like tiny drinking straws to pull liquid water away from the wall surface.
This wicking helps prevent rot and blistering. The payoff is fewer peeling flakes, less mold, and a healthier home.
The tradeoff is stiffness. Mineral coatings are less forgiving of movement, but they are a good fit for old damp masonry.
If your walls stay wet, this moisture balance matters. Painting over a wet wall without fixing the moisture source just hides the problem for a while.
On a damp masonry wall, apply a mineral primer first, then a mineral topcoat. Keep a wet edge to avoid lap marks, and work in sections so brush strokes blend before the coating sets.
Choose a matte, satin, or gloss sheen that fits the building, and check the VOC level if indoor air quality matters. Follow the drying time and cure time on the label before recoating or finishing nearby trim with stain, varnish, or polyurethane.
Use a drop cloth and painter’s tape to protect nearby surfaces. Sand rough spots with the sanding grit your primer calls for.
For particularly damp walls, consider pairing mineral paint with a waterproofing paint that blocks hydrostatic pressure up to 12 psi as an underlying barrier.
Pigment Stability Limits
Mineral paint gives you long color life because its inorganic pigments hold up well under sunlight. That strength comes with a limit: you need to work from a smaller color palette than you get with acrylic paint.
Color drift is rarely a problem with mineral finishes. The pigments resist UV light, so the first coat keeps close to its original shade through years of exposure.
The binder helps here too. Silicate binder locks pigment particles into a hard mineral structure, and it does not form a plastic film that yellows like some varnish or polyurethane topcoats can. UV-resistant, non-yellowing formulas are similarly crucial for acrylic varnishes to prevent premature aging and discoloration.
The open structure keeps the wall breathable. It also lets grit and dust wear the surface, so a gloss or satin sheen can dull to matte on a windy facade over time.
Fading is uncommon, but surface texture can erode, especially on walls that take wind and rain. Use the right primer, keep a wet edge while brushing, and plan your brush strokes to avoid lap marks.
For prep, sand repair spots with 120 grit or finer, then spot prime and apply the topcoat. Lay a drop cloth, use painter’s tape at trim, and keep stain, varnish, and polyurethane off the mineral wall.
Check VOC limits and follow the label for drying time and cure time. Choose mineral paint when you want the longest color life and can accept a smaller palette.
Zero VOCs and Microplastics: The Health Case
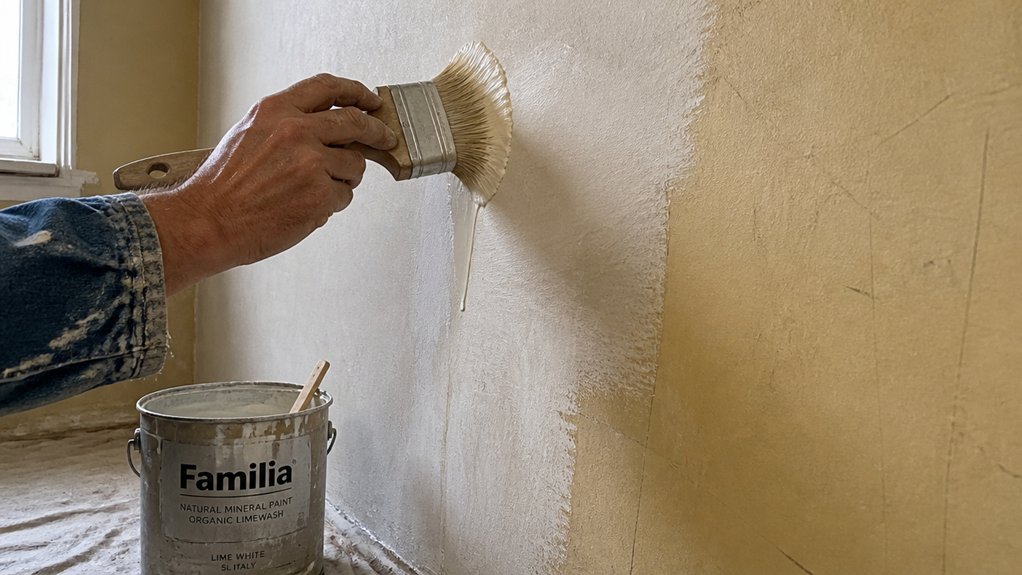
You may have seen zero VOC on paint labels. In mineral paint, the claim comes from the recipe: water and mineral binders replace solvents and acrylic plastic.
That matters when you test indoor air quality, because VOC spikes are common after typical paint. It also matters in homes with allergy sensitive people, where a strong smell can be a real problem.
Typical acrylic paint carries 50 to 250 g/L of VOCs and uses an acrylic binder, which leaves microplastics behind. Mineral paint carries 0 to 5 g/L of VOCs and has no plastic binder; its faint smell is gone in hours.
On a job, mineral paint is simple to handle. Use the right primer, keep a wet edge to avoid lap marks, and lay off brush strokes before the topcoat starts to set.
A matte sheen hides touchups best, while gloss and satin show more. Sand at 120 to 180 grit between coats if the label calls for it, and respect drying time versus cure time.
If you are also finishing wood in the same room, a drop cloth and painter’s tape keep stain, varnish, and polyurethane off the new paint. The paint has very low emissions as it dries, and the walls stay breathable.
You also avoid plastic dust later. Ask for the VOC test data before you buy, then use the specified primer and topcoat.
Read the label for recoat time and cure time, and test a small area first. Keep the room ventilated while it dries, even with low VOC paint.
Choosing Mineral Paint: 5 Practical Criteria
Five checks cover the main points, and none of them require sniffing paint cans in the store. You want a finish that lasts, so test the paint and the site before you buy.
First, check rheology, which is how the paint flows under the brush. It should be thick enough to stay where you put it and thin enough to level out brush strokes.
Test a small patch with a dry brush and look for lap marks or a rough wet edge. If the paint drags or runs, adjust your technique or choose a different batch before you open a full can.
Second, check application temperature. Below 50°F, silicate paint may not cure properly, so read the forecast along with the label.
Third, test substrate dampness with a dampness meter. Above 15%, walk away and fix the moisture source first, because wet stone will trap trouble under the coat.
Fourth, plan around cure time. Mineral paint may need weeks to reach full strength, so keep the area dry and protected; drying time tells you when to recoat, and cure time tells you when the film is fully set.
Fifth, match the paint to the substrate chemistry. A modified silicate is a strong choice for mineral surfaces, and a primer test patch will show whether the topcoat bonds well.
Before you start, set out a drop cloth and use painter’s tape on edges you want to keep clean. Sand rough spots with a suitable sanding grit, wipe the dust, and decide on the sheen you want, whether gloss, satin, or matte.
Choose a low VOC paint if fumes matter in your space, and test a small sample for color and finish. Then apply the first coat with a steady brush and keep a wet edge so the finish stays even.
Skip these checks and a small job can turn into a repair you live with for years. Pick a modified silicate, match it to your substrate, and respect the clock.
When to Choose Silicate Over Limewash: and Why
Choosing between silicate and limewash comes down to the substrate, the weather exposure, and how often you want to repaint. I pick silicate when the masonry is sound and the job is exterior.
Silicate bonds chemically to masonry, so it holds up for 20 years or more on exterior walls. Limewash breathes very well and gives that soft, chalky matte look, but it needs frequent recoating and acid rain cuts through it fast.
Silicate bonds chemically to masonry, lasting 20-plus years outside; limewash breathes beautifully but fades fast under acid rain.
For a Victorian terrace brick wall, I would use silicate and plan the work around a clean surface, a compatible primer if the wall needs it, and a topcoat applied with a wet edge to avoid lap marks. Keep drying time and cure time separate in your schedule, because silicate needs time to react and limewash needs time to settle before rain hits.
Limewash is a good choice on interior lime plaster when you want a chalky finish and you accept repainting every few years. If you want a durable exterior finish, use silicate and keep your drop cloth, painter’s tape, and brush strokes tidy because the coating is hard to remove once it cures.
Cost per year favors silicate because the recoat effort is low. Limewash has very high breathability, but its short lifespan and constant recoating make the yearly cost high.
On wood trim near masonry, use a suitable exterior primer and topcoat with the sheen you want, such as satin or gloss, and keep stain and varnish or polyurethane for the wood itself. Check the VOC level if odor matters, and use the right sanding grit before you apply any finish.
Frequently Asked Questions
Can Mineral Paint Be Applied Over Existing Organic Paint?
No, mineral paint cannot be applied over existing organic paint without removing the old coating first because the sealed film blocks the bond mineral coatings need. Mineral paint requires a porous mineral substrate, so adhesion over alkyd or acrylic films usually fails.
Strip the old finish to bare masonry or plaster, then sand with 80 grit to open the pores. A related term, breathable masonry paint, follows the same rule: it needs an absorbent base.
Test a small patch first: apply a thin coat, let it cure 24 hours, then scratch it with a fingernail. If it lifts, remove every trace before recoating.
How Do I Remove Mineral Paint if Needed?
To remove mineral paint, use a chemical stripper made for silicate coatings instead of dry sanding. Apply it to a small test area first and let it dwell 20 to 30 minutes before scraping with a plastic putty knife.
Work in small sections and keep ventilation strong because these removers can be harsh. For mineral paint removal on trim or furniture, use a gel stripper so it stays put on vertical surfaces.
Rinse the surface with clean water after scraping, then let it dry fully before recoating. Always test first; prevention beats a costly repair.
Will Mineral Paint Stick to Drywall or Plasterboard?
No, mineral paint will not stick well to bare drywall or plasterboard because gypsum lacks the mineral substrate its alkali-resistant chemistry needs. Adhesion failures are likely unless you prepare the surface carefully.
For a practical approach, scuff-sand the drywall with 120-grit paper, dust it off, and apply a specialized primer, then let it dry for at least 24 hours before topcoating. Dampness tolerance testing is still wise on moisture-prone walls.
Treat bare gypsum board as a weak candidate for mineral paint, not a straightforward mineral surface. If you want the mineral paint look, use a primer designed for gypsum board and expect a shorter service life than on masonry.
Does Mineral Paint Need a Primer Before Application?
Mineral paint usually does not need a primer before application, but only on compatible mineral surfaces. Check coating compatibility with your substrate first, because chalky, glossy, or sealed areas may demand a bonding primer.
For a practical adhesion test, sand a small patch with 120-grit abrasive, wipe away dust, then apply one thin coat and let it cure for 24 hours. If it scratches off easily, use the appropriate primer or improve surface prep before coating the whole wall.
On sound masonry, lime plaster, or cured render, two coats of mineral paint often bond well without primer. Always confirm the manufacturer’s substrate guidance and test adhesion before committing to the full application.
Can Mineral Paints Be Tinted to Any Custom Color?
Mineral paints cannot be tinted to just any custom color because pigment dispersion limits restrict how far a base can be shifted. For a practical result, choose the closest color from the maker’s inorganic palette and ask for a small drawdown on your actual mineral substrate before committing.
Custom color matching can push the formula beyond stable pigment loading, and organic dyes often destabilize the binder and shorten the coating’s lifespan. If you need a deeper accent, keep the tint within a modest percentage of an existing palette color rather than chasing an exact match.
Always confirm the final mineral paint color matching sample under the same lighting as the job.
Rounding Up
Mineral paints are the closest thing to a controlled substance in a good way because you fuse glass instead of slapping on plastic. That is the difference. Check whether the wall is damp brick before repainting, and write down silicate as the option if it is.
Skip the latex for that damp brick wall, then compare the cost at roughly $60 a gallon for silicate. Confirm the silicate will not peel, let the wall do the heavy lifting, breathe easy, and skip the VOCs.
Read next about damp brick walls.