What Are Milk Paints? Types, Uses and How to Choose
Milk paint can look perfect on a dresser and wrong on a slick cabinet, and the difference often comes down to surface prep and cure time. This guide to what milk paints are, their types, uses, and how to choose will help you match the finish to your project.
You will see how casein and lime create that chalky matte sheen, where it bonds well, and when a bonding agent is needed. We will also cover cost, topcoats, and the chippy antique look versus modern adhesion.
Read on for mixing and durability details so your next coat holds up.
Quick Answer
- Milk paint is a casein-and-lime binder with pigment, drying to a chalky matte finish.
- Traditional milk paint suits porous surfaces and chippy, distressed looks; modern formulas handle slick surfaces.
- Use milk paint on bare wood, plaster, or drywall; prime concrete, metal, or floors for durability.
- Apply thin coats, maintain a wet edge, and sand lightly between coats for even coverage.
- Topcoat with wax, varnish, or polyurethane for durability; full cure takes about 30 days.
What Is Milk Paint? The Ingredients That Make It Unique
Milk paint is one of the oldest finishes people have used. Its main binder is casein, a protein from milk.
Lime activates the casein, and the mix forms a tough, breathable film. Pigments add color, and clay gives the paint body.
Milk paint comes as a dry powder. You mix it with water and let it sit for 20 to 60 minutes before use.
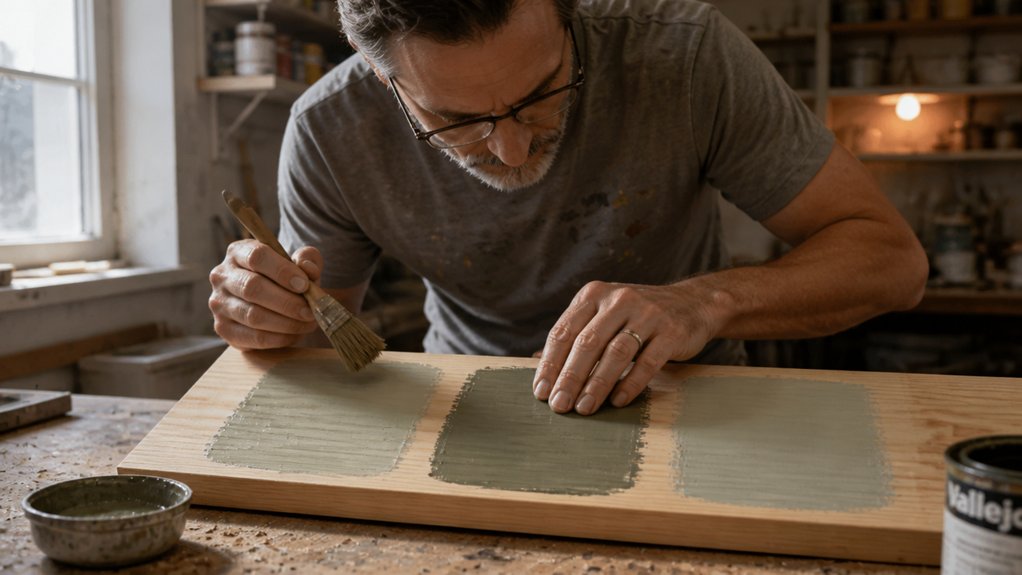
That simple mix has no solvent smell and low VOC content. Test it on scrap wood first so you learn how it covers and dries.
For furniture and toys, sand the wood to 220 grit, wipe off dust, and lay a drop cloth. Use painter’s tape on edges you want to keep clean.
Milk paint can be a matte or satin topcoat over a primer, but it may show lap marks if you let the wet edge dry. Keep brush strokes moving and work in small sections.
Drying time is fast, but cure time takes longer. A clear topcoat of varnish or polyurethane adds wear resistance, and it can change the sheen from matte to gloss.
Stain can go under milk paint if you want more depth. Light sanding between coats helps the next coat bond.
Mistakes are easy to fix: add water to thin the mix or let it sit longer. This forgiveness makes milk paint a friendly choice for DIY work.
If you want old style charm, milk paint gives you that look. It works well on furniture, cabinets, and toys when you prepare the surface properly.
Because it uses zero VOC content, it is safe for kids and approved for children’s furniture projects.
Which Surfaces Can You Use Milk Paint On?
Milk paint bonds best to porous surfaces such as bare wood, plaster, and drywall. The casein binder needs an open surface to grab, so sand bare wood to 120 or 150 grit and wipe off the dust before the first coat.
On concrete, metal, or floors, use a bonding primer and a proven topcoat so the finish holds up. For floors, lay a drop cloth, tape edges with painter’s tape, and seal the cured paint with oil wax or polyurethane to resist wear.
Milk paint dries fast, so keep a wet edge, watch for lap marks and brush strokes, and plan your work around drying time and cure time. Choose a sheen that suits the room, such as matte or satin on walls and gloss on trim, and check the VOC level if indoor air quality matters.
Test stain, varnish, or polyurethane on a small sample first, because old finishes can affect adhesion. For no-prep alternatives on non-porous surfaces, water-based chalk paints offer a matte, chalky finish with minimal sanding or priming. Apply thin coats and sand lightly between them with 220 grit for a smooth topcoat.
Wood & Furniture
For wood furniture, milk paint is my first choice. It bonds to raw wood and sinks in, so a farmhouse table or a tired dresser takes the color well.
On bare wood you can skip primer, but scuff an old finish with 120 grit sandpaper and wipe off the dust. Lay a drop cloth and use painter’s tape on edges before you start.
Color matching can vary from batch to batch, so mix enough for the whole project upfront. Measure twice and mix once, then accept a little unpredictability in the batch.
A simple repaint usually needs two coats, and you should let each coat dry before the next one. Work quickly to keep a wet edge, because milk paint dries fast and lap marks can show.
Brush strokes usually level out, but a dry brush can leave texture, so use a quality brush. For a distressed finish, let the paint chip and crack naturally for that shabby chic look.
A matte sheen suits this style, and you can skip a topcoat if you want the aged peeling charm. Milk paint has low VOC and a low-odor formulation, so it is comfortable to use indoors.
Drying time is when you can recoat, and cure time is when the finish is hard enough for daily use. A wax or oil topcoat boosts durability and can shift the sheen from matte to satin.
Use a stain first only if you want extra color under the paint. If you want a clear film finish, use varnish or polyurethane after the milk paint is fully cured.
A gloss topcoat will show brush strokes and lap marks, while satin or matte hides them better. Test the paint on a scrap board first if color and sheen matter.
Plaster and Drywall
Interior plaster and drywall take milk paint much differently than raw wood, and both surfaces soak it up like a sponge. That works in your favor because the porous surface grabs the casein binder tight, so a clean wall free of dust is enough and you can skip a drywall primer.
Lay a drop cloth and use painter’s tape at trim before you start. If you repaired plaster with patching compound, that patch will drink paint at a different rate and can leave a shinier spot under the same matte sheen.
Sand the patch with 120 grit, wipe off the dust, and test the sheen before you coat the whole wall. Milk paint dries fast, so work in small sections and keep a wet edge to avoid lap marks and harsh brush strokes. Match the patch size to the hole for any drywall repairs, since an oversized patch can create a larger area of uneven absorption.
On sound plaster, two or three coats give an even matte finish with low VOC content. On fresh patches, the sheen can stay uneven, so plan for extra coats or work the patch into a distressed look.
Let the paint dry fully and respect the cure time before you seal it with wax for washability. A wax topcoat adds protection, but it can change the sheen, so test a small area first.
Concrete, Metal, Floors
Milk paint can work on concrete and masonry if you use a bonding agent. Expect a chalky, matte sheen, and outdoor color will fade over about ten years.
I have used milk paint on a basement floor, and it is a risky choice. Prep has to be thorough, or the coating will fail to adhere and peel.
A bonding agent is required because it helps casein grip slick concrete and metal. On metal, skip the bonding agent and the film will flake within a year.
For floors, choose a bonding agent rated for horizontal wear. Sand the slab with the sanding grit the product label recommends, then remove dust and lay a drop cloth and painter’s tape to protect nearby surfaces.
Apply three thin coats, and keep a wet edge to avoid lap marks and visible brush strokes. Thick coats crack, so build the film slowly, respect the drying time before each coat, and let the final coat reach full cure time before heavy use. High-traffic durability is far greater with an industrial-grade coating like a 20-year rated epoxy with aluminum oxide additives.
Seal the floor with oil or wax within 48 hours. Without a sealer, foot traffic will wear the finish quickly.
Plan to recoat every three to five years, even with sealer. In a busy room, a polyurethane topcoat will hold up better.
Use milk paint on accent pieces and areas with little traffic. On floors, you trade durability for that flat, matte look.
Which Type of Milk Paint Should You Choose?
If you are painting furniture that has seen some wear, start with a modern milk paint mix. It handles slick or sealed surfaces better, and you can control the sheen with a topcoat in gloss, satin, or matte.
Traditional milk paint gives the chippy look many people want on old pieces. It is less forgiving, so clean the piece, scuff sand with 120 to 220 grit, and use a primer where the surface is slick.
Lay down a drop cloth and tape off edges with painter’s tape before you open the can. Check the label for VOC content, drying time, and cure time, and test an unseen spot over old stain, varnish, or polyurethane. Full cure takes 24–72 hours for the real hardness and chemical resistance needed before heavy use.
Brush or spray in thin coats, keep a wet edge, and watch for brush strokes and lap marks. A water based topcoat can add durability without changing the color much, and a matte sheen hides small flaws.
Choose the modern mix when you want a smooth durable finish on a piece that gets daily use. Choose traditional milk paint when the aged character matters most and you are willing to do the prep.
Traditional vs. Modern Formulas
A bag of powdered milk paint gives you two routes: a traditional mix and a modern mix. I reach for traditional milk paint on most wood furniture, and I use modern formulas on slick or sealed surfaces.
Traditional milk paint uses binders such as casein and lime. It dries to a chalky matte sheen, and the color can shift from batch to batch, which suits antique looks.
Mix traditional milk paint with care and give it time. Keep a wet edge while you brush, expect some brush strokes and lap marks, and let the color variation be part of the charm.
Modern milk paint adds synthetic binders for stronger adhesion on surfaces such as metal, laminate, or old varnish. These formulas level more easily, hold a consistent color from can to can, and some can act as a primer on prepared wood.
Modern cans cost about 15% more than traditional ones. That extra cost can save you sanding time and frustration on nonporous surfaces. Natural bristle brushes hold about 30% more paint than synthetics, so choose them for oil-based stains and varnishes, though they work best with traditional rather than modern milk paint mixes.
For furniture, sand to 120 or 150 grit, wipe off dust, lay a drop cloth, and tape off edges with painter’s tape. If the wood is stained, let the stain dry fully before you paint.
Use traditional milk paint when you want an aged look, then add a topcoat if the piece gets daily handling. For that topcoat, choose a matte or satin sheen, since a gloss finish shows more brush marks and lap marks, and use a clear varnish or polyurethane to protect the paint.
For slick or sealed surfaces, use the modern formula and check the label for VOC level and recoat time. Pay attention to drying time versus cure time, and avoid sanding or stacking the piece before it cures.
Surface & Finish Selection
Before you grab a bag of milk paint, ask what you are painting. That one answer narrows the choices faster than any label.
Raw wood and plaster take traditional milk paint made with lime. Sand to 120 grit, wipe off dust, and lay a drop cloth before you start.
Previously painted wood, metal, and other slick surfaces need a bonding agent mixed in. Without it, the paint can peel, so test a small area and tape off edges with painter’s tape.
Concrete and masonry usually need traditional milk paint plus a bonding agent. Porous surfaces soak up paint and may need an extra coat, while surfaces that repel water need the bonding agent to grip.
For cabinets and busy areas, use a modern milk paint and add an oil or wax topcoat. A primer can help on uneven wood or old stain, and low VOC options keep the room comfortable.
Milk paint dries to a flat matte, almost chalky sheen. If you want satin or gloss, apply wax, varnish, or polyurethane as a topcoat.
Work with a wet edge to avoid lap marks, and keep brush strokes moving in one direction. Check drying time before recoating and cure time before heavy use.
Match the paint to how the surface takes paint. Pick the prep and topcoat first, then choose your color. Check filler compatibility with the surface material, just as you would for a repair, to avoid a visibly mismatched finish.
How Durable Is Milk Paint? Cure Time and Long-Term Lifespan
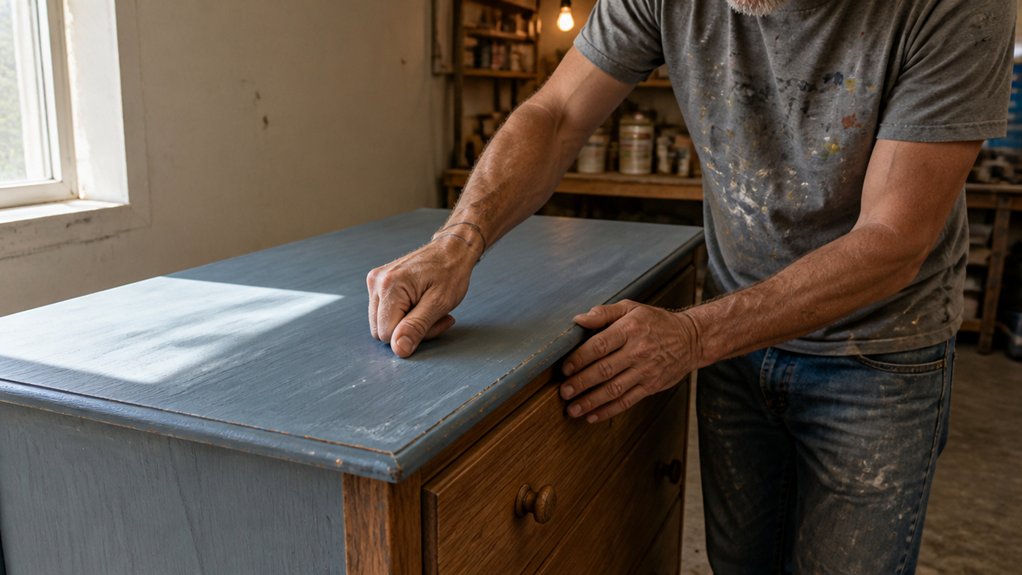
Milk paint durability depends on how far the finish has cured and how you topcoat it. Right after application it is fragile, and full cure takes about 30 days.
Drying time and cure time are different: the film may feel dry in hours, but water resistance stays near zero until cure finishes. I have seen water spotting ruin a weekend project in that window.
Drying isn’t curing; water resistance stays near zero until the 30-day mark.
For indoor work, apply a topcoat such as polyurethane or varnish for a matte or satin sheen, and expect 15 to 50 years. Use a drop cloth and painter’s tape, scuff sand with 220 grit before the topcoat, and keep a wet edge to avoid lap marks and heavy brush strokes. Thin coats under 0.1mm speed up drying compared to thick applications, which helps prevent the tacky residue that attracts dust.
Outdoor milk paint without a topcoat will start to fade around year 10. Unsealed interior milk paint often chips within 5 years, especially on high traffic surfaces.
Extra coats do not add toughness; they tend to crack and peel. Milk paint has low VOC content, but that does not change the cure schedule or the need for a proper primer on glossy or sealed wood.
How Do You Mix and Apply Milk Paint Correctly?
I mix milk paint by weight and keep each batch small, because small changes in powder can shift the color. I also set up a drop cloth and painter’s tape before I open the powder.
For the batch, I blend the dry powder with room temperature water using a hand blender. Then I let it sit for 20 minutes so the casein binder can activate.
Cold water slows activation and makes the paint gummy, while hot water can cause clumps. That is why I keep the water at room temperature and stir the mix often. A spiral or helix drill attachment can prevent air bubbles and create a smoother, more uniform mix if you prefer mechanical stirring over a hand blender.
Sand bare wood with 120 grit, then smooth it with 150 grit before painting. On raw wood, you can usually skip primer.
If old stain or varnish is on the wood, sand it dull and use a primer that blocks stain. Milk paint needs a clean surface, so remove dust before you start.
Apply the paint with a good brush in thin coats, and plan on two or three coats for full coverage. Keep a wet edge as you work to avoid lap marks.
Lay off your brush strokes in one direction, and do not panic if the first coat looks streaky. Drying time is 30 minutes to two hours per coat, and cure time runs longer.
Before the next coat, sand lightly with 220 grit if you want a smoother finish. A topcoat of polyurethane adds protection and lets you choose a matte, satin, or gloss sheen.
Choose a low VOC topcoat if fumes bother you, and let the milk paint cure fully before you apply the topcoat. Stir the paint often during use, and keep batches small so the finish stays even.
Clean brushes and tools with warm water and soap before the paint dries. Keep the room ventilated while you work, and follow the topcoat label for its recoat window.
Is Milk Paint Worth It? Cost, Toxicity, and Finish Goals
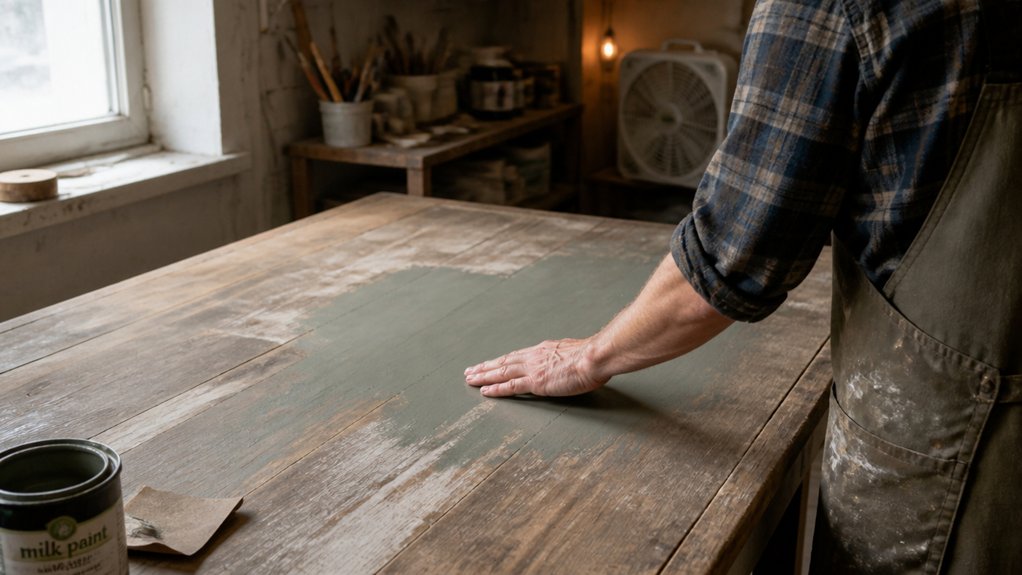
Milk paint is worth the cost for furniture and accents when you want an old painted look or a paint low in VOCs. For a whole room, compare the cost and coverage of latex before you commit.
Milk paint suits furniture and accents for an aged look, but latex wins on cost for whole rooms.
Milk paint costs about $60 to $90 per gallon, while latex runs around $30. That price difference is hard to justify on large wall areas, but it is reasonable for a dresser or a small cabinet.
Milk paint is low in VOCs and safe enough for toys after it cures, but the powder can put silica dust in the air. Wear a mask when you mix it, and use a drop cloth and painter’s tape to control the work area.
Color matching is tricky because batches vary, so buy all the paint you need at one time. If you run short, you may end up chasing a different shade and repainting to blend it.
The finish you want decides the topcoat: unsealed milk paint gives chippy, distressed charm, while a clear topcoat adds durability. Use wax, varnish, or polyurethane for a satin, matte, or gloss sheen, and sand with 220 grit between coats if the surface feels rough.
Brush strokes and lap marks show more when the paint dries fast, so work in small sections and keep a wet edge. Check drying time versus cure time before you sand or apply a stain or primer, since the paint may feel dry before it is ready.
Use milk paint on furniture and accents where the look matters. Choose a wall paint for large rooms where cost and coverage matter more.
Frequently Asked Questions
Can I Use Milk Paint Over Existing Latex Paint?
Yes, you can use milk paint over existing latex paint, but only with proper surface preparation and a test patch first. Clean the latex with a degreaser, rinse it, and scuff it with 220-grit sandpaper to dull the sheen.
That gives milk paint a mechanical bite and helps prevent latex paint adhesion failure. Wipe away dust, then apply two thin coats, allowing about two hours between coats in good conditions.
If the latex is glossy or chipped, sand those areas more or spot prime them before painting. For a durable finish, keep coats thin and avoid overworking the paint as it dries.
Check the test patch after 24 hours to confirm the bond before committing to the whole piece.
Does Milk Paint Need a Topcoat or Sealer?
Milk paint does need a topcoat or sealer for durability in most practical uses. Without a protective finish, water marks and grime can settle into the porous surface and shorten the life of the milk paint finish.
For a rustic, cracked look you can skip it, but expect more maintenance and touch ups. For everyday furniture, apply two thin coats of a quality furniture wax, let it cure 24 hours, then buff lightly with 0000 steel wool.
Oil based varnish or a penetrating oil also works when you want a more durable protective finish. Test the chosen sealer on a scrap board first and keep coats thin to avoid a plastic look.
Why Does My Milk Paint Appear Chalky After Drying?
Milk paint can appear chalky after drying because uncured casein and porous pigments leave a dry, matte film before the finish is sealed. This is normal pre seal, so do not judge the color until the coating has cured and been topcoated.
For a chalky finish fix, buff the dried film with a soft cloth after 30 days or lightly sand with 400 grit before sealing. A thin coat of dead flat varnish or wax will also reduce the powdery look without changing the color much.
Work in thin coats and allow 24 hours between coats, then seal with two coats of finish for better durability.
Can Milk Paint Be Used on Kitchen Cabinets?
Yes, milk paint can be used on kitchen cabinets, but only with careful prep and a protective topcoat. Its durability on cabinets hinges on surface adhesion, and roughly 80% of failures come from poor prep.
Scuff sand the frames and doors with 220 grit, then prime and seal with an oil or wax topcoat for kitchen proof protection. A concrete cabinet prep tip is to let the sealer cure for at least 7 days before hanging doors.
This milk paint finish for cabinets can work well in low traffic areas, but test a door first. Keep coat counts thin and avoid heavy buildup near edges.
How Do I Clean Brushes After Using Milk Paint?
To clean brushes after using milk paint, rinse them in warm water right away and scrub the residue with a brush comb. Work the comb through the bristles from ferrule to tip, then rinse until the water runs clear.
For stubborn bits, soak the brush in a vinegar water mix of 1 part white vinegar to 4 parts water for 15 minutes. Wash with mild soap, rinse thoroughly, and reshape the bristles with your fingers.
Never let milk paint dry in the ferrule; set a timer for 10 minutes if you are interrupted. This simple milk paint brush care routine keeps restoration easy.
Dry the brush with bristles pointing down or flat with good airflow.
Rounding Up
Milk paint is worth it if you want a matte, vintage look and do not mind elbow grease. It is not for glossy perfectionists.
Check the finish you want before buying, then buy it for furniture and skip it for kitchen cabinets. Write down the 30-day cure time so you do not slam drawers.
Compare the price per quart with premium chalk paint before you commit, and test zero-VOC expectations on your project. Test a second coat on scrap before skipping sanding, or accept a distressed look.
Ask whether you want a matte, vintage look before you start. Related topic: Types of milk paint.