What Are Mold Killer and Biocide Washes? Types, Uses and How to Choose
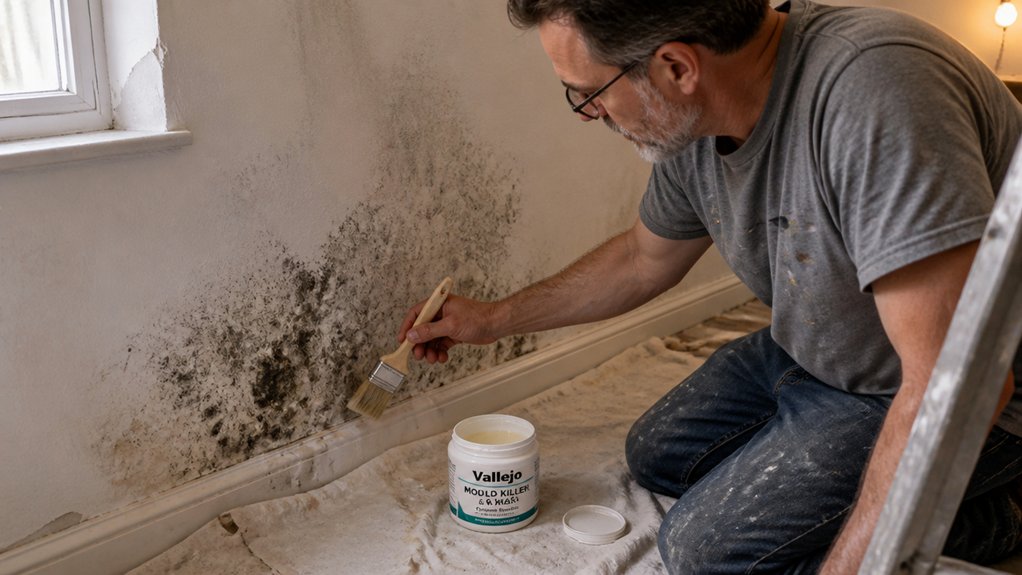
Mold killer and biocide washes can solve the stain, but only if you match the product to the surface. Bleach suits tile, hydrogen peroxide handles bare wood, and quats are gentler on sealed surfaces.
Killing mold is step one: you still need surface prep, scrubbing, drying time, and a stain blocking primer before topcoat. This guide covers types, uses, and how to choose the right wash for your project.
Ventilate, wear gloves and an N95, and never mix bleach with ammonia. Stick around for safe cleaning and repainting details.
Quick Answer
- Bleach kills mold on nonporous tile and glass but fails on porous drywall and wood.
- Hydrogen peroxide suits bare or sealed wood, needing longer dwell and full drying first.
- Quaternary ammonium disinfectants remove mold stains on hard surfaces within one minute without scrubbing.
- Mold color fading doesn’t mean removal; dead spores require physical wipe-down and disposal.
- Choose cleaners by surface porosity, and always follow label ventilation, PPE, and dilution rules.
Which Mold Killer Works on Your Surface?
Match the cleaner to the surface before you start. The material decides which product is safe to use.
I once left bleach on a countertop too long and etched the finish. A safe cleaner gives a clean result without damaging the surface.
On tile or glass, chlorine bleach works fast and can kill mold spores in minutes. Bleach barely soaks into drywall, so it kills less mold and survivors can return.
On bare wood, 3% hydrogen peroxide is a better choice, but leave it on longer. Let the wood dry fully before sanding with 120 grit and applying primer or topcoat.
Lay a drop cloth and use painter’s tape to protect nearby surfaces. Keep bleach off gloss or satin finishes because it can dull the sheen.
Protect nearby surfaces with a drop cloth and painter’s tape. Keep bleach off gloss and satin finishes—it dulls their sheen.
Follow the label for drying time and cure time before you apply varnish or polyurethane. Work with a wet edge to avoid lap marks and obvious brush strokes, and check the VOC level if you work indoors.
For hard, non-porous surfaces like tile, a quaternary ammonium disinfectant such as Mold Armor Rapid Clean can erase visible mold stains in one minute without scrubbing.
Killing Mold Isn’t the Same as Removing It
You can match a cleaner to the surface and watch the mold color fade. The mold may still be there as dead spores on the tile or wood.
Dead spores can still trigger allergies and breathing problems. You have to wipe them away and throw away the dirty cloth.
On nonporous tile, spray a bleach solution, let it sit for the time listed on the label, then wipe with a clean cloth. Rinse with water and dry the surface.
If you work near finished wood, lay a drop cloth and mask the edges with painter’s tape. Keep the bleach off the wood finish.
On sealed wood, hydrogen peroxide can help, but test a hidden spot first. Wipe the area with a damp cloth and dry it right away.
A varnish or polyurethane finish can be dulled or lifted by harsh cleaners, so check the sheen after cleaning. If the finish feels rough, sand lightly with a fine sanding grit after the wood is fully dry.
If the mold left a stain in the wood, clean it first and let it dry. A primer made to block stains can help before you apply the topcoat.
If you need to recoat, match the old sheen, whether gloss, satin, or matte, and choose a low VOC topcoat. Follow the label drying time and cure time, keep a wet edge, and watch for lap marks and brush strokes.
Treat the spray as step one. Wipe the surface, dispose of the waste, and your sinuses will thank you. For garden surfaces, match the active-ingredient strength to the scale of the mold problem, as products like chlorothalonil are labeled for broad-spectrum control and require gloves.
Porous vs. Non-Porous: Match the Product to the Material
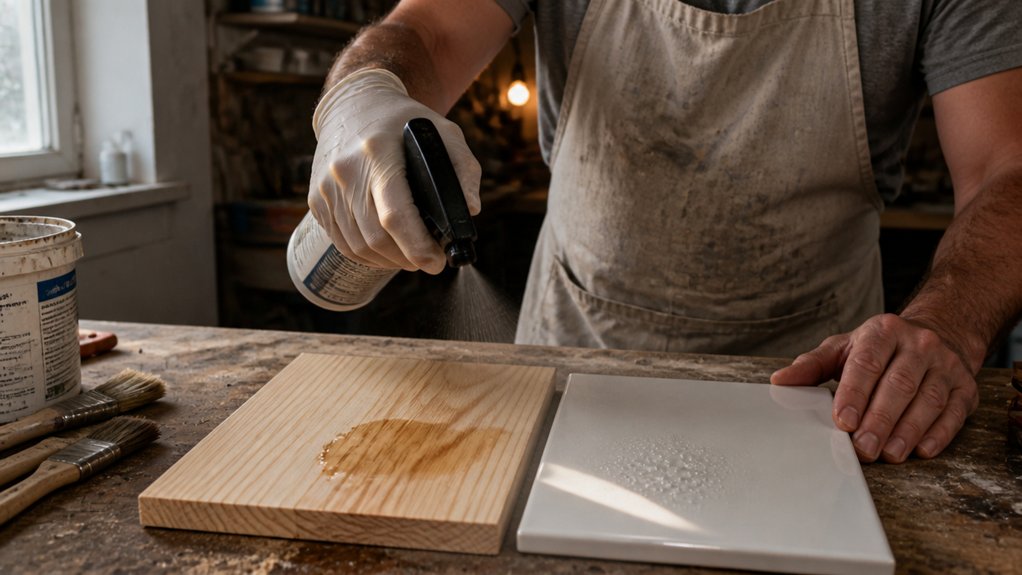
The material under the mess decides what cleaner will work. Treat this like surface prep before primer: the base layer controls how the topcoat will hold.
For drywall, wood, or carpet, moisture soaks in and a bleach wipe stays near the surface. You can waste money and still smell a musty odor while mold stays deeper in the grain, much like stain that has soaked into open wood.
Nonporous tile and glass are different because the surface is smooth and sealed. A bleach cleaner can act fast there when you follow the label and keep the area ventilated.
Porous materials trap spores, and a chemical cleaner may not reach them. For those items, removal is more reliable than any chemical treatment.
Match the cleaner to the material the way you match sanding grit to the job or choose a sheen for a topcoat. A harsh product can dull a varnish or polyurethane finish, damage a countertop, or push mold deeper into an absorbent surface.
Before you start, use a drop cloth and painter’s tape to protect nearby finishes. Wear gloves and eye protection, and check the label for ventilation and VOC warnings while you work.
Toss porous items that are soaked or heavily affected. Clean nonporous surfaces with a product labeled for that material, and leave it on for the time listed on the label.
On porous substrates, a fungicidal primer like an EPA-registered mold killer can seal residual spores only after the surface is dried to a 5% moisture content, ensuring the barrier holds.
Safety Rules: Ventilation, Mixing, and Protective Gear
I have skipped safety steps in the shop, and I have seen other painters and finishers do the same. You crack a window, wave a rag, and hope the air clears while you work.
That habit leaves you exposed to mold killer chemicals, paint fumes, and solvent vapors. Ventilation is part of the job, so open windows, run a fan, and push air outside.
Keep the fan behind you when you can, and set up a drop cloth and painter’s tape before you open any product. A low VOC paint still needs airflow, and stain, varnish, and polyurethane can put more vapor in the room.
Wear gloves, safety goggles, and an N95 mask when you handle mold killers, stains, or finishes. The basic gear costs about $20, and it protects your lungs and skin while you work.
Read the label once, then read it again before you pour or mix anything. Dilution ratios matter, and the label tells you the drying time and cure time for that product.
Do not mix chemicals, and keep bleach away from ammonia because the two make toxic chloramine gas. Mix only what the label says to mix, and use one product at a time.
When you sand between coats, use the sanding grit the label recommends and wear your mask. Sanding primer or topcoat makes dust, and that dust belongs in your mask and your shop filter.
Brush strokes and lap marks show up more when you let the wet edge dry before you finish a section. Work in small areas, keep a wet edge, and plan your drying time around the room’s airflow.
Choose gloss, satin, or matte sheen for the look you want, and check the VOC level before you buy. A topcoat with strong fumes needs more ventilation than a water based finish.
Keep your drop cloth flat, tape off edges with painter’s tape, and move the fan so air leaves the room. Gear up, open up, and follow the label every time you work.
For longer jobs, swap your N95 for a reusable half-mask with organic vapor cartridges to handle solvent fumes from paints and finishes more effectively.
When to Skip DIY and Call a Professional Instead
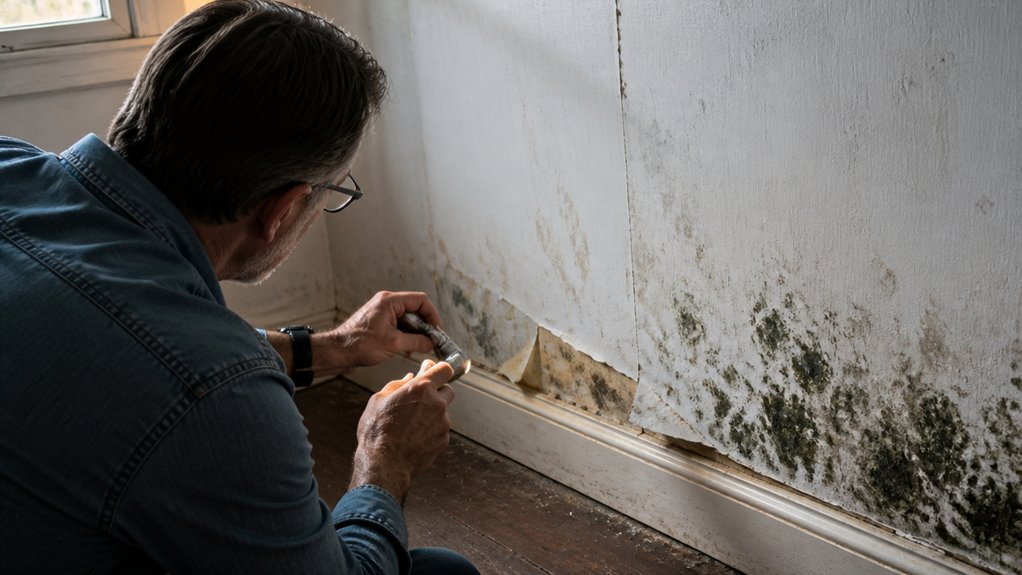
As a painter and wood finisher, I look at mold the way I look at a failing finish: the surface tells only part of the story. I call a professional when mold covers more than ten square feet, when I see water damage inside walls, or when a musty smell returns after I have scrubbed everything twice.
Those signs can point to hidden mold behind drywall or under flooring. That hidden growth is often the source, and painting over a stain with primer and a topcoat only hides it for a while.
I pick the right sanding grit and keep a wet edge when I finish wood, but those skills cannot fix mold inside a wall. I still lay a drop cloth and tape off trim with painter’s tape before I paint, and I know drying time and cure time will not solve a moisture problem.
Painting over mold is like putting varnish or polyurethane on damp wood. The sheen may look fine at first, but trapped moisture keeps the problem alive, and brush strokes or lap marks are the least of your worries. Even a quality mildewcide-in-film paint only lasts up to five years indoors, and that protection drops by 20–40 percent when humidity stays above 60 percent.
If you are coughing, fatigued, or getting headaches that will not quit, you may be dealing with toxic mold syndrome. That happens when mold toxins called mycotoxins get into your system, so do not treat it as a paint problem.
A pro sets up HEPA containment and negative air pressure, removes the mold properly, and finds the moisture source. Bleach sprays alone do not fix mold in porous materials, and a low VOC primer does not make water damage safe to paint.
If your mold patch is bigger than a bathmat, call a certified remediator. Your lungs will thank you.
Frequently Asked Questions
Can Biocide Washes Remove Mold Stains From Painted Walls?
Yes, biocide washes can remove mold stains from painted walls, but they are risky because bleach and strong biocides may damage the paint. Use a spot test first: apply the wash to an inconspicuous area, wait 24 hours, then check for blistering, chalkiness, or color shift.
If you search for a mold stain remover, pick one labeled for painted surfaces, ventilate, wear gloves, and rinse with clean water after the stated dwell time. Then repaint with a stain blocking primer and two coats of quality topcoat for an even finish.
How Long Should I Wait After Applying a Biocide Wash?
Wait 10 to 30 minutes after applying a biocide wash, but verify the product label before you start. Dwell time and surface porosity decide the real window, so sealed tile often sits at the short end while bare drywall needs longer.
For a quick field test, set a timer for 10 minutes on a small tile patch, wipe it with a clean rag, and add 5 minutes if the film still smears. Always read the label for the biocide dwell time because that beats any rule of thumb.
On porous drywall, plan closer to 30 minutes and check for dampness before coating. Keep the wash wet for the full dwell, then rinse or wipe as directed.
Are Biocide Washes Safe to Use Around Children and Pets?
Biocide washes are not universally safe to use around children and pets, so treat every label as the final authority. Toxicity varies by active ingredient, concentration, and surface, and pets can pick up residues on paws or fur.
As a painter and finisher, I keep kids and pets out of the work area until surfaces are completely dry, then ventilate for at least 24 hours after application. For a typical bathroom mold remover, that means blocking the door, running an exhaust fan, and waiting a full day before normal use.
Read the label for the required dwell time and rinse step, and never mix biocide washes with other cleaners. Your family’s health matters more than quick mold removal.
What Is the Shelf Life of an Opened Biocide Product?
The shelf life of an opened biocide product is not fixed, because active ingredient stability varies by formulation and storage. Check the label expiration date first, then mark the container with the date you opened it.
For most paint biocides, expect roughly 6 to 12 months after opening, though some in-can preservatives last longer in cool, dry storage. Keep the cap tight, avoid freezing, and store away from direct sunlight.
If the product looks separated, smells off, or has been diluted, replace it rather than risk a failed batch. A practical habit is to write the open date on the lid with a permanent marker and review it before every mixing session.
Do Biocide Washes Prevent Mold From Returning After Cleanup?
Biocide washes do not by themselves prevent mold from returning after cleanup. They kill surface mold, but prevention hinges on fixing dampness, so treat the source first.
Otherwise, it is like bailing a boat with a hole. Before recoating, use a moisture meter and run a dehumidifier until the wood holds below 15 percent for 24 hours.
Then clean and dry the area, correct the leak or ventilation issue, and only apply a compatible biocide wash if the surface is still suspect. Think of it as mold remediation and moisture control, not a one step wash.
Rounding Up
Mold killer and biocide washes are surface matched products for killing mold, so choosing them means matching the wash to the surface, reading the label, and ventilating.
Check the surface before you choose a wash. Read the label and ventilate the area like your brain depends on it.
For drywall, skip bleach because it is a surface only fix. For tile, compare a $12 bleach spray, and when in doubt, ask a pro before you start.
Your lungs will thank you, so ventilate and call a pro when in doubt.
Related topic: Drywall mold removal.