What Are Micro-Cement Coatings? Types, Uses and How to Choose
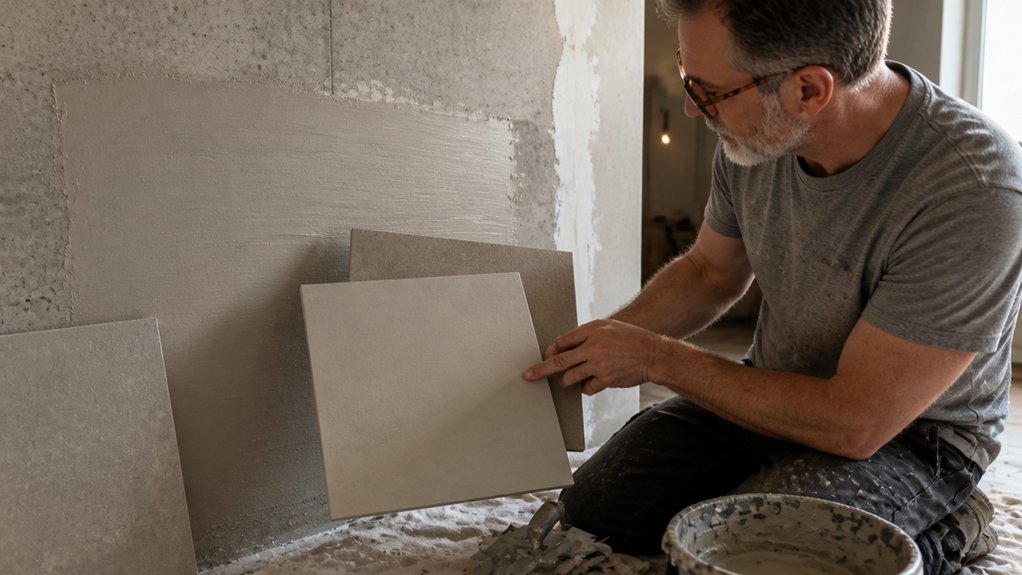
Tired of grout lines and ugly, cracked flooring? If you are considering micro-cement coatings, you are looking at a seamless, durable finish that transforms any space.
Mastering micro-cement is about understanding its different types, from ready-mixed options for quick projects to high-performance polyurethanes for wet zones.
We break down the five main micro-cement types so you can choose the right coating for your traffic and humidity.
You will learn about substrate preparation, cure times, and how to stay within a smart budget while achieving that custom concrete look.
Ready to ditch the traditional methods and finally get those perfect, paint-finish results for your home?
Quick Answer
- Microcement is a 2–3 mm polymer-reinforced coating for seamless floors and walls.
- Main types: monocomponent for DIY walls, bicomponent for high-traffic floors, polyurethane for wet zones.
- Uses: showers, patios, vanity tops, and kitchens; requires stable, dry, primed substrates.
- Choose based on traffic, moisture: matte hides scuffs; satin suits kitchens; nonslip for wet areas.
- Cost ranges $14–$20/sq ft, plus prep; large areas need professional application.
Substrates That Reject Micro-Cement: Wood, Loose Tiles, and More
Microcement only holds when the surface is stable, clean, and porous. I have watched it crack off natural wood after the boards moved with heat and moisture.
Microcement needs a stable, clean, porous base; wood moves and cracks it right off.
Wood can look great with stain, varnish, or polyurethane, yet it still moves under a microcement coat. That movement breaks the coating’s grip, so leave timber out of the plan. Ensure substrates have less than 5% dampness and are fully cured before any application.
Loose tiles also fail because they shift underfoot and crack the new topcoat within weeks. Substrate prep decides whether the finish lasts.
I tap every square foot and listen for a hollow sound; if I hear an echo, I do not apply over it. Applying over a hollow spot invites delamination, where the coating lifts off.
Old vinyl and oily surfaces push adhesive away, so clean or remove them before you open a primer can. Before you start, lay a drop cloth and mask edges with painter’s tape.
Check the primer label for VOC level and the sanding grit it recommends. Note drying time versus cure time so you do not apply the topcoat too soon.
Stick to concrete or soundly bonded tile that is clean and porous. If the base wobbles, fix it first, or you will waste about 14 dollars per square foot.
When you apply the topcoat, keep a wet edge to prevent lap marks and brush strokes. A matte or satin sheen hides small flaws better than a gloss finish.
Sand rough spots with the grit your primer calls for, then remove all dust. Test a small area first and let it cure before you judge the sheen.
The 5 Micro-Cement Types: and the Job Each One Does Best
Five formulas cover most microcement jobs, and each one fits a different surface and schedule. Bicomponent is my first choice for high traffic floors because it wears hard.
It also has a longer drying time, so plan your coats and keep a clean wet edge. Monocomponent is easier to prep and blend for color matching on DIY walls.
It gives you a simple path if you have more patience than speed. For wet zones, use a polyurethane formula as your waterproof layer and follow the cure time on the label.
It takes longer to cure than to dry, so do not rush the topcoat. Ready mixed microcement cuts down on mixing tools and cleanup, and it offers decent coverage for a weekend job.
Tape off edges with painter’s tape and set a drop cloth before you open the bucket. Epoxy is the tough industrial option, but it punishes sloppy prep.
Sand the surface to the sanding grit your primer calls for, then remove all dust before you roll. For a matte, satin, or gloss sheen, check the topcoat system and test a small area first.
Keep brush strokes in one direction and watch for lap marks where sections meet. Check the VOC level and ventilation before you start, especially in a small bathroom.
Match the formula to your patience and the room, then let the finish cure fully before water or furniture touches it. If you plan to stain or varnish nearby wood, cover it and keep the microcement dust out of the finish.
A quick wipe with a damp cloth will show whether the topcoat has cured evenly. That check has saved me a return trip more than once. For a durable, washable result similar to a satin sheen from tested acrylic latex paints, ensure your topcoat system includes a scrubbable layer that holds up to repeated cleaning.
Where Micro-Cement Works: Floors, Walls, Showers, and Outdoor Areas
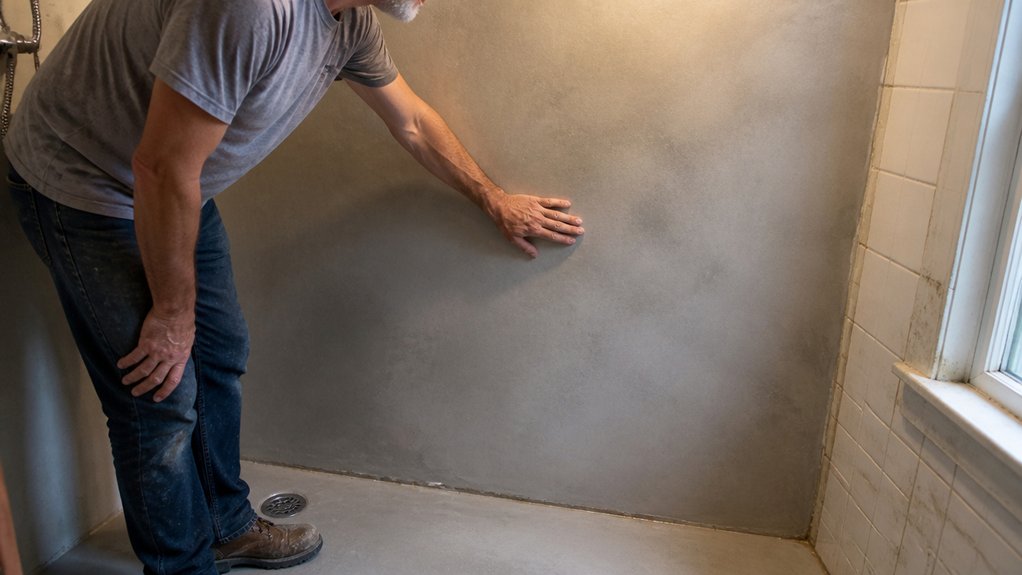
Floors and walls take most microcement jobs, and that is where the material earns its keep. You get seamless surfaces that hide joints, so I often recommend it for kitchen floors and living room feature walls. For bathrooms, microcement works well, and showers and bathtub surrounds are where it helps most. Once sealed, it is waterproof, so you get no grout lines and no mold traps. For outdoor patios and terrace floors, choose a matte finish with grip. I have seen it hold up on pool decks without cracking when the substrate stays stable. Before you start, mask edges with painter’s tape and cover nearby floors with a drop cloth. Scuff the substrate with the sanding grit the maker recommends, then remove all dust. Apply a primer made for the substrate, then check the VOC rating if indoor air quality matters. Keep a wet edge to avoid lap marks, and apply thin coats to reduce brush strokes. Respect the drying time before recoating and the full cure time before water exposure. A sealer or topcoat controls sheen, whether you want matte, satin, or gloss, and it helps the water resistance. For wood trim near the job, use stain, varnish, or polyurethane as the finish calls for. Test a small area first so you can check the sheen and grip before you commit. To ensure the waterproof seal holds, verify the substrate is bone-dry before applying the primer, as moisture will cause adhesion failure and peeling.
DIY vs. Pro Installation: When It’s Safe to Skip the Contractor
You can skip the contractor for about half of all microcement jobs. I have done many of these jobs myself.
For small, flat surfaces such as a bathroom vanity or a kitchen backsplash, the DIY savings are often half the professional price. You still need patience, a trowel, and a steady hand.
Professional skill matters quickly on floors and showers. Seamlessness is hard to achieve on large areas, and uneven trowel work shows as shadows.
Waterproofing protects the subfloor, and one missed corner can lead to mold. Use painter’s tape and a drop cloth to protect edges and nearby surfaces before you start.
Prime the surface first, then apply the microcement in thin coats. Use a fine sanding grit between coats if the product maker allows it.
Choose a matte, satin, or gloss topcoat for the sheen you want, and check the VOC level for indoor work. Keep a wet edge when you apply the topcoat to avoid lap marks and brush strokes.
Follow the drying time before you recoat, and wait the full cure time before heavy use. For wood trim near the work, use painter’s tape to protect it, then apply stain, varnish, or polyurethane as needed.
Matte, Satin, or Non-Slip: How to Choose the Right Finish
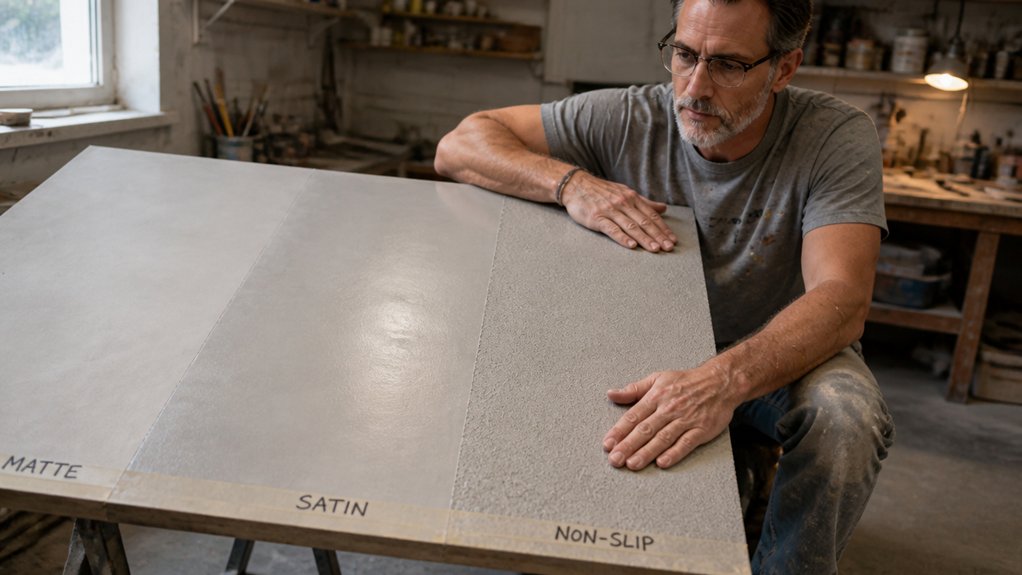
Choose the finish before you open the can, because the sheen decides where the coating can go. Matte is my first choice for living rooms.
Matte hides scuffs and cuts glare, but it is softer, so durability drops in high traffic hallways. Satin sits between matte and gloss: slightly reflective, easier to wipe, and tough enough for kitchens.
Before you buy, check the VOC rating and whether the topcoat needs a primer. Sand with the sanding grit listed on the can, then wipe off the dust so the finish bonds.
Use a drop cloth and painter’s tape to protect nearby surfaces while you work. Keep a wet edge as you apply the topcoat to avoid lap marks and visible brush strokes.
For showers and other wet zones, use a nonslip matte with a polyurethane sealer that carries grit. That grit boosts safety and resistance to damp conditions, and for high-traffic wet areas, industrial coatings often require wet COF ratings of 0.70 or higher to meet safety standards. On wood, match the topcoat to the stain or varnish and follow the label for drying time before recoating. Wait for full cure time before heavy use, because a dry surface can still be soft.
Texture matters: fine texture pairs with matte for a sleek modern look, while rougher texture suits nonslip outdoor areas. Test a small area first so you can see how the texture catches light and holds up to wear.
If you are unsure, pick satin for versatility, or use nonslip anywhere water lands. That small extra step is cheap insurance and helps you avoid a slide later.
How to Pick a Micro-Cement Type That Fits Your Budget
A budget plan works when you match the coating to the room and the traffic it gets. Start with the surface you have and the abuse it will take, then compare products at the same prep level.
I have seen a $20 per square foot epoxy microcement go into a utility room while a $14 cement based system held up for a decade on a busy kitchen floor. The cost per square foot tells you part of the story, and the prep and topcoat tell you the rest.
For a utility room, a basic primer and a matte topcoat can keep the cost down and still give you a surface you can clean. On a kitchen floor, spend more on a tough topcoat and plan for a longer cure time before heavy use.
Sanding grit matters because the primer needs a surface it can grip. Use a drop cloth and painter’s tape to protect edges, then cut in with steady brush strokes and keep a wet edge so lap marks do not show.
Check VOC limits when the room has poor airflow or you are working near living space, and remember that low-VOC options are defined as ≤50 g/L before colorants are added. A satin or gloss sheen can hide less than matte, so pick the sheen after you test a sample panel.
Drying time and cure time are different, and the floor keeps getting harder after it feels dry. Give the topcoat the full cure window before you move furniture back, especially on a floor that takes daily traffic.
Budget vs. Performance
Your wallet and your walls are about to have a conversation, and you are the mediator. I have seen many projects go sideways when someone chases the cheapest bag of mix.
Cost problems show up later when a floor starts flaking in eighteen months. Long term value beats a low upfront price when you compare the full job.
For a tough, flexible finish at a middle price, choose bicomponent. Monocomponent mixes easily and gives decent durability, while polyurethane is waterproof and has excellent abrasion resistance.
Ready to use is the fastest option and gives a decent finish. Epoxy gives industrial strength at a higher price.
Prep is where hidden costs live. Tape off edges with painter’s tape, lay a drop cloth, and sand to the correct sanding grit before any primer or topcoat goes down.
Keep a wet edge while you apply the finish so lap marks and brush strokes do not show. Check drying time before recoating, and wait for full cure time before heavy use.
Choose a sheen that suits the room: gloss and satin are easier to wipe, while matte hides scuffs. Low VOC products help indoor air quality, and a stain or varnish can add color before the polyurethane topcoat.
For most homes, bicomponent hits the sweet spot. It balances cost, adhesion, and lifespan without breaking the bank. Always keep temperatures above 50°F during application for optimal drying conditions to prevent adhesion failures.
Spend more on the material that takes wear, and save on the final sheen. That balance keeps your budget and your floor in good shape.
Smart Spending Strategies
A few smart choices can turn a microcement project into a good value instead of a money pit. Match the product to the traffic and abuse the surface will take.
For a bathroom wall that gets little traffic, use a cement product. It costs less and covers small mistakes well.
For a garage floor, pay for a harder grade with a strong topcoat. Use a tough polyurethane finish for that kind of wear.
Costs usually run $14 to $20 per square foot, and prep adds more. Check for loose tiles because repairs can raise the price fast.
Get at least three quotes and ask what each one includes. Bundling walls and floors can give you room to negotiate, so ask for a clear breakdown.
Ask about the material grade, the primer, and the sealer topcoat. A better sealer can protect the surface more than a higher grade base material in some rooms. Uniform nap density on application tools stops stippling and helps the sealer lay down evenly for consistent protection.
Use painter’s tape and drop cloths to protect nearby trim and floors during prep and sealing. Follow the drying time and cure time on the label, and keep dust under control with the right sanding grit.
For wood trim near the work, stain or varnish can add warmth, and polyurethane adds wear protection. Choose a sheen that fits the room, such as gloss, matte, or satin, and check VOC levels if indoor air matters.
Apply the topcoat in even passes and keep a wet edge to avoid lap marks. Good brush strokes and steady lighting help you spot thin spots before the finish dries.
Spend on durability where feet hit hard and save on appearance in areas that see less contact. That approach protects your wallet and your floor.
Micro-Cement vs. Concrete Overlay: What’s the Real Difference?
Microcement and concrete overlay differ in thickness, flexibility, and the amount of labor they take. Concrete overlay goes on 5 to 10 mm thick, while microcement stays thin at about 2 to 3 mm.
That thickness changes how each surface feels and how well it handles movement in the base. Concrete overlay holds up better under heavy foot traffic, but microcement uses polymer resins to resist cracking on uneven floors and walls.
For installation, overlay requires aggressive grinding, primer, and heavy troweling. Microcement takes a clean surface, a roll on primer, thin trowel coats, and a sealer.
The sealer works like a topcoat, and you can choose a matte or satin sheen for walls and a gloss sheen for floors if you want more wear resistance. A gloss finish shows lap marks and brush strokes more easily, so keep a wet edge while you apply it.
Check the VOC content and follow the drying time and cure time on the label before you walk on the floor. Use painter’s tape and a drop cloth to protect nearby wood, and save stain, varnish, and polyurethane for the trim.
For surface prep, a light scuff with 120 grit sandpaper helps the primer bond on walls that are already sound. Overlay costs about $6 to $12 per square foot, and microcement runs about $14 to $20 per square foot.
Choose microcement for seamless walls, curved surfaces, and a modern look with a controlled sheen. Choose concrete overlay for a garage floor or a heavy duty patio when the budget matters and the base is stable. For deep spalls or gouges on that stable base, a pourable concrete patch can fill holes up to 4 inches deep in a single application.
Frequently Asked Questions
How Long Does Micro-Cement Last Before Needing Replacement?
Micro-cement lasts about 15 to 25 years before needing replacement when cared for properly. Skip maintenance and you will likely refinish it sooner, though that remains cheaper than a full replacement.
Lifespan expectations hinge on surface prep and traffic, so factor refinishing costs into your long-term plan. For a practical example, apply two coats of sealer and recoat high-traffic zones every 12 to 18 months; test a small area first with a 220-grit sanding pad before recoating.
Treat it like a microcement floor finish and inspect wear paths annually, because small touch-ups extend service life.
Can Micro-Cement Be Applied Over Existing Countertops?
Yes, micro-cement can be applied over existing countertops when the surface is sound, clean, and prepared for a permanent bond. Start with 80-grit sanding to dull the finish and open the pores, then vacuum and wipe with a degreaser before applying a compatible bonding primer.
Build the micro-cement in two thin coats at roughly 1/16 inch total, letting each coat dry per the manufacturer’s schedule before sanding lightly with 220-grit. This makes a durable countertop overlay for kitchens or baths, provided you respect cure times and seal the finish for moisture resistance.
Does Micro-Cement Crack Under Heavy Furniture or Foot Traffic?
Micro-cement will not crack under heavy furniture or foot traffic when the substrate and surface prep are right. First, apply a moisture barrier to control dampness, because trapped vapor is what usually causes hairline failures in a microcement overlay.
For a practical starting point, roll two coats of epoxy moisture barrier and let each coat dry for 12 hours before the next step. Then fill and sand the base to a flat, sound surface, using 80 grit for leveling and 120 grit before the primer.
Keep movement joints open and avoid point loads from metal feet by fitting felt pads. With that system in place, normal furniture and foot traffic are safe.
How Soon Can You Walk on Freshly Applied Micro-Cement?
You can walk on freshly applied micro-cement after 24 to 48 hours, but wait 3 to 5 days for full traffic. Treat that window as a guide, not a guarantee, because humidity and temperature control the cure.
A practical tip is to keep the room at 65 to 75°F with steady airflow and avoid adding a sealer until the surface feels hard and dry. For a micro-cement floor coating, test a discreet corner with light foot pressure before opening the whole area.
If conditions are cool or damp, add a day or two to your schedule rather than rushing. Rushing the cure can leave a soft finish that shows every mark.
Is Micro-Cement Safe for Use Around Food Preparation Areas?
Micro-cement can be safe for use around food preparation areas, provided it is sealed with a certified food-grade topcoat. Bare micro-cement is porous, so spills and bacteria can settle into the surface if the sealer wears thin.
Use a two-coat application of a food-safe sealer, following the manufacturer’s recoat window, often 4 to 6 hours between coats. Let the finished surface cure fully, typically 7 days, before placing food, cutting boards, or appliances on it.
Check the sealer annually with a water-drop test: if the bead soaks in rather than sitting on top, it is time to recoat. For a practical search term, look for “food-safe microcement sealer” and confirm it carries a food-contact certification.
Rounding Up
Micro-cement coatings are a smart, durable upgrade on stable concrete if you respect their limits, not magic. Check the substrate for wood, wobbly tiles, or a sinking foundation before you commit.
Ask a pro to seal bathroom or kitchen micro-cement instead of taking on the DIY itch. Compare installed costs, write down your budget, and pick a matte finish to help hide footprints.
Properly installed micro-cement floors outlast most epoxy coatings, and that is real value. That durability is the real value on stable concrete.
Read next about sealing micro-cement.