High Quality Brushes for Painting: How to Choose and Use It

Nothing ruins a weekend paint job faster than a brush that sheds bristles into wet paint. High quality brushes for painting make a bigger difference than most DIYers expect.
This guide shows you how to match bristles to latex, acrylic, oil, or varnish. Along the way, you will learn sizing, cleaning, and storage tips that keep a good brush working for years.
Read on for quick, practical steps to choose and use the right brush on your next project.
Quick Answer
- Match bristles to paint: use nylon or polyester for latex and acrylic, and natural bristles for oil-based coatings.
- Choose a 3–4-inch flat brush for broad surfaces and a 1–2-inch angled brush for trim, edges, and corners.
- Look for dense, springy, flagged bristles, a rust-resistant ferrule, secure joints, and a comfortable, balanced handle.
- Load only the bottom third of the bristles; use light pressure, long strokes, and a wet edge to reduce marks.
- Clean brushes promptly with the paint-appropriate cleaner, then store them carefully to preserve their shape.
Match Paint Brushes to Latex or Oil Paint
Match your brush to the paint. For latex and acrylic paint, use a nylon or polyester brush.
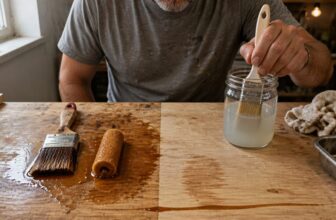
For oil paint, such as enamel or varnish, use a natural bristle brush, like one with white China bristles. Choosing the right brush makes the job easier and keeps the paint working for you.
Latex and acrylic are water based, so they swell natural bristles. Swollen bristles go limp, hold less paint, and leave messy brush strokes.
Nylon and polyester don’t soak up water, so they stay stiff and spread paint smoothly. That makes them the right choice for latex and acrylic.
Oil paint works the other way around. Natural bristles hold up well to oil enamel and varnish, and they release paint evenly, which helps you keep a clean wet edge.
White China bristles are a popular choice for oil paint. Check the label on any paint before you buy, especially if you switch between paint types.
One brush won’t do every job, especially if you move from a latex primer to an oil based polyurethane topcoat. A basic brush about 2 inches wide costs $8 to $20, and specialty brushes cost more.
Keep separate brushes for each paint type so oil never ends up in your latex work. Clean each brush with the right solvent: soap and water for latex and acrylic, and mineral spirits for oil paint.
Water can’t fix an oil problem, so match the cleaner to the paint. Choose every brush by its paint base.
Choose Bristle Materials for the Finish
Choose bristles by the finish you want, not just the paint can. Soft nylon or polyester bristles lay down satin and gloss coats smoothly, while firmer synthetic bristles handle thick coatings like heavy primer.
Natural hair works well with oil enamel and varnish because it releases these finishes smoothly. Water makes natural bristles swell and lose their shape, so keep them away from latex paint.
For oil enamel or varnish, I reach for a white China bristle brush. It’s a dependable natural hair choice that holds its shape through long jobs.
For latex paint, a blend of nylon and polyester gives you balanced spring and a smooth release. Split tips, also called flagged tips, hold more paint and spread it evenly across the surface.
Before I start, I check that the tips vary in length and come to a point. Then I test the brush on a sample board.
If lap marks or brush strokes show up on the board, the brush or the paint is usually the problem, not my wrist. That test saves me from blaming my hand for every streak.
Match the bristle material to the finish first. Then choose soft or firm bristles based on the texture of the coating.
Pick Paint Brush Sizes for Each Surface

Match the brush size to the surface. A wide brush covers more ground quickly, while a narrow brush gives you more control in tight spots.
For siding, use a 3 to 4 inch flat brush. Its broad face spreads paint fast across boards, and the wet edge stays open long enough to blend lap marks.
Doors and window frames call for a 2 inch angled sash brush. The angled bristles cut a clean line along the seam between the door and frame, so you may use less painter’s tape.
For trim and small repairs, use a 1 to 2 inch angled brush. A smaller brush carries less paint per stroke, so you apply less paint to the wall and avoid heavy drips and visible brush strokes.
Wide Surface Brushes
Use a flat brush that’s 3 to 4 inches wide when you paint siding or another large, flat surface. A wide brush holds more paint than a small one.
You make long, smooth brush strokes and reload less often. That saves time on a shed or fence, where speed matters more than fine control.
Choose a brush with synthetic nylon or polyester bristles for latex paint. Natural bristles soak up water and can swell, which warps the shape of the brush.
Look for dense bristles that spring back when you press them. Check that the brush sheds only a hair or two when you run your fingers across it.
Look closely at the tips as well. Flagged tips are split ends, and they release paint more evenly across the surface.
That even flow helps you avoid lap marks and streaks on long boards. Keep a wet edge as you move along each board so the paint blends without dry spots.
Before you buy, hold the brush and move it through the air as if you were painting. Check the balance in your hand, and pick a brush you can control for the whole job.
Lay a drop cloth under your work and use painter’s tape along trim before you start. Those steps protect the surfaces you don’t want to paint.
Trim and Detail Brushes
For trim and detail work, I reach for an angled sash brush that measures 1 to 2 inches across. The slanted bristles let you guide paint along narrow edges, so you control where the paint goes instead of flooding the surface.
Choose a 2 inch brush for doors and frames. For narrow trim, window muntins, corners, and cabinet profiles, the smaller brush gives you better control.
Use synthetic nylon or polyester bristles when you paint with latex. Natural bristles can soak up water, lose their shape, and leave brush strokes that look uneven.
Before you buy, test the bristles. They should spring back when you press them, stay packed together, and shed no more than a couple of loose hairs when you run your fingers across them. A stray bristle stuck in a fresh coat of topcoat is a frustrating fix.
Pick a handle that feels comfortable in your hand. A wood grip gives you a firmer hold than slick plastic, and a balanced brush keeps your wrist steady during small, fussy work.
If you buy only one brush, make it the 2 inch size. It covers doors, frames, and most trim, and you can add a smaller brush later for tight spots. Lay a drop cloth under your work, and keep a wet edge as you move along each board so lap marks stay away.
Choose Flat or Angled Paint Brushes
Choose a flat brush for broad surfaces and an angled brush for crisp edges around trim, doors, and window frames. Flat brushes cover large walls quickly and spread paint evenly. Angled brushes let you cut clean lines where two colors meet.
The slanted bristles on an angled brush give you more control along edges. They’ll not fix an unsteady hand, though, so take your time and rest your wrist on the surface if you need to. Use painter’s tape to protect the adjacent surface when precision matters most.
Match the brush shape to the job to save time on touch-ups. Use a flat brush to lay down paint across walls and large panels. Switch to an angled brush for the detail work around frames, corners, and trim. Keep a wet edge as you work so lap marks stay minimal.
Flat Brushes for Coverage
A brush that’s 3 to 4 inches wide is my first choice for covering large, flat surfaces like siding. It holds more paint than a smaller brush, so you make fewer passes and fewer trips back to the can.
For siding and fence boards, the square tip spreads paint evenly across the surface. Flagged bristles, which have split ends, help you lay on a smooth coat with fewer lap marks.
For latex paint, choose a brush with nylon or polyester bristles. Natural bristles soak up water and lose their shape, so they don’t hold up well in latex.
Check that the bristles are packed tightly and sit firmly in the ferrule, the metal sleeve that holds them to the handle. Bend the bristles gently, and they should spring back into place.
Keep a wet edge as you work so each new stroke blends into the last one. Good timing keeps the paint from drying in visible brush strokes.
I prefer an unfinished wood handle that feels balanced in my hand, so long sessions don’t cramp my grip. Spend about 20 dollars on a brush, and choose the one that feels right when you hold it.
Angled Brushes for Edges
I reach for an angled sash brush when I cut in around door frames or paint trim. A 2 inch size is my pick because the slanted edge gives me better control along corners and borders.
When a flat brush feels clumsy, the angled tip lets me place paint exactly where I want it. To cover a corner neatly, I turn the brush so the longest bristles lead, then draw a steady line with light pressure.
Look for tightly packed bristles that spring back after a gentle bend. Check the ferrule, which is the metal band that holds the bristles to the handle, and choose one that resists rust so it lasts through many cleanups.
A 2 inch angled brush usually costs between 8 and 15 dollars. Spend more if the brush sheds bristles into your topcoat or leaves ragged lines, since those flaws leave lap marks you have to fix.
I still use painter’s tape on glossy trim when the edge must be perfect. For most edges, the angled brush keeps a clean wet edge and saves time.
Choose by Painting Task
Choose your brush based on the surface you’re painting. A flat brush works best on broad, straight runs, while an angled brush gives you more control on trim, corners, and edges.
For exterior siding, a 3 to 4 inch flat brush spreads paint quickly and keeps your brush strokes even. It works well on long boards because it covers more area with each pass.
For interior work, start with a 2 inch angled sash brush to cut in around door frames. Then switch to a 1 to 2 inch angled brush for narrow trim.
The angled bristles help you steer a steady line along the edge of the trim. A sash brush is simply a brush shaped for sharp, precise edges.
Flat brushes move faster on broad boards, but they feel clumsy in tight corners. Angled brushes give you better control when cutting in, but they cover less area.
For latex paint, choose a brush with nylon or polyester bristles. Check that the bristles spring back into shape and don’t shed loose hairs onto the wall.
A comfortable handle matters, too. If your grip feels cramped, your hand will shake and a straight wall line will wander.
Match the brush width to the surface, and keep a few shapes on hand for different jobs. Use a satin topcoat on walls when you want a soft sheen that hides small brush strokes.
Tape off glass and hardware with painter’s tape, and lay a drop cloth under your work. Keep a wet edge as you move across the wall so your lap marks blend away.
Inspect Ferrules and Brush Construction
Start with the ferrule, the metal band that holds the bristles to the handle. It should be firmly nailed into solid wood, and it should stay still when you hold the brush.
A loose ferrule is the first construction problem to check for, and it rarely tightens on its own. Look for tight nails spaced evenly around the band. Each nail should sit flush with the metal and hold the band firmly in place.
Choose a brush with a copper or stainless steel ferrule. These metals resist rust far better than tin or nickel, and rust weakens the joint over time.
Check that the bristles fill the ferrule all the way to the center. A filler material hiding empty space in the middle means the brush will lose its shape and shed faster.
Pick a brush with a solid wood handle. Wood feels sturdy in your hand, and a plain finish gives you a grip that stays put when your fingers are wet with paint.
Gently tug the handle and inspect the seams where the handle meets the ferrule. Gaps let paint and water seep inside, which swells the wood and loosens the bristles.
For a brush in the $10 to $20 range, expect a firmly crimped ferrule and a tight seal at the base of the bristles. Glue alone shouldn’t hold the brush together.
Skip any brush with visible gaps or rattles. Sound construction lasts longer and saves you money on repairs and replacements.
Good construction also helps your finish. A brush that sheds bristles leaves specks in your topcoat, and a wobbly handle makes it harder to hold a steady stroke.
A well loaded brush lets you keep a wet edge, which prevents lap marks in satin or gloss paint. Keeping a wet edge is much easier with a brush that stays balanced and holds its shape from the first stroke to the last.
Check Bristle Tips, Density, and Spring-Back

Look closely at the tips of the bristles. Flagged tips, which are the split ends, release paint evenly and leave cleaner edges, so you avoid extra work later.
Next, check how the bristles sit in the ferrule, the metal band where the handle meets the bristles. They should pack tightly with no hollow spots, because paint can hide in gaps and drip onto your work later.
Then bend the bristles gently near the base. A good brush springs back into shape without crimping, which keeps your brush strokes smooth from the first pass to the last.
A brush that stays bent will leave uneven lines and lap marks on the wall.
Choosing a brush that passes all three checks saves you time, and it saves your back after a full day of painting a ceiling.
Flagged Bristle Tips
A brush with flagged tips gives you the smoothest, most even paint release.
Flagging means the bristle ends split into tiny, fine fibers.
These split ends hold paint and release it evenly, so the brush lays down a neat film without streaks or lap marks.
Animal hair splits naturally at the tips, while manufacturers split synthetic bristles during production.
That fine fringe matters most on trim and doors, where clean edges along painter’s tape count.
A brush without it can leave a heavy stripe of paint right where you want a sharp line.
Look for tiny forks at the tips.
Blunt cuts or ragged ends usually mean the brush will leave marks.
For latex paint, choose nylon or polyester bristles.
Natural hair soaks up water and loses its shape, so save it for oil finishes such as varnish, stain, and polyurethane.
A brush in the $10 to $20 range handles small trim jobs well.
Before you paint the good surface, test the brush on scrap wood to see how it lays paint and whether the bristles shed.
Dense Bristle Packing
Choose a brush with dense bristles that spring back when you bend them. A full brush holds more paint and lays it down more evenly.
Look for bristles packed solid from the ferrule, the metal band where the bristles meet the handle, all the way to the tip. Check for any hollow center or thin patches, because those spots release paint unevenly and can leave streaks on siding or trim.
A full bundle carries paint farther across the wall, so you spend less time reloading the brush.
It also leaves fewer lap marks and brush strokes when you work along a wet edge.
The bristle ends should vary slightly in length, which helps the brush release paint smoothly. The bundle should still look even across its width, with no filler strip down the middle to create weak spots.
Split, tapered tips release paint more smoothly than blunt, square ends. Before you buy, give the bristles a gentle tug near the ferrule to see whether any come loose.
A few loose hairs are normal. More than a couple means the brush will shed into your topcoat and add cleanup work.
Spring-Back Test
Before you buy a brush, run a quick bend test. Hold the bristles near the base, bend them, then let go.
A good brush springs back without a lasting kink or crimp. This rebound helps the brush keep its shape when you cut in along trim.
Check the tips too. Tips that vary in length and have split ends hold paint and release it smoothly, which gives you clean lines.
Work through a few quick checks at the store. Start by bending a small bundle, and notice how fast the bristles return to their shape.
Look for full, even packing where the bristles meet the ferrule, the metal band that holds them to the handle. Gaps or a soft, hollow center tell you the brush will leave uneven brush strokes.
Skip any brush with a bend that stays put. Paint won’t fix a kink, and it will show up in every stroke.
Then tug lightly on the bristles. If more than a couple loose hairs come out, pass on that brush.
A brush in the $15 to $25 range should feel firm and springy in your hand. Choose one that rebounds reliably and feels dense.
A brush that holds its shape keeps a wet edge longer. Control matters more than any cleanup later.
Choose a Balanced, Comfortable Paint Brush Handle

Choose an unfinished wooden handle that feels balanced in your hand. Painted and plastic handles often get slippery once paint splatters on them or your palm starts to sweat.
A brush that strains your grip makes even a small job feel long. Wood handles hold their feel over hours of cutting in along a ceiling line.
Before you buy, test the balance. Hold the brush as if you’re painting a doorframe, then make a few strokes in the air.
Before choosing a brush, hold it like you’re painting a doorframe and make a few strokes to check its balance.
If the ferrule, the metal band where the bristles meet the handle, pulls the front end down, keep looking. A handle that feels too thick for your fingers will tire your hand before the job ends.
Comfort matters more than the label on the package. Compare two handle sizes and choose the one you can guide without squeezing. A smaller handle may suit a small hand, but a wider handle can feel steadier when you run a straight edge along painter’s tape.
Even a $12 brush can cost you time if it cramps your hand during trim work. A relaxed grip helps you keep a steady wet edge and even brush strokes, so test the brush in the store if you can. Ergonomic grips reduce fatigue by guiding finger placement and spreading pressure across more skin, much like the designs used for writing tools.
Pay attention to how your wrist feels after ten minutes of strokes.
Load Paint Brushes for Cleaner Lines
I load only the bottom third of the bristles. Then I tap each side of the brush against the can to settle the paint.
I don’t scrape the brush on the rim of the can. That gives me enough paint to work with and keeps me from flooding an edge.
I keep the ferrule, the metal band where the bristles meet the handle, mostly dry. Paint sitting up there drips down and creates lumpy corners, and I’ve made plenty of those.
I reload when the coverage starts to thin, before the brush feels scratchy. Waiting until the brush squeaks is too late for clean work.
I dip the brush straight in, then lift it slowly. A slow lift keeps extra paint in the bristles and off the can.
For trim, I load just one side of an angled sash brush. That side gives a sharp line along the painter’s tape.
On broad boards, I spread paint with long, even passes. Those passes help me avoid lap marks where one section meets the next.
I point the brush tip toward my wet edge as I stroke. This keeps the fresh paint blending into the paint that’s still open.
I work in small sections and smooth each one with a light pass. Keeping the wet edge alive means I never let a section dry before I blend into it.
Satin and gloss sheens show lap marks and brush strokes more than matte does. I take extra care with those finishes and keep my passes even.
I keep my pressure light. Heavy pressure spreads the bristles and leaves uneven brush strokes.
Choose a brush sized for the job. A small brush on a wide board takes longer and leaves more lap marks.
Drying time tells me when I can recoat, and cure time tells me when the finish can handle wear. I check the can for both numbers and lay a drop cloth under the work before I start.
Clean Paint Brushes Without Damaging Bristles

Clean your brush before the paint dries. A brush left with dried paint loses its shape and its wet edge, which leads to lap marks and rough brush strokes on your next coat.
Match the cleaner to the paint. Latex and acrylic paint clean up with water, while oil paint needs mineral spirits or a brush cleaner recommended on the label.
Choose a cleaner that matches the paint: water for latex or acrylic, and mineral spirits for oil paint.
The wrong liquid can swell, dry out, or weaken bristles, so check the label before you pour anything on the brush.
Work in a room with good airflow and follow the cleaner’s directions.
For latex or acrylic, rinse nylon or polyester bristles in warm water. Then work a small amount of mild soap into the bristles with your fingers.
Wipe off the excess paint with a rag first. Then rinse or clean the brush from the ferrule toward the tip.
Never mash the brush against the sink. Pressing and scrubbing can bend the bristles and weaken the glue that holds them.
Separate clumps with your fingers or a comb with wide teeth. Start at the tips and work slowly toward the ferrule.
Tugging pulls out bristles, so keep the motion gentle.
Take your time with the comb, since a single hard pull can leave a bald patch.
Rinse until the water runs clear. Blot the brush with a towel, then reshape the bristles with your fingers.
Do not soak the handle. Water can loosen the glue that binds the ferrule to the handle.
Lay the brush flat on a towel or drop cloth with the bristles over the edge.
Wrap the bristles in paper or plastic wrap to hold their shape while they dry.
Let the brush dry completely before you store it or use it again.
Patience pays off here, and gentle cleaning keeps your brushes working for years.
Store Paint Brushes to Protect Their Shape
Store paint brushes clean and completely dry, with the bristles protected from pressure. Keep each brush in its original cover, or slide on a brush sleeve to hold the tips in place.
A sleeve keeps the tips aligned, and aligned tips give you a crisp edge when you cut in along painter’s tape or a ceiling line. Tips that spread out make it harder to keep a wet edge and can leave lap marks on the wall.
After washing, I dry each brush upright until the bristles are fully dry at the base, where moisture hides the longest.
Then I store it flat or hang it by the handle, and I never rest weight on the tips.
Keep sleeves off damp bristles, because trapped moisture can loosen the metal band that holds them. Hang brushes from a rack, or stand them in a jar with the handles up.
Keep brushes away from heaters and sunny windowsills, since heat can warp wooden handles. Group brushes by size so your trim brush is easy to find.
Keep brushes used for stain and varnish separate from those used for latex primer and topcoat. Leftover residue from one finish can spoil the next.
Before you store a brush, reshape the tips gently with your fingers. This small step keeps the bristles ready for the next job.
A sleeve costs under $5, so it’s cheap insurance for a good brush. Protecting the tip now saves you from a rough start on your next paint job.
Frequently Asked Questions
How Should I Prepare a New Paintbrush Before Its First Use?
To prepare a new paintbrush before its first use, remove the loose bristles and condition the fibers in water or the correct thinner. Start by gently pulling and combing the bristles so loose hairs come out.
Soak the brush for about 5 minutes in clean water for latex or acrylic paints, or in mineral spirits for oil-based paints. Wipe the ferrule and tip with a lint-free cloth, then reshape the bristles.
Shake out the excess and let the brush dry flat or hang it with the bristles down. Test your strokes on scrap cardboard before touching your project, since this seasoning step helps the brush hold paint evenly and prevents streaks.
Can I Use the Same Brush for Primer and Topcoat?
Yes, you can use the same brush for primer and topcoat, as long as you clean it thoroughly between coats and the formulas are compatible. Latex primer and latex topcoat both clean up with warm soapy water, so rinse until the water runs clear.
Mineral spirits are needed for oil-based primers, and leftover residue can soften the bristles or leave the topcoat patchy. Use separate brushes when switching between oil and water-based products to avoid poor adhesion.
Natural bristles suit oil-based coats, while synthetic bristles work best with latex. Let the brush dry for about 30 minutes after a water rinse before reusing it.
When Is a Roller More Suitable Than a Paintbrush?
A roller is more suitable than a paintbrush when you need to cover large, flat surfaces quickly and want a smooth finish with few visible strokes. Walls, ceilings, and wide hallways are where a roller saves hours compared with working a brush across the same area.
For best results, use a 3/8-inch nap roller on smooth drywall and a 1/2-inch nap on lightly textured surfaces. Load the roller evenly, then apply the paint in a W pattern and finish with light, parallel strokes from one direction.
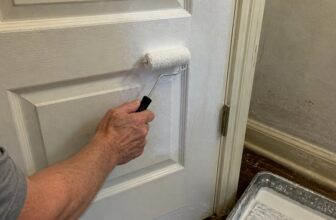
Let each latex coat dry for about two hours before recoating. I still switch to a brush for edges, corners, trim, and tight spots, since a roller cannot reach those areas cleanly.
How Can I Keep Paint From Drying on a Brush During Short Breaks?
To keep paint from drying on a brush during short breaks, wrap the bristles tightly in plastic wrap so air cannot reach the paint. Shake off the excess first, then wrap the ferrule and bristles together, pressing the film snugly without crushing the tip.
Secure the end with a rubber band, and avoid soaking the brush, since water can swell the handle and loosen the ferrule. Latex paint wrapped this way usually stays workable for two to four hours, while oil-based alkyds can last a full day in a sealed zip-top bag.
Before returning to the job, check the bristles and rinse out any thickened paint.
Can Paintbrushes Be Used to Apply Wood Stain or Deck Sealer?
Yes, paintbrushes can be used to apply wood stain or deck sealer, and they often give the most even results on rough or textured boards. Choose a brush with synthetic bristles for water-based products and natural bristles for oil-based stains, and check the label to confirm which type suits your product.
Work in sections about three feet wide and brush along the grain, keeping a wet edge so lap marks do not show. Apply thin coats rather than one heavy coat, since excess product pools in the grain and stays tacky. Most penetrating stains need 24 to 48 hours to dry before a second coat, but follow the manufacturer’s directions for your conditions.
Rounding Up
High quality brushes for painting come down to matching bristles to your paint, sizing them to the job, and caring for them after every session.
Check the ferrule, handle, and bristle tips before you pay.
Write down the paints you use most, then match synthetic brushes to latex and natural bristles to oil. Test each brush by loading it lightly and watching how cleanly it releases paint onto a scrap board.
Clean it thoroughly, then store it flat or hanging. A brush with this care lasts through many projects, while a neglected one becomes an expensive stick.
Next, read about choosing paint rollers.
References
- https://www.consumerreports.org/painting/how-to-pick-a-paintbrush/
- https://images.sherwin-williams.com/content_images/sw-pdf-brush-roller-guide-en-ca.pdf
- https://www.benjaminmoore.com/en-us/interior-exterior-paints-stains/how-to-advice/painting-101/choosing-the-best-paint-brush
- https://www.sherwin-williams.com/painting-contractors/products/resources/pro-tips/sw-article-pro-brushesrollers