How to Apply Paint Pads: Step-by-Step Guide
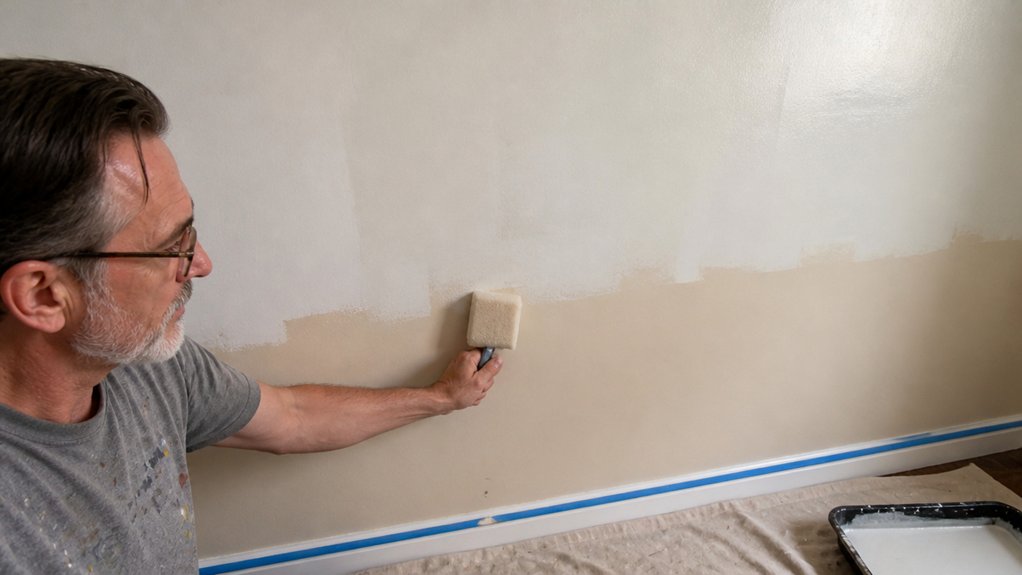
Applying paint pads well is the fastest way to get a smooth, professional finish without hauling out a sprayer or wrestling with roller splatter.
If you’ve ever fought with drips, lap marks, or visible strokes, the fix is usually in your loading technique and keeping a wet edge.
This guide breaks down the exact hand positioning and stroke pattern to eliminate those flaws.
You’ll learn the simple reloading rhythm that meters paint evenly and prevents overloading.
By the end, you’ll handle any sheen or primer coat with confidence, from bare drywall to repainting trim.
Let’s get your pad loaded and your first smooth pass in motion.
Quick Answer
- Load pad in shallow tray, roll across grid to meter even paint.
- Keep pad flat at 0° against wall; tilt causes streaks and patchy coverage.
- Reload every 3–4 strokes or per 18 inches; maintain wet edge.
- Use built-in guide wheels pressed firmly against trim for clean lines.
- Dab fresh mistakes with damp rag; sand dried spots with 220-grit.
Load the Paint Pad Without Drips or Patchy Coverage
The paint pad tray does the hard work for you. Most beginners skip its built-in ribbed roller, but that part meters the paint evenly. Drag the pad across the roller once or twice, and the tray handles the excess.
Keep the applicator flat against the wall. Tilting it pushes paint into a ridge, leaving streaks that take forever to fix. Let the tray control the paint flow, not your wrist.
Reload every three or four strokes, or about every 18 inches of wall. This keeps coverage even without soaking the fibers. Overload the pad and you get drips; underload it and you scrub the surface dry.
Aim for that middle ground, where the pad holds just enough paint to lay down a smooth wet edge. If you skip reloads, you’ll see lap marks where each pass dries before the next.
Work in sections you can finish while the paint stays wet. That way, the satin or flat finish dries uniformly, with no patchy sheen. Use painter’s tape on trim and a drop cloth below, so you can focus on the stroke.
The right loading keeps your topcoat smooth, whether it’s a low-VOC latex or an alkyd enamel. You avoid brush strokes and sanding later. Just reload often, keep the pad flat, and the tray does the measuring. High-density polyester microfiber ensures this smooth finish even on large wall and ceiling surfaces.
Gather Your Supplies: Pad, Tray, and Drop Cloths
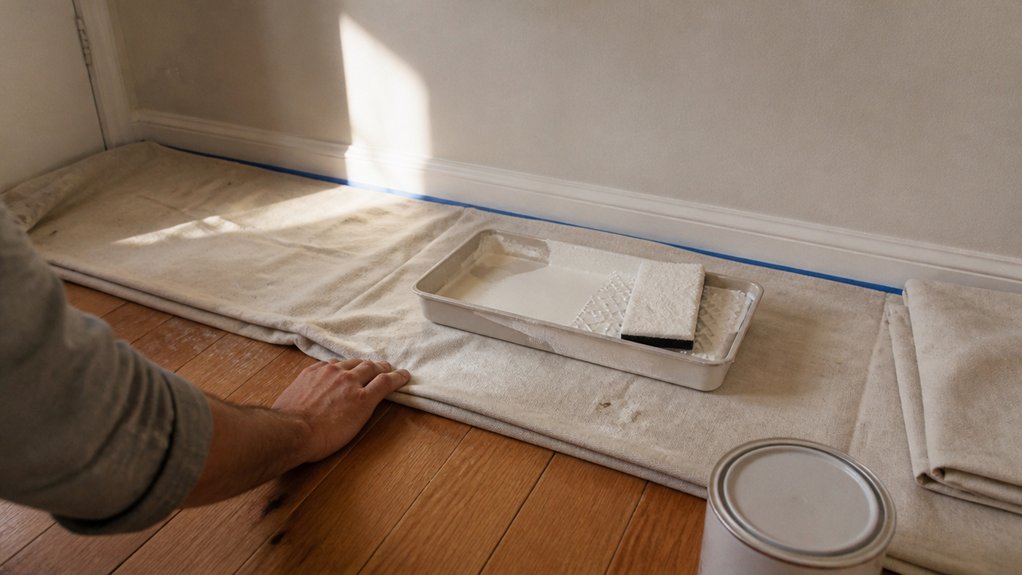
Before you crack that can, you’ll need three things: a paint pad, its special tray, and drop cloths. Skipping any one turns a quick job into a cleanup marathon.
I grab the cheap canvas drop cloths from the hardware store, about $10 for a 9×12, and lay them over floors and furniture. Tape-on plastic just slides around and drives me crazy, so canvas is worth the few extra bucks.
Keep windows open and wear old clothes, because pad painting is low-spatter but not zero-spatter. That’s a lesson I’ve learned the sticky way.
A paint pad holds more paint than a brush and lays down a flat, even coat without brush strokes, which helps you keep a wet edge as you work. The special tray has a shallow well and a rolling grid that loads the pad evenly, so you don’t get drips or lap marks.
For a clean finish, you still want to work in sections and overlap each pass while the paint is still wet. If you pause too long, you’ll see a dull sheen shift where the new coat meets the old, especially with satin or matte finishes.
Use a primer first if you’re covering a darker color or bare wood, then follow with a topcoat. Check the drying time versus cure time on the can, because you can recoat after a few hours but shouldn’t scrub or set furniture on the wall for up to a week.
Low-VOC paints cut the smell, but they still need airflow, so open a window or run a fan. And keep a damp rag handy for drips on trim or baseboards.
Once you’re done, rinse the pad in warm soapy water until it runs clear, then let it dry flat. A clean pad lasts for many jobs, and a dirty one leaves streaks that ruin your topcoat.
For maximum coverage on large rooms, consider a 9 x 12 ft canvas cloth that absorbs drips but isn’t waterproof, so you’ll still want to wipe up wet spills promptly.
Protective Floor Coverings
When you press a wet paint roller against a wall, some paint will end up on your floor. That’s unavoidable, so plan for it now, not after the damage is done.
Skipping floor protection means scraping dried latex off hardwood for a whole weekend, and that is a miserable way to spend your time.
Use canvas drop cloths for open areas because they are heavy, absorb drips, and stay put better than plastic. Plastic sheeting works in corners because you can tape it fast and seal it tight, but it slides underfoot in big rooms.
For doorways, lay down painter’s tape with an old cloth to block foot traffic while you work. Furniture gets draped with old sheets, which are free, flexible, and easy to pull off when you’re done.
Along trim edges, a paint shield gives you a precise guard so you don’t have to rely on a steady hand.
Tape down the edges of any plastic sheeting to keep yourself from tripping, especially near ladders.
I once bought the cheap drop cloths to save a few bucks, and they tore right in the middle of the room, leaving paint splatters everywhere.
Spend the extra ten dollars on a decent canvas cloth, and your floors will thank you later.
For maximum leak protection in spill-prone zones, consider a two-layer design that combines absorbent canvas with a leak-resistant backing.
Masking Off Surfaces
Masking off surfaces beats scraping dried paint out of carpet pile later, so get that decided before you open the paint can. I like shortcuts, but skipping tape is not one of them.
Grab a roll of 1.5-inch painter’s tape, the blue or yellow kind, not the cheap stuff that tears like wet newspaper. Use delicate-surface tape for fresh drywall and standard tape for trim.
Press the tape down firmly and run a putty knife along the edge to seal it, which prevents paint bleed. Spending five minutes on edges saves you forty minutes with a razor blade and a lot of swearing.
You will also want drop cloths to catch drips, but the tape does the real work. It costs about two bucks a roll, and your baseboards will stay clean.
Tape everything that is not getting painted, press those edges flat, and you are set. For crisp lines on a topcoat, let the primer dry fully before you tape over it.
Keep a wet edge while painting so you avoid lap marks and brush strokes that dry unevenly. If you use a satin or semi-gloss sheen, tape matters even more because the light will show every flaw.
Low-VOC paints still need the same masking care, so do not skip it. After the paint dries to the touch, peel the tape back at a sharp angle to avoid lifting the fresh coat.
Stain and varnish work also benefits from this habit, especially around wood trim. Polyurethane drips are harder to clean than paint, so tape off any surface you do not want finished.
For tackling wavy chair rails or bumpy plaster, choose a high-crepe paper tape that flexes around the contours without wrinkling.
Ventilation and Workwear
Ventilation decides whether a paint job feels like work or like punishment. Open every window you can and set a box fan in the frame, blowing outward, to pull fumes away from your face.
Moving air keeps you sharp, while stagnant air brings on a headache fast. I once painted a closet with the door shut and spent the evening feeling like I had huffed a marker, so learn from that mistake.
For workwear, wear long sleeves and pants you do not care about. A roller splatters less than a brush, but it still flings paint where you least expect it.
When you use oil-based paint, put on a cheap respirator with organic vapor cartridges; that is real breathing protection, a solid step above a paper mask. For latex paint, a basic two dollar dust mask is enough to keep you comfortable.
Tie back long hair before you start, because paint in your hair is a miserable cleanup job. A drop cloth under your feet and painter’s tape on the trim will save you more time than any shortcut.
If you work with a primer or topcoat, check the label for VOC levels; lower VOC means less smell and less fog. Wet edge matters too, especially with satin or eggshell sheen, so keep your strokes overlapping before the paint starts to set.
Drying time is not cure time, so wait the full window before you sand between coats. Sanding with 220 grit knocks down dust nibs and gives the next coat something to bite into, which prevents brush strokes from showing through. For maximum safety, ensure your respirator’s cartridge matches the specific hazards, since bayonet and threaded mounts are not interchangeable.
Use the Up-and-Down Stroke for a Smooth Finish
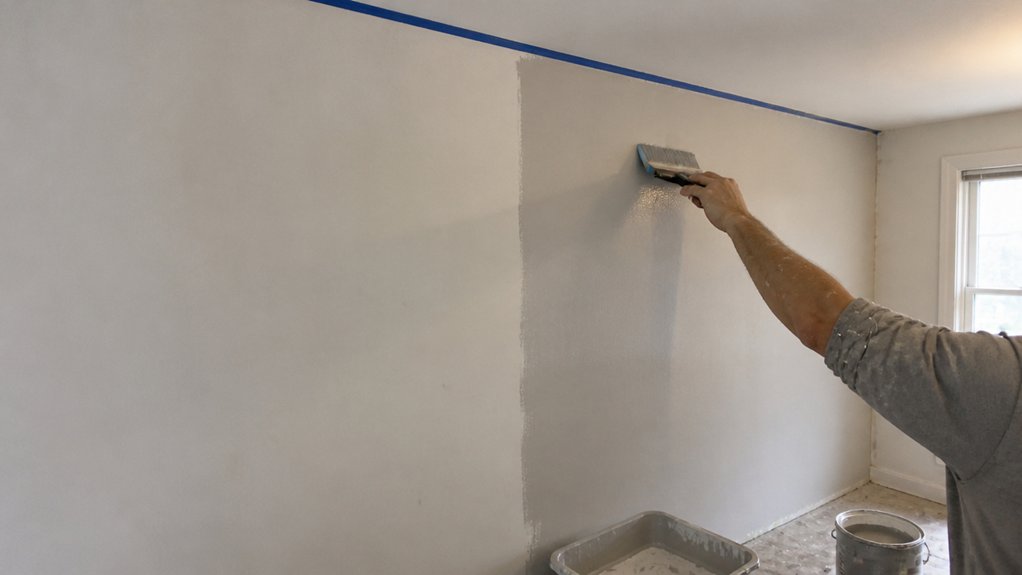
Keep the pad flat against the wall, or you’ll fight the finish instead of laying down a smooth coat. Work in strips about four times the pad’s width, and blend each pass into the previous one while it’s still wet.
That wet edge is your best friend, because it stops lap marks from showing up once the topcoat cures. Think of it as polishing the paint, not scrubbing a dirty pan, so let your rhythm do the work.
Use a steady up-and-down stroke, and overlap each strip by a few inches to keep the sheen even across the whole surface. You don’t need heavy pressure, just a consistent touch, and the paint will level out on its own.
For a satin or gloss finish, this matters even more, since any unevenness shows up in the light. Check your pad for fresh paint often, and keep a wet edge from start to finish.
If you’re working with a primer or a low-VOC paint, the drying time is shorter, so move a bit faster between passes. Give the final coat a full cure time before you touch it, and you’ll get that smooth, professional result. Choose a pad with double-stitched edges to keep the core away from the finish and prevent scratching as you work.
Proper Pad Positioning
The up-and-down stroke is everything when you’re using a paint pad, and the pad must sit flat against the wall for a clean coat. If you tilt it even a few degrees, you’ll leave streaks and uneven pressure that ruin the finish.
Keep your wrist loose but steady, like you’re guiding a handshake, not chopping wood. A locked wrist makes your arm fatigue fast, and your lines will wobble.
Here’s how pad angle changes the result:
| Pad Angle | Result |
|---|---|
| Flat (0°) | Smooth, even coat with no streaks |
| Tilted (10°) | Patchy spots and uneven paint thickness |
| Wrist locked | Tired arm, wobbly edges, skipped sections |
Hold the pad too tight and it will skip like a scared cat, leaving bare spots you’ll have to fix later. Relax your grip, let the pad ride the surface, and rely on the up-and-down rhythm to carry the load.
Your arm is only the guide, not the engine, so keep the motion slow and steady like you’re painting a satin topcoat over a well-primed wall. For best results, keep a wet edge as you go, lap marks disappear when you don’t let sections dry mid-stroke, and use a drop cloth to catch drips. Keeping a wet edge also prevents the telltale wave pattern that can show up along baseboards and trim.
If you need a second pass, wait for the drying time before you add another coat, and sand lightly with 220 grit between coats for a smoother finish. That flat pad angle is your friend, and once you feel it, you’ll stop thinking about the tool and just paint.
Maintaining Wet Edge
A wet edge is the line of wet paint you keep moving across the wall so each new stroke blends into the last. If you let it dry, you will see lap marks, and those are nearly impossible to fix without sanding and repainting.
I load the pad, press it flat against the surface, and stroke up, then down. I overlap each pass by a few inches, keeping that wet edge alive as I go.
Fast drying paint will betray you, especially in dry climates, so I never stop for a coffee break mid-strip. I work in four-foot sections, reloading the pad often to keep the film wet.
Smooth, steady moves win here, not speed. Let the pad’s up and down rhythm blend every layer into a single, seamless topcoat.
Think of it like waxing a car: patient, repetitive, and a little ridiculous, but the result looks professional. A dry edge means uneven color and a patchy finish, so guard that wet edge like it’s the last bit of primer you own.
If you break it, you will spend tomorrow sanding down your mistake and touching up with a fresh coat, so do it right the first time.
Since temperature and humidity impact drying time and leveling, monitoring these conditions helps prevent the film from setting up before you finish your four-foot section.
Cut Clean Lines With Paint Pad Guides
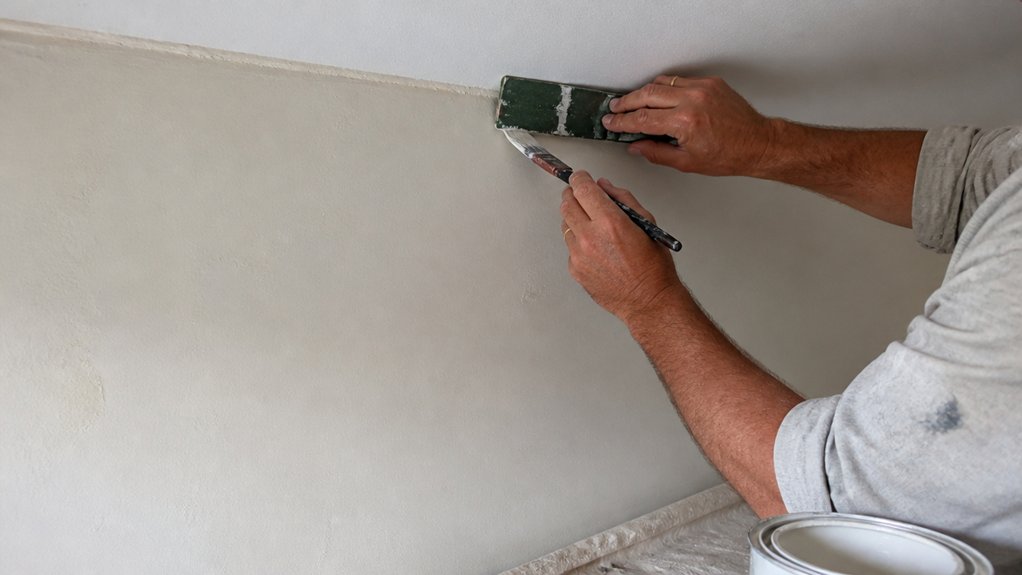
Most paint pads include a built in guide, either small wheels or a flat plastic tab. That guide is the key to cutting clean lines without any painter’s tape.
My first attempt looked like a kindergartner’s art project, but once I figured out guide wheel alignment, everything changed. The wheeled pads glide along trim or ceiling edges like a tiny cart, while the tab style rests flat and is simpler but less forgiving.
Press the guide firmly against the edge you’re cutting, keep the pad flat against the wall, and pull in one steady stroke. Don’t rush, because a wobble will push paint past the line.
Press the guide firm, keep the pad flat, and pull steady—wobble, and you’ll paint past the line.
For long straight runs on baseboards or crown molding, choose a wheeled pad for precision. The wheels hold a consistent gap, so you get a sharp edge without needing a steady hand.
Before you start, make sure the surface is clean and dry, and use a low VOC primer if you’re covering bare wood or a previous gloss. A satin or eggshell topcoat will show fewer lap marks than a high gloss, so work in wet edge sections to avoid overlaps.
If you’re painting over stained wood, let the stain cure fully, then sand with 220 grit for smoothness. The pad guide works best on flat surfaces, so skip it for textured walls and use a brush there. For high ceilings, consider pairing your pad with an extension pole to reduce shoulder strain and reach distant areas safely.
Wipe the pad guide with a damp cloth between strokes to keep paint from caking on the wheels. Once you’re done, clean the pad with water or the solvent that matches your paint type.
With a drop cloth down and a steady pull, you’ll get clean lines in half the time it takes to tape. Your baseboards will look sharp, and you can save the tape for tricky corners or curves.
Fix Mistakes Fast: Wipe and Reload
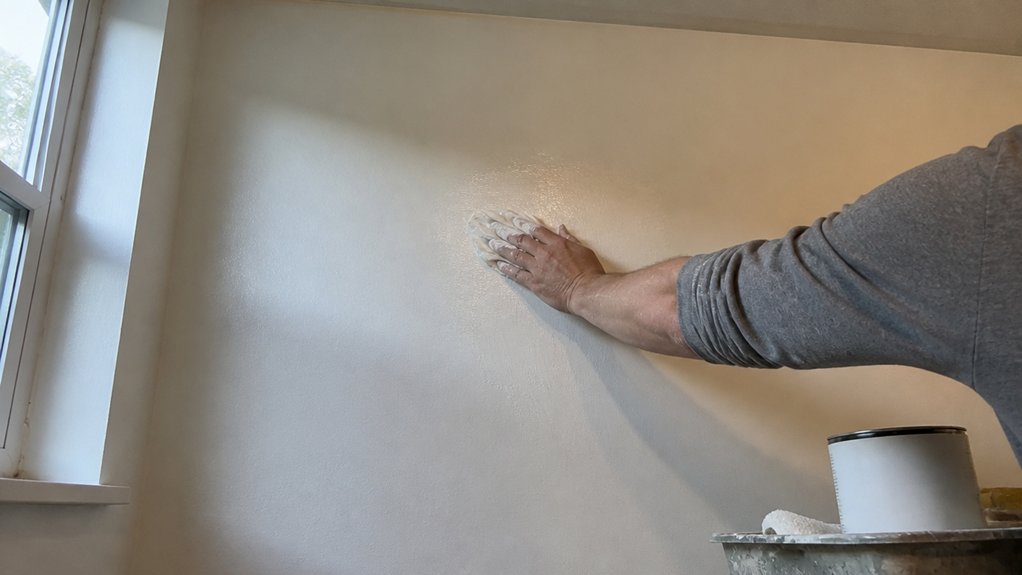
Every painter hits that moment when the pad slips and paint crosses the line. Don’t panic, because your wipe technique matters more than speed.
Grab a damp rag, not soaking wet, and dab the fresh paint instead of scrubbing it. Scrubbing smears pigment into the drywall, and then you’ll need primer to fix that mistake.
For latex paint, you have about thirty seconds to wipe cleanly before it starts setting. Oil-based paint gives you more time, maybe two minutes, before it tacks up and becomes harder to lift.
Watch your reload timing closely, because an overloaded pad drips and wanders on its own. Load less paint and reload more often to keep a wet edge and avoid lap marks. For tougher dried spots, super-fine steel wool can gently lift residue without gouging the surface.
Keep the pad flat against the wall and ease off pressure near trim and corners. One stray streak won’t ruin the room, so accept it and move on.
Let the spot dry completely, then sand lightly with 220-grit sandpaper to knock down any raised edge. Wipe off the dust with a clean cloth, then repaint that area to match the topcoat sheen.
Wash and Store Your Paint Pad for Years
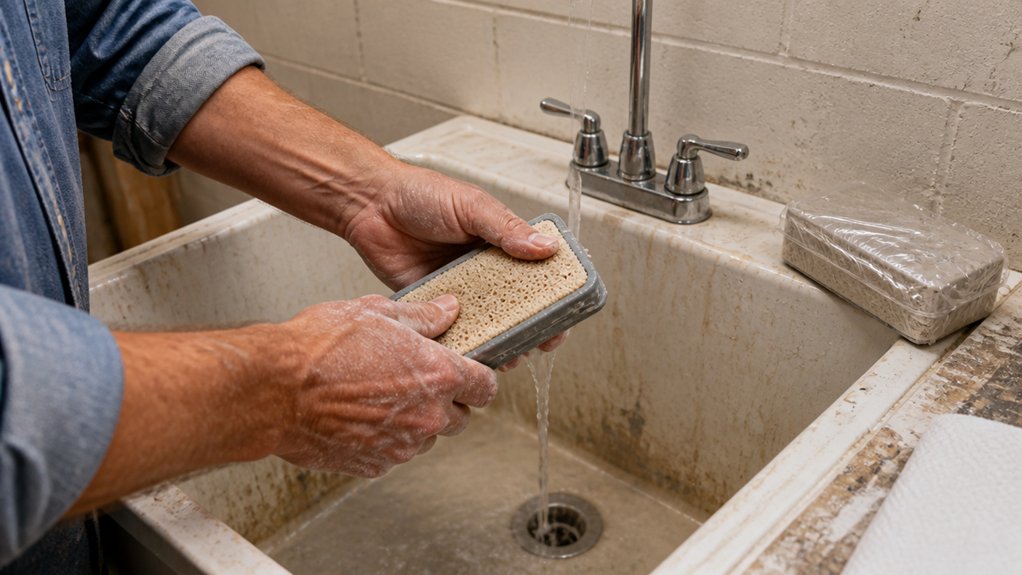
A paint pad costs less than a gallon of primer, so treat it like a tool you want to keep around. Tossing it in a corner to dry leaves crusty paint in the fibers and shortens its life.
Rinse the pad under warm running water until the stream runs clear. Squeeze out the excess gently, the way you would handle a wet kitten.
Store the pad flat or hang it with the fibers facing down. Never set it on its side, where water settles and the fibers flatten.
My rinse and repeat ritual:
- Wash in warm, soapy water within 20 minutes of finishing
- Work soap into the fibers with your fingers, not a brush
- Rinse until no color bleeds, then shake dry
- Wrap in plastic wrap or a zip bag to keep fibers soft
- Hang it by the handle for airflow, away from direct sunlight
These storage tips keep the fibers soft for the next coat of satin or matte paint. A pad that lasts years saves you money on replacements.
Frequently Asked Questions
Can I Use Paint Pads on Textured Walls?
No, you should not use paint pads on textured walls, as the pad’s shallow nap won’t reach into the deep texture, leaving patchy spots. Instead, choose a roller with a thicker nap, ideally 3/4 inch or 1 inch, to fully coat the peaks and valleys of the surface.
For heavily textured finishes like popcorn or orange peel, a 1 inch nap is your best bet for even coverage. Before you start, always test the roller on a small section to confirm it loads and releases paint evenly without dragging.
Thick nap rollers hold more paint, so you’ll need to work in smaller sections to avoid drips and lap marks. A related term is stipple effect, which refers to the texture pattern you’re trying to match. If the wall has very deep texture, applying two coats with a 3/4 inch nap will give you a durable, uniform finish.
How Often Should I Reload the Paint Pad?
You should reload the paint pad about every four feet of coverage, which mirrors a roller’s pace and prevents patchy overlap. I keep it loaded often because a dry pad drags and leaves thin, uneven streaks that force you to rework the surface.
Wait until the pad feels light, not until it’s fully dry. A good habit is to dip after every two swaths, about the width of a standard door panel, to maintain a wet edge.
For a flawless finish, reload before the previous pass loses its sheen, roughly 30 to 60 seconds in normal room conditions. This keeps the coating uniform, and if you’re using a water-based enamel, avoid pressing hard; let the pad’s nap carry the paint. Finally, never skimp on loading for corners, as a dry tip there will show chalky marks after curing.
What Paint Is Best for Paint Pad Applicators?
Latex and acrylic paints are the best choice for paint pad applicators because their flow characteristics suit the pad’s fiber bed without excessive dragging.
Flat or eggshell sheens are ideal for smooth walls and trim, as they minimize roller stipple and pad marks.
For a flawless result, apply two thin coats rather than one heavy one, waiting about two hours between coats at 70°F.
If you need a slightly more durable finish, a satin latex works well, but avoid high-gloss formulas, which can leave streaks with a pad.
Before starting, sand any patched areas with 220-grit paper to ensure the pad glides evenly and picks up uniformly.
This preparation, paired with consistent pressure and overlapping strokes, delivers the streak-free coat you want.
Do Paint Pads Work for Exterior House Painting?
Yes, paint pads do work for exterior house painting, but only on the right surfaces and with thorough prep. On smooth siding, like well-prepped cedar or hardboard, a pad can lay down a thin, even coat faster than a brush, though it won’t match a roller’s texture.
For rough surfaces like stucco or bare brick, skip the pad entirely. You will burn through the felt in minutes, and the coverage will be patchy, so use a thick-nap roller with a 3/4 inch or 1 inch sleeve instead.
Before any pad work, wash the wall and sand glossy areas with 120 grit to help adhesion. Also, keep a wet edge and work in small sections, as pads dry out quickly, leaving lap marks you’ll regret later.
Can I Use a Paint Pad for Staining Wood?
Yes, you can use a paint pad for staining wood, and it is a solid choice for flat surfaces like tabletops and cabinet doors. The key is to prepare the surface properly, so sand to 120 or 150 grit and wipe away all dust with a tack cloth before starting.
Load the pad lightly by dipping it into the stain and pressing out excess on the tray’s ribbed area, then apply with smooth, overlapping strokes that follow the grain. This technique prevents drips and gives you an even, minimal-spatter finish, which is a real advantage over brushes.
For best results, work in sections and keep a wet edge to avoid lap marks, then wipe off the excess after five minutes with a clean rag. If you prefer a deeper tone, apply a second coat after eight hours, but always test on scrap wood first. A pad applicator also works well with gel stains, which go on thicker and need less pressure.
Rounding Up
Apply paint pads by loading them lightly and stroking straight, which trades roller splatter for a smoother, quieter coat.
Clean up right after use, before the paint sets like concrete, to keep the pad reusable and your walls flawless.
Check your pad’s load before each pass, pressing it lightly into the tray to avoid drips or heavy edges.
Test one straight stroke on a spare board to confirm even coverage, then compare it to your roller’s texture for a final choice.
Write down your cleanup time as a habit, aiming for under ten minutes per session to stay ahead of hardening paint.
The article offers no statistic, so none is repeated here.
Read next about choosing the right pad thickness for different wall textures.