How to Apply Milk Paints: Step-by-Step Guide
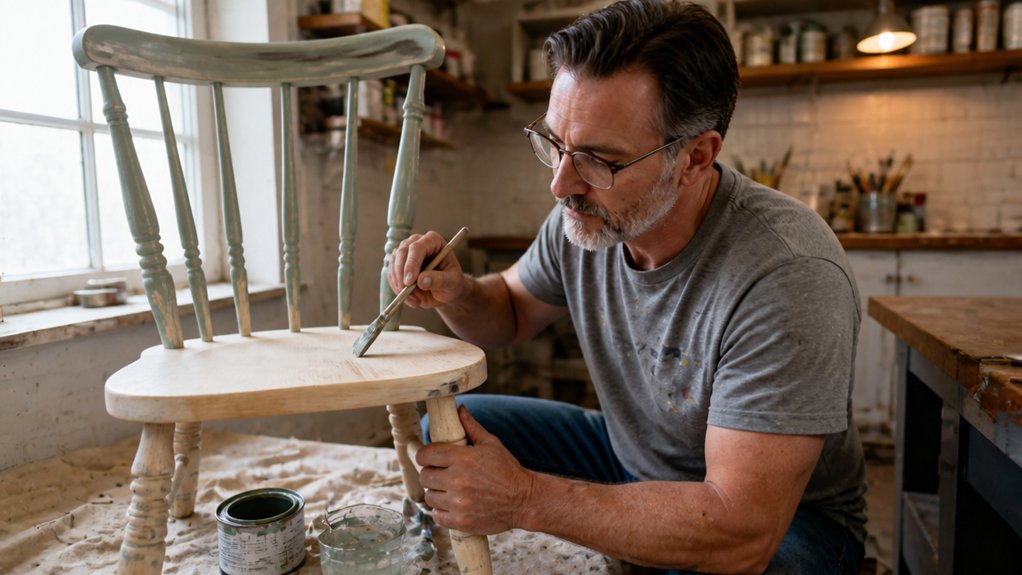
Getting milk paint look smooth is more about patience than perfection. Gritty, patchy results almost always come from skipping the basics like mixing ratios and surface prep.
You want that rich, matte finish without the frustration, right? This guide walks through mixing, brushing, and curing so your first coat looks intentional, not accidental.
The right prep and timing make all the difference, and we cover both in detail. Let us break down the exact steps you need to know, from the first stir to the final topcoat.
Quick Answer
- Mix milk paint powder with equal volume room-temperature water, rest 20 minutes, then stir again.
- Sand bare wood with 120-grit, then 150-grit; never exceed 150-grit for proper absorption.
- Prime previously painted surfaces with shellac-based primer to block stains and ensure adhesion.
- Apply two thin coats with a high-quality synthetic brush, maintaining a wet edge throughout.
- On humid days, add extra water to paint; on dry days, thicken mixture to prevent running.
Mixing Milk Paint: Water Ratios, Rest Time, and Thinning
Mixing milk paint is a forgiving process, not a chemistry experiment. Skip the rest step, though, and you’ll be brushing on a gritty, rough mess.
I whisk the powder into cool water at a 1:1 ratio by volume, then walk away for 20 minutes. That rest lets the casein fully dissolve, so you avoid rough patches and uneven grain raising later.
Temperature matters more than you’d think. Cold water slows dissolving, so I always use room-temperature water to keep the mix moving smoothly.
On humid days, I add a splash of extra water to keep the brush glide wet and avoid lap marks. On dry days, I might thicken it slightly so it doesn’t run.
Don’t stockpile mixed paint, it only lasts a few days in the fridge at best. Mix fresh each time, and you won’t fight curdled clumps or a sour smell.
For a smooth topcoat, I stir, rest, then stir again before dipping my brush. That second stir breaks up any settled powder and gives you a consistent satin or matte finish.
If you’re thinning for a first coat, add water a tablespoon at a time until it flows like heavy cream. Too thin, and you’ll get brush strokes and see-through coverage; too thick, and it dries with a rough texture.
Apply two thin coats with a synthetic brush, and sand lightly with 220 grit between coats to knock down any raised grain.
Always lay down a drop cloth, because milk paint spatters easily and dries fast. Use painter’s tape on edges, and work in small sections to keep a wet edge and avoid uneven sheen.
For a durable finish, let the paint cure for at least seven days before adding a clear varnish or polyurethane. Drying time is only a few hours, but cure time is what makes the film tough enough for daily wear. Unsealed milk paint does not survive daily wear, so the sealer is a mandatory step for longevity.
How to Prepare Raw Wood for Milk Paint
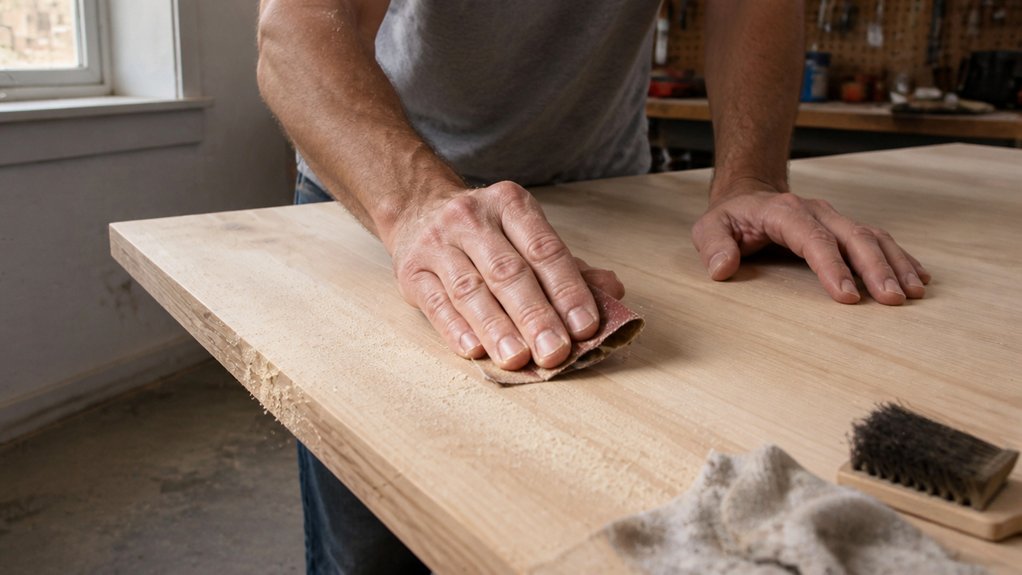
For raw lumber, start sanding with 120-grit to knock down the roughness, then switch to 150-grit to smooth the surface. Stop at 150; anything finer, like 220-grit, seals the wood grain so tightly that milk paint can’t soak in and bond properly.
If your piece already has a sealed finish, skip the sandpaper and scuff it with a Scotch-Brite pad and a 50:50 mix of denatured alcohol and water. After scuffing, vacuum the dust and wipe with a damp rag, then let the surface dry completely before applying any primer or paint. Starting with lower grits like 120-grit removes material quickly to level ridges, while higher grits remove material more lightly to reduce scratches.
Remember that milk paint dries fast, so work in small sections to keep a wet edge and avoid lap marks. Once your paint is dry, protect it with a topcoat like satin polyurethane or matte varnish, and allow the full drying time before handling.
For brush strokes, use a high-quality synthetic brush and lay the paint on evenly without overworking it. If you’re worried about drips or spills, lay down a drop cloth and use painter’s tape on edges you want to keep clean.
Low-VOC paints and finishes are easier on your lungs and still give a durable finish. Sanding dust and drier conditions can affect your coat, so check the humidity before you start.
Sanding Grit Sequence
For raw wood, the sanding sequence sets up how well your milk paint will bond and look. Start with 120-grit, then follow with a 150-grit pass, and don’t go any finer than that.
Sanding beyond 150-grit seals the wood grain too much, so the paint can’t absorb evenly and you end up with patchy color. I skipped this rule once early on, and the blotchy result taught me the hard way.
That second 150-grit pass also handles grain raising, which happens when moisture makes the wood fibers stand up rough. You want to knock those fibers down flat before any primer or paint touches the surface. Anti-clog coatings on sandpaper help prevent buildup when working over paint or filler, keeping your abrasives effective longer.
Dust contamination is the next thing to manage, because leftover debris will show up as bumps under your finish. Vacuum the whole piece thoroughly, wipe it down with a damp rag, and let the wood dry completely before you proceed.
Skip steel wool for this job, since tiny rust particles can get stuck in the grain and ruin a smooth topcoat. Those specks are a nightmare to remove once they’re embedded.
A clean surface at 120 then 150 grit gives your milk paint a proper tooth to grip. That preparation is your foundation for a smooth, even coat every time.
Sealed Surface Prep
If the wood already has a finish, like old varnish, polyurethane, or paint, you can’t just brush milk paint over it. The goal here is to roughen the existing finish so the new paint can grip, not to strip it down to bare wood.
I grab a maroon Scotch-Brite pad and scuff the entire surface lightly. This dulls the gloss and gives the milk paint a mechanical bite, which is all you need for good adhesion.
After scuffing, wipe everything down with denatured alcohol. It evaporates fast, leaves no residue, and cuts through grease or grime without swelling the wood grain like water would.
Skip water entirely. It raises the grain and creates a rough texture that shows up under your topcoat, and that leads to a patchy finish you don’t want.
You’re not sanding to bare wood, so don’t reach for heavy grit sandpaper. A light hand with the pad is enough to take the shine off and prep the surface for painting.
This whole prep takes about ten minutes. It saves you from peeling paint later, and it works for both varnish and polyurethane surfaces.
Once the surface is dull and clean, you can move straight to painting. Just check that the denatured alcohol has fully flashed off before you lay down the first coat of milk paint.
Use a low-VOC primer if the old finish is glossy or dark, even after scuffing, since a stain-blocking primer can seal stubborn tannins that might otherwise bleed through. That adds a uniform base and helps your topcoat stick more reliably.
When you do paint, keep a wet edge as you go to avoid lap marks. Work in smooth sections, and brush strokes will level out if you don’t overwork the paint.
A satin or matte topcoat works well over milk paint, but you can choose any sheen you like. Let the first coat dry fully before adding a second.
Final Dust Removal
Dusting is where most finishes go wrong, so treat it as a step worth doing right. After sanding, I vacuum the surface with a brush attachment, then wipe it twice with a rag dampened in water. You’re not scrubbing; you’re lifting grit that would show up as bumps under milk paint. Let the wood air out for ten minutes so that moisture fully evaporates, or the paint won’t bite into the grain. This is why microfiber blends with their sub-0.5 micrometer yarn diameter prevent lint and pull particles away better than cotton, which absorbs less and leaves residue.
Static charge is your enemy here, since synthetic cloths just push dust around. I use a microfiber pad, which pulls particles off without creating clingy buildup. Skip tack cloths with oil in them, because they leave a residue that blocks adhesion. A final pass with compressed air in the corners seals the deal, and I check by rubbing my palm across the surface. If it feels slick, you’re ready for primer, stain, or a first coat of finish. Dust now, or curse later, but I’ve learned that a clean surface saves you from brush strokes and lap marks down the line.
Best Brushes, Rollers, and Spray Settings for Milk Paint
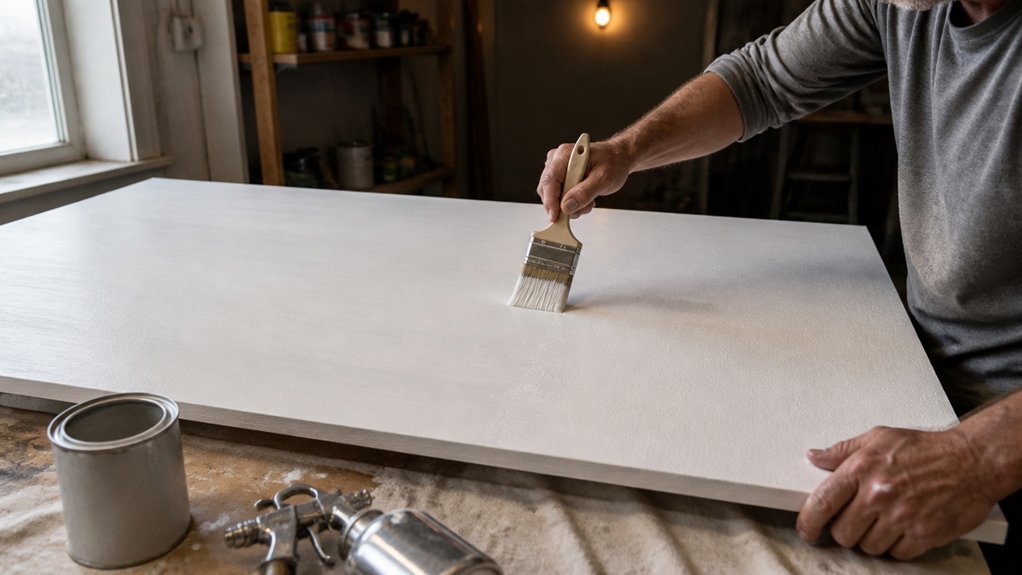
Let’s talk tools, because the right applicator makes or breaks a milk paint finish. You have three solid routes: brushes, rollers, or a spray gun, and each fits a different project.
For brushes, I reach for a high-quality synthetic bristle brush with a chiseled edge. It lays down a smooth, even coat and keeps brush strokes to a minimum, especially on flat surfaces like cabinets or furniture panels.
Use a 2 to 3 inch brush for most pieces, and a smaller angled brush for corners and trim. Keep a wet edge as you work, meaning overlap each stroke while the paint is still damp, so you avoid lap marks and uneven sheen.
Rollers work best on large, flat areas like table tops or dresser sides. Choose a 3/8 inch nap microfiber roller for a smooth finish, and avoid foam rollers because they can leave bubbles in milk paint.
Roll in one direction, then lightly tip off the surface with a dry roller to even out the texture. This helps you avoid blotchy patches and keeps the finish looking uniform.
For spray guns, I use an HVLP system with a 1.8 to 2.0 mm tip for milk paint. Set the fluid control to about 70 percent open, and adjust air pressure to around 25 to 30 PSI at the gun.
Spray in thin, even passes, holding the gun 6 to 8 inches from the surface. You want a wet coat that flows out, but not so heavy that it sags or runs.
Before you spray, always strain the paint through a mesh filter to catch lumps. Milk paint can clump, and a clogged tip ruins your day.
Regardless of the tool, prep matters more than the applicator. Sand bare wood to 120 grit, then to 220 grit for a smoother base, and wipe off all dust with a tack cloth.
Milk paint bonds well to raw wood, but on previously painted surfaces, use a primer first. A shellac-based primer blocks stains and gives you a stable base for the topcoat.
After the paint dries, which usually takes about 2 hours, you can apply a topcoat. A clear matte or satin varnish protects the finish, and you can use a water-based polyurethane for durability.
Remember that drying time is not the same as cure time. The paint feels dry quickly, but wait at least 24 hours before light use, and 72 hours before heavy handling.
Finally, protect your work area with a drop cloth and use painter’s tape on edges you want to keep clean. Milk paint is water-based and low in VOCs, but it still stains fabric and wood fast, so cover up.
Pick the tool that matches your project size and shape, and test on scrap wood first. That way, you dial in your brush pressure, roller nap, or spray settings before you touch the real piece.
For extended cutting-in sessions, choose a brush with an ergonomic handle design that reduces hand fatigue.
Brush Selection Tips
The paint itself rarely causes problems, so the applicator is where most finishes go wrong. For brushwork, choose synthetic bristles because they hold their shape in water-based milk paint, unlike natural ones.
You will pay between $12 and $18 for a quality 2.5-inch sash brush, and that cost is justified by the control it gives you. Foam brushes degrade quickly, shedding bristles after a single coat, so reserve them for tiny touch-ups instead of full surfaces.
Cheap rollers with stiff nap create a stipple texture you do not want on furniture. Instead, use a 3/8-inch microfiber roller, such as the Whizz brand, for smooth, even coverage on flat panels. A uniform nap density stops stippling and fills minor wall texture for a cleaner finish.
For edges and corners, use that synthetic angled brush to cut in cleanly against trim or tape. For wide areas, switch to the microfiber roller, and keep a wet edge to avoid lap marks between passes.
Before you start, lay down a drop cloth and apply painter’s tape along any hardware or adjacent surfaces. Sand between coats with 220 grit, and remember that drying time for milk paint is short, but full cure takes several days before you add a topcoat like polyurethane or varnish.
Spend the extra money on a decent brush and roller, because they prevent brush strokes and uneven sheen that you would otherwise have to sand out. Your prep work, including priming bare wood and choosing the right sheen for the room, matters just as much as the final coat.
Roller Application Guide
Most roller problems come from choosing the wrong nap or rushing the pace.
For milk paint, I use a 3/16-inch microfiber nap on flat surfaces, since anything thicker leaves an orange-peel texture you will not like.
Load the roller fully, then lay off with light, even passes without pressing hard.
Your roller technique matters more than the brush, so work in 3-foot sections and keep a wet edge to avoid lap marks.
| Surface | Roller Nap Size | Speed |
|---|---|---|
| Smooth cabinets | 3/16″ microfiber | Slow, steady |
| Textured walls | 3/8″ synthetic | Medium |
| Trim details | 1/4″ foam | Fast, light |
Do not aggressively back-roll over wet edges, because that is where streaks bite.
Instead, move steadily and let the paint level out before you add a topcoat, keeping in mind drying time versus full cure time.
Apply primer first on raw wood, then sand with 220 grit for a smooth base.
For trim, a satin or semi-gloss sheen resists grime better than matte, and a low-VOC finish keeps the room breathable.
Use painter’s tape to protect adjacent surfaces and lay a drop cloth before you start.
Match nap to surface, move steady, and you will get a flat, even coat without brush strokes or patchy sheen.
A polypropylene core resists bending and solvent damage, which helps maintain consistent roller contact on textured surfaces.
Spray Gun Settings
Milk paint sprays well once you respect how it behaves. The right gun settings are the difference between a smooth coat and a frustrating afternoon.
I use an HVLP gun with a 1.8mm to 2.0mm tip and a medium air cap. Thin the paint 10% with water before spraying. Thicker mixes will clog the tip mid-pass, and that ruins your wet edge.
Set conventional pressure around 30 psi, or 10 psi at the cap for HVLP. Milk paint dries fast, so overspray hangs in the air. Use a spray booth or good ventilation, and wear a respirator rated for VOCs. Match your gun’s CFM to your compressor’s actual output, since insufficient airflow causes a coarse finish.
Hold the gun 6 to 8 inches from the surface. Overlap each pass by 25% to avoid lap marks and thin patches. Too much pressure creates a dry, dusty finish, like sanding dust stuck in the film. Too little pressure leaves a pudding-like texture that sags.
Aim for a wet film thickness of 3 to 5 mils. Strain the paint through a medium-mesh filter before pouring it into the cup. A cheap gun from Harbor Freight will work, but expect spits and uneven fan patterns.
Buy a decent gun if you can, and practice on scrap first. Keep your arm moving at a steady speed, and let each pass overlap the last one. The finish should look even and glossy while wet, then dry to a matte or satin sheen depending on your topcoat.
Sand between coats with 220 grit to knock down any raised grain. Milk paint dries quickly, but the cure time is a few days before you can apply a varnish or polyurethane topcoat. Always wipe the surface clean with a tack cloth after sanding.
If you respect the thin mix and keep the gun moving, you will get a smooth coat every time. Dial in the settings, test on a board, and adjust pressure only in small steps.
How Many Coats of Milk Paint Do You Need for Full Hide?

You’ll need two to three coats of milk paint for full hide on most surfaces, but bright reds, greens, yellows, or stubborn whites can push you to three coats minimum. I’ve been there, brushing on coat after coat and wondering if I’d bought a ghost, and that’s just how pigments with low hiding power work.
Two coats cover most mid-tones and darker shades, while three coats give you a safety net for light or vivid hues. Always test on a scrap board first, because the wood’s grain and tone change how much paint you’ll burn through.
For tricky colors, plan on three coats and keep a wet edge as you work to avoid lap marks or brush strokes. Use a quality natural bristle brush for milk paint, and let each coat dry fully before the next, usually two to four hours. White China bristle brushes, with their hollow fibers, release paint slowly for a smoother, more even application on varnish-grade finishes.
You don’t need a primer with milk paint, but a light sanding with 220 grit between coats helps the finish lay flat and bond better. Wipe off the dust with a tack cloth, then apply the next coat with even, overlapping strokes.
After the last coat, let the paint dry overnight before you consider a topcoat. For durability on furniture, add a coat of varnish or polyurethane in a satin or matte sheen, but wait seven days for the milk paint to fully cure first.
Work over a drop cloth, keep your brush wet, and don’t rush the drying time between coats. Grab that extra coat if you’re unsure, because fixing a see-through finish later is a lot more sanding and repainting than just doing it right the first time.
Sanding Between Milk Paint Coats Without Ruining the Finish

Sanding between coats is where most milk paint disasters happen, but it doesn’t have to be a gamble. I’ve ruined my share of finishes by pressing too hard, leaving shiny burnish lines that catch the light and ruin the matte sheen.
Use a 320-grit foam pad, which is cheap, flexible, and forgiving, and keep a light touch. You’re not sculpting the surface, you’re just knocking off dust nibs and that chalky texture.
Two quick passes with no elbow grease is enough. If you see gloss spots, you’ve overdone it, so stop, let it dry, and spot-sand those marks with even lighter pressure.
Trust the paint’s self-leveling to bond fine without aggressive scuffing. Dust off with a tack cloth, then recoat, and keep your drying time consistent before the next layer.
Light, float, and back off, and your finish stays smooth without brush strokes or lap marks. A foam pad also won’t gouge the paint like sandpaper wrapped around a block can.
VOC levels don’t matter much here, but a well-ventilated room helps the paint cure evenly. If you’re working near a drop cloth or painter’s tape, keep the sanding dust off both so it doesn’t stick to fresh edges.
After the final coat, you can decide on a topcoat like varnish or polyurethane for extra durability, but only after the milk paint has fully cured. Until then, resist the urge to sand again, because the finish will stay matte and disaster-free without it.
Topcoats, Stain Blockers, and Curing Rules for Milk Paint
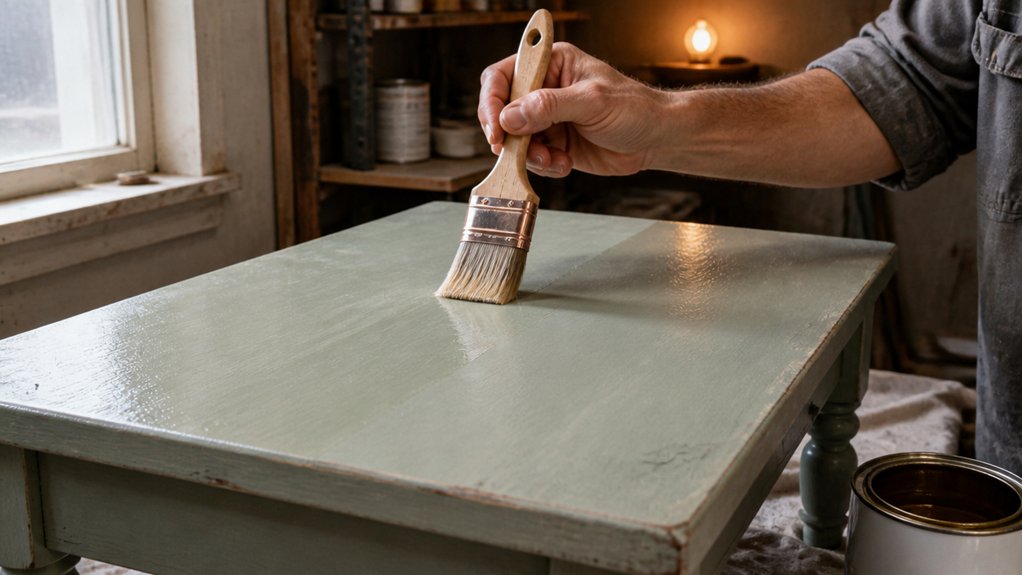
The real work begins after that last coat of milk paint dries. Curing takes a full 21 days, so don’t rush it.
The real work begins after milk paint dries—curing takes a full 21 days, so don’t rush it.
Heavy furniture or commercial cleaners will dent or blotch the finish during this time, so keep both away.
Stain blocking is more important than any topcoat when you paint raw oak or pine. Two coats of a stain blocker stop tannin bleed-through, but knots need three coats or you’ll chase brown spots later.
For white or light paint over wood, skip the clear topcoat because it yellows fast. Darker colors can take Enduro Clear Poly for extra sheen, but milk paint seals itself well on its own.
Use a topcoat only where durability matters, like a kitchen table. Otherwise, let the cure finish and call it done.
You get a matte, self-sealing surface that needs no extra protection. This saves time, money, and worry about yellowing or lap marks in the sheen.
If you do topcoat, work with a satin or flat clear poly and keep a wet edge to avoid brush strokes. Sand lightly with 220 grit between coats for a smooth finish.
Use painter’s tape and a drop cloth if you’re working near trim or floors, and pick low-VOC products for indoor air quality.
The drying time from a few hours to overnight is not the same as the 21-day cure, so treat the piece gently until then.
Frequently Asked Questions
Can I Use Milk Paint Over Painted Metal Surfaces?
Yes, you can use milk paint over painted metal surfaces, but only if you prepare the substrate correctly. Surface prep is non-negotiable: sand the existing paint with 120-grit, then wipe down with a degreaser to remove any oils or wax.
After that, apply a metal-specific primer and let it cure for a full 48 hours before any topcoat. Don’t skip an adhesion test in a small, hidden area, then check it with a piece of tape after two days.
If the tape pulls clean, you’re safe to proceed with two thin milk paint coats, lightly sanding between them. Remember, milk paint can also be used as a glaze over properly bonded steel or aluminum surfaces, depending on your existing finish’s compatibility.
What Happens if I Stir Milk Paint Too Vigorously?
Stirring milk paint too vigorously is completely safe, and you will not ruin the mix. The bubbles that form from fast mixing are purely cosmetic and will dissipate before you even load your brush.
The true problem is letting the paint sit undisturbed for too long, which lets heavy pigment sink to the bottom. To avoid this, give the bucket a final, gentle swirl right before dipping your brush, and you will get consistent color.
For a practical tip, after a vigorous stir, wait about two minutes for the foam to break, then apply your first coat. If you need a smoother surface on raw wood, sand with 220 grit between coats, or you can add a bonding agent to improve adhesion.
How Do I Fix Drips After Milk Paint Dries?
You’ll fix drips after milk paint dries by sanding them level and applying a thin touch-up coat once the surface is fully cured. For most milk paints, that means waiting a full 24 hours, not just until the film feels dry to the touch.
Grab a 220-grit foam sanding pad and gently work the drip down until it’s flush with the surrounding finish. Use a light, circular motion, then wipe the dust off with a tack cloth before recoating.
Now brush or spray a thin coat of the same paint over the sanded area, feathering the edges so the blend disappears. One coat usually covers, but if the sheen looks uneven, add a second after two hours.
Don’t rush this step. Patience here prevents you from chasing a rough patch later, and you’ll avoid needing a full strip and repaint. For a smoother result, you can also use a damp sponge to lightly soften the drip before it dries, but once cured, sanding is your only clean fix.
Does Milk Paint Work on Plastic or Acrylic Surfaces?
Milk paint generally does not work on plastic or acrylic surfaces without extensive preparation. The porous, mineral-based binder in milk paint cannot grip smooth, non-porous synthetics, so adhesion will fail without a proper bonding primer.
You can try, but only after scuffing the surface with 220-grit sandpaper and applying a high-adhesion plastic primer. Even then, the finish remains brittle and prone to chipping, especially on flexible acrylics. I recommend using a dedicated plastic paint, such as a spray enamel or a rubberized coating, which flexes with the material.
For a reliable result, clean the plastic with denatured alcohol, then apply two thin coats of your chosen plastic spray, letting each dry for 30 minutes. This approach, unlike milk paint, will avoid peeling and save you from redoing the job. If you’re after a matte look, search for “chalky finish paint for plastics” as a more durable alternative.
Can I Apply Milk Paint With a Paint Sprayer Outdoors?
Yes, you can apply milk paint with a paint sprayer outdoors, and it works beautifully when conditions are right. The key is to pick a calm, dry day with temperatures between 60 and 75°F, because high humidity or wind will wreck your drying time and leave a blotchy finish.
Sprayer cleanup is essential, so flush the system immediately with warm water after each coat, since milk paint cures fast and will clog your nozzle in minutes. For a smooth result outdoors, spray two thin coats at about 25 psi, letting each coat dry for 30 minutes, then sand lightly with 220 grit between coats.
If you are using a handheld sprayer, thin the paint with 10% water to avoid spitting. This water-based finish is forgiving, but direct sunlight can cause it to skin over before it bonds, so keep your work in shade or spray early morning, and always test on scrap first. For a more durable outdoor finish, consider a clear acrylic topcoat over the cured milk paint.
Rounding Up
Milk paint can feel unpredictable, but you can master it by learning its quirks and embracing the process.
Mix, stir, and test your paint on a scrap piece first.
Check your sanding between coats to avoid a rough, uneven finish.
If you want that matte, worn-in farmhouse vibe, skip the topcoat and accept that coffee rings will leave their mark.
For a flawless, durable finish, apply a clear coat, but know that getting there is half the fun and cleaning your brush is the other half.
Go on, get messy and try it today.
Next, read about choosing the right brush for milk paint.