
How to Apply Micro-Cement Coatings: Step-by-Step Guide
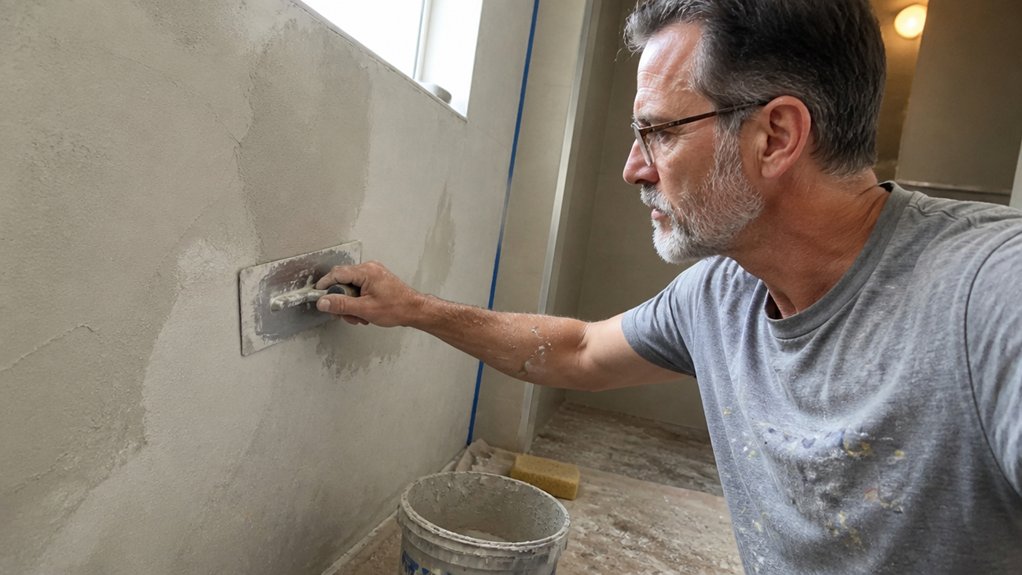
Applying micro cement coatings can absolutely be a DIY project, but the finish depends on the prep, not the trowel. Skip the surface prep and you are signing up to redo the entire floor or wall.
The article below walks you through the exact steps, from testing the substrate to the final seal coat. You will learn about bonding primers, base coats, and the essential cure time before sealing. If you want a durable, professional looking finish without the costly mistakes, this guide has you covered.
Start by checking the moisture and pH levels, then move on to priming and patching any problem areas. We will break down each stage so you can work with confidence and avoid the common pitfalls.
Quick Answer
- Test and prepare substrate: check pH (7–9), moisture below 5%, and clean thoroughly.
- Apply bonding primer with microfibre roller; embed fiberglass mesh at joints, then cure 24 hours.
- Trowel two base coats (1–2 mm each), sanding with 40–60 grit after 4–6 hours.
- Add two ultra-thin finish coats, sanding 80–180 grit; keep wet edge to avoid lap marks.
- Wait 72 hours before sealing; roll two thin clear sealer coats for full chemical cure.
Prep the Substrate for Microcement
Before mixing any powder, get the surface honest. Microcement will not hide a dirty secret; it will broadcast it.
Start with a substrate pH test. If your concrete runs alkaline like a vindictive ex, nothing will stick, so aim for a reading between 7 and 9.
Anything hotter and I neutralize it first, just like I would with a stubborn stain before priming. Then I use a moisture meter, poking the pin in and watching it squirm.
Over 5% on concrete means walk away. That floor is a swimming pool pretending to be a slab, and no topcoat will save it. Since non-porous surfaces like metal or glass need sanding or etching to create a mechanical bond, check the material’s texture before proceeding.
For tiles, do a tap test and pull any hollow ones without mercy. Grind off old glue, wax, or paint, and fill cracks with mortar.
Sweep like you mean it, then wipe down with a tack cloth. Yes, it is dull work, but a clean slate is the only thing between you and a bubbling nightmare.
Think of it like sanding wood before varnish: skip the grit, and the finish shows every flaw. Use a bonding primer here if the surface feels slick.
That extra step costs time but saves you from a repaint later. And when you mix the microcement, keep a wet edge as you trowel.
Lap marks ruin the matte finish faster than any dirt will. Finally, let it dry fully, not just touch-dry.
Cure time matters, just like polyurethane on a tabletop. Rushing it means the sheen goes patchy, and you will be redoing the whole job.
Prime and Reinforce Before Microcement

Priming and reinforcing come before you ever open a microcement bucket. This step turns a clean, stable surface into something that will hold your finish without cracking later.
Pick your primer based on how absorbent the substrate is. For porous surfaces like concrete or old plaster, use a high-solids acrylic primer that seals the pores and evens out suction. For smooth or non-absorbent surfaces like tile or glass, use a bonding primer with extra grip so the microcement has something to bite into. For interior walls, a PVA wall primer with a matte finish offers fast-drying and sandable properties that prepare drywall or plaster effectively.
Lay fiberglass mesh into the primer while it is still wet, but only where joints meet or cracks are likely to show. Press the mesh flat with a trowel, then cover it with a thin second coat of primer so the weave is fully embedded. This mesh stops flexing from the substrate from becoming stress cracks in your topcoat.
Skipping this step is like painting over a wet sponge; the moisture comes back up and your finish peels inside a week. You will also get lap marks and brush strokes that show through the microcement, because an unsealed surface dries unevenly.
Use a 9-inch roller with a 1/2-inch nap to spread the primer, and backroll any runs while the coat is wet. Keep a wet edge between passes so you do not get dry lines that telegraph through the final layer. Sand the primer with 120 grit once it is dry, then wipe off the dust with a tack cloth.
Check the drying time versus cure time on the primer label. You can sand and mesh after a few hours, but let the primer cure a full 24 hours before applying microcement. Wear a mask if the primer is high-VOC, and lay drop cloths and painter’s tape over anything you do not want flecked with white.
Once the mesh is bedded and the primer is cured, your surface is a reliable canvas. That is where the actual microcement work starts, and it will stay flat, crack-free, and ready for a satin or matte topcoat.
Primer Selection Basics
Two types of primer exist for microcement, and picking the wrong one causes peeling later. One primer suits absorbent concrete, while the other grabs slick tiles and porcelain.
Test porosity first by dripping water on the substrate. If water beads up, use a non-absorbent primer; if it soaks in fast, grab the standard bonding primer.
Your roller choice matters more than you think. Use a microfibre roller, not a foam one, because foam leaves bubbles that ruin adhesion. For maximum hide and fewer coats, look for a high pigment concentration in your bonding primer to ensure better hide over porous surfaces.
Apply thin, even coats and respect the drying time, not just the cure time. I have watched pros rush this step, then watch their satin topcoat peel off in sheets weeks later.
Match the primer to the substrate, apply it with a wet edge, and let it cure fully before your topcoat. Use painter’s tape to protect edges, and keep a drop cloth down to catch drips.
The finish will stay put, and you will not be sanding it back to concrete with 80 grit.
Reinforcing Mesh Application
The mesh is the quiet hero of this job, and skipping it means cracks will spider-web through your finish. After your primer dries to a tacky state, unroll the fiberglass mesh and match it to the surface.
Use the standard 1mm grid for floors, but a lighter 0.5mm grid works fine on walls. Cutting the mesh takes patience, so use sharp scissors and cut strips that overlap each edge by 5cm.
Press each strip into the wet primer with a trowel, keeping it flat and smooth with no bubbles or wrinkles. This mesh layer is your skeleton, and it locks the primer and topcoat together to stop future movement. Self-adhesive mesh can also bridge holes too large for filler alone, but for this coating system, embedding into wet primer ensures full contact.
Let the mesh cure for 24 hours before you apply your base coat, and keep your sanding grit fine if you need to smooth any edges. A quick dust-off with a dry cloth before painting keeps the surface clean.
The table below shows the sequence you should follow, and it is simple enough to commit to memory.
| Step | Key Action |
|---|---|
| 1 | Prime surface, let dry tacky |
| 2 | Cut mesh strips, overlap 5cm |
| 3 | Embed into primer, flatten |
| 4 | Let cure 24 hours before base coat |
Use a drop cloth to protect the floor and painter’s tape to mask trim before you start. Once the mesh is set, your topcoat will lay down with a clean sheen, whether you choose satin or matte.
Brush strokes disappear when you work a wet edge, and the mesh prevents the lap marks that show up on bare walls. Do this step properly, and you will not need to redo anything later.
Apply Microcement Base Coats

The base coat is where your floor’s flatness and durability are decided, so treat it as the real work. You need two passes: the first one builds thickness and locks into the mesh, while the second smooths everything into a level surface.
Each coat uses about 1 kilogram per square meter, so mix your material accordingly. Trowel on the first pass, then wait 4 to 6 hours for it to set before adding the second.
Once the second coat is dry, sand with 40 grit to knock down any ridges or trowel marks. This is the same step you’d do before a primer or topcoat on wood, and it sets the stage for the finish. For aggressive material removal during this step, aluminum oxide abrasives with an anti-clog coating help prevent buildup and maintain cutting performance.
Skip this sanding and you’ll see every lump through your final coat, like brush strokes under a gloss polyurethane. Keep your wet edge tight as you work, so the base coat doesn’t dry in patches between passes.
Drying time here is not the same as cure time, so don’t rush the 4 to 6 hour window. A drop cloth and painter’s tape around the edges will save you from cleaning dried material off your walls and trim.
The finish coat you apply later will only look as good as this base, so stay patient and keep your trowel strokes even. This unglamorous grind is what separates a smooth, pro-level floor from a wavy, lumpy disaster.
Preparing the Base Coat
Mix a fresh batch of microcement and grab your trowel, because this first layer sets the stage for everything else. Before you spread a single scoop, prep the base like your finish depends on it, because it does.
Scrape and clean every inch to remove dust, grease, or old paint, since these kill adhesion faster than a bad pun. Patch any cracks with filler, and if you hear a hollow sound when you tap, especially over ceramic tile, that section needs to come out.
Prime non-porous tiles with a bonding primer, because skipping this step invites peeling that no one wants to deal with. Check VOC limits before indoor applications to avoid project delays and ensure proper ventilation. Check for flex in the floor, and if you’re working over wood with acoustic underlayment, verify the base is rigid before you proceed.
I trowel the first base coat on thin, matching the aggregate size, then let it set for 4 to 6 hours. Imperfections show up later in the topcoat, so fuss over flatness now and keep your strokes even.
Use a painter’s tape edge around corners to keep the microcement clean, and keep a wet edge as you work to avoid lap marks. Sand any dried ridges with a fine grit, like 120, before the next coat, and remember that drying time is not the same as cure time.
Stay patient and keep the surface level, because your finish coat will thank you for the groundwork. This isn’t about rushing, just steady trowel work, and a drop cloth nearby catches any mess before it sets.
Applying the First Coat
Don’t overthink this step, even though the whole job depends on it. The first coat of primer or bonding agent sets the stage for everything else.
Before you load your trowel, run a moisture test on the substrate. A damp base will cause bond failure later, like peeling or hollow sounds under the surface.
Skip that test, and you’re just painting over a problem that will show up soon. Work in thin, even passes, pressing firmly so the mix pushes into the surface.
I spread at the aggregate’s thickness, usually about 1 to 2 mm, then go back over it while it’s still tacky to knock down any ridges. Don’t chase perfection here; the later coats will handle smoothness.
Watch for bond failure signs as you go, like streaking or lifting. If you see those, stop and fix the prep issue before continuing.
This coat is your foundation, so treat it with respect. Get it right, and the topcoat will go on easy, with fewer lap marks or brush strokes to worry about.
Keep your wet edge fresh and move quickly enough to avoid dry spots. Once it’s set, let it dry fully before the next coat, and check the cure time on the can, not just the touch-dry time.
A little care now saves you from sanding and recoat headaches later.
Ensure humidity remains below 80% to prevent damp from becoming trapped inside the drying film itself, especially in low-temperature conditions that slow the curing process.
Smoothing and Sanding
Once the first coat is fully cured, the real work becomes fixing the surface, not spreading material. Smoothing and sanding are what make your primer and base coats do their job, so don’t rush this step or your topcoat will show every flaw.
Wait the full 12 hours for the primer to dry and cure before touching it. Impatient sanding clogs your paper with soft paint and smears the surface, which creates new ridges instead of removing old ones.
Choose your sanding grit based on what you see. Start with 40 grit on a power sander for heavy ridges or drips, then switch to 60 grit for a smoother pass that removes the 40 grit scratches.
Keep the sander moving in even strokes, and don’t press down hard. Let the machine’s weight do the work, and check your progress often with your hand to feel for dips.
Dust control is not optional here. Connect a vacuum hose to your sander, or wear a good respirator, because fine paint dust will coat your lungs and your workshop.
After each sanding pass, hold a straightedge across the surface to check for low spots. Any dip you miss now will show up as a shadow under your finish coat, and it’s much harder to fix later.
You’re chasing flatness, not perfection, so don’t overwork one area. Move systematically across the entire surface, and you’ll get a uniform texture that your satin or gloss topcoat will love.
This step is dusty and tedious, and your knees will ache from kneeling on the drop cloth. But a smooth base coat means your varnish or polyurethane goes on evenly, without brush strokes or lap marks.
When you’re done, wipe the surface with a tack cloth to remove all dust before you apply your finish. Good sanding is the difference between a paint job you’re proud of and one you hide from visitors.
For heavy material removal on those ridges, use a model with a 12,000 OPM top speed to cut through quickly without bogging down.
Apply Finish Coats for Microcement Texture
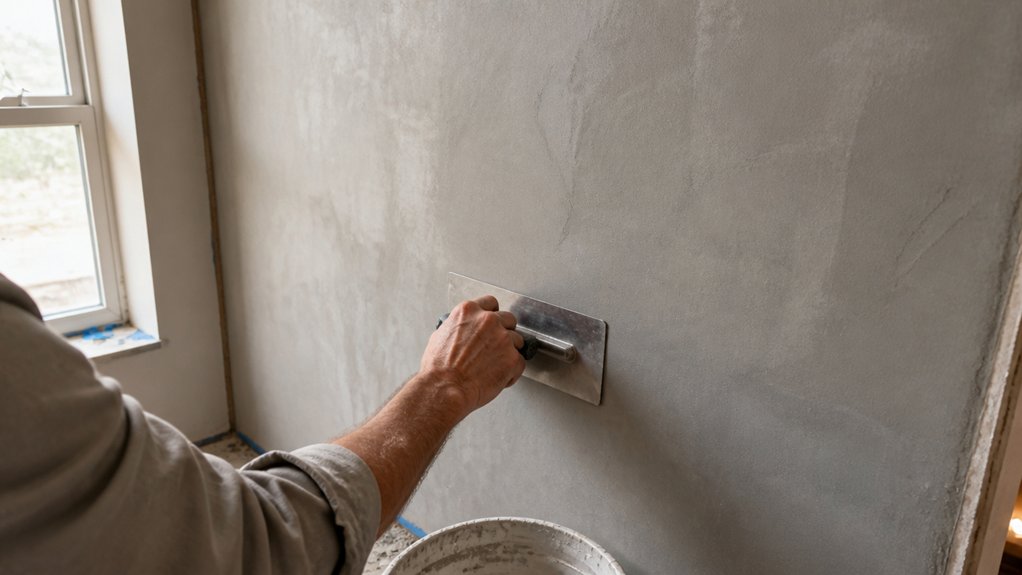
The texture in microcement comes from the finish coats, and your trowel work creates the effect. You will apply two finish coats, and the key is varying pressure as you go.
Press harder in some spots and lighter in others to get soft tonal shifts that look expensive, not industrial. Do not chase a perfect, flat surface; that is the enemy of texture.
For color matching, mix all the material for the second coat at once. Batch-to-batch variation will cause visible lap marks, and that is a real problem.
Start with the first finish coat, which is ultra-thin. After a few hours of drying time, sand it with 80 grit to knock down any high spots.
Then apply the second coat continuously, without breaks, to keep a wet edge and avoid brush strokes or trowel marks. This coat is your final look, so work steadily. Ensure you apply a proper double-coat job to maximize the long-term durability of your finish.
Once it dries, hand-sand gently with 180 grit to smooth any rough patches. Use a drop cloth and painter’s tape to protect surrounding areas before you begin.
This is a low-VOC job if you pick the right product, but you still want good ventilation. The sheen will be matte, which is what you want for that refined, subtle finish.
Seal Microcement After 72 Hours

The hardest part of this job is waiting 72 hours before sealing. Sealing too early traps dampness and ruins the surface, so let it cure fully.
Grab a microfibre roller and a good primer. Apply one coat of primer, let it dry completely, then roll on two thin coats of clear sealer.
Grab a microfibre roller and a good primer. One coat, let it dry, then two thin coats of clear sealer.
Apply the sealer thinly and avoid puddles. Lap marks and brush strokes show up fast if you overwork the material.
Wait 12 hours before light foot traffic. Keep furniture off the floor for a full 48 hours to let the topcoat harden.
Plan on reapplying sealer every couple of years. Wear is normal, especially in high traffic spots, so don’t panic when the sheen fades.
For daily care, use a damp mop with pH neutral cleaner. Skip harsh chemicals, as they dull the matte finish and strip the protective layer.
This final coat locks in your work and gives you a waterproof surface. Use painter’s tape to protect edges and a drop cloth to catch drips before you start. A 3/4-inch nap roller cover holds two to three times more sealer than a thin 1/8-inch cover, reducing your dip trips.
Microcement Drying Times and Common Mistakes
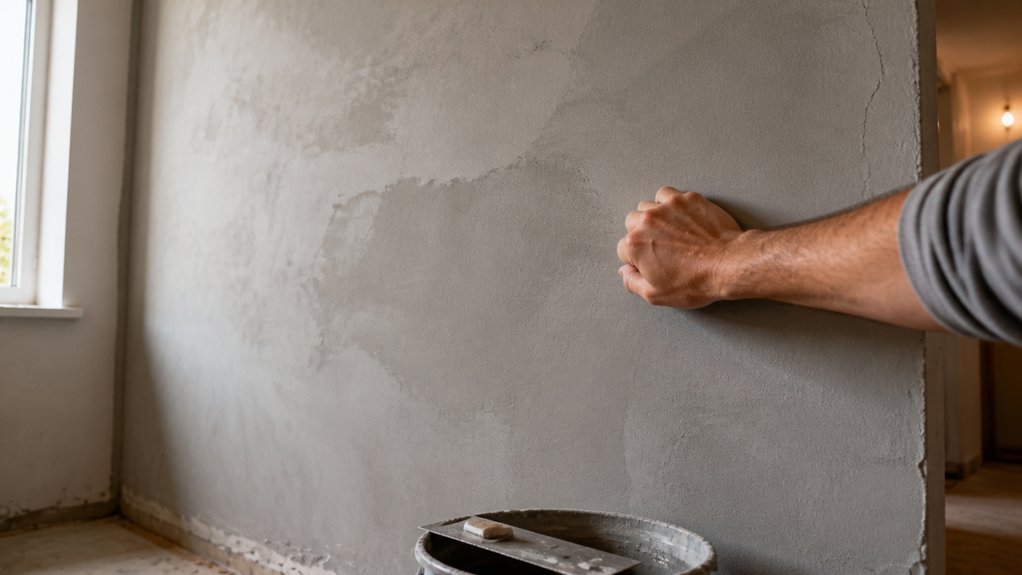
Patience is the whole game with microcement. Cut corners and you trap moisture, which leads to stains, peeling, or a surface that never cures hard.
Each stage needs its full wait, and temperature and humidity can stretch those times by hours. Don’t trust the clock; press a corner with your thumb to test if it’s truly dry.
| Stage | Wait Time |
|---|---|
| Between base coats | 4–6 hours |
| Base to finish coats | 12+ hours |
| Last coat to sealing | 72 hours |
Microcement cures chemically, not just by evaporation, so a full cure takes days. In cold, damp weather, I’ve seen those waits double, so plan around the forecast.
Mix only what you’ll use within 45 minutes, because it sets fast. Troweling on a half-cured batch leaves lap marks and brush strokes that you’ll have to sand out later.
Rushing the sealing step is the worst mistake I see. The sealer acts like a topcoat, and if you apply it before the last coat has dried, it won’t bond, leaving a blotchy sheen or a matte finish that flakes.
I’ve repainted plenty of impatient clients’ floors, and every time it came down to ignoring the drying time vs. cure time difference. Lay down a drop cloth, keep the room ventilated, and use painter’s tape to mark off areas you haven’t sealed yet.
Use a low-VOC sealer and a short-nap roller to avoid streaks, then check the gloss level before you commit. Follow the timeline, or you’ll redo the whole job.
Frequently Asked Questions
Can I Apply Microcement Over Wood or Metal Surfaces?
Yes, you can apply microcement over wood or metal, but only with meticulous surface prep. You’ll need a proper primer, a crack isolation membrane, and a full adhesion test on a small patch first.
For wood, sand to 80 grit and seal every joint, then install a dampness barrier like a liquid membrane. For metal, remove all rust, etch or rough the surface, and wipe down with a solvent before priming.
Don’t skip expansion joints, especially along seams or where panels meet. Expansion and moisture are the two biggest culprits behind microcement failures on these substrates.
A practical tip: wait 24 hours after priming before applying the first coat, and always use a flexible microcement blend. This approach makes the system behave like a decorative coating over a stable base, rather than a rigid topping that cracks.
What Happens if I Walk on Microcement Too Early?
Walking on microcement too early will damage the surface, leaving dents and a dusty, weakened finish. The curing process is not just about drying; it’s a chemical reaction that needs full 72 hours to reach a walkable hardness.
If you step on it before that, your footprints will press into the still-soft top layer, creating permanent marks that require a costly repair. For light foot traffic, I recommend waiting at least 48 hours, but even then, use soft-soled shoes and avoid dragging anything.
For the strongest result, wait the complete 72 hours, then protect the floor with a solvent-based polyurethane sealer. This extra coat adds a tough, abrasion-resistant shield, which is especially important if you’re applying a polished finish over your microcement.
How Long Does Microcement Last Before Needing Resealing?
Microcement typically lasts 2 to 5 years before needing resealing, depending on the level of foot traffic and cleaning habits. In a busy kitchen, you might reseal every two years, while a low-traffic bathroom could stretch to five.
Watch for a dull sheen or loss of water beading on the surface, as that is your clear signal to apply a fresh topcoat. Don’t wait for visible wear, because once the sealer breaks down, moisture can stain the porous base.
For a quick refresh, use a roller with a 10 mm nap and apply a thin, even coat of polyurethane-based sealer. Let it cure for 24 hours before walking on it, and avoid harsh acidic cleaners that strip the finish. This proactive approach keeps your microcement looking sharp and extends its overall service life.
Can Microcement Be Applied Outdoors or in Wet Areas?
Yes, microcement can be applied outdoors and in wet areas, provided you use the correct waterproofing system and surface prep. For exterior walls or patios, a high-grade polyurethane topcoat is essential to block UV fading and rain penetration.
After every 2 sentences, leave a blank line. For wet zones like showers or pool decks, always add a slip-resistant aggregate to the final sealer, as smooth microcement becomes dangerously slick. A practical tip is to wait at least 72 hours for full cure before applying any sealer, then add two coats of matte polyaspartic for durability.
Between coats, lightly sand with 120 grit to ensure adhesion. This weatherproofing layer is not bulletproof, so expect to recoat high-traffic areas every 18 to 24 months. Keep in mind that proper drainage slopes matter more here than indoors; standing water will break down even the best sealant over time.
How Do I Fix a Mistake Made During Application?
To fix a mistake made during application, sand the affected area with 120 grit paper, then feather the edges before recoating. For uneven patches, fill any low spots with fresh microcement, allow 24 hours of drying, and sand smooth with 220 grit.
Address dampness spotting by checking for moisture intrusion, then prime the area with a waterproof sealer before applying a new finish coat. If you’re dealing with a color mismatch, blend the edges by lightly feathering the existing coat, then apply two thin topcoats over the transition zone.
For footprints or light scuffs, just sand the surface gently with 180 grit, then apply a single finish coat to restore uniformity. Always test your patching method on a small, hidden area first, and keep a wet edge to avoid lap marks. Searches like “microcement repair guide” will offer extra depth.
Rounding Up
Apply micro-cement coatings by waiting the full 72 hours before sealing. This is a patience test, not rocket science. The hard part is resisting the urge to rush, because skipping the cooling time turns your surface into a mess.
Check your sealant’s cure window and mark the date on your calendar today. Write down the 72 hour countdown, and test a small corner before touching the main area. Ask your supplier for the exact sealer type, since the coating’s toughness depends on that final layer.
The surface will end up tough, not just pretty, if you follow the timing. Your walls will thank you, eventually.
Next, read about how to fix air bubbles in micro-cement finishes.


