How to Apply Roofing Paints: Step-by-Step Guide
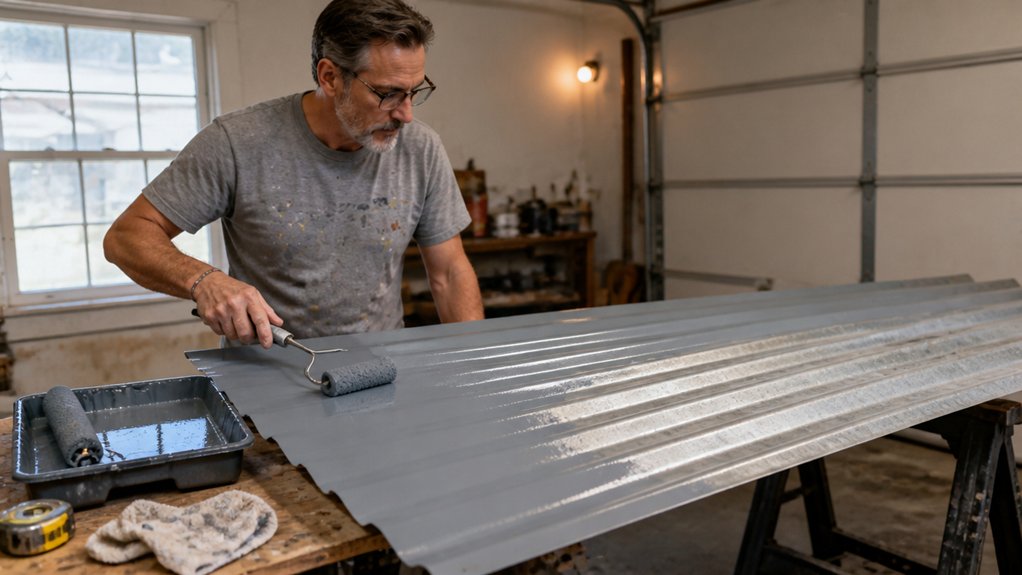
Applying roofing paint the right way starts with surface prep, not the paint itself. If you skip cleaning and repairs, you are just coating a sponge that will fail fast.
This guide covers the full step by step process, from patching cracks to choosing the right primer and sheen for your roof. You will learn how to spray cross directionally, brush edges, and time your coats for a durable finish.
Drying time and cure time matter more than most DIYers realize, so we also break down what to expect after each coat. Stick with us through the final sections, and you will know exactly when your roof is ready for weather and foot traffic.
Quick Answer
- Inspect and repair all roof damage before cleaning or painting any surface.
- Pressure wash at 4000 PSI, sterilize with bleach solution, and let dry completely.
- Apply a water-based acrylic primer and allow two hours of dry time.
- Spray two cross-directional coats of satin acrylic paint, maintaining a wet edge.
- Wait full cure time before exposing the roof to rain or foot traffic.
Inspect and Repair Roof Damage Before Coating
Check the roof surface for cracks, chips, or lifted tabs before you open any paint can. Walk every inch and mark any damage, because a weak spot will ruin a fresh topcoat later.
Replace damaged shingles and reseat loose ones so the base is solid. Check the valley irons for rust too, since water sneaks through there fast.
Replace damaged shingles and reseat loose ones so the base is solid—check valley irons for rust, too.
Skip leak detection and you’re painting a sponge, not a roof. Paint won’t seal a leak; it will just peel once moisture pushes through from underneath.
Seal any gaps with a matching roofing caulk and let it cure fully. Sand down rough edges with a medium grit, like 80 or 100, to help the primer grab tight. Surface prep is non-negotiable because the best elastomeric coatings with 900% elongation still fail on a dirty or unstable base.
If you see rot or sagging, call a pro. I’ve done this for years and I still know when my ladder skills hit their limit.
A sound roof takes a primer and a topcoat with a consistent sheen, like satin or gloss. A leaky one just gets wetter, so fix every issue first.
Use painter’s tape along flashing and vents to keep lines sharp. Lay a drop cloth below to catch drips, and pick a low-VOC paint if you’re working in tight spots.
Work in sections to keep a wet edge, so you avoid lap marks and brush strokes. Drying time is short, but cure time matters, so wait the full window before rain hits.
Pressure Wash, Sterilize, and Test Adhesion
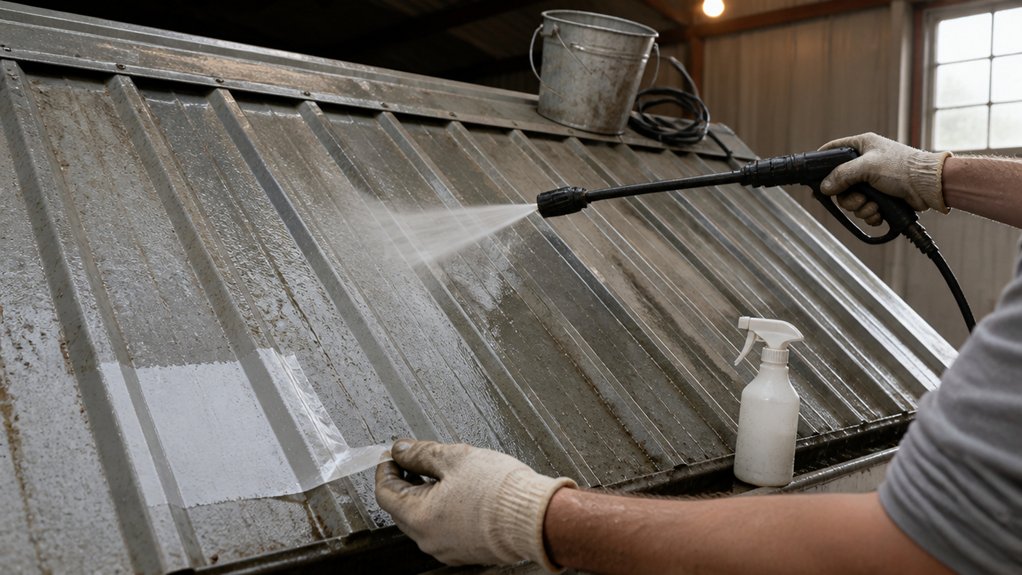
Once the roof is sound and sealed, the real work begins: stripping away grime and checking if the old paint will even hold.
I start with a pressure washer cranked to at least 4000 PSI, using a turbo nozzle to blast off years of dirt, loose paint, and moss tucked into the valleys.
Multiple slow passes beat one heroic sweep, so don’t rush it.
Let the surface dry completely before you move to the next step, because moisture hiding under old paint will ruin your topcoat later.
Next, sterilize the roof to kill algae and mold spores.
Mix one quart of bleach with a gallon of water, add a splash of dish soap or a house wash cleaner, then apply it with a pump sprayer.
Let that sit for 15 minutes, then rinse it off thoroughly with plain water.
This step matters more than you think, because algae left behind will eat through your fresh primer within a season.
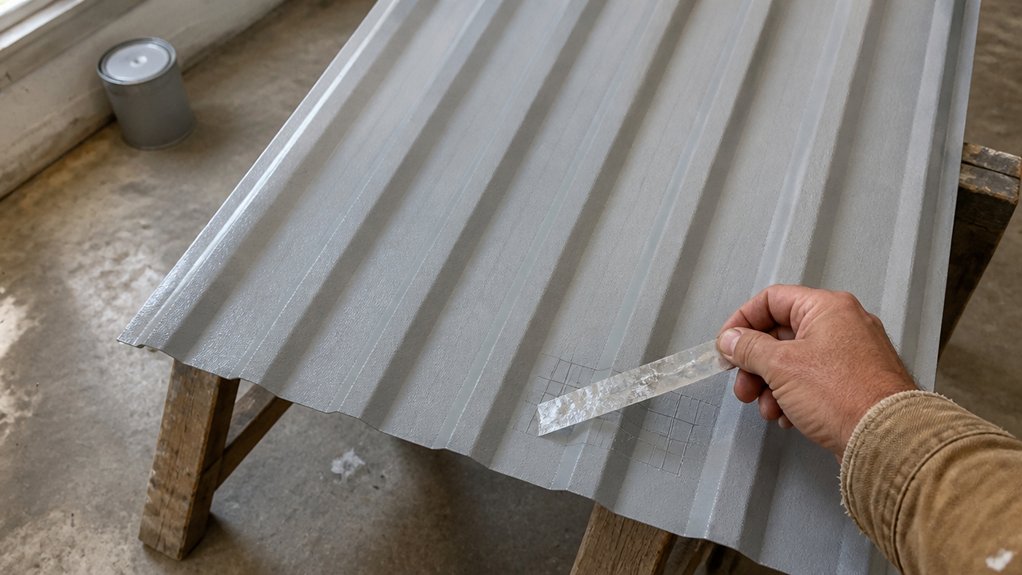
Now test adhesion with a cross‑hatch cut.
Use a sharp utility knife to score a small grid about an inch square, pressing just through the paint film, then press a strip of painter’s tape firmly over the cuts and rip it off fast.
If paint flakes off with the tape, you’re not ready for primer or topcoat.
That flaking tells you the old coating has lost its grip, so you need to scrape or pressure wash further until the substrate is bare and sound.
Don’t panic when you see this; it’s a weekend job, not a tragedy.
Once the grid stays clean and crisp, you’re good to go, and you can lay down a stain-blocking primer before your finish coat, keeping a wet edge to avoid lap marks.
Work in sections, keep your brush strokes going in one direction, and watch your drying time versus full cure time before walking on it.
Since moisture exposure during the curing window causes peeling like old wallpaper, your patience here pays off.
A little patience here saves you from peeling paint and a redo next spring.
Select Primer and Paint That Bond to Your Surface
A clean, dry roof is only half the job. The primer you choose decides if you are relaxing in three years or scraping paint off a ladder.
For tile or metal, use a water-based acrylic primer. It bonds tightly and forgives small misses in your prep work, which I have learned the hard way.
Skip latex primer entirely. It traps dampness and invites mold, a mistake that cost me a full recoating job.
Let the primer dry for two hours, and always mind the cure time before you walk on it.
For the topcoat, pick a satin or low-sheen acrylic paint. It hides ridges and reflects heat without glaring, and it keeps brush strokes and lap marks from showing.
Glossy looks sharp but magnifies every crack and bump, so avoid it unless your roof is perfectly smooth.
Use white or light tones to keep the surface cooler in summer. Dark colors absorb heat and speed up paint failure.
Apply the satin topcoat with a wet edge, working in small sections so you do not leave dry lines.
Drop cloths and painter’s tape protect your gutters and walls while you work. Use a medium sanding grit like 120 to smooth rough spots before priming.
Check the VOC level on your paint can; low-VOC acrylics smell less and are easier on your lungs.
For the best results on similar surfaces, apply multiple thin coats to avoid runs and ensure durability.
The direct action is simple: use acrylic primer, wait two hours, then put on a satin acrylic topcoat. Your roof will stay sealed and your future self will not be on a ladder with a scraper.
Spray in Cross-Directional Passes, Then Brush Edges
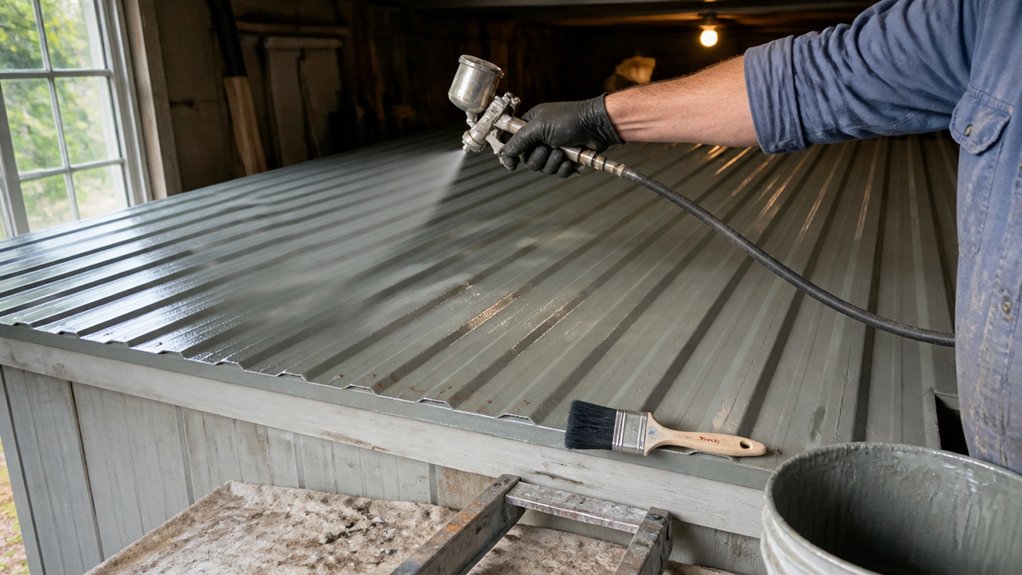
Spraying in cross-directional passes is what separates a professional finish from a DIY giveaway. I start with a full coat moving north to south, holding the airless sprayer about eighteen inches off the surface, then I lay a second coat east to west.
This crisscross pattern eliminates the pinholes and thin spots that single-direction spraying always leaves behind. It also improves cross hatch adhesion, so the paint locks onto the roof like a stubborn barnacle.
Higher pressure ratings like 3000 PSI deliver finer atomization and smoother coats, which is key when working with thicker roofing paints.
Keep your overlap at three to four feet, and don’t rush. Patience beats speed every time, and rushing leads to lap marks and uneven coverage.
Monitor your wet edge as you go, and work in sections so the paint doesn’t dry before you recoat. If you see a dull spot, that’s a sign you’ve lost your wet edge and need to move faster.
After spraying, grab a brush for the edges and tight corners, since the sprayer misses those spots. Brushwork alone won’t leave the same finish, but it seals the deal by blending everything into one uniform layer.
Use a high-quality brush and keep a smooth, steady stroke to avoid visible brush strokes. For a low-sheen satin or matte topcoat, brush marks blend easily; for gloss, you’ll need to feather the edges more carefully.
Don’t forget the prep: lay a drop cloth and tape off anything you don’t want painted. Primer matters too, especially on bare wood, and it should be fully dry before you spray your topcoat.
Drying time is not the same as cure time, so wait the full cure period before heavy rain or foot traffic. Once you’ve brushed the edges and the topcoat cures, you’re done.
Drying Windows, Recoat Timing, and Roof Safety Gear
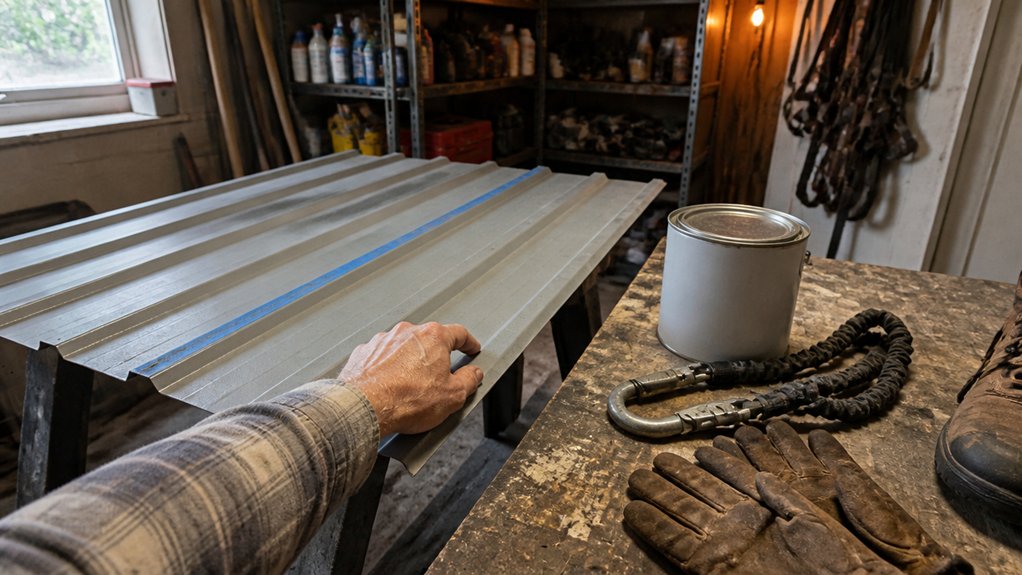
Recoating timing matters as much as the paint you use. If you rush it, you will get peeling, bubbling, or a finish that looks like a bad tattoo.
Wait at least two hours between coats, and check the label for exact numbers. Sunny days can shorten that window, but cloudy days will stretch it, so don’t trust a timer.
If rain threatens, stop painting and cover your gear with a drop cloth. I learned that the hard way when a sudden shower wrecked a fresh topcoat.
Store paint cans sealed in a cool, dry spot away from direct sun. Heat and light break down the binder, which leads to uneven sheen and poor adhesion later.
For a third coat, wait another two hours after the second one. The surface should feel dry to the touch, but drying time is not the same as cure time.
Full cure can take days or weeks depending on humidity and the product’s VOC level, so keep foot traffic and cleaning off the finish until then. For metal surfaces like exhaust pipes, check the manufacturer’s max temperature rating to ensure the paint won’t blister under direct engine heat.
When you work on a steep roof, non-slip shoes and a harness with a ridge bracket are non-negotiable. A ladder won’t catch you if you slip, so cheap gear is a bad trade for a cracked crown.
Lay painter’s tape along window edges to keep lap marks off the glass, and use a wet edge technique so brush strokes stay invisible between sections.
Sand between coats with fine grit, like 220, to knock down dust nibs. Wipe the surface clean with a tack cloth before you roll on the next coat of satin or gloss.
Primer matters for bare wood or stained patches, because it seals the grain and keeps the topcoat from blotching. Varnish and polyurethane have longer recoating windows, so read those labels twice.
Frequently Asked Questions
Can I Paint Over Rusted Metal Roof Panels?
Yes, you can paint over rusted metal roof panels, but only if the surface is properly prepared first.
Start by using an acidic metal prep to remove loose rust and chalky oxidation, then let it dry completely before moving on.
Apply a rust conversion primer over the remaining corrosion, which chemically stabilizes the rust and gives your topcoat a sound base.
For the finish, use a magnetic rust inhibitor paint, which bonds to the primed surface and blocks moisture from returning.
Aim for two thin coats, waiting about four hours between them at 70°F, and avoid painting in direct sun or high humidity.
As a related term, look for “oil-based metal enamel” if you need a tougher, glossier alternative for severe weather exposure.
Finally, check for bare spots after the first coat and touch them up before the second, since skipped coverage will fail fast.
This method works on galvanized and corrugated steel alike, giving you a durable, long lasting roof without replacing the panels.
What Paint Works Best for Concrete Tile Roofs?
The best paint for concrete tile roofs is a high quality, water-based acrylic coating, as its flexibility prevents cracking and it won’t trap damaging moisture. This type of paint also offers superior stain adhesion and resists color fading from harsh UV rays.
Always apply a dedicated acrylic primer before the topcoat to seal the porous surface and ensure a lasting bond. For maximum protection, use two finish coats, and plan on allowing at least four hours of drying time between them.
A helpful tip: check the weather forecast and only paint when the temperature stays above 50°F for 48 hours, so the curing process isn’t interrupted by dew or rain. For extra durability on steep slopes, ask your supplier for a textured elastomeric option, which is a common synonym for a thicker roof coating. Lightly sand any rough spots with 80 grit before priming to help the paint grip tighter.
How Long Does Roof Paint Actually Last?
Roof paint typically lasts about 10 years, though that lifespan hinges heavily on your climate and the quality of the prep work. In my experience, harsh UV exposure and thermal expansion are the real culprits behind premature failure, so don’t expect a flawless film beyond that mark.
Check your roof coating every spring for hairline cracks or chalky residue, especially on south facing slopes. A simple pressure wash with a low pressure tip, around 1500 psi, will reveal early blisters before they turn into costly leaks.
You can stretch that decade out by applying a second coat within the first two years, but only if the manufacturer’s recoat window is still open. Related term: elastomeric roof coating, which flexes better than standard acrylic under extreme heat, though it still won’t beat the 10 year average.
Can I Apply Roof Coating on Damp Surfaces?
No, you cannot apply roof coating on damp surfaces, and doing so will cause the moisture barrier to fail with peeling shortly after. Even on a sunny day, the substrate needs at least one full hour of dry conditions, so wait a full 24 hours after any rain or morning dew.
Check the surface with a clean, dry hand or a plastic sheet taped down overnight; if condensation forms underneath, it is still too wet. Never rush this step, as trapped moisture creates blisters that ruin adhesion and waste your material.
For a practical trick, use a moisture meter set to the wood or concrete mode, aiming for a reading below 15 percent before you roll on the first coat. This is the same rule you would follow for a primer or elastomeric topcoat, so treat drying time as your cheapest insurance.
If you are unsure, sand the damp area lightly with 80 grit to open the pores, then recheck it, but remember that surface prep beats any coating choice you make.
Do I Need to Prime Previously Painted Roofs?
No, you do not always need to prime previously painted roofs, but it is the safer route for a lasting job. I recommend starting with a simple adhesion test on the old paint. Press a strip of tape over a small cut, then pull sharply to see if any paint lifts. If it stays solid, you can spot-prime only bare metal or rust, skipping a full coat.
Coating compatibility is another reason to prime. A quality water-based primer seals any old alkyd gloss and prevents bleed-through, especially if your old roof is a dark color under a light new finish. This guarantees a uniform topcoat. For example, wait two hours after priming before applying your acrylic roof coating. If you skip primer, always scuff the surface with 80 grit first to improve mechanical adhesion for the new layer.
Rounding Up
Applying roofing paints starts with the prep, not the spray, and that prep decides how well the coating will cling.
Scrub and clean the roof surface first, then let it dry completely before you open a single can.
Check the weather forecast for a dry, calm window, and test a small patch before committing to the full job.
Write down your safety harness checklist and inspect every clip and strap before you climb.
The article says good coating is 90% elbow grease and 10% spray, so measure that effort into your time plan.
Take your time with each coat, and watch for cloudy skies that could stall your curing.
For your next read, look up how to fix cracked roof flashing.