What Are Satinwood Paints? Types, Uses and How to Choose

Choosing paint for doors, skirting boards or cabinets is trickier than it looks, and satinwood paints often hit the practical sweet spot. This guide to satinwood paints covers types, uses and how to choose the right finish for your project.
You will see how sheen affects durability and appearance, when water based or oil based makes sense, and why surface prep and primer matter. We will also cover coats, drying time and cure time so you can avoid a finish that scuffs, yellows or drags.
Read on for clear, practical details before you buy your next tin.
Quick Answer
- Satinwood paint offers 40% sheen, balancing durability with a subtle, low-glare glow.
- Choose water-based satinwood for fade-resistant white trim, or oil-based for hard-shell restoration.
- Prime and sand with 120 grit, then fill dings and wipe dust for proper adhesion.
- Use satinwood on doors, skirting, cabinets, and radiators, where scuffs and fingerprints show.
- Pick satinwood over eggshell for hallways needing scrubbability, but avoid it on ceilings or exterior.
What Is Satinwood Paint: and How Shiny Is It?
Satinwood is a satin finish that sits at about 40% sheen, between gloss and eggshell and above matte. It is less reflective than gloss and has more glow than eggshell.
I use it on doors and skirting boards because it hides small dings and still looks crisp. Sand the wood with 120 grit, wipe off the dust, and apply a primer before the satinwood topcoat.
Yellowing is the main difference between the two formulas. Water based satinwood stays white for years, while oil based satinwood slowly turns slightly amber.
Durability is solid either way, and the finish handles scuffs from shoes and vacuum bumps. Choose water based for high traffic trim if you want low VOC, low odor, and fast drying times.
Oil based satinwood is tough and smelly, and you should plan for longer drying time and cure time. Use a drop cloth and painter’s tape, keep a wet edge to avoid lap marks, and lay off brush strokes in one direction.
Satinwood gives woodwork a clean look that survives daily use. You can coat over stain or varnish after proper prep, but test a small area and check the label before you add polyurethane. Ceramic-fortified resins in premium water-based formulas further improve durability and resistance to chipping and wear.
Satinwood vs. Gloss vs. Eggshell: Which Sheen Do You Need?
Choosing a sheen starts with the surface and the traffic it sees. Before you open the tin, lay a drop cloth and mask the edges with painter’s tape.
Choosing a sheen starts with the surface and traffic. Prep first: drop cloth, tape, and a clean edge.
For trim and woodwork, sand with 120 grit, wipe off the dust, and apply a primer made for the topcoat. Keep a wet edge while you paint to reduce lap marks and brush strokes.
Gloss gives the highest shine and suits front doors where you want impact. It shows every nick, so prep the surface well and allow the full drying time and cure time before you handle the door.
Eggshell has a matte look with a little sheen, and it hides small flaws on bedroom trim. In busy hallways it wipes down poorly, so use a scrubbable satin or satinwood there.
Satinwood sits near 40% sheen and gives a tough finish for skirting boards, cabinets, and interior doors. Use a primer that blocks stains on knots, then apply the stain, varnish, or polyurethane topcoat your product system calls for.
Pick a low VOC paint when fumes are a concern, and check the label for recoat times. If you are painting trim, use satinwood and keep your brush strokes neat. For high-traffic areas, select a formula with mildew and mold resistance to ensure lasting durability.
Oil-Based or Water-Based Satinwood: Which Should You Pick?
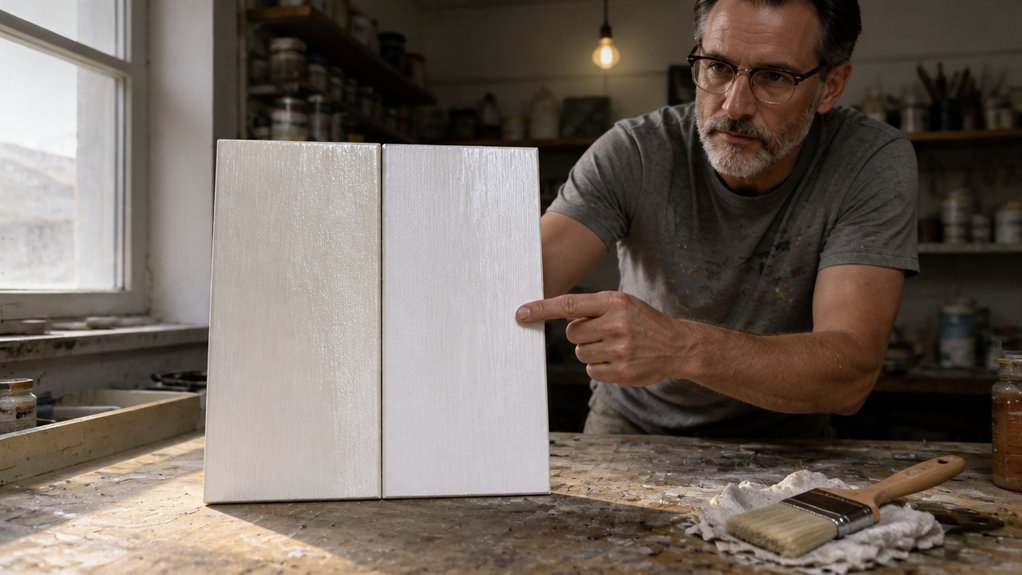
Oil based satinwood will yellow over time, and water based satinwood keeps a clearer color. That difference matters most on white trim, pale cabinets, and doors that get little sunlight.
Oil based satinwood gives a hard topcoat that stands up to knocks and levels out well with a brush. It also has a longer drying time, so plan on a full day before you sand or recoat.
Water based satinwood has lower VOC levels, so the smell is milder and you can work near a nursery with normal ventilation. It reaches a touch dry surface in about two hours, but let the full cure time pass before you scrub or stack the pieces. Water-based acrylic formulas also include a built-in primer, which can save time on projects like these.
Prep the same way for both products: lay a drop cloth, tape edges with painter’s tape, and scuff sand with 220 grit to give the primer a key. Use a stain blocking primer on bare wood or knots, then apply your topcoat in thin coats, and use varnish or polyurethane only where a clear film suits the job.
Keep a wet edge while you paint to avoid lap marks, and use steady brush strokes so the finish looks even. A satin sheen hides small flaws better than gloss, while matte shows fewer brush marks but can be harder to clean.
If you are restoring old doors and expect to recoat in a few years, oil based satinwood can give you that hard shell. For quick projects with less smell, water based satinwood is the easier choice, and it gives the same satin look without the yellowing.
Where Satinwood Works Best: Trim, Doors, Kitchens, Radiators
Satinwood shows up in renovations because its sheen sits between gloss and matte. It gives you a finish that hides small flaws and still wipes clean.
On interior doors and skirting boards, satinwood takes scuffs well and keeps a neat look. Kitchen cabinets are a good fit because the mid sheen hides fingerprints better than gloss and wipes down after spaghetti night. Water-based low-VOC formulas provide an even coat and safer indoor air quality for these frequent-use areas.
Metal radiators work too when you use a waterborne satinwood that coats evenly and resists yellowing. On bare wood, sand to 120 grit, apply a primer on knots and bare spots, then apply the satinwood topcoat.
Keep a wet edge and work in small sections so brush strokes and lap marks blend out. Follow the label for drying time and cure time before you hang doors or stack cabinets.
Lay a drop cloth and use painter’s tape to protect floors and edges. Choose a low VOC waterborne satinwood for rooms you use soon after painting.
Satinwood is a paint, so use stain, varnish, or polyurethane when you want to see the grain. Stick to interior grade satinwood for wood and metal, and use an exterior product with UV protection outdoors.
For high touch surfaces, satinwood is a practical choice. Leave ceilings to a matte ceiling paint.
How to Prep and Apply Satinwood for a Flawless Finish
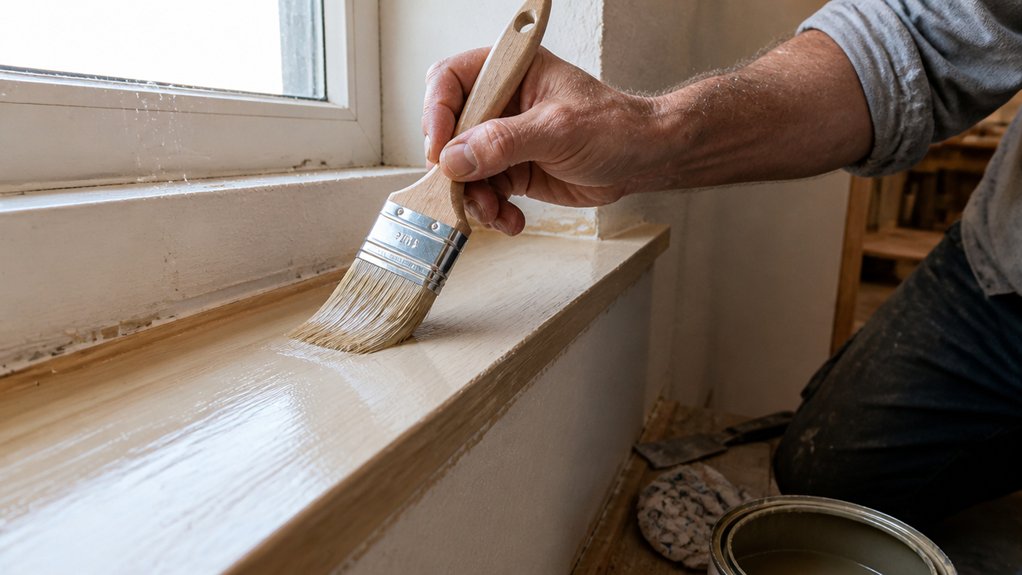
A smooth finish starts before the brush touches the wood. I learned that after I rushed prep and had to sand the first coat back twice.
Lay a drop cloth and tape off edges with painter’s tape. Fill any dings with wood filler, then sand with 220 grit until the surface feels even.
Wipe off every speck of dust with a tack cloth. Clean prep helps the primer and topcoat bond and keeps small bumps out of the final sheen.
For water based satinwood, choose a low VOC product if fumes matter. Use a high quality synthetic brush made for water based paint.
Keep a wet edge and lay off in long, even strokes. This reduces lap marks and brush strokes.
Lightly sand between coats with fine grit. This step is boring, but it knocks down small bumps and helps the next coat grip.
Check the drying time on the can and respect it. Water based paint often feels touch dry in two hours, but give it overnight before recoating and follow the cure time before heavy use.
Brush techniques matter, so avoid overworking the paint. Too much brushing leaves marks in the satin sheen.
Apply thin coats and let each one dry. Thin coats level out and give you the satin sheen you want.
When you finally open the paint can, a sturdy steel opener prevents bending the rim and keeps the lid reusable for later coats.
Frequently Asked Questions
Can Satinwood Be Applied Over Existing Gloss Paint?
Yes, satinwood can be applied over existing gloss paint if the surface is prepared and tested first. Run a small adhesion test by pressing tape onto a cleaned area, then pull it off to check for lifting.
For the real prep, sand the gloss with 120-grit paper to dull the shine, remove dust, and wipe with a degreaser. This gives the new satinwood a sound surface for a durable, non-yellowing finish.
Apply two coats, allowing about four hours between coats, and avoid overloading the brush. If the old coating is sound, this method gives reliable results without stripping the existing gloss paint.
Does Satinwood Require a Primer on Bare Metal?
Yes, Satinwood does require a primer on bare metal for reliable adhesion and corrosion protection. On a rusty radiator, skipping it leads to peeling and quick rust spots because the topcoat cannot bond properly or block moisture.
Sand bare metal with 120-grit paper, wipe away dust, then apply one thin coat of a direct-to-metal primer and let it dry for 24 hours. That step gives Satinwood a sound base and protects the metal.
Use a brush or roller made for solvent or water-based metal primers, depending on the product. Trust me, primer is non-negotiable on bare metal.
How Long Before Recoat Can You Apply Satinwood Paint?
You can usually apply a recoat of satinwood paint after four to six hours with water-based formulas, or sixteen to twenty-four hours with oil-based ones. Rushing the window risks dragging, wrinkling, or poor adhesion.
For a practical check today, lightly sand the dried coat with 220-grit paper and wipe off the dust before recoating. Humidity and thick coats extend drying time, so add extra hours in damp conditions.
If you are comparing products, the satinwood paint drying time on the label is only a guide; test a small area first.
Can Satinwood Be Used on Floors or Staircases?
Satinwood is not a good bare finish for floors or staircases; reserve it for trim and walls unless you add a floor-grade clear topcoat. For a practical workaround on stair treads, scuff sand the cured satinwood with 220 grit, wipe off dust, then apply three coats of a waterborne floor polyurethane, lightly sanding between coats.
That topcoat gives the wear layer that satinwood durability lacks under foot traffic. Keep the satinwood for vertical surfaces and use the same system on any floor area you cannot avoid finishing.
Test a small offcut first, and allow each polyurethane coat to dry per the label, usually 2 to 4 hours before recoating.
What Is the Best Brush to Use for Satinwood Paint?
For satinwood paint, the best brush is a synthetic bristle brush, such as an angled sash brush. Synthetic filaments resist water-based satinwood instead of swelling like natural bristle, so they lay off a smoother coat with fewer brush marks.
Choose a brush with tapered filaments and a firm feel, and keep the size matched to the surface: a 1.5 inch angled sash brush suits trim and small panels. Before you load it, dampen the bristles slightly with water and spin out the excess to help water-based satinwood flow.
Apply two thin coats rather than one heavy coat, and sand the first coat lightly with 220 grit paper once dry. That small step makes the finish feel smoother and helps avoid streaks.
Rounding Up
Satinwood paints are trim paints with a Goldilocks finish, not too shiny and not too flat, and they are the workhorse your baseboards deserve; it laughs at radiator grime. Check kitchen trim for grubby fingerprints and radiators for grime before you begin and let your woodwork show off.
Sand the woodwork first for a flawless finish and treat prep as your best friend; sanding beats swearing every time. Ask for a water-based tin for interiors and compare tins at about $40 a gallon.
Related topic: Water-based versus oil-based interior trim paint.