What Are Satin Varnishes? Types, Uses and How to Choose

What are satin varnishes? They’re the middle ground when gloss feels too shiny and matte looks flat.
For trim, furniture, and art, a satin sheen hides fingerprints and still gives a clear finish. Thin coats and light sanding between them help you avoid streaks and uneven drying.
This guide covers the main types, best uses, and how to choose based on UV needs and removability. Keep reading to match the right resin to your project and skip the messy trial and error.
Quick Answer
- Satin varnish offers a low-to-mid sheen, softly diffusing light between gloss and matte finishes.
- Apply thin coats with a wet edge, sanding between coats with 400-grit for an even finish.
- Choose Laropal or Regalrez resins for long-lasting clarity, unlike dammar which yellows and embrittles.
- Use on wood, canvas, or primed painted surfaces; avoid high-traffic floors due to thin wear.
- Match water-based, oil-based, sprayable, or brushable formulas to project needs, considering UV stabilizers and recoat windows.
What Makes Satin Varnish Different From Gloss and Matte?
Satin varnish sits between gloss and matte because of how its topcoat reflects light. Gloss sends most light straight back and acts like a mirror, while matte scatters light in every direction and kills the shine.
Satin breaks up the light softly and leaves a low sheen you can see without glare. That soft sheen makes satin forgiving on a dining table, where a gloss topcoat shows fingerprints and scratches and a matte finish can look chalky on dark stained wood.
On real jobs I keep a drop cloth down and tape off edges with painter’s tape before I lay a satin polyurethane topcoat. Sanding grit matters here: sand between coats with 220 grit or finer, wipe the dust, and keep a wet edge so brush strokes and lap marks blend out.
Check the label for VOC content and follow the drying time before you sand and the cure time before you put the piece back in service. A primer helps seal bare wood, and satin usually costs less than a high gloss varnish while hiding small marks better. Sheen meters are used to verify dried films when matching satin to existing finishes.
How to Apply Satin Varnish Without Cloudy or Streaky Results?
Satin varnish turns cloudy or streaky when you apply thick, uneven coats and the matting agents clump as the film dries. Thin coats give you control and keep the satin sheen even.
Brush on a thin coat and keep a wet edge so your brush strokes blend before they set. Work in one direction and overlap each pass slightly without brushing back into a tacky area.
Brush thin coats, keep a wet edge, and blend strokes before they set—no brushing back into tacky areas.
Let the coat dry for at least four hours and check the label for drying time and cure time. Rushing the recoat can trap solvent and leave lap marks or a hazy topcoat. Synthetic bristle brushes are recommended for achieving a smooth, streak-free satin finish.
Sand between coats with 400 grit paper, then wipe off the dust with a tack cloth before the next coat. Apply two or three thin coats and keep your work area clean with a drop cloth and painter’s tape where needed.
Use a low VOC varnish or polyurethane and test the finish on scrap wood before you start. A stain or primer under the topcoat can change how the satin sheen reads, so follow the product schedule.
Which Satin Varnish Resin Base Stays Clearest for Decades?
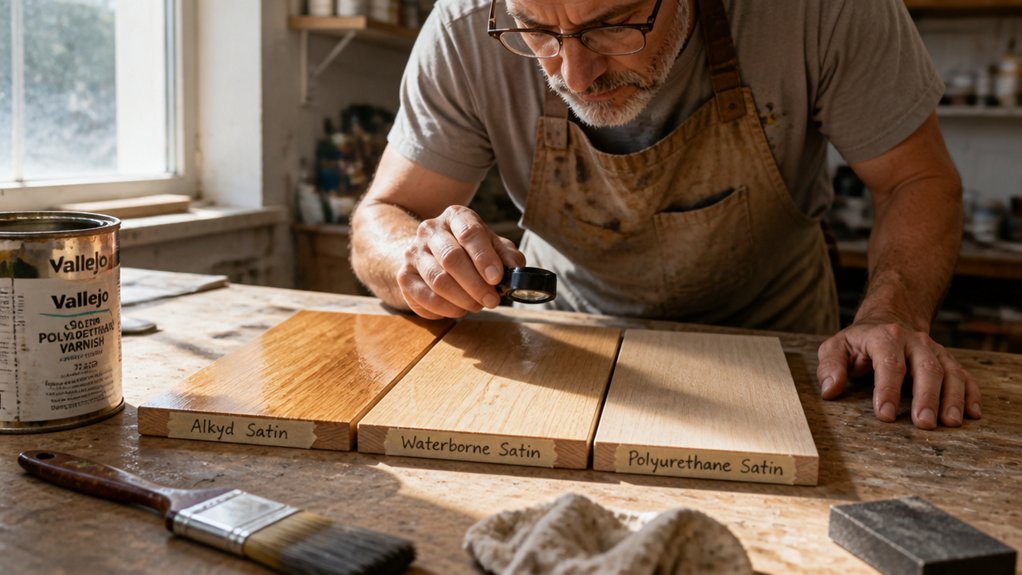
For a satin varnish that stays clear for decades, Laropal is my top pick. This synthetic resin resists yellowing much longer than dammar, which turns amber and brittle.
I have seen Laropal hold a clear satin sheen for many years when the topcoat dries fully. Regalrez also stays clear for a very long time, and its harder film can last over a century in good conditions.
Both resin varnishes beat acrylic varnish, which can cloud slightly, and dammar, which goes amber. On wood, apply primer and stain first, then follow the drying time and cure time before the topcoat.
For wood furniture that gets handled a lot, a polyurethane topcoat can take more wear. Use painter’s tape and a drop cloth to protect nearby surfaces, and test the finish on scrap first.
Laropal gives a slightly softer film that you can remove later with gentle solvents. Use it on paintings you plan to clean.
Regalrez gives a harder, glossier film that suits pieces you will rub down. You can adjust it to a gloss, satin, or matte sheen with an additive.
Keep your brush strokes moving into a wet edge so the satin finish levels out. Use the right sanding grit between coats if the surface feels rough, and wipe away dust before the next topcoat.
Check the VOC label and ventilate the room while the varnish dries. Watch for lap marks near edges, and keep the coat thin so it dries evenly.
Drying time is when dust stops sticking, and cure time is when the film reaches full hardness. Plan your work around both times, especially in cool or humid rooms.
Use Laropal on paintings you expect to clean later. For a tougher, more abrasion-resistant option on high-traffic wood pieces, an oil-based formula offers greater longevity. Use Regalrez on pieces that need a tough gloss topcoat and can take a rub down.
Safe Surfaces: Where to Use Satin Varnish on Art and Wood
I keep a brush in hand and use satin varnish on wood and canvas. It gives a soft sheen that reduces glare without hiding the grain.
On a thrift store sideboard, satin varnish works as a topcoat that protects the wood and keeps the grain readable. For a painted piece, apply primer first, sand with 220 grit, wipe off dust, then lay down the topcoat.
Keep your brush strokes with the grain and work a wet edge so lap marks do not show. Check drying time before you recoat, and wait for full cure time before hard use.
Satin seals painted trim tight and keeps chips and grime away, so baseboards hold up to kids, pets, and that one clumsy friend. On jewelry boxes and picture frames, it gives a tough finish with a quiet look.
Use satin on vases and trays when you want a finish that resists fingerprints better than gloss. A matte finish hides more flaws, while satin gives a little more sheen and still keeps the look calm.
Choose a low VOC varnish or polyurethane for indoor work, and set out a drop cloth plus painter’s tape before you open the can. Stir the varnish slowly to avoid bubbles, and do not shake the can.
Skip satin on floors with heavy traffic because it wears thin fast. For lighter duty, it is a reliable ally that stays quiet and holds up well.
If you need a stain under the varnish, test it on scrap first and let it dry fully. Then apply the satin topcoat in thin coats and sand lightly between coats with 320 grit. Because satin formulations often require two days for a full cure after the final coat, plan your project timeline so the piece rests untouched before regular use.
How to Choose a Satin Varnish by Removability and UV Stability?

Satin varnish can protect your work, and two choices matter most before you buy. First, decide whether you need to remove the varnish later.
Satin varnish protects your work, but first decide if you’ll need to remove it later.
For oil paintings, choose a topcoat you can reverse with the right solvent. Synthetic resins such as Laropal stay soluble for decades, while Dammar hardens and becomes very hard to remove.
Second, check how the varnish holds up under UV light. Sunlight fades color and yellows clear finishes, so pick a product with UV stabilizers if the piece will hang in a bright room.
Read the satin varnish shelf life before you buy. Old stock may not flow evenly and can leave lap marks.
Respect the recoat window printed by the maker. If you miss it, the next coat may look cloudy or patchy.
For a satin sheen, stir the varnish gently and work with a wet edge to reduce brush strokes. Keep a drop cloth down and use painter’s tape on frames or edges you want to protect.
Check the VOC level if you work indoors, and allow the full drying time before you handle the piece. Cure time can take longer, so let the finish sit before you stack or wrap it.
A removable synthetic varnish with UV stabilizers is the safer choice for artwork. It gives you a finish you can fix later with less risk to the paint.
Technical specs confirm that effective UV stabilizers, such as benzotriazole derivatives, can filter up to 99% of UVA/UVB rays.
Frequently Asked Questions
Can Satin Varnish Be Applied Over an Old Paint Layer?
Yes, satin varnish can be applied over an old paint layer, provided the coating is sound and properly prepared. Before you start, run a simple adhesion test by pressing tape onto a clean, dry patch and lifting it; if paint comes away, sand and prime first.
Clean the surface with a degreaser, then scuff it lightly with 220 grit sandpaper and wipe away all dust with a tack cloth. Apply two thin coats of satin varnish, letting each coat dry 2 to 4 hours before recoating; this clear satin finish gives even protection.
Does Satin Varnish Require a Specific Brush or Sprayer?
Satin varnish does not require a specific brush or sprayer, but the right tool helps you control the finish. For brushing, use a fine bristle brush and keep a wet edge; a 2 inch synthetic brush works well on trim and furniture.
If you spray, an HVLP sprayer with a 1.3 mm to 1.5 mm tip gives even coats without flooding the surface. Apply two thin coats rather than one heavy coat, and sand lightly with 320 grit between coats once dry.
Avoid thick application because it prolongs drying and can cause runs, sagging, or an uneven sheen. A clear satin finish rewards patience: check the can for recoat time, usually 2 to 4 hours, before adding the next coat.
How Long Should I Wait Before Touching the Surface?
Wait 24 hours before touching the surface in normal conditions. Do not trust the clock alone because humidity and coat thickness change drying time.
Test for tack in an inconspicuous spot first: press a clean fingertip or a small piece of masking tape, then check for resistance. As a practical example, at 70 F and 50 percent humidity, a thin varnish coat may feel dry in 4 to 6 hours, but still give it the full day before sanding or handling.
If it feels slick and leaves no mark, you can proceed. Use the tack test as your real-world check, and keep airflow steady to speed curing.
Can I Mix Satin Varnish With Paint for a Custom Finish?
Yes, you can mix satin varnish with paint to create a custom finish, but I would not rely on it for an even sheen. Keep any varnish addition to roughly 10 percent or less, because too much clear varnish can make the paint look cloudy or uneven.
For a more predictable result, apply a satin varnish as a separate clear coat over fully dried paint. Let water based paint cure for about 7 days before coating, and sand the dried film lightly with 220 grit paper to improve adhesion.
If you still want to experiment, test the varnish and paint blend on a scrap board first. This custom paint sheen approach helps you check color, flow, and leveling.
Will Satin Varnish Darken the Color of My Artwork?
Satin varnish will not darken the color of your artwork when you apply thin, even coats. Its subtle sheen only softens glare, so colors stay crisp and true.
For a practical test, brush a 2 inch square onto scrap or a hidden corner and let it dry for 24 hours before judging the final tone. Stick with synthetic resins such as acrylic or polyurethane; natural resins carry a higher archival yellowing risk over time.
Apply two thin coats rather than one heavy coat, and use a soft synthetic brush to avoid bubbles and uneven sheen. A removable picture varnish is a smart choice for future cleaning and conservation.
Rounding Up
Satin varnishes are a goldilocks finish, not too shiny, not too flat, and right for hiding flaws while looking classy.
Test your product on scrap first, then compare a water-based acrylic satin like Liquitex or Golden for clear art sealing. For wood, compare a polyurethane satin like Minwax at around $15 a quart, a measured price, and stir it, do not shake it, to avoid bubbles.
Apply thin coats with a clean brush instead of thick ones, and keep UV protection in mind for the final soft glow. Read next about UV protection.