What Are Whiteboard Paints? Types, Uses and How to Choose

Bulky whiteboards can eat up wall space fast. For DIYers asking what whiteboard paints are, their types, uses and how to choose, the upgrade is a coating that turns a smooth wall into a writable, erasable surface.
A DIY kit runs $50 to $150 and covers about 40 square feet, so surface prep, primer, and cure time matter more than sheen. You will see standard white, clear, magnetic, epoxy, and waterborne options, each with real trade-offs.
This guide covers the best pick for a cramped office or messy garage, plus coats and drying time, so you can skip the guesswork.
Quick Answer
- Whiteboard paint turns any smooth wall into a writable, erasable surface.
- Types include standard white, clear, magnetic, waterborne, and epoxy coatings.
- Costs range from $50–$150 DIY, covering roughly 40 square feet.
- Use bonding primer, sand glossy spots, and keep humidity at 40–50%.
- Allow five to seven full days of cure time before writing or cleaning.
Whiteboard Paint vs Wallpaper: Which Should You Choose?
Whiteboard paint costs less for a small area, but wallpaper takes daily abuse better. For a small wall, a DIY paint kit costs about $50 to $150 and covers roughly 40 square feet.
A roll of wallpaper can run $200 to $400, and installation adds time and extra seam work. It can also show seam problems if the walls are not flat and clean.
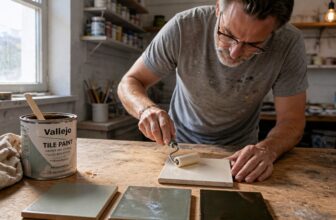
For paint, prep matters. Sand gloss spots with 120 grit, lay a drop cloth, tape edges with painter’s tape, and apply a primer made for the surface.
Prep matters: sand gloss with 120 grit, drop cloth, tape edges, and prime the surface first.
Roll the topcoat in small sections so you keep a wet edge and avoid lap marks. Keep brush strokes light, check the sheen, and respect the full cure time before writing on it.
Paint can scratch, show ghost marks, and resist invisible repairs, but wallpaper hides scuffs and is ready once the paste dries. If you want lower cost and can handle the prep and cure time, choose paint.
If you want a shorter cure wait and magnetic walls, choose wallpaper. If you choose paint, pick a matte or satin finish, check the VOC level for indoor air, and plan around drying time and cure time. Since humidity above 60% causes streaky marks that ghost forever, aim for a 40–50% humidity range during application to protect the coating’s performance.
The 5 Types of Whiteboard Paint: From Clear to Magnetic
Whiteboard paint offers more options than the classic white surface you may picture. Standard white gives a bright, crisp surface that works with dry erase markers, and a primer plus two coats helps you get even coverage.
Clear whiteboard paint keeps the wall color underneath while making that surface writable. It suits a bold accent wall, and a small test patch helps you check the sheen and coverage.
Magnetic whiteboard paint adds a metallic layer under the writing surface. Apply it over a suitable primer, then add the whiteboard topcoat so magnets stick and the dry erase surface holds up.
Epoxy coatings mixed from two parts can give a low sheen finish and strong wear. They also release more odor and VOC during cure, so set out a drop cloth and painter’s tape and ventilate the room.
Waterborne whiteboard paints are easier for a DIY job and often cost less per area. In busy rooms, add an antibacterial topcoat and check drying time versus cure time before you use the wall.
For a clean finish, sand the wall with the sanding grit your primer calls for and remove the dust. Keep a wet edge as you roll, watch for lap marks, and lay off brush strokes in one direction near edges.
Match the coating to how the room gets used. Clear paint suits style, magnetic paint adds function, and every job needs the right primer and topcoat.
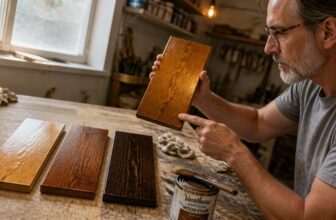
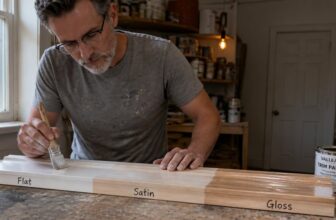
If you also finish trim in the room, choose your stain, varnish, or polyurethane and protect the wall with tape and a drop cloth. Use the sheen the product lists, whether gloss, satin, or matte, and respect the stated drying time before you wipe the wall in a panic. For oil-based options, odorless mineral spirits can thin the paint and clean brushes with minimal residue and low smell, making interior touch-ups more pleasant.
Rooms Where Whiteboard Paint Saves More Than a Hanging Board

Whiteboard paint turns a whole wall into a working surface. In the right room, it does more than a hanging board.
Whiteboard paint turns a whole wall into a working surface, doing more than a hanging board in the right room.
A cramped home office or narrow hallway shows the problem. A bulky board takes space and gets in your way, while paint gives you the full wall for planning.
You sand the wall to a dull finish, often with 120 grit, then wipe off dust and lay a primer. Use painter’s tape and a drop cloth to protect trim and floors before you start.
Apply the whiteboard topcoat in even passes and keep a wet edge so you avoid lap marks and visible brush strokes. Check the can for VOC level, drying time, and cure time, then let the coating cure fully before you write on it.
Choose a sheen the maker recommends, often a satin or gloss finish that wipes clean. A matte wall paint can show marks and may need a different topcoat. Satin sheens provide the durability and scrubbability needed for a frequently used writing surface.
In a kid’s playroom, paint lets you set the writing zone at any height, from floor to ceiling. In a garage workshop, a smooth wall wipes down without a frame to trap dust.
If you coat wood first, use stain, varnish, or polyurethane and let it cure before whiteboard paint goes on. Test a small area first and follow the label for recoat times.
Acoustics and lighting still matter in these rooms. Flat paint can reduce echo, and you can place lights to avoid glare on the wall.
Pick paint for awkward spaces where a board gets in the way. It gives you flexible writing space that stays visible and out of the way.
How to Apply Whiteboard Paint: Prep, Primer, and 5-Day Cure
Check the label for VOC level and follow the maker’s safety steps before you open the can. Set up the room with painter’s tape and a drop cloth, then sand smooth and patch holes first.
Use the sanding grit the manufacturer recommends, then wipe off all dust. Apply the primer approved by the manufacturer and let it dry for the full drying time on the label.
Do not put stain, varnish, or polyurethane under the whiteboard paint unless the maker approves that system. A primer made for the paint is the safer base, and the wrong finish can cause poor adhesion.
Check the primer for brush strokes, lap marks, and dry spots before you start the topcoat. A smooth primer coat helps you get the even sheen you want, whether you choose gloss, satin, or matte.
Mix the epoxy from its two parts and note the working time on the label. You may have about 30 minutes before it starts to stiffen, so plan your rolling before you mix.
Roll the paint in one continuous pass and keep a wet edge so you do not leave lap marks. Do not roll back over a section that has started to set.
Let drying time pass until the surface feels dry, but remember that cure time takes much longer. Keep the room closed, keep markers and cleaners away, and do not test a corner during the five full days of cure.
If you break the cure, you can get ghosting that will not wipe away cleanly. Wait until the five full days are over before you write on the wall or clean it.
After the cure, test a small spot with a dry cloth before normal use. Keep leftover paint for touchups and write down the grit, primer, and topcoat you used.
Maintain humidity levels between 40% and 70% during application and drying to ensure proper film formation and avoid blistering.
7 Whiteboard Paint Mistakes That Cause Ghosting and Slow Wipe-Off
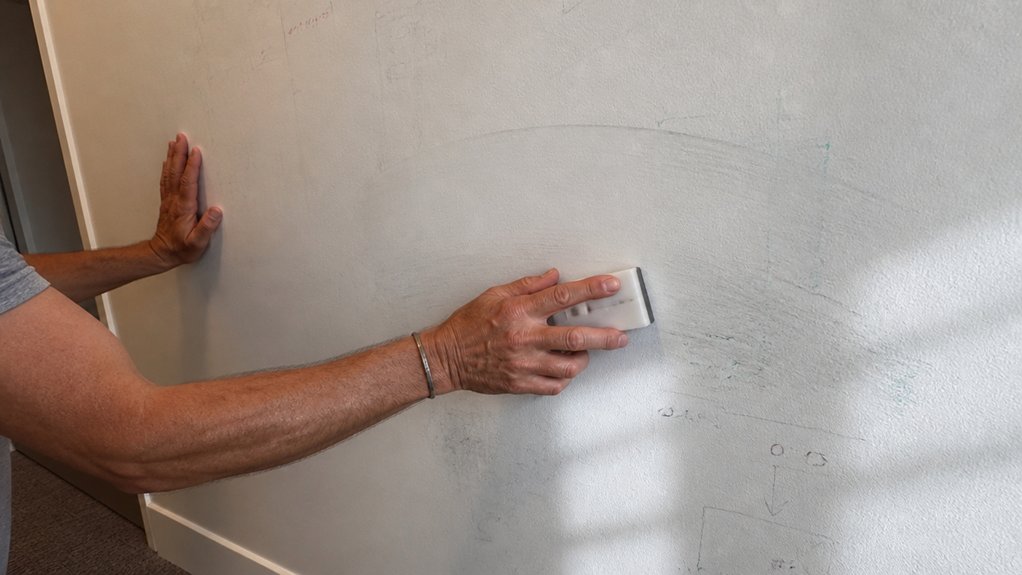
Your new whiteboard wall can show ghost marks even after hard scrubbing. Most of the time the paint is fine and the trouble comes from prep or care mistakes.
Whiteboard paint needs a full cure, and a gloss or satin topcoat cleans easier than a matte finish. Check the label for VOC level, use painter’s tape and a drop cloth, and apply a primer under the topcoat for a sheen that keeps wipe off fast.
Start writing too early and ink can settle into the pores before the film hardens. Wait the full 5 to 7 day cure, because drying time and cure time are different stages and the film is still soft after the surface feels dry.
Permanent markers and low grade markers leave polymer residue that turns into ghost marks. Use quality dry erase markers and erase them fully between sessions.
Abrasive pads and harsh sprays scratch the gloss layer and slow every swipe. Use a microfiber cloth and a cleaner made for whiteboard paint.
Skip surface prep and uneven texture traps ink, which slows every wipe. Sand with the right sanding grit, wipe off dust, and keep a wet edge when you roll the topcoat so lap marks and brush strokes do not trap ink.
Respect the cure time and choose quality markers. Stick to microfiber cloths and gentle cleaner, and your wall will stay clean without hard scrubbing.
For problematic surfaces, a bonding primer like the Zinsser 373693 Multi-Purpose Primer grips glossy or slick areas without deglossing and dries touch-ready in about 30 minutes, though you should confirm its low-VOC water-based formula meets your indoor air quality needs before application.
Frequently Asked Questions
Can Whiteboard Paint Be Applied Over Existing Wallpaper?
No, whiteboard paint should not be applied directly over existing wallpaper. The wallpaper adhesive is the weak link, and a heavy coating can pull it loose.
Strip the wallpaper completely, wash off paste residue, then sand the wall with 120 grit to dull the surface and improve bite. Prime with a high adhesion primer and let it dry fully, often 4 to 6 hours, before applying two coats of whiteboard paint.
If you skip stripping, expect bubbling and wasted material. This is standard dry erase paint prep, and proper prep is critical for a durable finish.
Does Whiteboard Paint Smell During Application or Curing?
Yes, whiteboard paint can smell during application and curing, especially two-part epoxy versions with higher VOC levels. Water-based whiteboard coating is milder, but you still need adequate ventilation and masking to control odor.
Plan to keep the room empty and fans running for at least 24 hours after the final coat. For epoxy kits, mix only what you need and work in a steady flow so you do not extend the smelly application window.
A related term shoppers use is dry erase coating, and the same curing odor rules apply.
Can I Use Any Brand of Dry-Erase Markers?
No, you cannot use any brand of dry-erase markers on a dry-erase painted wall. Cheap markers can act like sand on glass and scratch the film, so ghosting resistance fails quickly.
Stick with low-odor dry-erase markers made for whiteboard paint, and avoid gritty or heavily scented discount brands. Before writing across the wall, run a 24-hour test on a hidden corner, then wipe it with a dry cloth and a damp cloth to check for staining.
If the test wipes clean, you are good to go. Keep a dedicated set for the wall and replace it when tips fray, because worn tips scratch more than fresh ones.
How Do I Remove Permanent Marker From Whiteboard Paint?
To remove permanent marker from whiteboard paint, wipe the stain with a microfiber cloth dampened with isopropyl alcohol. Use light pressure and let the alcohol soften the ink before wiping again, because aggressive scrubbing can dull the cured coating.
For stubborn marks, draw over the permanent ink with a dry erase marker, let it sit for about 10 seconds, then erase the marks. This marker trick often lifts the ink without abrasive pads or heavy scrubbing.
Avoid harsh cleaners such as acetone or abrasive sprays, since they damage the surface and can cause marker ghosting. Test any solvent in a small corner first, and keep the cloth barely damp so liquid does not seep into seams.
Will Whiteboard Paint Yellow Over Time?
Whiteboard paint can yellow over time if it lacks UV resistance and a quality formulation. Cheap formulas fade and amber under sun exposure, so check the technical data sheet for UV stabilizers before buying.
Apply two thin coats at the manufacturer’s wet mil spec, usually 4 to 6 mils, and let each coat dry 4 to 6 hours before recoating. For a concrete test, paint a scrap sample panel and leave it in direct sun for 48 hours beside an uncoated control.
That simple sample panel tells you more than marketing claims about a non-yellowing whiteboard coating. Choose a UV-stable product and you will protect the wall’s brightness.
Rounding Up
Whiteboard paints create a dry erase surface for writing directly on a wall, and their types, uses and how to choose depend on careful prep, primer, cure time and ghosting risk. Check whether you can handle the careful prep, primer and cure time before you commit to a dry erase surface.
Write down the real ghosting risk if you mess up, because that is part of the commitment. First compare a magnetic type and the good primer before you buy, then practice your deep breaths carefully.
Magnetic whiteboard paint options.