How to Apply Bonding Plasters: Step-by-Step Guide
Bonding plaster fails when the surface prep is rushed, not when the trowel work is sloppy.
If you are staring at a cracked wall and dreading the skim coat, this guide is for you.
The trick is to treat bonding plaster like a primer coat, not a shortcut.
You need a clean, sound base, cracks opened up beyond 2mm, and a mix that hits the right consistency for a smooth, even pull.
I will show you the exact 600mm strip method, when to scratch the surface for the next coat, and how to time your drying window so you never sand a disaster.
Follow these steps, and your skim coat will glide on without a single redo.
Quick Answer
- Clean walls thoroughly, repairing cracks over 2mm with masonry additives before plastering.
- Mix 25kg plaster with 10 liters water, sprinkling powder in, then blend at 400–600 RPM.
- Apply from bottom up at 30–40 degrees, spreading 600mm strips to an 8mm thickness.
- Scratch diagonal lines 3–4mm deep when surface turns matte, within 30–60 minutes.
- Wait 1.5–2 hours at 20°C for skim readiness; test firmness before finishing.
Prep the Wall for Bonding Plaster: Clean, Repair, Dampen
Grab a stiff brush and give the wall a real cleaning, because a dusty surface will ruin adhesion faster than anything else. Check how flat and sound the substrate is, then sweep, vacuum, and sweep again to get it truly bare.
For cracks wider than 2mm, don’t just smear filler over them. Mix masonry additives into your repair material, and for structural cracks use injection instead of patching, that’s the only lasting fix.
Skip plastic-based sealers on the substrate. You want a breathable coating, so trapped moisture can escape without blowing the plaster off later. For surfaces with paint loss or crumbly old plaster, apply a flexible binding primer that forms a breathable film.
A clean, damp, and solid wall makes all the difference when I’m troweling on the bonding coat. If you skip this prep, you’re just polishing a problem with your primer and topcoat.
Mix Bonding Plaster: Ratios, Slaking, and Consistency
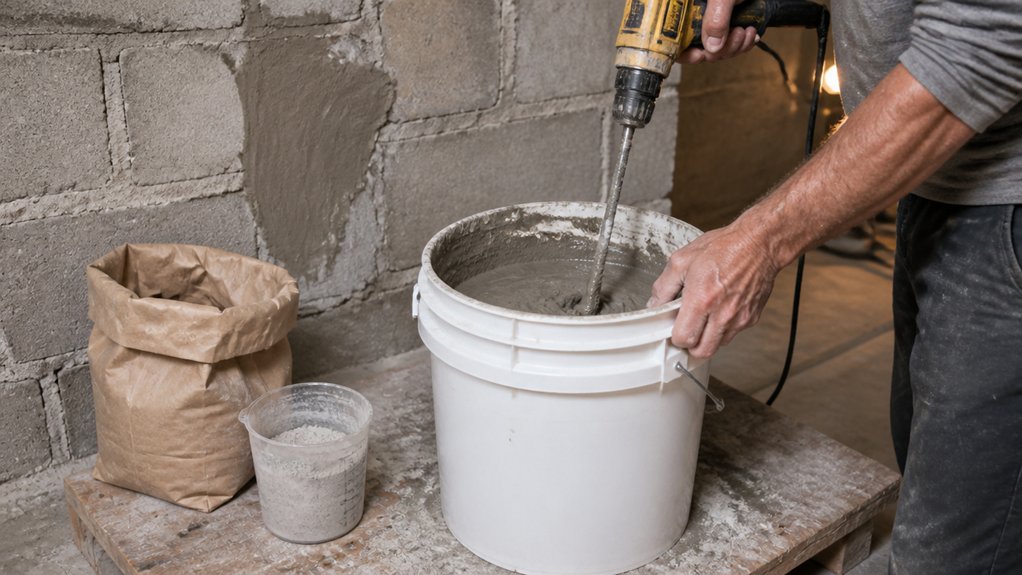
The mix is where most DIY plastering jobs fail, so start with the right ratio. For a 25kg bag of bonding plaster, use about 10 litres of clean water, and adjust by half a litre if the room is very dry or humid.
Sprinkle the powder into the water, never the other way around, then let it slake for 30 seconds so the plaster can soak. Mix with a paddle drill at 400 to 600 RPM for 2 to 3 minutes until it is thick and creamy, with no lumps.
Over-mixing speeds up the set, so stop as soon as it looks smooth. This is like keeping a wet edge on a topcoat, where working fast and steady beats rushing back to fix mistakes. Keep the mix’s exothermic heat below 50°C to reduce the risk of cracking as it sets.
Keep the room above 5°C, because cold air slows the cure time just as it does for varnish or polyurethane. You have 20 to 30 minutes of working time, so plan your surface like you would mask off trim with painter’s tape.
Keep the room above 5°C—cold air slows cure time just like it does for varnish. Plan your 20–30 minute window before you start.
If the plaster starts to set in the bucket, throw it out. Adding water to revive it is a rookie error, much like sanding a fresh primer coat before the drying time is up.
A creamy, even mix behaves like a satin finish, smooth and forgiving, while a lumpy one leaves ridges that show under paint. For a beginner, aim for a consistency that holds a peak when you lift the paddle, just like checking a stain’s coverage on bare wood.
Clean your tools right after spreading, because dried plaster is harder to remove than a missed brush stroke. Work in small batches, and you’ll get a flat, solid base that any primer or paint will grab onto without issue.
Apply Bonding Plaster, Scratch It, and Know When to Skim
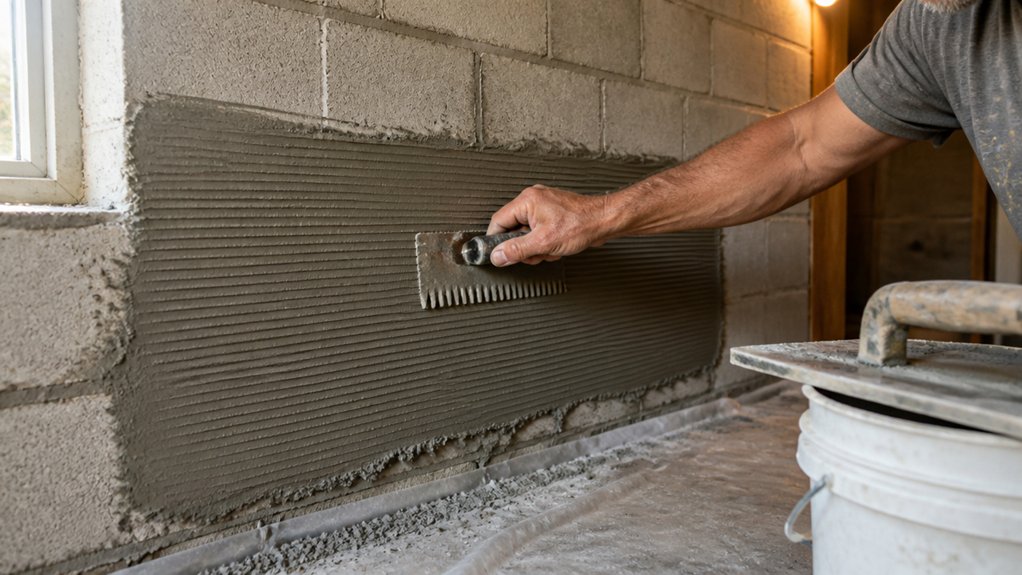
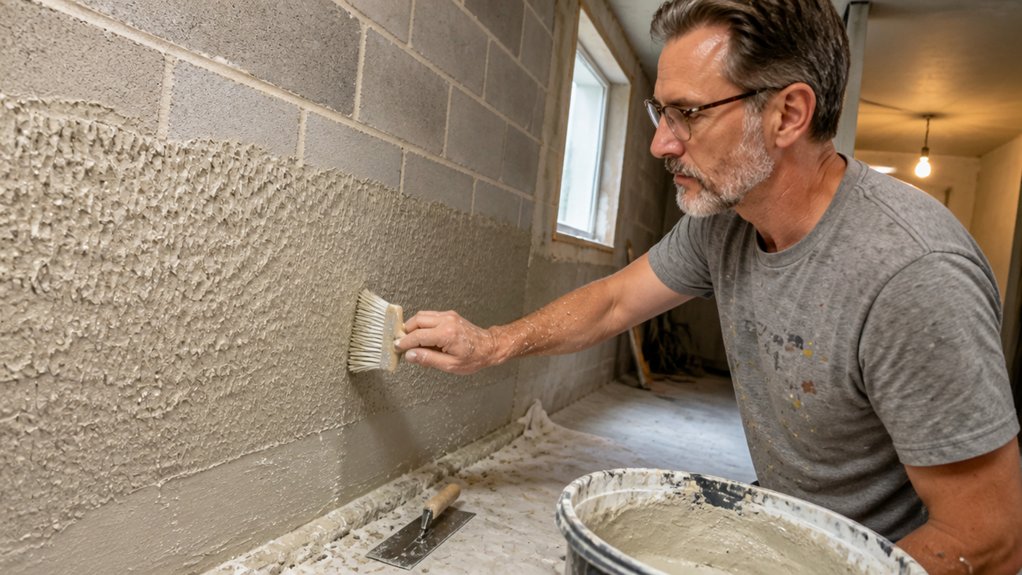
Your bonding plaster is mixed, so now it’s time to get it on the wall before it hardens. Work from the bottom up with your trowel held at a 30 to 40 degree angle, spreading in 600mm strips.
The first pass sticks the plaster to the surface, and the second pass builds up the depth. Keep the total thickness to 8mm, because you are not building a fortress here.
Once the plaster is on, the devil float comes out for scratching, and this is where timing makes or breaks the job. Wait until the surface loses its shine and turns matte, then press your thumb in gently.
It should leave a mark without sinking, which usually takes 30 to 60 minutes. Scratch too early and you will drag a gooey mess; scratch too late and you are carving into concrete with a pickaxe.
Use the devil float to scratch diagonal lines, about 3 to 4mm deep, spaced 50 to 75mm apart. That rough texture is the key, because it gives the skim coat something to bite into, just like keying up a sanded primer before a topcoat.
For skim readiness, at 20°C room temperature, give it 1.5 to 2 hours. The plaster will feel firm, slightly warm, and take on a pinker tone, which means the chemical cure is progressing.
Do not rush this step, because skimming over damp plaster causes blisters that force you to redo everything. Patience here is cheap compared to the cost of a second full coat of finish, so let it dry like you would a fresh varnish layer before sanding with fine grit.
The reward is a smooth base that takes your paint or finish without hidden surprises, and that is where the real craftsmanship shows. For a paint-ready finish, use higher grits such as 180–220 to remove material lightly and reduce scratches before your final coat.
Frequently Asked Questions
Can I Apply Bonding Plaster Over Old Painted Walls?
Yes, you can apply bonding plaster over old painted walls, but only if the surface is sound and properly prepared. First, scrape away any loose or flaking paint, then wash the wall with sugar soap and rinse it clean.
Do a plaster adhesion test in a small, hidden corner before committing to the full job. Apply a PVA bonding agent evenly with a roller, and let it tack up until it feels sticky but not wet, usually 30 to 60 minutes.
Rebond any bare patches with a second coat of PVA just before troweling on the plaster. Use a 120-grit sandpaper to key up gloss or satin paint if you skip stripping, and remember to check for efflorescence or damp spots first.
What Happens if I Skip the PVA Bonding Agent?
If you skip the PVA bonding agent, you risk immediate adhesion failure, with plaster delaminating from the substrate as it cures. This omission leaves the surface vulnerable to moisture infiltration, which can lead to efflorescence, paint blistering, and long term structural decay.
A proper primer, like polyvinyl acetate, creates a tacky film that grips both the porous wall and your topcoat. For a reliable bond, apply one full coat of PVA and let it dry for at least four hours before troweling on new plaster or joint compound.
You can test the readiness by pressing a finger against the surface; it should feel dry but slightly sticky. Never substitute paint or water, as this compromises the entire system. A quick search for “plaster bonding primer” will show the same advice from every professional.
How Do I Fix Plaster That Is Cracking After Drying?
To fix plaster that is cracking after drying, cut out the cracks with a sharp knife or scraper to create a clean, V-shaped key. Widen each crack to at least 6 mm and dampen the edges with water before applying bonding plaster.
Press the plaster firmly into the recess, then strike it off flush and leave it to dry for at least 24 hours. For a smooth finish, sand with 120 grit paper once fully cured.
Surface preparation is the hidden culprit, so brush away all dust and apply a mist coat of PVA if the background is porous. Poor adhesion, not the plaster itself, causes most repeat failures. This repair method, often called raking out, works best when you also check for dampness underneath.
Finish with two thin coats of a topcoat plaster if needed, allowing each to dry completely between applications.
Can I Use Bonding Plaster for Exterior Walls?
No, you cannot use bonding plaster for exterior walls, as it lacks the necessary durability and weather resistance for outdoor exposure. This material is strictly designed for internal surfaces, where it bonds well to smooth substrates like concrete or plasterboard.
For outside walls, you need a cement-based render or a specialist exterior plaster that can handle rain, frost, and UV degradation. I recommend using a scratch coat and a top coat of acrylic render, which flexes with temperature changes better than traditional lime mixes.
As a practical tip, always apply exterior render in two coats, keeping each layer between 10 and 15 mm thick, and let the first coat cure for at least 24 hours before adding the second. Search for “external wall render systems” if you need more detailed product guidance. Don’t risk bonding plaster outdoors; it will crack and fail within a single season, leaving you with costly repairs.
How Long Should I Wait Before Painting the Skim Coat?
You should wait between 3 and 7 days before painting over a skim coat, depending on humidity, temperature, and coat thickness. Don’t rely on touch alone, since the surface can feel dry while moisture still sits deep beneath.
Perform a simple dampness test by taping a small square of plastic sheeting to the wall and sealing the edges. If condensation forms underneath after 24 hours, the skim coat is still releasing moisture, so wait another 48 hours and retest.
For fast drying, keep indoor humidity below 50% and run a fan or dehumidifier to speed up the curing process. Once the surface passes the plastic test, sand with 120 grit to knock down any high spots before priming.
Use a high quality primer, like a PVA sealer, to lock in the porous skim coat and prevent flashing in your final paint finish. A full 7 day wait is safest for thick applications or in cooler spaces, but 3 days works if conditions are warm and dry.
Rounding Up
Applying bonding plaster starts with prep, not talent, and that prep beats a botched mix every time.
Check your surface is sound, clean, and dry before you open a bag, then scratch pass the first coat to give your skim something to grip.
Keep a spray bottle nearby and work in small patches so the timing stays on your side, not against you.
A $15 bag of bonding plaster is real cash, so test your mix consistency on a small area before committing to a full wall.
Write down your water ratio as you go, then compare it to the manufacturer’s guide to lock in repeatable results.
Follow the steps exactly and you’ll get a flat, solid base that’s worth the elbow grease.
Read next on applying a finishing skim coat.