How to Apply Boiled Linseed Oils: Step-by-Step Guide

Applying boiled linseed oil is one of the simplest ways to bring bare wood back to life, but it goes wrong fast if you rush it.
A sticky, tacky finish usually means you skipped the thin coats or didn’t wipe off the excess. The trick is treating it like a soak, not a paint job.
You wipe it on, wait 20 minutes, then buff off what didn’t absorb. Drying time matters too. Wait 8 to 24 hours between coats, and sand lightly in between for a smooth surface.
This guide covers the full process, including surface prep and safe rag cleanup, so you get a durable, natural sheen every time.
Quick Answer
- Mix two parts boiled linseed oil with one part pure turpentine.
- Sand bare wood from coarse to fine grit, then wipe dust-free.
- Apply thin coats along the grain; wait 20 minutes; wipe excess.
- Lightly sand with 150 grit between coats; repeat until desired finish.
- Dry used rags flat outside, then seal in a metal can.
Prep the Surface and Ventilate the Room
Proper prep is what lets the wood drink up the oil like a dried out sponge. Skip it, and you will end up with a blotchy, sticky mess that looks like a bad oil painting.
Proper prep lets the wood drink oil like a dried-out sponge; skip it, and you get a blotchy, sticky mess.
I have made that mistake before, so trust me on this one. First, strip off any old finish, wax, or grime until you reach bare wood.
Sand with coarse grit, then move to finer grit to open the pores. Wipe everything down with a tack cloth until it is spotless, because dust seals the grain and blocks the oil.
Now set up your ventilation before you touch the oil can. Open windows, run a fan, and crack a door, since those fumes will haze your brain fast.
I learned that the hard way when my workshop smelled like a varnish factory for a week. Work at room temperature too, because cold wood won’t absorb the oil the way warm wood will.
Use a low VOC finish if you can, and keep a drop cloth down to catch drips. A clean surface and fresh air are the two things that make every later step easier.
After you oil the wood, let it sit for the right drying time, not just the cure time, before you add a topcoat.
That way you avoid lap marks and brush strokes when you apply the final sheen, whether you choose satin, gloss, or matte.
Remember that boiled versions dry faster than raw variants, so adjust your wait time between coats accordingly.
Mix Boiled Linseed Oil and Turpentine in a 2:1 Ratio

Grab a clean container and measure two parts boiled linseed oil to one part pure turpentine. This 2:1 mix is the workhorse blend for most wood projects because it penetrates well and still builds a proper film.
I’ve tried a 1:1 ratio for faster drying, but that thins the oil too much and leaves less protection. Pure turpentine cuts the oil’s tackiness and speeds absorption without changing the color, so I skip additives like Japan drier. Thin coats under 0.1mm speed up drying compared to thick applications, which is another reason this blend stays effective.
Stir the blend thoroughly until it looks like a uniform, honey-colored liquid. A four-liter batch covers roughly 37 to 60 square meters, which is plenty for a shelf or tabletop over a weekend.
Apply it with a clean cloth or brush, keeping a wet edge to avoid lap marks, and sand between coats with 220 grit once the surface feels dry. This blend works well as a sealer under varnish or polyurethane, and it keeps VOC levels lower than many commercial finishes.
For a standard project, stick with 2:1 unless you are experimenting for fun. It is reliable, cheap, and forgiving, and it gives a warm satin sheen without needing a topcoat on indoor pieces.
Let each coat dry overnight before adding another, and remember that drying time is not the same as cure time, so wait a few days before heavy use. Use a drop cloth and painter’s tape if you are working near trim or walls.
Apply Boiled Linseed Oil: Wipe On, Wait 20 Minutes, Rub Out

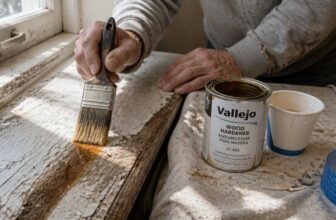
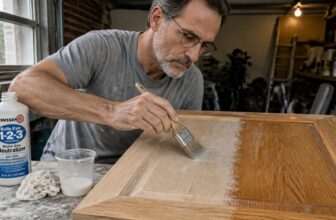
Most people mess up the application, but it is honestly the easiest step if you respect the clock. I dab my cloth in the oil, then wipe it on with the wood grain, not against it.
You are feeding the fibers, not flooding the surface. For furniture refinishing or antique restoration, aim for a thin, even coat like you would with a stain.
Then you wait twenty minutes, no cheating. That is when the oil blends and sinks into the pores, much like a primer soaking into bare wood.
After that, grab a clean, lint-free cloth and rub out all the excess, pressing firmly. This step is not optional; it builds the surface luster and stops that sticky mess.
Keep rubbing until the wood feels dry and almost polished to the touch. You will see the grain pop and realize you did not screw it up.
Use a low-VOC boiled linseed oil if you want fewer fumes, and work on a drop cloth to catch drips. The finish will dry to a satin sheen, so do not expect a high gloss like polyurethane.
Wipe, wait, rub, and that is the whole trick. After that, let it cure fully before layering any varnish or topcoat.
Boiled Linseed Oil Drying Times Between Coats

Boiled linseed oil needs patience between coats, and rushing this step will ruin your finish. After the wipe-wait-rub routine, give each layer enough time to penetrate and settle into the wood.
A thin coat does not dry faster, so do not rely on that trick. A thick, sloppy layer turns tacky and can stay sticky for weeks, which is a nightmare to fix.
Use a light sanding pass with 150 grit between coats to smooth the raised grain. This helps the next coat absorb evenly, and you just wipe off the dust with a clean cloth before reapplying.
Your drying climate is the biggest variable in this process. In a humid garage, I wait a full 24 hours between coats, sometimes two full days before I touch it.
In a warm, dry room, you might get away with 8 to 10 hours, but do not push it. If the surface feels tacky or grabs your finger, it is not ready, so wait longer.
The distinction between drying time and cure time matters here. Drying means the oil is no longer wet to the touch, but curing means the oil has fully hardened, which can take weeks.
Always test the surface with a clean fingertip before adding the next coat. If it sticks, give it more time, because a sticky layer will ruin the final sheen and make your topcoat or varnish lap marks obvious.
Sanding with 150 grit also knocks down any dust nibs or brush strokes from the previous coat. That keeps the finish smooth and helps the next layer bond instead of peeling.
For a beginner, a simple schedule works best: apply one coat, wait 24 hours, sand lightly, wipe clean, then repeat. Use a drop cloth under your project to catch drips, and keep painter’s tape handy to protect edges you do not want coated.
If you are working with stain or polyurethane over the boiled linseed oil, factor in the oil’s cure time first. A primer or topcoat applied too soon will sit on a soft film and scratch easily.
Keep the room ventilated, since linseed oil has a noticeable smell and low VOCs do not mean zero fumes. You are not in a race, so let each coat dry fully, and your wood will reward you with a deep, glossy finish.
For a more forgiving application that hides sanding marks, consider a polymerized linseed oil blend, which dries harder and faster than raw alternatives.
Rag Safety and Food-Safe Alternatives for Boiled Linseed Oil

Rag safety is where boiled linseed oil turns from a helpful woodworking product into a real fire hazard. Those soaked rags can self ignite because the oil oxidizes, heats up, and catches fire.
I never crumple them. I lay them flat outside to dry, then put them in a metal can with water.
Do not skip this step, or you will learn the hard way. The same care applies when you think about drying time versus cure time on any oil finish.
Food safe oils matter if you are finishing cutting boards or bowls. Standard boiled linseed oil contains metallic driers, so it is not safe for food contact.
Instead, use pure tung oil or heat treated walnut oil, since both cure safely. Brands like Tried & True skip the toxic additives, though they cost more. Keep in mind that tung oil requires a 30 to 45 day curing period before it is fully food-safe.
For a salad bowl, I would pick walnut oil every time. It is simple, safe, and smells like a bakery.
Rag safety saves your shop, and food safe oils save your dinner. Keep a drop cloth down and a metal can nearby whenever you finish a project.
Frequently Asked Questions
Can Boiled Linseed Oil Be Applied Over Existing Paint?
No, boiled linseed oil should not be applied over existing paint, because it cannot penetrate the cured film and will leave a sticky, non-drying surface that ruins adhesion. You must strip the paint down to bare wood first, using a chemical stripper or heat gun, then sand with 120-grit paper to open the grain.
After sanding, wipe away all dust with a tack cloth, then apply the first thin coat of oil with a lint-free rag, letting it soak in for about 15 minutes before wiping off the excess. Wait 24 hours between coats, and apply a second and third coat for proper saturation. If you skip this prep, the oil will sit on top, creating a mess that requires full refinishing. For best results, work in a warm, dry room; related terms like “penetrating oil finish” help you find similar guidance.
What Happens if I Apply Oil in Direct Sunlight?
Applying oil in direct sunlight will cause uneven drying and blotchy, patchy spots that ruin the finish. UV exposure also accelerates the curing process on the surface while the layer underneath stays soft, leading to a tacky mess that never hardens properly.
I once wrecked a tabletop this way, so I always preach shade or overcast conditions for any oil-based project. The sun’s heat can also yellow the coating over time, which is a separate discoloration risk you don’t want to fight later.
For a practical fix, work in the early morning or late afternoon, and stick to two thin coats instead of one thick one. Sand between coats with 220 grit once dry, and let each coat cure for at least 24 hours in a dim, breezy spot. If you must be outside, use a pop-up canopy or move the piece under a tree, and check the surface temperature with your hand: if it feels warm, it’s too hot for oil.
How Do I Fix a Sticky Finish After Application?
To fix a sticky finish after application, start by removing the uncured top layer with 150-grit sandpaper, then wipe the surface clean with a dry cloth. Don’t add another coat of oil, because that will trap the soft film underneath and make the problem worse.
Let the piece cure for a full 48 hours in a warm, dry room; humidity is often the culprit behind tackiness. If it’s still sticky after that time, strip the finish completely with a chemical remover and wipe down with mineral spirits.
Reapply thinner coats and wait at least 24 hours between each, using two or three light passes instead of one heavy one. Always test on scrap wood first, and check your drying time against the label’s cure window, not just touch-dry. This approach also works for varnish or polyurethane if you substitute a fine 220-grit sanding step after stripping.
Can I Use Boiled Linseed Oil on Outdoor Furniture?
Yes, you can use boiled linseed oil on outdoor furniture, but you are signing up for a fight. Weatherproofing is a myth; it is dampness resistance and UV protection that barely hold up under real sun and rain.
Annual maintenance is non-negotiable, and think of it as repainting a battleship, not a fence. For a concrete start, apply three thin coats, waiting 24 hours between each, and always wipe off the excess after 30 minutes or it turns sticky.
A better option for less fuss is a spar varnish or an exterior tung oil blend, which handle mildew better. Sand with 220 grit before recoating, and you’ll get maybe two seasons per reapplication.
Does Boiled Linseed Oil Darken Wood Over Time?
Yes, boiled linseed oil darkens wood over time, and that shift comes mostly from natural aging and oxidation rather than the oil itself. You’ll notice amber tones deepening gradually, especially on lighter woods like maple or pine, within a few months.
However, its UV resistance is poor, so prolonged sunlight will turn the surface grayish instead of a rich, warm brown. For outdoor projects, this means you’ll need to reapply coats every six to twelve months or top it with a spar varnish.
A practical tip: sand to 150 grit before applying thin, even coats, and allow 24 to 48 hours drying time between layers. This related term, *polymerized linseed oil*, offers faster curing and slightly better color stability if you want less yellowing.
Rounding Up
Applying boiled linseed oil starts with a lint free cloth and a lot of elbow grease. Your first coat may look streaky, but patience fixes that mess.
Keep a dedicated rag bucket for soaked cloths, since linseed oil can combust and cause a dramatic fire. For cutting boards, skip this oil and use pure tung oil instead.
Check your shop for any leftover rags and put them in a sealed metal container today. Compare your first coat’s finish to the honeyed glow described, then rub harder where it looks uneven.
If you want to finish food contact surfaces, read about tung oil application next.