How to Apply Cold Galvanizing Compounds: Step-by-Step Guide
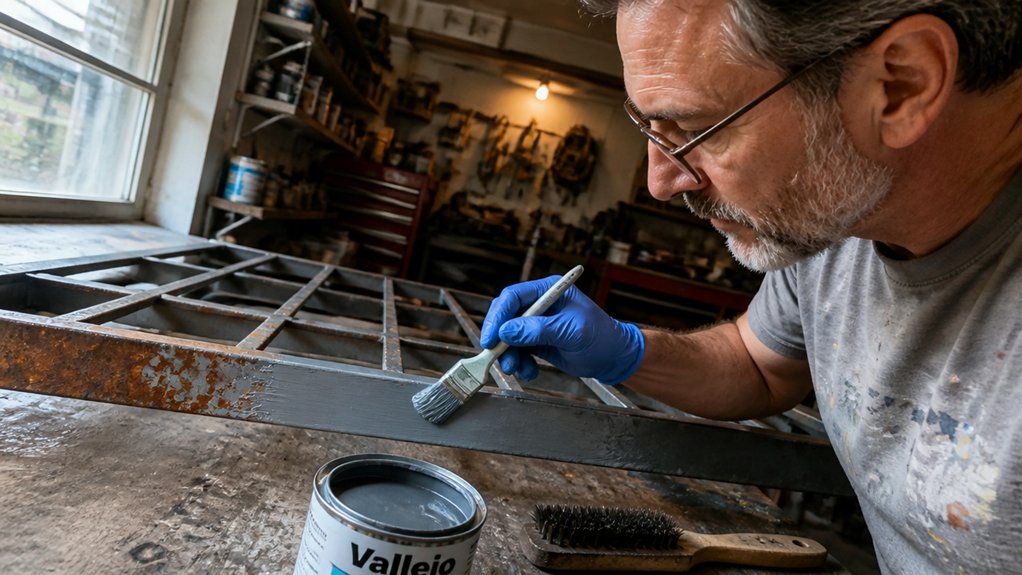
Applying cold galvanizing compounds starts with surface prep, and that is where most DIYers go wrong. Rust and grease will sabotage your finish no matter how carefully you spray.
You need clean, bare steel with a dull gray profile, plus thin, overlapping coats applied from 12 to 16 inches away. Two light passes beat one heavy pass, and timing matters for recoat: within an hour or after a full 24 hour wait.
This guide covers the exact drying times, cure times, and topcoat compatibility so you get a durable, rust resistant barrier the first time.
Keep reading to nail the details and avoid a messy redo.
Quick Answer
- Clean bare metal with detergent, rinse, dry, and sand glossy surfaces to 80-grit.
- Remove all rust to bare steel, targeting a dull gray profile with 60–80 µm roughness.
- Shake can one minute, spray 12–16 inches away, applying two thin overlapping coats.
- Recoat within 1 hour or wait 24 hours; avoid alkyd topcoats over zinc primer.
- Check temperature and humidity; cold air extends dry and cure times significantly.
Prepare Your Surface Before Applying Cold Galvanizing Spray
Winning or losing with cold galvanizing spray happens before you ever shake the can. Surface contamination like oil, grease, or salt will kill adhesion faster than you can say recoat.
The battle is decided before you shake the can; oil, grease, and salt murder adhesion.
I have made that mistake, and it is not pretty. Start with a detergent wash, rinse with fresh water, and dry everything completely.
Scrape off any glossy old paint with a paint scraper or a stiff putty knife. Sanding with 80-grit paper also works well to rough up slick surfaces so the zinc-rich coating can bite.
Rust removal is your next priority. A wire brush or medium-grit sandpaper handles loose scale, but heavy corrosion calls for a chemical rust remover or a blast to near-white metal.
That just means getting down to bare, clean steel with no dark spots left behind. You want a uniform, dull gray surface before you lay down any primer or topcoat.
This prep work is tedious, but it is cheap insurance. Skip it, and you are spraying money straight onto a failing surface.
Use painter’s tape to mask off any areas you do not want coated, and lay down a drop cloth to catch overspray. Work in thin, even passes to keep a wet edge and avoid lap marks.
Remember that drying time is quick, but cure time takes longer before you topcoat with anything else. Keep the spray can warm and shake it for a full two minutes to mix the zinc properly.
For optimal adhesion, aim for a surface roughness of 60–80 µm peak-to-valley on the bare metal before applying the coating.
Mix and Spray Cold Galvanizing Compound for a Smooth Coat

Shake the can for a full minute before spraying, and keep shaking between passes. The mixing ball rattling means the zinc is blended, but it settles fast, so a lazy can leaves streaky, uneven coverage.
Hold the can upright so the pickup tube stays in the paint, and keep the nozzle 12 to 16 inches from the metal. Spraying closer floods the surface and causes runs, while spraying farther wastes the product in the air.
Work in steady back-and-forth strokes, overlapping each pass by about half. Two thin coats give a better result than one thick one, because heavy coats sag and trap solvent under the film.
Test the spray pattern on scrap metal or cardboard first, and if the nozzle sputters, stop and clear it gently. Do not poke the tip with a wire, since that can ruin the spray pattern for good.
This cold galvanizing compound acts like a zinc-rich primer, so treat it like any spray paint for a smooth base. A light first coat, followed by a second pass after the flash time, gives you an even sheen without lap marks or brush strokes. The second coat can typically be applied within a 2-to-4-hour re-coat window before any dampness creeps into the film.
Keep the drying time in mind, and give the coating full cure time before any topcoat or handling. A smooth finish here means fewer sanding grit touch-ups later, so shake often, hold your distance, and build thin layers.
Time Your Drying, Recoating, and Topcoating for a Durable Finish

If that smooth coat flakes off a week later, the problem is usually your timing, not your spray technique. Drying times are the backbone of a durable finish.
At 70°F, paint touches dry in about 30 minutes, but that doesn’t mean it’s ready for another layer. Recoat within 1 hour or wait a full 24 hours, because anything in between traps solvent and causes blistering later.
At 70°F, recoat within 1 hour or wait 24—anything between traps solvent and blisters later.
I’ve scraped off my own work after making that mistake. For topcoats like varnish or polyurethane, wait the full 24 hours, and longer if the shop is cool.
A drop cloth and painter’s tape protect the edges, but the clock protects the sheen. Latex topcoats work fine over zinc primer, while alkyds can eat through it. Cold-galvanizing options provide sacrificial protection, but their cure times can range from 15 minutes to six hours depending on the product.
Wet edge and lap marks are controlled by how fast you work, but cure time is controlled by temperature and humidity. Check the forecast before you start, because cold air stretches every stage.
Sanding with a fine grit, like 220, between coats helps adhesion, but only after the coat has cured. Patience costs less than repainting, so respect the dry time and cure time.
Frequently Asked Questions
Can I Use Cold Galvanizing Spray on Aluminum Surfaces?
Yes, you can use cold galvanizing spray on aluminum, but you should not expect it to last. The zinc in the spray won’t adhere well to aluminum, and it will trigger a corrosive galvanic reaction that eats away the base metal over time.
Even with thorough sanding and cleaning, the bond remains weak, so the coating will peel or blister within weeks. For aluminum, skip the zinc and use a self-etching primer instead, which is formulated to grip the surface chemically.
A practical tip: scuff the aluminum with 220 grit sandpaper, wipe it with acetone, then apply two thin coats of an etching primer before any topcoat. Look for a “zinc chromate” alternative if you need extra corrosion resistance, but never layer cold galvanizing over bare aluminum.
Does Temperature Affect the Shelf Life of an Unopened Can?
Yes, temperature does affect the shelf life of an unopened can. Heat accelerates chemical reactions inside the container, causing the protective coating to break down faster and shortening its usable lifespan.
Store your cans in a stable spot, ideally between 50°F and 70°F, like a basement or interior closet. A garage that swings from freezing to scorching can cause condensation and thermal degradation, which rusts the metal and weakens the zinc liner.
For a concrete rule, keep every can below 75°F and never near a furnace or south facing window. One hot afternoon above 90°F can shave months off the product, so rotate stock by jotting the purchase date on the lid. Cool storage is the same protection you give varnish or oil based paint.
Will Cold Galvanizing Spray Work Over a Freshly Cured Primer?
Yes, cold galvanizing spray will work over a freshly cured primer, provided that primer is fully hardened and completely sound.
I still recommend a light scuff with 220 grit sandpaper to break the surface gloss, then wipe down with a clean, dry rag to remove any dust.
This mechanical keying is critical because a smooth, slick primer can cause poor bonding and premature failure of the zinc coating.
Before committing to the whole job, spray a small test patch, let it dry for 24 hours, and press a piece of masking tape over it, then pull it off sharply.
If the tape comes away clean, your adhesion is solid.
For best results, apply two thin coats of the galvanizing spray, waiting 30 minutes between them, and avoid touching the surface with bare skin, as oils will block the zinc’s sacrificial action.
This method also works well over aged epoxy primers, but never over uncured or chalky layers, as those will undermine the entire system.
How Do I Clean the Nozzle if It Clogs During Spraying?
To clean a clogged nozzle during spraying, turn off the unit, remove the nozzle, and soak it in a solvent matching your material, like lacquer thinner for oil-based finishes. Zinc and other dry particles often lodge in the tiny orifice, so disassemble the tip with a small wire brush or a dedicated nozzle pick before flushing.
After soaking for five minutes, blow compressed air through the opening and finish with a clean solvent rinse. Keep mineral spirits in a sealed jar for quick cleanouts mid-project, just drop the nozzle in while you prep the next coat.
For water-based paints, use warm water with a drop of dish soap; for shellac, denatured alcohol works best. Test the spray pattern on cardboard before resuming, as even a micro-speck can alter atomization. This routine prevents most blockages, but a spare nozzle set saves you time if a stubborn clog resists.
Is Cold Galvanizing Spray Safe to Use Near Open Flames?
No, cold galvanizing spray is not safe to use near open flames, so treat it as a serious fire hazard. The aerosol propellant and solvent base are highly flammable, and the spray itself offers zero flame retardant protection until fully cured.
You must work in a well‑ventilated area with no ignition sources within at least 20 feet, including pilot lights, sparks, or hot tools. Wait a full 24 hours for the zinc film to dry completely, and even then avoid grinding or welding on the surface until it’s been tested with a spark detector.
For practical use, apply thin coats at 6 to 8 inches away, letting each layer tack up for 10 minutes. If you need a safer alternative, consider a brush‑on cold galvanizing compound, which still requires strict ventilation but reduces aerosol drift near heat sources. Always keep a fire extinguisher rated for solvent fires within arm’s reach.
Rounding Up
Applying cold galvanizing compounds works, but only if you prep the surface correctly.
Skip the grinder and you will be recoating in a month, so that step is non-negotiable.
For touch-ups on fences or trailer hitches, this beats welding in time and cost.
Roughly twenty bucks a pop, which is a solid price for the protection you get.
Check your dry film thickness with a magnetic gauge before you walk away.
Test a small patch first and let it cure fully, then scratch it to confirm adhesion.
Remember the compound is a sacrificial layer, not armor, so treat it as such.
Respect the drying time between coats, because rushing ruins the bond.
You may want to read next about hot-dip galvanizing versus cold spray for structural steel.