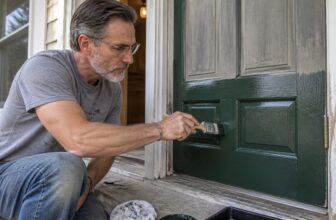
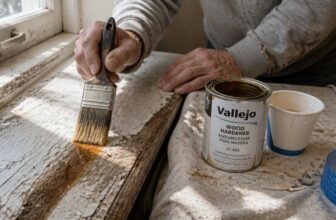
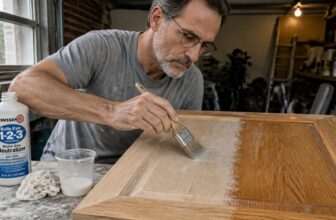
How to Apply Mold Killer and Biocide Washes: Step-by-Step Guide
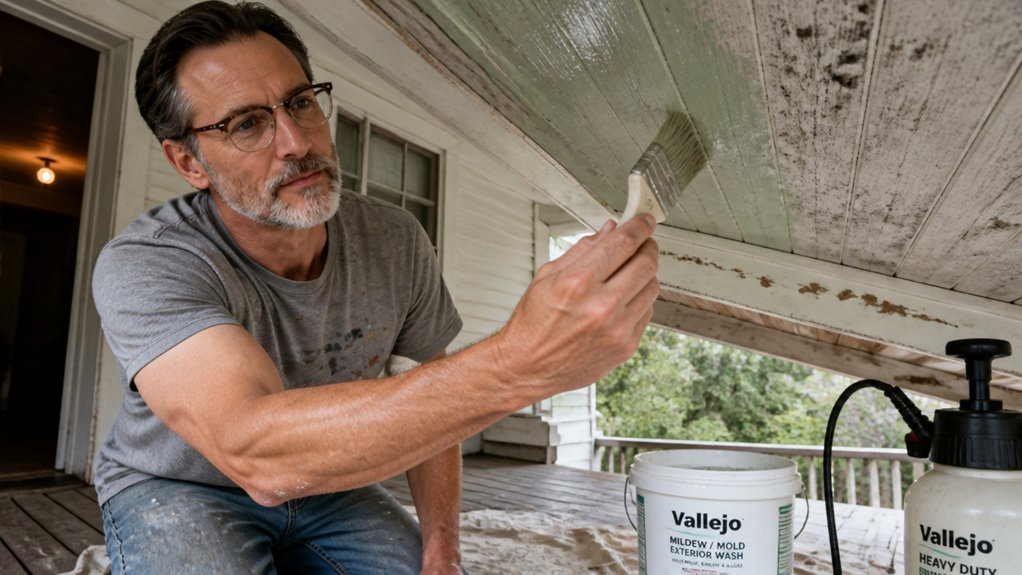
Spraying mold killer without scrubbing is like painting over a dirty wall. You are just sealing the problem in for next season.
If you are dealing with stains or mildew before a repaint, surface prep is the step that saves your topcoat.
A simple bleach and water wash works, but only if you rinse and dry fully before your primer goes on.
We will walk through the exact mix, timing, and drying steps so you get a clean base for your paint and finish.
Stick with the process and you will avoid peeling and blistering later.
Quick Answer
- Wipe surfaces clean before applying biocide; mold hides under grime and dirt.
- Prepare fresh bleach solution (1 cup per gallon) and spray generously.
- Keep surfaces wet for 15 minutes minimum; reapply if drying occurs.
- Rinse all treated areas with clean water, then dry completely before priming.
- HEPA vacuum dead spores after drying; never paint over uncleaned mold residue.
Why Cleaning Must Come First
Clean the surface before you apply any antimicrobial treatment. Biocides do not break down dirt, and I have learned that lesson the hard way on more than one job.
Biocides don’t break down dirt—skip the wipe and you’re just wetting the problem, not killing it.
Mold hides underneath grime, so a quick spray only wets the top layer and leaves the roots active underneath. You need to physically wipe away the fuzzy growth first, just like you sweep a floor before you mop it.
If you skip this step, you are only painting over a problem, and that is a waste of time, not a chemistry fix. After the surface is clean, check what you are working with before you commit.
Drywall soaks up mold like a sponge, while tile or sealed wood just shrugs it off. For porous materials like drywall, removal and replacement is often smarter than trying to treat it.
My rule is simple: clean it, look at the material, then pick your move. That approach costs less than a repeat visit, and it protects your topcoat from failing later.
Think of it like prep work before a finish coat. You would not lay down polyurethane over a dusty, greasy surface and expect a smooth sheen, would you?
The same logic applies here. Use a cleaner that suits the substrate, wipe until the rag comes up clean, then let the area dry completely before you spray or brush on anything else.
That dry time matters because a wet surface ruins the wet edge and leaves you with lap marks or brush strokes. And if you are using a low-VOC product, it still needs a clean base to cure properly, not just dry on the surface.
Take the extra few minutes to do the physical work first. It is the difference between a job that lasts and one that fails in a few months.
For persistent stains that resist this prep, a bleach-based spray like RMR-86 can handle deep embedded discoloration after your initial wipe-down.
Mix a Safe Bleach Solution for Mold Removal

Mixing bleach for mold removal is straightforward if you treat it like a measuring job, not a guessing game. Use one cup of household bleach, which is about 8 ounces with 1 to 5 percent chlorine, per gallon of tap water.
That mix is strong enough to kill surface mold but mild enough to keep the fumes manageable. I’ve skipped measuring before and regretted it, so use a measuring cup every time.
Never mix bleach with ammonia or any other cleaner, because that combination releases toxic gas that can hurt you badly. Read the labels on everything before you pour.
Use fresh bleach from a recently opened bottle, since old stock loses its punch and won’t do the job. Check the date on the bottle, and if it’s been sitting for months, buy a new one.
Work in small batches, mixing only what you’ll spray within the hour, because the solution breaks down quickly once diluted. A gallon at a time is plenty for most bathrooms or small rooms.
Before you start, put on rubber gloves, safety goggles, and a respirator with organic vapor cartridges, not a cloth mask or bandana. Open the windows and point a fan out toward the open air to pull fumes away from you as you work.
Spray the solution onto the moldy area and let it sit for a few minutes, then scrub with a brush or sponge to lift the stain. Rinse the surface with plain water and dry it thoroughly, because lingering moisture invites new mold growth.
Treat this like a primer coat on bare wood: you need full coverage, but you don’t need to soak the surface into a puddle. A light, even mist works better than a heavy flood, and it keeps overspray off your nearby paintwork or trim.
If you’re working near painted walls or finished wood, lay down a drop cloth and tape off edges with painter’s tape to protect the surface from bleach drips. Bleach can dull a gloss or satin sheen, so keep it off your good finishes.
After you finish, let the room air out for at least an hour before you close the windows or step back in for normal use. The drying time for the surface is quick, but the cure time for the bleach smell to fully dissipate takes longer, so be patient.
That’s the whole process: measure, protect yourself, spray, rinse, and air out. Respect the fumes, and the mold will be the only thing that disappears. For a more durable solution on porous surfaces, consider an EPA-registered fungicidal primer that kills residual spores and blocks regrowth for up to two years.
Apply the Biocide: Then Wait 15 Minutes

Once the bleach solution is mixed and your gloves are on, get to work. Spray generously over every visible patch of mold, and don’t hold back, a light mist won’t cut it.
Let the surface soak, then step back and set a timer for 15 minutes. This is the contact time where the chlorine breaks down the mold’s cell walls, so let it sit without fussing. Check the label for the active-ingredient concentration and intended application to ensure you’re using the right product for the job.
Around minute ten, check the surface wetness with your glove. If it’s dried out, especially on porous wood, reapply, bleach evaporates fast and a dry surface kills nothing.
Keep it wet, keep it waiting, and treat this like a wet edge on a fresh coat of paint. Once the timer dings, rinse it off with clean water.
No timed wait means no dead mold, so don’t rush the process. After rinsing, let the area dry fully before you think about primer or topcoat, since trapped moisture will ruin your finish.
Bleach + Ammonia = Toxic: Ventilation Rules

Mixing bleach with ammonia creates chloramine gas, which is a toxic fume that burns your lungs and eyes. This isn’t a science experiment you want to win, and I’ve seen the damage it can do firsthand.
Your ventilation setup is your lifeline, not just a suggestion. I treat it like I’m prepping a spray booth before laying down a coat of polyurethane.
Open every window and door to create a cross-breeze that pulls fresh air through the space. Run an exhaust fan pointing straight outdoors, never toward a hallway or another room.
Open every window, create that cross-breeze. Exhaust straight outside, never down the hall.
Wear a respirator rated for organic vapors, not a dust mask, because that thin cloth won’t stop the gas. NIOSH-approved P100 filters trap 99.97% of particles down to 0.3 microns, but they still won’t stop chloramine gas, so you need a chemical cartridge for true protection. If the air feels tight in your chest, you’ve already waited too long, so don’t rely on your nose to warn you.
Keep the airflow moving like you’re drying a wet edge on a satin topcoat, and you’ll live to sand another day. But the honest rule, like with a primer that’s past its shelf life, is to just toss the mix and never combine them at all.
Rinse and Dry Mold-Treated Surfaces

Rinsing the treated surface is where the job really gets decided. After the biocide has sat for fifteen minutes, grab a clean bucket of warm water and a damp towel, then wipe down every inch you sprayed. Dead mold still holds moisture, so leaving the surface wet just invites a second round of growth.
That is why drying matters just as much as cleaning. Run a dehumidifier for at least 48 hours and keep the humidity under 50%. A box fan works fine for open areas, but for tight corners I rent a high-velocity blower for about $40 a day, which cuts the drying time dramatically.
Before you call it done, touch the surface with a dry hand. If you feel any cool or damp patches, keep the airflow going. When the surface feels dry and stable, you can move on to priming and painting.
For the finish work, use a stain-blocking primer over the treated area, especially if you saw water stains. Oil-based primers offer up to 400 square feet of coverage per gallon with a one-hour recoat time for efficient project turnover. Once the primer cures, apply a satin or matte topcoat with a good brush to avoid lap marks. Check the drying time on the can, because it is not the same as full cure time, and wait before recoating.
Keep painter’s tape along the edges for clean lines, and lay down a drop cloth to catch drips. Low-VOC paints keep the air safer while you work. With dry surfaces and a proper coat of primer and paint, the repair will hold up for years.
Vacuum Up Dead Mold: and Trash the Bag Right

Rinsing and drying isn’t the finish line, because dead mold spores are still allergenic. You have to pull them off the surface with a vacuum, not just wash them away.
I use a HEPA vacuum, which traps those tiny spores in a special filter instead of blowing them back into the room. I move the nozzle slowly over every treated spot, about a minute per square foot, so the suction actually lifts the spores out of the wood grain.
Once the bag is full, I don’t carry it through the house like a trophy. I put the whole vacuum bag inside a regular trash bag, tie it shut, and walk it straight out to the outdoor bin.
That part matters because a loose bag leaks spores into the air as you move. Think of it like sanding dust after a refinish job: you don’t sweep it into a pile and then kick it around.
You treat the bag like a wet rag soaked in stain thinner, sealed and gone. For the vacuum itself, wipe the hose and attachments with a damp cloth after you empty it. For a more thorough prep on surrounding surfaces, consider using a tack cloth to capture any lingering dust or spores before priming.
If the mold was on a painted wall, I’d also spot-prime those areas with a shellac-based primer before any topcoat. That seals any leftover stain and keeps the surface ready for a fresh coat of satin or matte finish.
Keep in mind that drying time and cure time are different. Let the primer dry fully, then give it a full day to cure before you sand with 220 grit and apply your topcoat.
HEPA Vacuum Techniques
Wiping down dead mold with a damp towel only removes the surface mess. The allergenic spore bodies are still sitting on your wood and walls, like dust that won’t quit.
You need to pull them out with a vacuum, and I’ve learned this the hard way after plenty of failed cleanups. Pick a true HEPA filter, not a “HEPA-type” knockoff, because it traps particles down to 0.3 microns. That’s the same standard as a good spray booth filter, and it’s the difference between clean air and a spore confetti cannon. NIOSH-approved N95 masks filter at least 95% of particles in this same size range, which underscores why true filtration matters.
Set the vacuum on low or medium speed, because high suction just kicks spores into the air like a tiny hurricane. Go over each spot twice, once in each direction, crisscrossing at right angles, since the first pass always misses something along the grain or in the seams.
Think of it like sanding a finish: you don’t rush a final pass with fine grit, and you don’t hurry a vacuum over mold. Use a drop cloth to catch any stray dust, and work before you apply primer or topcoat, so the surface is truly clean.
A decent HEPA vac costs money, but it beats repainting a room that still smells musty. Take your time, move slow, and you’ll actually win this round.
Bag Disposal Protocol
Vacuuming up dead mold without disposing of the bag properly is like wiping down a brush and leaving it in the thinners overnight, expecting it to stay clean. You are just storing the problem for later. After I finish HEPA vacuuming, I never just yank the bag out and toss it in the kitchen can.
That is rookie stuff, like forgetting to sand between coats of polyurethane. I seal the bag in a heavy-duty trash liner, double-bagging if it feels even slightly damp, and tie it off with a tight knot. This is your final coat of protection, the same way a satin topcoat seals the wood underneath. For this step, avoid using bags that might tear easily, opting instead for heavy-duty options that resist disintegration under heavy use.
Bag disposal is not glamorous, but it is the last line of waste containment, and it has to be done right. Those spores stay allergenic even when dead, so they need to leave your house completely, just like you would not leave a rag soaked in oil-based stain lying around. I take the sealed bag straight to the outdoor bin, no detours through the garage, no setting it down near the drop cloth.
Treat that bag like toxic waste, because that is exactly what it is. A clean job is not finished until the debris is gone, and that means getting the bag out of your living space for good.
Visual Checks and Mold Clearance Testing
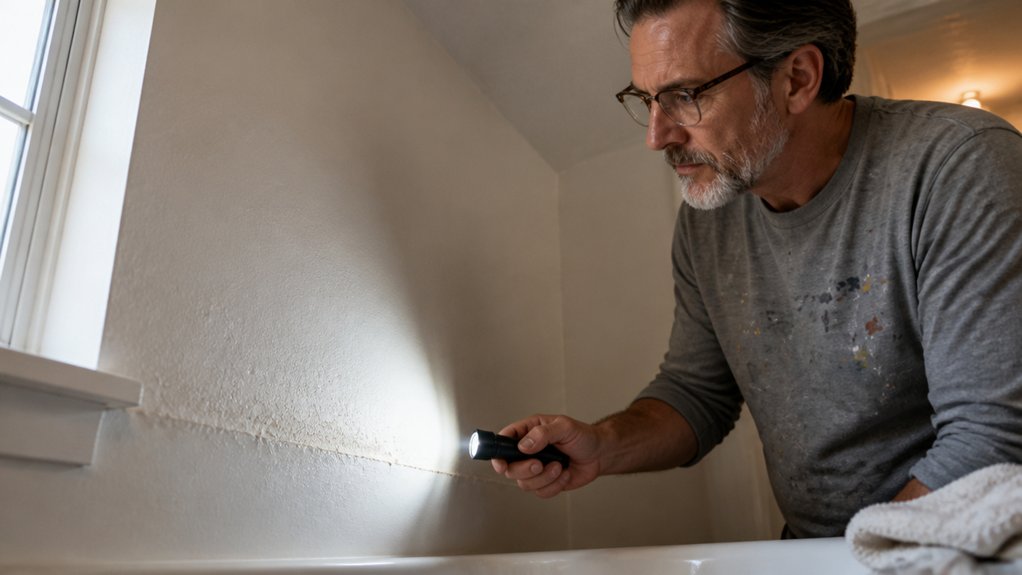
After you scrub and rinse, don’t just trust your eyes. Visual checks are the first step, but they can miss thin mold in rough wood grain or behind a corner.
Look for lingering stains, damp spots, or any fuzzy discoloration under good light. Run your fingers over the surface to feel for slimy or powdery residue that paint would only seal in.
Once you’re satisfied, move to clearance sampling, which is the scientific proof your cleanup worked. This test measures airborne mold spores, much like checking the wet edge before you lay down a topcoat.
Think of it as the final exam before you prime or varnish. You wouldn’t sand with 80 grit and skip to 220, so don’t skip this step either.
You’ll need a clean sampling cassette and a pump that pulls a set amount of air. Run it near the cleaned area, then send the sample to a lab for spore counts.
Compare the results to an outdoor baseline sample. If indoor counts match or fall below that, you’re clear to move on with your finish work.
If the counts come back high, that means mold is still hiding, maybe behind trim or under a stain blotch. You’ll need to scrub that spot again, re-check, and sample until the numbers drop.
Only when the lab report comes back clean can you safely lay down your primer and topcoat. That’s your green light, and it beats guessing any day.
Hidden moisture pockets in walls or wood can drive spore counts back up, so using a pinless moisture meter to scan the surrounding area before retesting helps confirm no damp zones remain.
Visual Inspection Criteria
You know the mold battle is won when visual inspection backs up your treatment, but your eyes are only the first gate. I’ve been fooled by a clean-looking surface before, so I always check three basic things.
First, zero visible growth. No black speckles, no fuzzy patches, anywhere. Second, dry surfaces. Touch-test every corner with the back of your hand, because dampness means the mold is still feeding.
Third, no residue. No dust, no debris, no staining left behind on the wood or wall. Then hit the sneaky spots: light fixtures where condensation collects, and ventilation gaps that trap moisture like a sponge.
If I see anything suspicious, I don’t clear it. I retreat, clean again with a mold killer, and re-treat before I even think about primer. Your eyes are good, but they’re not perfect, so trust the touch test and the smell test too. Just remember that a mold-resistant primer can actively kill lingering spores and keep them from staging a comeback, but it only works on a surface that has already passed your clear check.
Pass this check, and you’re ready to move on to sanding with 120-grit and laying down a stain-blocking primer. Fail it, and you’re just painting over a leak, which means lap marks and brush strokes hiding a problem that will come back through your topcoat.
Clearance Sampling Methods
Visual inspection is a decent starting point, but it won’t tell you the whole story about mold clearance. I’ve walked into rooms that looked spotless, yet the spores were hiding behind the drywall like it was their job.
That’s where clearance sampling comes in, and it’s the only way to get proof that your remediation actually worked. You’ve got two main routes: a wipe test that swabs surfaces and grows whatever’s lurking, and an air sample that catches floating spores mid-flight.
Both run $150 to $400 per sample, which is a fair price when you’re dealing with a skeptical landlord or a nervous buyer. If you had visible mold growth, don’t skip this step, because guessing is just throwing money at a problem you can’t see.
A wipe test that comes back under 5,000 CFU per square inch means you’re in the clear, and that number gives you something solid to hand over. My rule is simple: if you can smell mustiness, take a sample, and if there’s no smell and no visible stain, you’re probably fine.
Think of it like finishing wood, you wouldn’t skip sanding before you lay down a coat of varnish, and you wouldn’t trust a surface that looks clean without checking the grain underneath. Pay for certainty, not hope, and treat that clearance report like a final coat of satin polyurethane: it seals the deal and protects you later.
When you walk that room with a painter’s eye, check the corners like you’d check for lap marks on a fresh coat of primer, because mold loves the same edges you’d miss. A dry wipe might leave a sheen that fools you, but a proper sample is like checking drying time versus cure time, the result takes a bit longer, but it’s the real deal.
Frequently Asked Questions
Can I Use Vinegar Instead of Bleach for Mold?
Yes, you can use vinegar instead of bleach for mold, and it works well on nonporous surfaces like tile and glass. The acetic acid kills surface mold without the harsh fumes or toxicity of bleach, which is a real advantage in tight spaces.
That said, vinegar is not a registered EPA disinfectant, so don’t expect it to eliminate every spore or prevent regrowth for long. On porous materials like drywall or raw wood, the liquid can wick in and cause swelling or staining, so stick to hard surfaces only.
For best results, spray full strength white vinegar, let it sit for 10 minutes, then scrub with a stiff nylon brush and rinse. You’ll still need to address the moisture source, or the mold will return, just like with bleach. For deeper outbreaks, search for “mold remediation” to know when to call a pro.
How Long Should I Ventilate After Applying Biocide?
Ventilate after applying biocide until the surface is completely dry, which typically takes 2 to 4 hours for most water based treatments under normal airflow. This drying period is your primary safety window, so point a box fan out the window and keep cross ventilation going the whole time.
Check with a handheld air monitoring device for lingering fumes, especially in low areas where heavier vapors settle. Base your re entry timing on that moisture assessment, not just the clock, because humidity and temperature can stretch drying to six hours or more.
Don’t rush it. A simple test is pressing a clean paper towel against the treated wood; if it pulls back dry, you are safe to close up and resume normal activity. For extra peace of mind, wait overnight when treating indoor spaces, as the off gassing curve often tails off slowly.
What Respirator Rating Is Needed for Bleach Cleanup?
For bleach cleanup, you need a NIOSH-approved respirator with an N95 rating or higher, but only if the area is well ventilated and exposure is brief.
If you’re mixing or spraying bleach solutions, step up to an N100 or a half-face elastomeric respirator with organic vapor/acid gas cartridges, since bleach fumes can irritate airways beyond what a disposable filter stops. Always check the label on your bleach product: if it lists chlorine gas as a hazard, upgrade your protection accordingly.
As a practical tip, open windows and run a fan to cut fume concentration, which lets a basic N95 work far better. For heavy cleanup jobs, fit-test your respirator first and replace the filter if you smell bleach inside the mask. And remember, an N95 won’t protect against oil mists, so keep it dry and away from any degreasers you might use nearby.
Is It Safe to Stay Home During Mold Treatment?
Staying home during mold treatment is not safe, especially while antimicrobial sprays and foggers are actively releasing biocides. Those fumes can overwhelm your lungs and trigger serious reactions long before you notice a headache or dizziness.
You must evacuate before application starts and stay out until every treated surface feels completely dry to the touch, which often takes 24 to 48 hours depending on humidity. For a quick check, press a clean paper towel against the treated area; if any moisture transfers, it’s not ready.
Keep windows open for cross-ventilation during the drying phase, and run a dehumidifier set below 50% relative humidity to speed things up. I’ve seen crews return too early and end up with chemical sensitivities that lasted weeks.
Your safest move is to treat the affected zone as a containment area, sealing it off from the rest of the house with plastic sheeting and duct tape. If you have to re-enter briefly for a forgotten item, wear an N95 respirator and limit exposure to under five minutes, then leave again.
Do I Need Clearance Testing for Small Mold Spots?
For small mold spots, you likely do not need clearance testing, as visual inspection after cleaning is usually sufficient. I’d rely on a thorough wipe-down with a diluted bleach solution or a mold-specific cleaner, then check for any staining or residual growth under bright light.
If you’re still unsure, sampling costs are low, but remember that clearance testing only makes sense after a professional remediation, not for minor surface issues. Instead, focus on complete removal by scrubbing porous wood or drywall gently with a 120-grit sandpaper to ensure the mold is gone and the area is smooth.
Just make certain the spot is completely dry for at least 48 hours before repainting or sealing, since moisture is the root cause. Use a moisture meter if you have one, or press plastic wrap over the area overnight; condensation underneath means you’re not dry yet. That simple step beats any lab report for a small patch.
Rounding Up
Applying mold killer and biocide washes works when you scrub the surface first. Skipping that step only coats the mold, it does not remove it.
Clean the area thoroughly before applying the killer. Let the product sit for the full 15 minutes so it can reach the roots.
Air the room out completely and throw away the vacuum bag after cleaning. Treat that bag as contaminated waste.
The article gives no statistic, so none is repeated here. For under twenty bucks in bleach and time, you have won the war.
You may want to read next about preventing mold regrowth after a successful treatment.