How to Apply Mold-Resistant Primers: Step-by-Step Guide

Mold-resistant primer is the only thing standing between your fresh paint and an ugly comeback. Skip it, and you will be scrubbing stains and recoating within months.
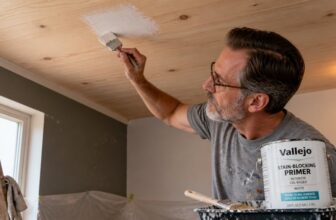
The trick is matching the primer to your surface and giving it proper cure time. Water-based options like KILZ work for drywall, while Zinsser PermaWhite handles high moisture rooms without a topcoat.
Apply it above 50°F, back roll for adhesion, and wait a full hour before your finish coat. Keep humidity low during drying, and you will avoid the dreaded bleed through.
This guide walks you through surface prep, product picks, and timing so your paint job actually lasts.
Quick Answer
- Prepare surfaces by scrubbing with mildew remover, rinsing, drying, sanding glossy areas, and filling cracks.
- Apply low-VOC primer with back-rolling immediately after spraying to penetrate porous surfaces.
- Maintain temperatures above 50°F, no rain for 48 hours, and keep humidity below 95% during application.
- Wait at least one hour for touch-dry, but allow up to 30 days for full cure before sanding or topcoating.
- Spot-prime persistent bleed-through areas, then sand lightly with 220-grit before final topcoat application.
Why You Can’t Skip a Mold-Resistant Primer
Skipping a mold-resistant primer is a mistake you will likely regret. Without it, mold and mildew can bleed right through your fresh paint and ruin all your hard work.
The spores that come back are not just ugly; they trigger allergies and asthma, especially in damp bathrooms and basements. I have peeled back paint to find a fuzzy, dark colony hiding underneath, and it is not a pretty sight.
Yes, the extra cost of primer is tempting to skip, but a $30 gallon of KILZ is cheap compared to repainting every six months. You also have to think about what you are breathing in while you work.
Use a quality primer on any surface that has seen moisture, then apply your topcoat with a satin or semi-gloss sheen for extra protection. Sand the primed surface with 220 grit to smooth out brush strokes before you paint.
Keep a wet edge while rolling to avoid lap marks, and remember that drying time is not the same as cure time. Let the primer dry fully, then apply your finish coat.
The mold will keep coming back if you do not seal it off properly. Do not gamble with your lungs or your labor; prime it right the first time. For stubborn spots on porous materials like cinder block, ensure you apply a thick enough coat to activate the EPA-registered fungicide that kills existing mold colonies.
Prep Checklist for Mold-Resistant Primer Surfaces

Every mold problem I have ever seen traces back to a skipped prep step, and that is a confession, not an exaggeration. You are not just painting; you are cutting off the mold’s food supply and moisture source.
Grab a scraper and get honest with the surface before you open a single can of primer. Scrub the area with a mildew remover to kill active growth, then rinse clean and let it dry.
Sand any glossy areas dull with 120-grit sandpaper so the primer has something to grip. Fill every crack with patching compound and let it dry fully, because hidden dampness pockets will ruin your topcoat later.
Check the forecast before you start, too. No rain within 48 hours and temperatures above 50°F are non-negotiable for proper drying and cure time.
Store your primer indoors, sealed tight, and stir it well before use. A cold or separated primer will leave brush strokes and uneven coverage that shows through your satin or matte topcoat.
Rushing now means bubbles, peeling, and a moldy encore that costs you twice the labor. I have painted that regret more than once, and it is never worth it.
Keep a wet edge as you roll, and use painter’s tape to protect trim and edges. Work in sections so you avoid lap marks, and lay down a drop cloth to catch drips.
Clean, dry, and patient is the whole trick. Do that, and your primer and topcoat will bond tight, stay smooth, and keep mold away for years.
Substrates must be dried to a 5% moisture content before priming to ensure the barrier integrity that keeps hidden dampness from sabotaging your work.
How Do You Choose the Right Mold-Resistant Primer?

Choosing the right mold-resistant primer means matching the product to the surface and the stain, not picking the flashiest can. I learned that the hard way after wasting a weekend on a cheap option that let stains bleed through like gossip.
Check the coverage rate first, since most mold-resistant brands like KILZ or Zinsser cover 300 to 400 square feet per gallon. That gives you the math to buy enough and avoid a second trip to the store.
Before you roll a single stroke, do the math: most primers cover 300 to 400 square feet per gallon, so buy enough to skip the second trip.
Match the primer to the surface you’re painting. For drywall or wood, a water-based option like KILZ Mold & Mildew works fine and keeps VOC levels low. For heavy stains on porous surfaces, an oil-based stain blocker provides stronger sealing power without sanding on glossy spots.
For metal or masonry, grab Sherwin-Williams’ mold-resistant primer, which grips smooth surfaces better. If you’re dealing with previously infested spots that keep coming back, Ritver’s acrylic-copolymer is the heavy-duty pick.
Here’s a quick comparison for stain severity: KILZ handles medium stains at a cheap price and is reliable on drywall. Zinsser PermaWhite doubles as a topcoat, so you can skip a separate finish coat on trim or ceilings.
Ritver is your go-to for stubborn cases, where the mold has left deep discoloration or a rough texture. Sand any glossy areas with 120-grit sandpaper before priming, then wipe off the dust with a damp cloth.
Lay down a drop cloth and use painter’s tape on edges to keep the work clean. Apply the primer with a roller for large flat areas, and cut in with a brush to keep a wet edge and avoid lap marks.
Let the primer dry fully, which usually takes a couple of hours, but cure time for full adhesion can be up to 30 days. Once it’s dry, you can topcoat with a satin or matte sheen, depending on the sheen you want for the room.
Choose based on the surface and how severe the stain is, not the brand hype. That approach saves you time, money, and a lot of frustration.
Apply Mold-Resistant Primer: Temperature, Spray, and Dry Time

Three numbers will save you from a moldy mess: 50°F, 35°F, and 30 minutes. Most primers should not be applied below 50°F, though Sherwin-Williams allows 35°F for some products.
I always check the forecast before starting. If rain is coming within three hours, I pack up for the day.
When you spray primer, back-roll immediately to push it into porous spots. You are not painting a car, so do not chase a perfect mist.
Use a brush or roller to work the wet edge and avoid lap marks. A drop cloth and painter’s tape protect the surfaces you are not coating.
For drying, touch-dry happens at 30 minutes, but I wait a full hour before any topcoat. That hour is non-negotiable, even if the primer feels dry.
Check humidity too; above 95% and you are feeding mold instead of preventing it. Keep the room ventilated, open a window, and let the numbers do their job. For severe mold and mildew stains, a synthetic shellac primer can offer permanent stain blocking that water-based options cannot match.
VOC levels matter in tight spaces, so choose a low-VOC primer if you are indoors. Sanding with 120-grit between coats smooths brush strokes and gives the topcoat something to grip.
A satin or matte finish hides imperfections better than gloss, and a full cure takes days even if drying time is short. Grab a coffee, respect the numbers, and you will keep the mold out.
Fix Bleed-Through and Mold Regrowth After Priming

Patience is the cheapest tool you own, and it stops bleed-through cold. If stains reappear after your first primer coat, don’t panic.
That’s not mold regrowth, it’s tannin or water marks pushing through. My go-to fix is simple: sand lightly with 220-grit, clean the spot, and roll on another thin primer coat exactly where it’s creeping.
Drying time matters more than you think. Rushing the topcoat traps dampness, and that moisture invites future mold growth under your finish.
Use a low-VOC primer for better adhesion and faster recoat windows. Before you commit to the whole wall, test a small patch with your topcoat.
Let it sit for 48 hours, if it holds without spotting or yellowing, you’re safe to proceed. Two thin primer coats beat one thick, stubborn layer every time, and they prevent lap marks and brush strokes later.
Apply each coat with a wet edge, keeping a steady pace so the primer doesn’t dry unevenly. Your patience now saves you a nasty scrubbing session with bleach and a stiff brush later.
Use a drop cloth and painter’s tape to protect trim, and remember that full cure time for primer is longer than its dry time. Wait the full cure before sanding or topcoating.
If you see bleed-through after the second coat, spot-prime again, then move on. The topcoat sheen, whether satin or matte, won’t hide stains, so fix the surface first.
Keep your sanding dust off the fresh primer, and clean the wall with a tack cloth before your final coat. That’s the whole trick, slow down, check your work, and let each layer breathe. Since humidity above 60% can cut protection duration by 20–40%, monitor indoor moisture levels before and after priming to ensure the coating lasts its full expected lifespan.
Frequently Asked Questions
Can I Apply Mold-Resistant Primer Over Glossy Paint?
Yes, you can apply mold-resistant primer over glossy paint, but only after you properly prepare the surface. Applying it directly to the shine will almost guarantee adhesion failure, so you must rough up that gloss first.
Sand the glossy area with 120 to 150 grit sandpaper until the sheen is completely dull, then wipe away all dust with a damp cloth. After that, clean the surface with a mild degreaser or trisodium phosphate substitute to remove any oils or mildew residue.
Once dry, apply one even coat of your mold-resistant primer, and let it cure for the full time listed on the can, typically 24 hours before topcoating. For bathrooms, this extra step is critical because the primer binds to the sanded texture and seals in stains, unlike a regular bonding primer.
How Long Must New Plaster Dry Before Priming?
New plaster must dry for roughly 30 days before priming, and that timeline is non-negotiable if you want a durable finish. Moisture content governs everything here, so test with a moisture meter before you even think about opening a primer can.
Rushing that cure window leads to primer bubbling or peeling, which looks like a bad sunburn and forces you to sand and redo the job. I’ve seen painters waste a full week fixing that mistake, so patience truly is the cheapest tool you own.
For a concrete rule, wait until the plaster reads below 12% moisture on a pin-type meter, then apply one coat of a high-build alkali-resistant primer. That primer seals the porous surface and lets your topcoat bond without flash spots. Searching for “plaster curing time” will give you regional variations, but 30 days at 70°F with good airflow is your safe baseline.
Should I Wash Surfaces With Bleach Before Priming?
No, you should not wash surfaces with bleach before priming, because the bleach leaves a slippery residue that wrecks primer adhesion. Instead, use a commercial mildew remover, which is formulated to kill mold without leaving that problematic film.
Rinse the surface thoroughly with clean water after applying the mildew remover, then let it dry completely for at least 24 hours. Drying time is critical, as any trapped moisture will cause your primer to peel later. For extra insurance on slick surfaces, lightly sand with 120 grit to scuff the area before priming.
This prep method also works for stains or old paint, and it pairs well with a stain-blocking primer if you see any discoloration. Adhesion is everything, so never skip the rinse step.
Can I Use Mold-Resistant Primer on Exterior Metal?
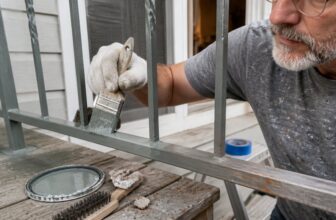
Yes, you can use mold-resistant primer on exterior metal, and Sherwin-Williams’ version handles it well. That said, don’t skip metal prep: remove all rust with a wire brush or 80 grit sandpaper, then wipe down with a degreaser.
A moisture cure is only guaranteed if the surface is clean and dry, so check the forecast and aim for at least 24 hours of no rain. Apply two thin coats rather than one heavy one, letting each dry fully, typically 2 to 4 hours at 70°F.
For best adhesion, use a rust-inhibitive metal primer as your related term if your substrate has pitting or bare spots. Finally, topcoat within 7 days, or the primer’s mold resistance may weaken from UV exposure.
How Soon Can I Paint After Using Zinsser Permawhite?
You can paint over Zinsser PermaWhite after just 2 hours, which is the manufacturer’s stated recoat time. This quick turnaround works best when you are applying a second coat of the same product, not a different finish.
Remember that PermaWhite’s full cure takes 7 to 10 days, so treat that first coat gently during that window. If you are switching to a latex topcoat for a color change, wait at least 24 hours and use a light 220-grit sanding pass first.
A practical tip: keep your film thickness thin, about 4 to 5 mils wet, to avoid long drying delays. For high-moisture rooms like bathrooms, allow the extra 7 days before scrubbing or hanging anything on the surface. Recoat time and cure time are not the same, so plan your project around the longer schedule for durability.
Rounding Up
Applying mold-resistant primers starts with a clean, dry surface, which is your best defense against mold returning. You are essentially giving the wall a protective flu shot, not a cure, so manage expectations accordingly.
Check the manufacturer’s dry times and stick to them strictly. Compare a decent brand’s coverage against your room size before you buy, and ask your supplier about the best formulation for damp areas.
Write down the cure time on the can with tape so you don’t rush the next coat. Test a small patch first if you are repainting over a previous stain, to ensure the primer seals properly.
For your next read, focus on moisture control behind the primer.