How to Apply Painters Plastic Films: Step-by-Step Guide
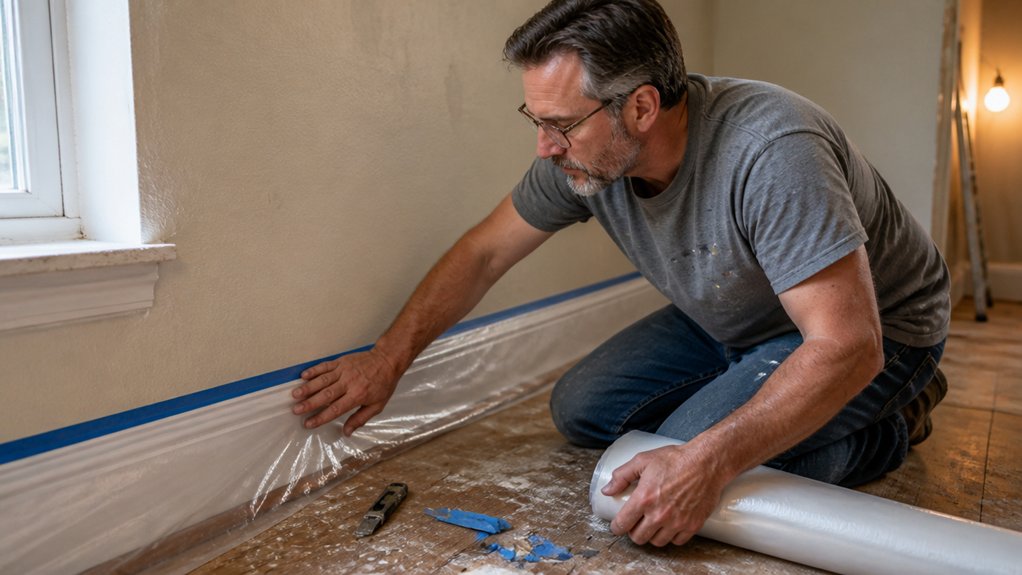
Applying painters plastic films seems simple, but skipping surface prep turns a quick job into peeling edges and paint bleed.
Dust, grease, or humidity above 70% will ruin your clean cut lines, so vacuum, wipe, and tape a test patch first.
Anchor your 0.3-mil film with 1.5-inch FrogTape, pressing every inch for a tight seal against trim and floors.
Pull the film off at a 45-degree angle while the paint is still tacky to protect your fresh coats and crisp edges.
This guide covers the full process, including drying time, tape removal, and the common mistakes that wreck a professional finish.
Follow these steps, and you will spend less time fixing touch-ups and more time enjoying your new sheen.
Quick Answer
- Prepare surfaces: vacuum, wipe dry, sand bumps, and test humidity below 70%.
- Select film thickness: 0.3-mil for furniture, 1-mil for rough surfaces like brick.
- Apply tape without stretching; burnish edges for crisp lines on trim and frames.
- Overlap plastic sheets by 12 inches; tape seams flat to prevent paint drips.
- Remove tape at 45-degree angle while paint is tacky; use solvent for residue.
Prep the Room: Clear, Clean, and Test Adhesion First
The worst way to start a masking job is to put good tape on a dirty floor. Sawdust and old spills will make the tape lift, and you will waste time fighting curling edges.
Do the boring work first. Move furniture or cover it with a drop cloth, then vacuum the whole room twice.
Check the climate before you start. Wipe a damp cloth on the wall and wait a minute; if it is still wet, the surface is not ready.
Check the climate first. Wipe the wall damp; if it’s still wet, the surface isn’t ready.
Humidity matters more than most DIYers think. If your weather app shows above 70% humidity, adhesion gets weak, so aim for 60 to 75°F and dry conditions.
Ten minutes of prep saves an afternoon of frustration. Painter’s tape is picky, but it behaves when the surface is clean and dry.
This same rule applies to primer and topcoat. A dusty wall means a patchy finish, and brush strokes will show in the sheen, whether you use satin or matte.
Keep a wet edge when you paint, and remember that drying time is not the same as cure time. Varnish and polyurethane need full cure before you tape over them.
Use fine sanding grit, like 220, to smooth any bumps before you seal. Then wipe the dust off with a tack cloth.
If you skip the cleanup, you will see lap marks and uneven gloss later. Do it right once, and the tape pulls off clean.
Static-cling films such as the Trimaco Easy Mask can be reused after shaking off dust and rerolling, saving you money on multi-room jobs.
Pick Painter’s Tape and Plastic Film by Surface Type
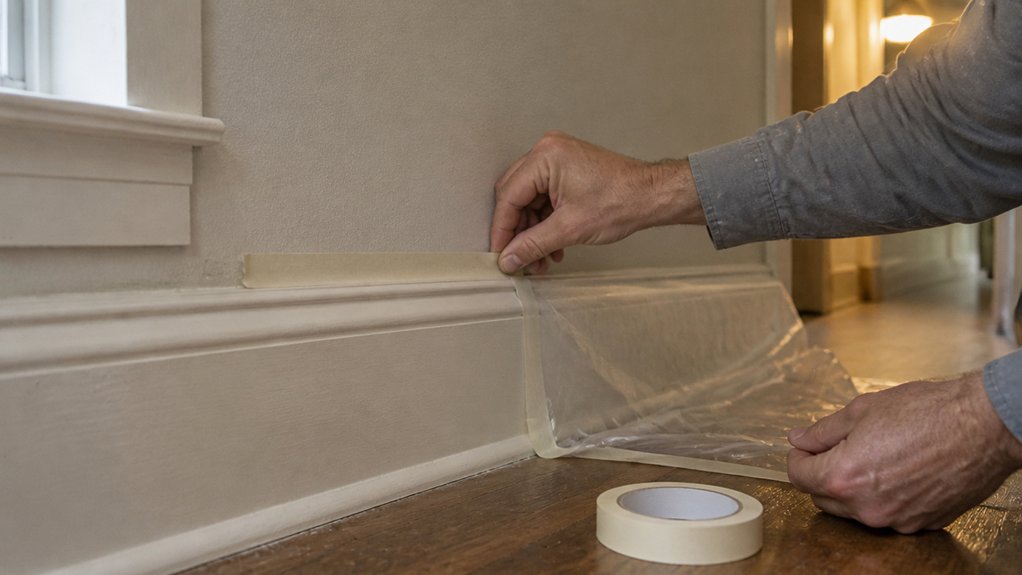
Check the surface before you choose your tape. For drywall, standard painter’s tape holds film well without pulling off fresh primer or paint.
On finished wood or glossy trim, grab gentle-release tape. It protects the varnish and topcoat from peeling when you pull it off.
Plastic film thickness follows the same rule. Thin 0.3-mil film works fine on furniture because it drapes over curves and corners.
For rough brick or concrete, use 1-mil film. The thicker sheet won’t tear when it snags on edges, which I learned after wrestling with flimsy film over cinder blocks.
Match the tape’s grip to the surface, not your preference. Smooth surfaces take standard tape; delicate finishes take the gentle kind.
If you are unsure, stick a small patch down and pull it off first. That test is cheaper than fixing peeled stain or paint.
Keep a drop cloth handy and press the film flat to avoid brush strokes and lap marks on the job. Tape is only part of the prep.
For surfaces exposed to sun or moisture, choose a tape that resists UV rays and dampness to keep the film secured until the job is done.
Apply Tape to Trim, Baseboards, and Window Frames
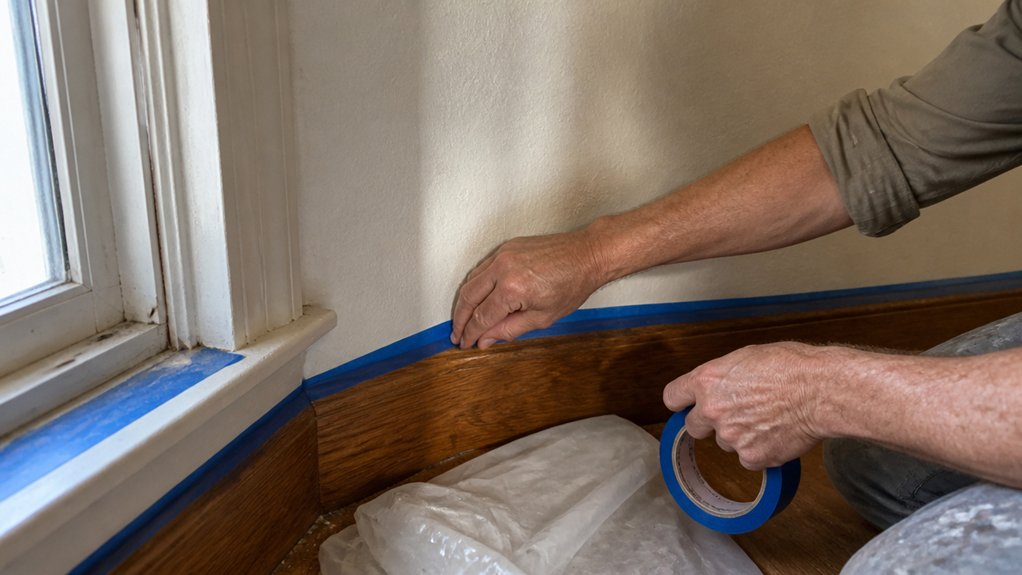
Painter’s tape does the real work here, so treat it like the boss and you’re just the helper. Start on trim by laying the tape along the edge without stretching it, because stretching creates film bridging where the plastic sags off the surface like a loose hammock.
Use your thumb to press the tape into curves and corners, which is called burnishing. That step is the difference between crisp paint lines and leaking drips that ruin your finish. For tight bends, high-crepe paper backing stretches gently around contours without wrinkling, making it ideal for curved trim work.
For window frames, overlap the tape slightly onto the glass and then press firm along the frame edge. Skip the cheap rolls, since adhesive transfer leaves sticky residue that fights you during cleanup.
Grab a decent 1.5-inch painter’s tape like FrogTape, which runs about $8 a roll, and it’s worth every penny. Press every inch slowly, and you’ll get a clean line that needs no touch-up with primer or topcoat.
The main goal is simple: burnish hard, never bridge, and your trim stays spotless. Before you paint, make sure the surface is clean and dry, and use a drop cloth to catch any splatter from the roller.
When you do paint, keep a wet edge and watch for lap marks, because dry spots show up fast on baseboards. If you’re using a satin or semi-gloss sheen, the light will expose any uneven tape job, so take your time.
After painting, pull the tape off while the topcoat is still slightly tacky, which prevents peeling the fresh finish. That’s the practical trick pros use, and it saves you from sanding and repainting the whole board.
Cover Floors and Furniture So the Plastic Stays Put
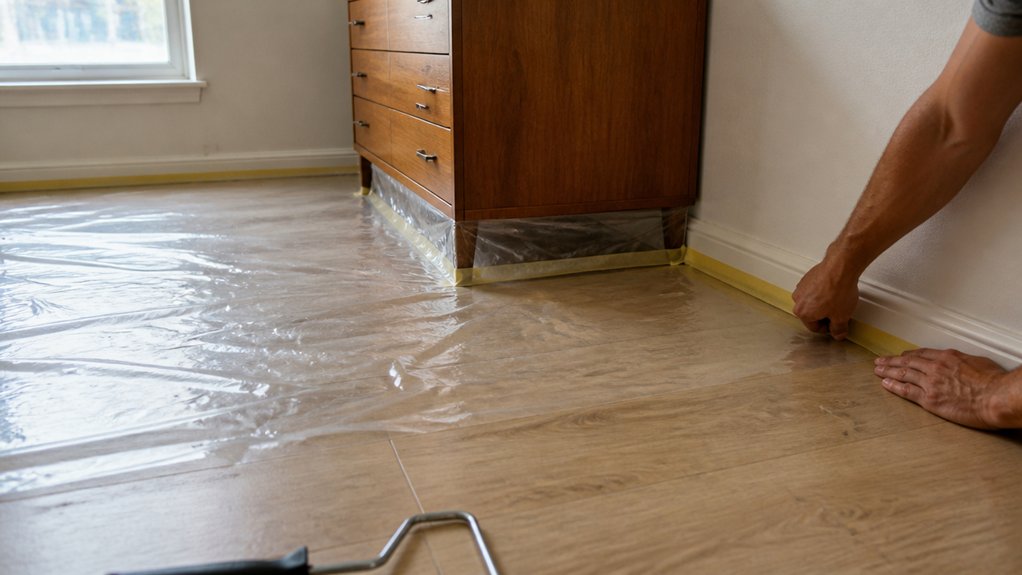
Once the trim is done, move to the floor and anchor that plastic down before it drifts. Painter’s tape is your best friend here; unroll the sheets with a 12‑inch overlap between them.
Tape every seam flat every few feet, because a loose edge will catch paint and drag it across the room. Keep the film smooth with a little slack, not drum‑tight, so it hugs the floor as you walk and doesn’t balloon into air pockets.
For furniture, drape the plastic completely over the piece and tuck tape underneath the base so no legs peek out. Wet floors are a deal‑breaker, so dry them first or the tape won’t stick at all.
A drop cloth under the plastic adds extra grip on smooth surfaces like hardwood or tile. Use a matte primer or low‑VOC topcoat nearby for touch‑ups, but only after the plastic is locked down.
Spend five extra minutes taping now, and you’ll avoid an hour of picking paint chips out of the grain later. Smooth it, tape it, and get back to brushing with a wet edge.
For projects needing heavier coverage, consider a 6 mil sheeting roll instead of thin painter’s films to resist sharp debris and heavy-duty jobs.
Remove Painter’s Tape and Plastic Without Pulling Paint
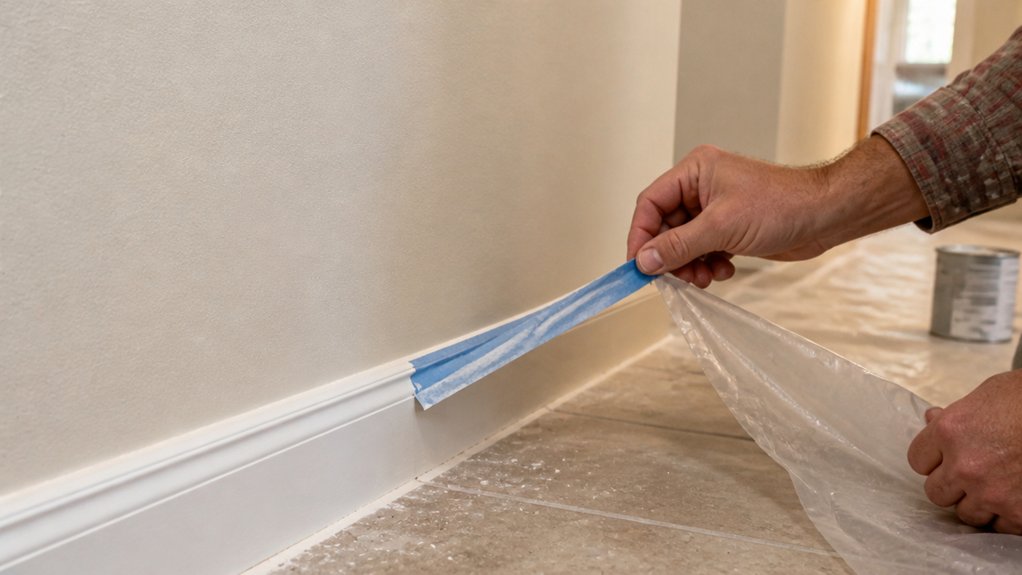
Removing painter’s tape without pulling off the paint underneath takes patience and timing, not force. The secret is to pull the tape while the final coat is still slightly tacky, usually within a few hours of painting.
Patience and timing beat force: pull the tape while the final coat is still slightly tacky, within hours.
Never wait for the full cure time, which is about seven days, because the paint needs that long to reach maximum hardness. Pull the tape back on itself at a low angle, around 45 degrees, instead of straight off the surface.
Go slow and steady, since rushing is the fastest way to tear the topcoat and ruin your trim. If the tape resists, score the edge with a sharp blade before you pull any further.
For leftover adhesive, use a citrus-based solvent and wipe gently with a clean cloth. This method works with any sheen, from flat matte to glossy satin, as long as you respect the drying time versus cure time.
Always apply the tape to a fully dry primer or topcoat before your last coat goes on. Keep a drop cloth handy and avoid low-VOC paints that dry too fast, since they can bond with the tape and lift off the finish.
Stain, varnish, and polyurethane all behave differently, so test a small corner before committing to the full strip. A clean edge comes down to smooth removal, not muscle, and your painted woodwork will stay intact.
For especially delicate surfaces, use low-tack tape to minimize the risk of lifting fresh paint during removal.
Frequently Asked Questions
Can I Use Regular Trash Bags Instead of Painter’s Plastic Film?
Yes, you can use regular trash bags instead of painter’s plastic film, but I strongly advise against it for any serious painting project. The adhesion of trash bag plastic is weak, so tape lifts easily, and you’ll spend more time fixing edges than rolling paint.
Cheap bags also release plasticizers and off gassing that can contaminate fresh latex or oil based finishes, leaving a dull or fish eyed surface. Instead, buy a 9 by 12 foot drop cloth roll of polyethylene film for under ten dollars; it clings flat and accepts tape without curl.
For a quick fix today, use blue painter’s tape with a 20 minute tack time on the bag, pressing firmly every six inches, but test a corner first. A related search term is “plastic drop cloth vs trash bags,” which shows similar failures from experienced finishers.
Spend the few extra bucks on real film. It’s the difference between a crisp, clean trim line and a redo that costs you hours and a second coat.
How Long Can Painter’s Plastic Stay Taped Before Paint Peels?
Painter’s plastic can stay taped for up to a few days before paint peeling becomes a risk, though the real problem is adhesive transfer, not peeling. I typically pull that tape within 48 to 72 hours after the final coat, especially on fresh drywall or trim where the paint film hasn’t fully cured.
Leaving it longer, even with gentle-release tape, can leave sticky residue that’s a pain to remove and may lift the topcoat when you finally yank it. For most latex paints, the surface is dry to the touch in about two hours, but the bond isn’t strong enough for tape stress until three days.
A concrete tip: score along the tape edge with a sharp utility knife before pulling at a 45 degree angle back over itself. That clean cut stops the paint from tearing, and it works for primer, stain, or varnish just the same. For longer projects, use a low-tack masking film instead, and check a corner daily by touch.
Will Plastic Film Trap Moisture and Cause Mold on Walls?
Yes, plastic film can trap moisture and cause mold on walls, but only if you leave it in place too long. When I use plastic as a temporary dampness barrier, I limit it to 48 hours at most, especially on cooler surfaces where condensation forms quickly.
Damp air trapped against a cold wall will always turn to water droplets, and that’s the perfect breeding ground for mold spores. I always pair the film with a dehumidifier or a fan running nearby to keep air moving.
For a concrete trick, tape the plastic only along the top edge and leave the bottom loose so moisture can escape behind it. If you need longer protection, switch to a breathable house wrap or polyethylene sheeting with ventilation holes, and check for weep lines before sealing anything. You’re safe if you’re quick and the wall stays dry to the touch.
Can I Reuse the Plastic Sheeting if It Gets Paint Splatters?
Yes, you can absolutely reuse plastic sheeting with paint splatters, provided it hasn’t been torn or punctured.
I simply flip the drop cloth over once the paint has fully cured, which usually takes 24 hours for latex or overnight for alkyds.
Wipe any heavy drips or pooled paint off with a putty knife while they’re still soft, then store the plastic rolled, not folded, to prevent creases that crack.
For dry splatters, leave them as is; they won’t transfer once cured, so just lay down the clean side up next time.
Avoid using it for stain or shellac work afterward, since those solvents can bleed through old paint layers differently.
Search “paint drop cloth reuse” for more finisher tips, but remember this plastic is durable, not perfect: every spot is permanent, yet harmless.
What Is the Best Way to Patch a Tear in Plastic Sheeting?
The best way to patch a tear in plastic sheeting is to use an adhesive patch that is at least two inches larger than the rip on all sides. First, wipe the area with isopropyl alcohol and let it flash dry for about 30 seconds to remove any dirt or grease.
Press the patch down firmly from the center outward, using a plastic scraper or your thumb to smooth out every air bubble for full contact. For a heavy-duty fix, apply a second layer of the same material, or use clear sealing tape as a backup on the opposite side.
Let the repair cure for at least 24 hours before exposing it to weather or stress, as this ensures the adhesive bonds completely. If the tear is longer than six inches, stitch it with a heavy needle and monofilament line first, then apply the patch over the seam for a reinforced barrier.
Rounding Up
Applying painters plastic films starts with the tape peel, not the paint roll. Pull that tape at a sharp, slow angle away from the wet edge to hear the satisfying *snick*.
Check your adhesion before you commit by testing a small corner on your trim. Write down the angle and speed that worked so you repeat it on every window and door.
Compare the film’s edge against your last paint line to confirm it caught all overspray. Test the film’s hold by lifting one corner after drying, then press it back if it flags.
The plastic’s job is just to catch chaos, and it redeems your baseboards every time.
Read next: how to tape crown molding without lifting existing paint.