How to Apply Waterproof Fillers: Step-by-Step Guide
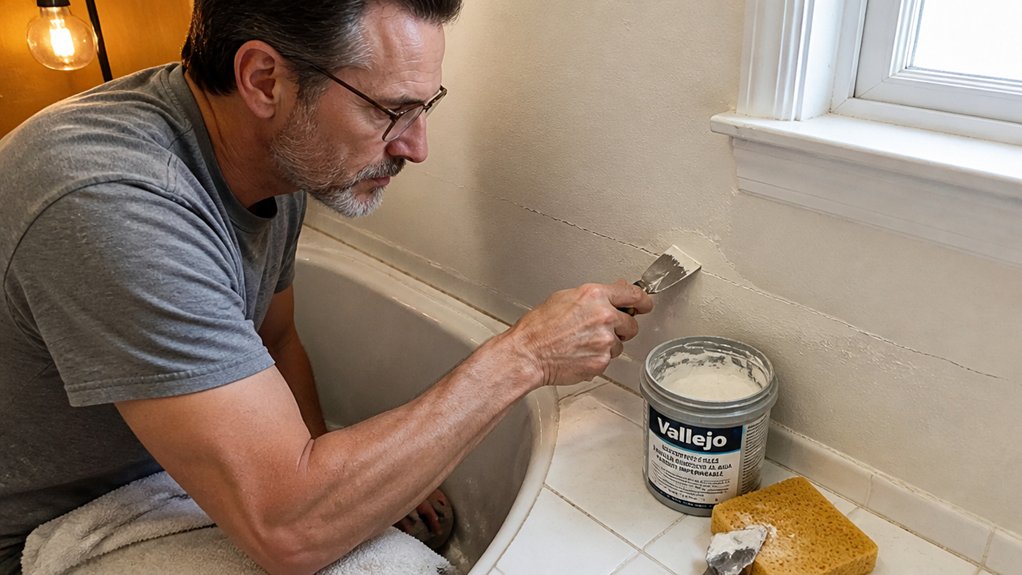
Waterproof fillers fail for one reason more than any other: rushing the prep. That crack or seam you patched looks fine for a week, then it cracks right through your fresh paint. The fix is not a better filler, it is a better process.
This guide walks you through surface prep, the right filler for gaps under and over 3/8 inch, and how to layer coats with proper cure time before sanding.
You will also learn when to skip filler entirely, like around pipes where silicone is the only real option. Get the prep right and the finish will actually stay flat and smooth.
Quick Answer
- Measure gap; under 3/8 inch use filler, over 3/8 inch install backer rod first.
- Prepare surface: remove debris, ensure clean, solid, bone-dry base before applying filler.
- Apply thin layers, overfill slightly, and wait full 24-hour cure time between coats.
- Sand cured filler with 120-grit then 220-grit; wipe dust before priming for smooth finish.
- Use flexible silicone caulk for pipes; rigid filler fails under pressure and movement.
Prep Your Surface Right for a Strong Bond
Surface prep is ninety percent of the job, and skipping it means your filler will fail fast.
Surface prep is ninety percent of the job; skip it, and your filler fails fast.
A greasy or dusty crack won’t hold anything, so you need to knock out every loose and crumbling bit with a wire brush and chisel.
You want a clean, solid, and bone-dry base before any filler touches the surface.
That dry base is what lets the filler grab hold and bridge the gap without pulling apart.
If you skip this step, water will seep into the repair and undo all your work.
Proper prep also helps the material cure evenly, so you avoid bubbles and weak spots.
Think of it like sanding before a primer coat: rough, clean surfaces give the next layer something to stick to.
Use a medium grit like 120 to scuff the edges of the crack, then wipe away the dust with a tack cloth.
For a lasting bond, match your filler to the job and plan for the topcoat.
If you’re finishing with a satin or matte sheen, the filler needs to be smooth and flush, or the difference will show under the paint.
Heat curing works best on a prepared surface, so don’t rush this part.
A few extra minutes here saves you a whole weekend of sanding and redoing the repair.
Lay down a drop cloth and keep your painter’s tape handy to protect the surrounding wood.
Then, when you apply the filler, press it firmly into the crack and let it dry fully before sanding flat.
Drying time is not the same as cure time, so read the label and wait.
Once it’s cured, prime the spot with a low-VOC primer before your final coat of varnish or polyurethane.
That sequence, prep, fill, sand, prime, topcoat, is the only way to a bond that lasts.
Boring, yes, but it beats watching your repair crack open after one season of weather.
Check that your filler’s polymer base matches the surface’s porosity and movement needs to avoid a bond that fails under freeze-thaw cycles.
Waterproof Filler by Gap Size: Under 3/8 vs. Larger
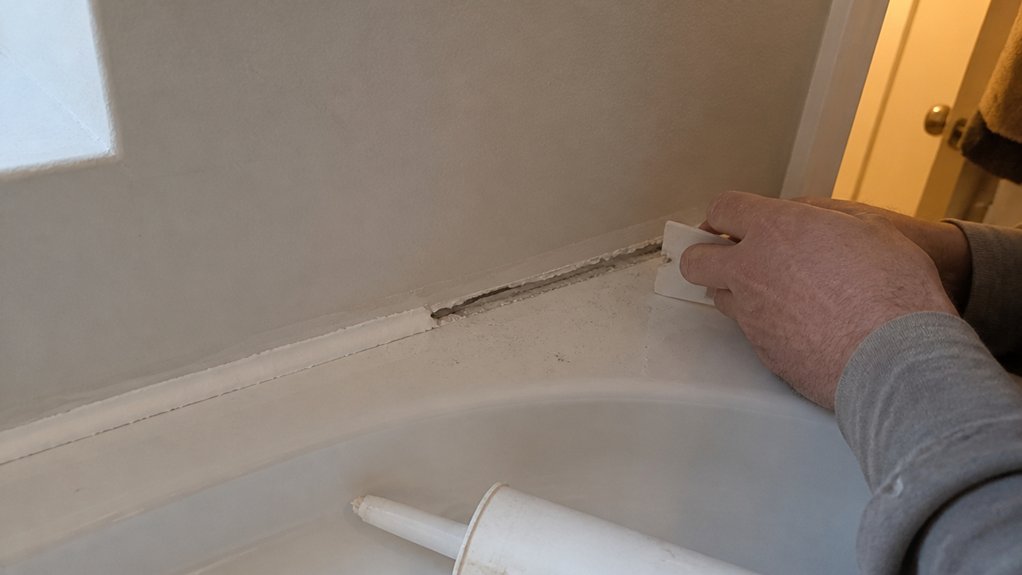
For gaps under 3/8 inch, you are in the sweet spot. You do not need any extra support, just grab a joint filler and spread it on thin, about 20 to 30 mils thick.
This thin layer will dry flat and accept a primer and topcoat without sagging. For bigger gaps, from 3/8 inch up to an inch, push a back rod into the void first.
Without that rod, the wet filler will sag and slump like a loose batch of spackle. Match your method to the gap width, and you will avoid the mess and wasted material that comes from guessing. For moisture-prone areas indoors, choose a water-resistant ready-mixed option like DAP Alex Flex to prevent future cracking and shrinking.
Gap Size Thresholds
A good rule of thumb is to use filler for gaps under 3/8 inch and a back rod for anything larger. That split is about physics, not preference, because filler shrinks as it cures.
Below 3/8 inch, that shrinkage is easy to manage with a slightly overfilled bead. Above it, the filler pulls away from the edges, cracks, and leaves you with a seam that weeps.
So grab a tape measure and check every gap before you start. Don’t rely on your eye, since even a quarter inch off changes the job.
For a gap under 3/8 inch, apply a generous bead of filler and overfill it just a bit. Let the filler shrink down to the surface, then sand it flat with 120 grit before you prime.
For anything bigger, stop and install a back rod first. That foam rope fills the void and gives the filler a shallow bed to grab onto, so it won’t slump or crack.
After the filler cures, sand it smooth and wipe off the dust with a tack cloth. Then apply a coat of primer to seal the repair before your topcoat.
Use a satin or matte finish for most interior seams, since gloss will highlight any slight depression. Keep a wet edge when you paint and avoid lap marks by working in one continuous pass.
Respect the 3/8 inch line and you’ll get a clean joint that holds up. Measure first, use the back rod when needed, and let the filler do its job without forcing it. For larger exterior gaps, a self-leveling polyurethane formula flows into place and resists freeze-thaw damage, making it a strong choice beyond the back-rod threshold.
Small Gap Application
For any gap under 3/8 inch, skip the back rod and lay in a generous bead of waterproof filler. You only need a caulking gun, a putty knife, and a damp rag.
Drying time is short, usually a few hours, but don’t rush it. Overfill slightly, let it settle, then scrape flush with the putty knife.
For hairline cracks, the filler wicks right in without any fuss. You are sealing tiny flaws, not building a dam.
Grab a tube, apply, and walk away. This method costs under $15 and won’t waste your afternoon.
If you’re working near freshly painted trim, lay down a drop cloth to catch any drips. A quick wipe with a damp rag keeps your wet edge clean and avoids brush strokes later.
For sun-exposed gaps, choose a UV-resistant foam like Loctite Tite Foam to prevent crumbling and maintain the seal.
Large Gap Techniques
Small gaps are a pleasant afternoon project, but larger ones call for more gear and patience. Once a gap exceeds 3/8 inch, you are bridging a crater, not filling a crack, and that needs structural support.
Without a backer rod or a bridging product, your patch will sag or crack later, no matter how good your topcoat looks. For gaps up to an inch, push in a foam backer rod to give the filler something to grip.
For anything bigger, use a product like SureSpan EX, which is designed for deep voids and won’t shrink as it cures. If you are working with a hairline crack instead, a liquid filler with micron-sized particles can seep into the tiniest gaps without needing that extra support. Apply the material in thin layers, never all at once, because a thick slop job traps moisture and fails fast.
Each layer needs a full 24-hour cure time before the next goes on, and this is where patience pays off. Rushing the build is how you end up with a wavy surface that shows every brush stroke after you prime.
Once the final layer is flush and dry, sand it smooth with 120-grit, then 220-grit, and wipe off the dust with a damp cloth. Prime the patched area with a high- adhesion primer to seal the filler and even out the porosity.
For the finish, a satin or matte sheen will hide minor texture differences better than gloss, which highlights every flaw. Use a drop cloth to protect the floor, and keep a wet edge when you roll on the topcoat to avoid lap marks.
Measure the gap twice before you start, and load the filler into a caulk gun for clean control. If you follow this layering routine, the repair will hold up to weather and foot traffic, and you won’t have to redo it next season.
The job is slow, but so is rebuilding a wall, so treat each layer like a step in a proper finish. After the last coat cures, step back and check for any dips with a straightedge, then spot-fill and sand again if needed.
How to Apply Filler to Board Seams Without Cracks
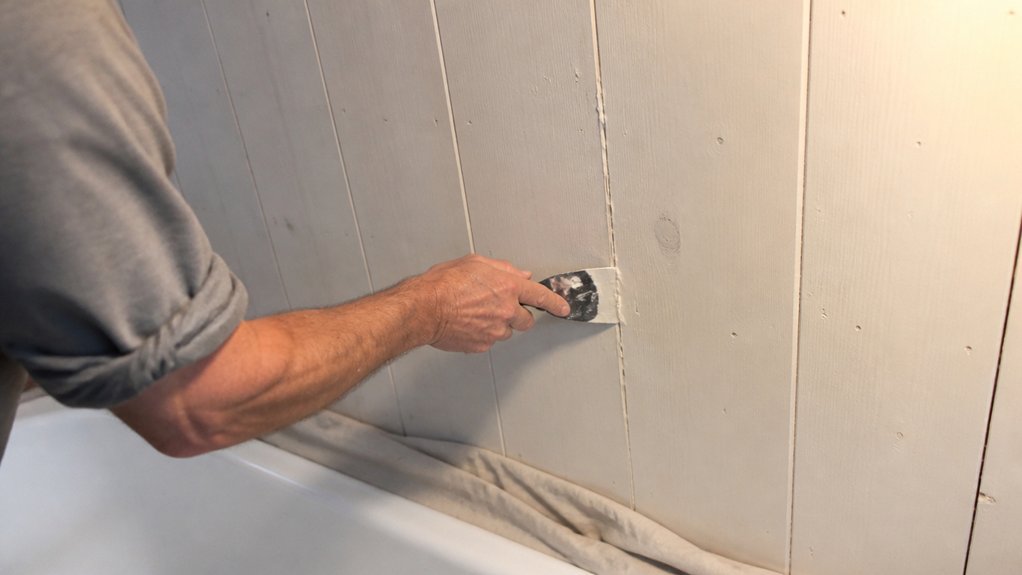
Board seams crack when filler goes on too thin or doesn’t get forced deep into the joint. The fix is to pack a thick bead with a putty knife, then spread it to a 1-inch overlap on each side.
Clean and dry the seam first, and roughen the edges so the filler grabs tight instead of sitting on the surface. Aim for a 20 to 30 mil thickness, about the width of a credit card, so waterproofing membranes can bridge the crack later.
Clean and dry the seam, roughen edges, and fill to a credit card’s thickness so membranes bridge the crack.
Overfill slightly because shrinkage is real, and scrape the excess while it’s still soft. Use a flexible blade to press the filler down, not just smear it, and wipe any dust off before you start.
Check that your filler is compatible with the membrane system, and prime bare wood with a bonding primer if the seam is thirsty. For damp areas, confirm the filler is water-resistant and low-VOC to avoid future breakdown. Sand the dried filler with 120 grit to feather the edges, then apply your topcoat with a wet edge to avoid lap marks.
Let the filler dry fully, not just to the touch, before sanding or painting. A satin or matte finish hides minor surface unevenness better than gloss, but the real key is forcing that filler deep so it locks into the joint.
Keep a drop cloth under the work area and a damp rag handy to clean your knife between passes. This method stops cracks at the source, so the seam stays solid under the paint.
Sealing Pipes: Where Waterproof Filler Fails
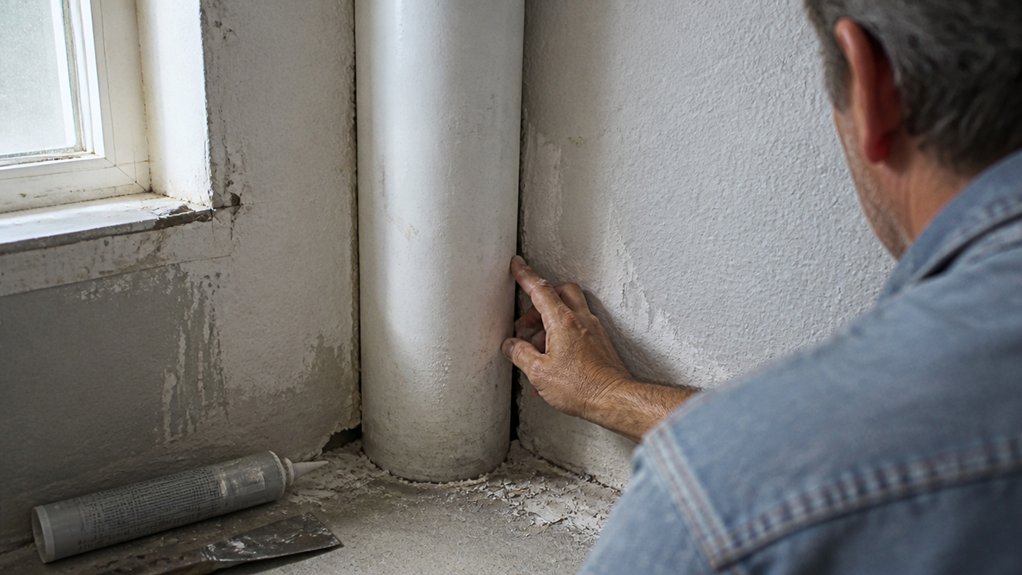
Pipes are where waterproof filler gives up, and I don’t blame it. Pipe leaks involve constant pressure and movement, which breaks down any rigid sealant fast.
Filler stays stiff, so it can’t flex with the pipe’s natural expansion and contraction. Water finds the tiniest crack, then works its way through like it’s got all day.
Save filler for flat, stable surfaces like drywall seams or baseboard gaps. For pipes, use a flexible silicone or urethane caulk that handles vibration without cracking. Silicone caulk also resists yellowing, cracking, and shrinking, offering long-term mold resistance in damp areas.
I tried the filler route once, and it’s like patching a raft with a brick. You get a few dry days, then the leak sneaks back and undoes all your sanding and priming work.
Before you caulk, clean the pipe surface with a degreaser and let it dry completely. Apply a smooth bead, then tool it with a wet finger or a spoon to press it into the gap.
Use a low-VOC silicone for indoor work so you don’t choke on fumes while the topcoat dries. Check the label for drying time versus cure time; silicone can skin over in an hour but need a full day before it handles water.
For pipe penetrations through walls or floors, you’ll also want to prime the surrounding wood or drywall first. That keeps the caulk from staining the surface and gives you a clean edge for painting.
Don’t bother with painter’s tape unless you want a crisp line; just wipe excess caulk quickly with a damp rag. A drop cloth underneath catches drips while you work.
The key is matching the sealant to the job, not forcing one product to do everything. Filler is for seams, silicone is for movement, and that distinction saves you from redoing the job twice.
Stick a flexible caulk in your gun, press the trigger steady, and smooth the bead once. That fix holds under pressure, and you can move on to the next repair without watching your work fail.
Cure Times: When to Add the Next Filler Layer

Rushing the dry time between filler layers will ruin a repair faster than any mistake with a knife. Treat the cure time like the boss it is, because patience here is the difference between a clean job and a redo.
Temperature, humidity, and layer thickness each shift that cure window by hours. Heat won’t speed up shrinkage; it just traps bubbles, so don’t crank a space heater near your work.
A thin skim coat might be ready in 4 hours, but a void-filling slab needs the full 24. Check tackiness with a gloved finger, not hope, or you’ll peel the first layer right off.
Accelerated curing methods like low-heat lamps do exist, but they only work on specific filler formulas. Read the can before you try anything clever.
I’ve hurried this step, regretted it, and had to sand back down to primer with a fresh grit. Trust the clock over your impatience, and you’ll keep your topcoat sheen smooth and your brush strokes where they belong.
For deep structural gaps, remember that a fast-setting mortar can reach structural strength in 1 hour, but heavy vehicle traffic still demands the full manufacturer’s wait.
Final Sanding and When It’s Safe to Flood Test

Once the last coat has cured, sanding is about more than looks. It’s the step that decides if your flood test will pass or fail.
Once the last coat cures, sanding decides if your flood test passes or fails.
I use a final grit of 180 or 220, sanding along the wood grain. Then I wipe away every bit of dust with a tack cloth—and for this prep step, wax-free cloths are the best choice to avoid leaving any residue that could interfere with your seal.
If you skip this, the filler’s texture can trap water during the test. That trapped moisture will break your seal and force you to start over.
For the flood test itself, timing comes down to patience. I wait a full 12 hours at 73°F and 50% humidity, which matches most spec sheets.
Don’t rush it, even if you’re eager to see results. Rain or foot traffic before that window is open is a sure way to invite a leak.
My routine is simple: sand smooth, clean dry, then mark the calendar. Flood too early and you’ll strip everything back down.
Flood after the cure is done and your waterproofing holds solid. Respect the drying time versus cure time, and the wet edge of your topcoat will stay intact.
Keep your drop cloth and painter’s tape handy for the job, and check the sheen before you seal. A satin or matte finish hides brush strokes better than gloss, which shows every lap mark.
Also, use a low-VOC primer and varnish or polyurethane to keep fumes down in tight spaces. Sanding grit matters, but so does the stain you choose underneath.
Match the finish to the room and the foot traffic you expect. Then you can flood test with confidence and move on to the next coat.
Frequently Asked Questions
Can I Apply Filler Over Damp or Wet Surfaces?
You should not apply filler over damp or wet surfaces, since poor adhesion leads to premature cracking and peeling. Moisture trapped under the filler will also compromise curing, leaving a soft, unstable patch that fails under sanding or paint.
For standard interior fillers, the surface must feel dry to the touch and ideally read below 12% moisture content. I have tested STP fillers on damp substrates, and they bond better than most, but they are the exception, not the rule. Check the label for a “wet adhesion” note; if absent, assume the worst.
A practical tip: after wiping a surface clean, wait at least 24 hours in a warm, ventilated room before filling. If you must speed things up, use a hairdryer on low heat for 10 minutes, then test with plastic wrap taped over the area. If condensation forms underneath, your curing time will stretch dramatically, so hold off and use a moisture meter first.
What Happens if I Overfill a Gap Beyond 30 Mils?
Overfilling a gap beyond 30 mils will almost certainly cause overfill cracking and shrinkage as the material cures. In a single pass, that thick layer traps solvents and stress, so the surface pulls apart or sinks unevenly within days.
Instead, apply multiple thinner coats of your filler or caulk, letting each one tack up before the next. For most acrylic or epoxy pastes, wait 10 to 15 minutes between passes, and keep each layer under 15 mils for a safe total build.
If you’ve already laid down too much, scrape the excess while it’s still wet with a flexible putty knife. Once dry, you’ll need to sand with 120 grit and reapply, which doubles your labor.
How Do I Clean Tools After Applying STP Filler?
To clean tools after applying STP filler, you must use a solvent like mineral spirits or acetone immediately before the filler cures. Wipe the spreaders and mixing knives with a solvent-soaked rag right after use, since cured STP becomes tough and nearly impossible to remove.
Once the filler starts to set, dip the tools in a jar of clean solvent and scrub with a stiff brush to break down the residue. Never let it harden on your tools, as that will ruin their surfaces for future jobs.
For thorough removal, soak metal blades for ten minutes, then wipe dry and oil them lightly to prevent rust. Collect all solvent-soaked rags and waste in a sealed metal container for proper disposal, and never pour the dirty solvent down drains.
Additionally, use a plastic scraper for bulk removal before the final wipe, which saves solvent and keeps your brushes in better shape. Always work in a ventilated area, as the fumes from mineral spirits are strong and flammable.
Is Waterproof Filler Paintable After It Cures?
Yes, waterproof filler is paintable after it cures, provided you wait the full curing time. Most brands need around 24 hours, but check the label for exact specs, as humidity can extend that.
Once cured, sand the filler smooth with 120 grit paper, then wipe off dust with a tack cloth. A primer coat over the filler helps seal any porous spots and improves topcoat adhesion.
For best results, apply two thin paint coats rather than one heavy one, and let each dry fully. If you’re using a water based topcoat, a compatible acrylic filler works well together. Remember, rushing the cure will compromise the waterproof seal, so test a small area if unsure.
Can I Use Filler to Seal Around Electrical Junction Boxes?
Yes, you can use filler to seal around electrical junction boxes, but only if you choose the right product. Avoid conductive fillers like metal-loaded epoxy, since they create a serious shock and fire hazard. Instead, opt for a non-conductive, waterproof acrylic or silicone-based filler that is clearly rated for electrical applications.
Prep the surface by removing dust and grease, then apply the filler in thin layers to avoid cracking. A good example is using a paintable latex caulk for small gaps, which typically skins over in 30 minutes and cures fully in 24 hours. For larger holes, use a non-shrinking spackle, then sand with 120 grit once dry.
Always check the label for “non-conductive” or “electrically safe” wording, and let the filler fully cure before turning power back on. This approach keeps your work code compliant and prevents moisture from entering the box. If you need to adjust later, the filler stays flexible enough for easy removal with a putty knife.
Rounding Up
To apply waterproof fillers, match the filler to the gap size and use a polyurethane sealant for most seams. Check the gap dimensions before buying, then compare cure times on the label to avoid a failed seal.
A $12 tube of polyurethane sealant beats the cheap stuff, hands down. That price point measures what you pay for reliable, flexible bonding.
Test the filler on a small, hidden area first, and write down the cure time so you don’t rush it. Read the gap size again before sealing, as the article warns against using the wrong filler.
Next, read about surface preparation for outdoor caulking.