What Are Stabilizing Solutions? Types, Uses and How to Choose
Dusty, shifting ground can make exterior projects feel like a losing battle before the first coat goes on. What are stabilizing solutions?
They are liquid chemicals that bind loose soil into a firmer base that can carry loads, cutting dust and preventing washboarding.
You will see chlorides, organics, and synthetic polymers, with different costs and cure times from $0.50 to $4 per square yard. Your soil type and surface prep needs dictate the choice, so test a patch first.
Match it to traffic, budget, and climate, then read on for the types, uses, and how to choose the right one.
Quick Answer
- Stabilizing solutions are chemical treatments that bind soil particles, reducing water movement and improving load capacity.
- Main types include chloride salts, organic non-petroleum binders, and synthetic polymer emulsions, each suited to different soil conditions.
- Chlorides work best in humid climates; organics like lignosulfonates suit clay soils but degrade in months; polymers resist water longer.
- Choose based on soil type, clay content, traffic level, and cure time; test a small patch before full application.
- Cost varies from $0.50 to $4 per square yard, with reapplication needs depending on stabilizer durability and rainfall.
The Stabilization Problem: Types and Immediate Benefits
Soil under a road or slab acts like a wood board that never got a primer coat. Water gets in, the surface swells, and the topcoat fails.
Water in soil is like a water stain on bare wood: it shows up and keeps spreading if you do not seal it. That is why wet ground under a road leads to swelling, rutting, and pavement that cracks within two years.
The quick fix is a chemical stabilizer that either binds soil particles tighter or dries the layer out. You get less movement with water, better ability to carry weight, and less shrinking and swelling.
Think of it like sanding a board to 120 grit before you seal it. You need the right prep before the finish can hold.
Work the stabilizer evenly, much like keeping a wet edge when you brush polyurethane. Uneven spraying can leave lap marks, and uneven stabilizer can leave soft spots.
Compare cost now with cost later. A cheap spray might save $500 today, but if it fails after one rainy season, you are repaving.
Proper stabilization often lets you cut base thickness, which cuts material costs. Drying time and cure time are different, and a surface that feels dry may still be soft underneath.
A cheap spray can look good for a week, like a thin coat of varnish with no primer under it. One wet season can lift it and leave you with a repaving bill.
Stabilize early, follow the product label, and test a small patch first. That keeps the road solid and your wallet happier. Stabilizers degrade under UV, temperature swings, and humidity, so verify that the shelf life is 12–24 months or less under poor storage before buying in bulk.
7 Stabilizer Categories: Chlorides to Synthetic Polymers
We have seven stabilizer categories to cover, and today I will start with the three you will meet most often: chlorides, organic options, and synthetic polymer emulsions. Think of this like choosing a primer for a job, because each choice changes how the next layer behaves.
Chlorides such as calcium chloride are cheap and do a good job controlling dust, but they need moisture from the air to work. In a dry climate they stop helping, just as a stain that has set too far will not wipe back cleanly. This makes them ineffective in arid conditions where you might otherwise rely on oxygen starvation methods seen in intumescent coatings.
Organic choices like lignosulfonates or molasses are greener on paper, yet they break down fast. They can also use up oxygen in nearby water as they break down, so you get a trade off between cost and environmental risk.
Synthetic polymer emulsions bind particles into a film, much like a topcoat locks down a sanded surface. Check the VOC content and the drying time against your site conditions before you buy.
Match each product to the job the way you match sanding grit to the finish you want. Use a drop cloth to catch spills and painter’s tape to mark the treatment edge.
Chloride-Based Stabilizers
Chloride stabilizers have done dust control work for decades, and they earn their place through practical results. Calcium chloride or magnesium chloride pulls moisture from the air, but both need enough humidity to work.
Below 30% relative humidity, they stop performing well and just sit there. You also need to watch what chloride does to nearby plants, because it can kill roadside grass quickly.
For the right climate, they are a low cost choice that works well. Expect to pay about 50 cents to $1.50 per square yard, and you can spray the material onto aggregate without fancy mixing.
They have a long record on roads that carry low traffic, which makes them a first choice for dry haul roads. Treat the spray pattern like a topcoat and keep a wet edge so you avoid lap marks.
Keep the spray away from primer, stain, varnish, polyurethane, and any fresh topcoat so it cannot ruin brush strokes or a cured film. Chloride can spot a sheen, whether it is gloss, satin, or matte, so protect finished surfaces with painter’s tape and a drop cloth.
Sweep loose grit the way you would remove sanding grit before a finish coat, then apply the chloride evenly. Spray when the road will stay dry through the initial drying time, and keep traffic off until the cure time is complete.
If local rules track VOC limits or coating specs, check them before the job and keep chloride spray out of those work zones. Do not use these stabilizers near plants, or you will regret it.
For dusty haul roads in a humid climate, they are a practical choice. Their low cost and simple spray application make them useful, but only in the right humidity. For best results, apply using an any-angle spray tip to avoid wrist strain and maintain consistent coverage during overhead or awkward applications.
Organic Non-Petroleum Options
Organic stabilizers that are not petroleum based give you a practical option for dust and erosion control when you want to avoid heavy salts. Molasses, lignosulfonates, guar, and plant oils coat soil particles and bind them together, which cuts dust without adding harsh chemicals.
Think of the first pass like a primer coat: it prepares the surface, and later passes act more like a topcoat that holds the soil in place. These products break down over time, so plan on reapplying every few months instead of following the yearly schedule you might use with chloride.
A small test patch helps you judge drying time and cure time before you treat a whole road or path, much like testing a stain on scrap wood before you commit to a satin or matte sheen. Start with a small area as you would with a new sanding grit, then check how the surface takes the product.
Spread the material evenly and keep a wet edge to avoid lap marks in the finished crust. When you mix or store these liquids, use a drop cloth and painter’s tape to keep spills contained and labels clear.
A low VOC product still needs sensible handling, much like a varnish or polyurethane in the shop. On wood, brush strokes and gloss level show the finish quality; here, even coverage and a wet edge matter most.
For application, consider using a silicone funnel to filter and pour these organic solutions cleanly, preventing clumps from blocking your spreader nozzle.
- Molasses: gravel roads, $1.50 to $3.00 per gallon
- Lignosulfonate: clay soils, $2.00 to $4.00 per gallon
- Guar: sandy areas, $3.50 to $6.00 per gallon
- Plant oils: paths with little traffic, $4.00 to $8.00 per gallon
- Blended organic: mixed soils, $2.50 to $5.00 per gallon
For clay soil, lignosulfonate is a good pick because it costs less, works well, and leaves vegetation alone. Near waterways, check biological oxygen demand before you apply any product.
Choose these organic options when you want a lower impact product and can accept more frequent applications.
Synthetic Polymer Emulsions
Synthetic polymer emulsions are a practical choice for soil stabilization when you need quick curing and lasting performance. They set quickly, and many treated areas can be driven on within 24 hours.
Once set, they resist water better than chloride treatments that can wash out. The polymer lasts for months instead of weeks, which saves money on reapplication.
They cost about twice as much as organic stabilizers, often $2 to $4 per square yard. The labor savings usually make up the difference. Fabric density quality plays a key role in how evenly these emulsions bond to the soil surface.
Apply them to a damp soil base so they bond properly. Do not spray on dry dust and expect good results.
Treat the cure like you would a primer or topcoat, and remember that drying time and cure time differ. Let the surface set fully before you judge the finish.
Work with a steady hand and watch for lap marks, much as you would when keeping a wet edge on a finish. Choose these emulsions when you want durable stabilization without heavy equipment.
Check your local EPA approval before you start. My permit paperwork taught me that lesson the hard way.
How Stabilizers Alter Soil Physics and Structure
A stabilizing solution changes how soil holds together at the particle level. The grains clump into larger, denser masses, and water pressure drops so water does not collect in the base.
Think of the first change like sanding wood with the right grit before a topcoat. You give the finish a solid surface to bond to, and the base stops acting loose and dusty.
The second change works like keeping moisture away from a varnish or polyurethane coat. Water stays out longer, so the base keeps its shape and does not turn soft under traffic.
More aggregation means less dust and better load bearing support. Lower water pressure means fewer ruts under wheels.
Reduced plasticity means less damage from shrink and swell. Higher density gives you stronger compaction.
Lower permeability keeps water out longer. On a gravel road, that means fewer potholes after rain.
A stabilizer works on soil much like a primer works on bare wood. It prepares the base so the topcoat, whether that is gravel, asphalt, or concrete, has something sound to sit on.
On a finish job, a wet edge helps you avoid lap marks, and steady brush strokes help you lay down an even coat. The same care matters on site: a clean drop cloth and painter’s tape protect edges indoors, and clean grading protects the edges of a road base.
You still need proper grading and compaction, along with the right drying time and cure time for any surface coat you add. A stabilizer helps the soil hold together and resist water, and that makes the road surface last longer.
Keep the base clean and well compacted, and the stabilizer can do its job. The final sheen, whether you choose gloss, satin, or matte, depends on the topcoat, and the road surface depends on the base underneath.
Temperature dictates application success, so check that conditions stay between 50°F and 90°F to ensure proper curing and adhesion.
Stabilizer Use Cases: Roads, Sites, and Subgrades
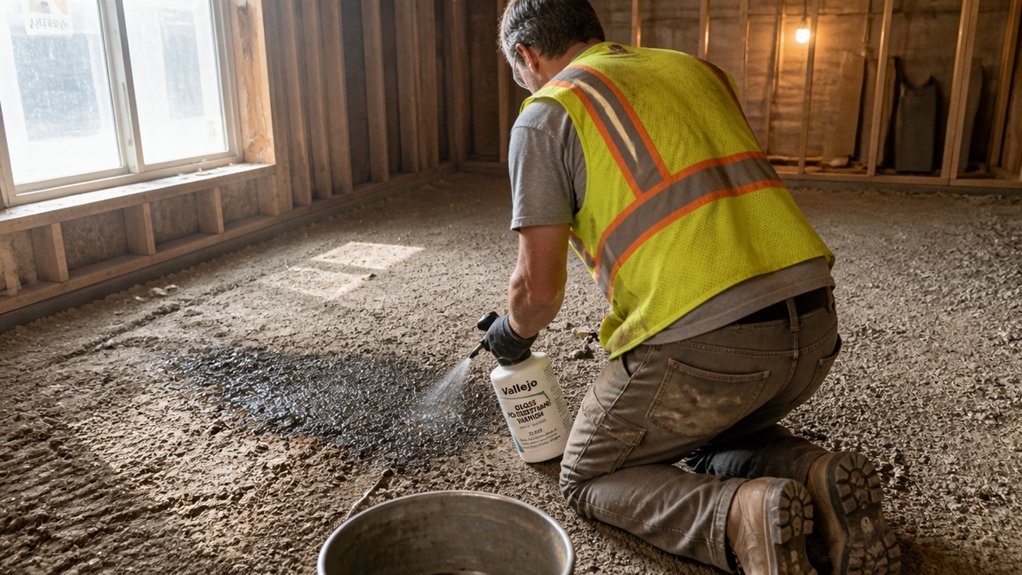
Stabilizers help most on low volume roads and haul roads, where dust and washboarding make every trip rough. A huge highway can use them too, but the payoff shows up faster on these smaller routes.
For subgrades, the stabilizer works on the dirt layer under the pavement. It raises bearing capacity so a thin asphalt patch holds together through spring thaw.
Think of that dirt layer like the base under a topcoat: if the surface is soft, the finish will fail no matter how careful you are with sanding grit. You can also use stabilizers to lock down a construction site against erosion or firm up a residential driveway.
The goal stays simple: keep the ground from acting like a wet sponge. I will walk you through the fix that fits your dirt, from a light surface treatment to a full primer and topcoat approach. For aggressive material removal on tough surfaces, a 40 grit sandpaper works much like a heavy stabilizer dose, stripping away weak layers to expose a stable base.
Roads and Low-Volume Traffic
I treat a low volume gravel or native road the way I treat a wood finish. You prep the surface, pick a product that bonds to it, and plan on recoating.
For dust control, a polymer you spray on or lignosulfonate works like a sealer coat and can cut fugitive dust by up to 80%. It saves your lungs and your paint job.
Chloride compounds or cement bind the fines so a 10 ton truck will not carve trenches after rain. Treat that step as the primer that gives the topcoat something to grip.
Plan on $2 to $4 per square yard each year for reapplication. That beats hauling in fresh gravel.
Match the stabilizer to the clay in your soil. Too little clay and the product goes to waste, while too much clay gives you a brittle crust. Because the binder must match the surface chemistry, ensure your stabilizer’s formulation aligns with the soil’s alkali resistance to prevent blistering on high pH ground.
Test a small patch the way you test stain on a scrap board. Check the matte sheen and how the surface sheds water before you commit.
A coarse gravel base gives the binder teeth, much like 80 grit sandpaper gives a finish something to grab. Keep the surface clean before you apply anything.
Apply the product in even passes and keep a wet edge so you avoid lap marks. Overlap your spray pattern or brush strokes with care.
Watch drying time and cure time as separate things. A road that looks dry can still be soft under a truck.
Choose a low VOC product when fumes or runoff matter near a barn or house. A thin film that cures like polyurethane can help on roads with light use, but the base must be clean.
For casual farm or forest roads, a diluted organic polymer gives you the best value. Use painter’s tape and a drop cloth around culverts or signs when you spray.
Subgrade Strength and Stability
Subgrade stabilization is the surface prep under every driveway, warehouse slab, and field road. Weak clay can turn a solid project into a sinking mess, much like a poor sanding job shows through the topcoat. When you raise the subgrade modulus, which is the soil stiffness, you reduce resilient deflection. That bounce back is what cracks pavement over time, the same way a soft base can let a finish coat fail. Test the soil before you pick a stabilizer, much like testing a stain on a scrap board before you commit to the whole floor. Match the stabilizer to the load and the soil, because a guess can leave uneven results like lap marks in a stained floor. For a driveway or warehouse slab, lime or cement treatment may cost 2 to 5 dollars per square yard. That cost is easier to handle than tearing out a failed slab later, and it works like applying a primer before the topcoat. For heavy haul roads, ask for a polymer emulsion because it cures faster and makes less dust. Dust control matters the way sanding grit matters in a finish room, and a faster cure time can keep the job moving. Give the treated soil the cure time it needs before traffic, just as you let varnish reach full cure before heavy use. If you spray a polymer near finished surfaces, cover them with a drop cloth and seal edges with painter’s tape. Outdoor applications demand rigorous prep and broader cure ranges, since UV exposure and moisture cycling can break down treatments that lack proper stability.
Choosing Stabilizers: Soil, Dosage, and Purpose
Start with soil type and chemical fit, just as you prep a surface before primer. Get that step wrong and you waste stabilizer money the way you waste varnish on a dusty board.
Soil type guides every choice after it, so read the ground before you buy a product. Read the product label the way you read a can of polyurethane: check the details before you open it.
Before you buy, settle three practical points. They are dosage, application method, and curing time.
Calibrate dosage with lab tests instead of guesswork, the way a test panel settles sanding grit. Too little does nothing, and too much can make the soil softer and harder to work.
Budget 10 to 15 percent extra for field adjustments, like keeping extra stain for lap marks and brush strokes. Apply the product with the right method for the depth, whether you spray it on or mix it in.
A pump truck will not fix a deep subgrade, and a drop cloth will not fix a bad prep job. Some products need 48 hours and others need weeks, so compare drying time versus cure time before you close a road.
If you cannot keep the road closed that long, choose a faster product. Purpose sets the rest, the way room use sets topcoat sheen, gloss, satin, or matte.
For dust control, a light dose is enough. For bearing capacity, use a heavier treatment and check VOC limits if fumes matter.
Match the stabilizer to the job, like matching primer and topcoat to the surface. Keep a wet edge in your work schedule and use painter’s tape only where it helps.
Check the flow rate against the equipment’s demand, much like a regulator’s SCFM rating must exceed a sander’s air consumption to avoid bottlenecks.
Environmental Trade-offs: Toxicity, BOD, and Vegetation Damage
Every stabilizer has a hidden cost, and you pay it in water, plants, and critters downstream. I learned this the hard way while trying to keep a site clean and a finish schedule on track.
Cationic polymers can be toxic to aquatic life. Get federal approval before they touch a site.
Chloride runoff can suppress vegetation. Green slopes can turn into bare patches, much like a bad primer coat that shows through the topcoat.
Organic options such as molasses or lignosulfonates raise biological oxygen demand. Bacteria use that oxygen, and fish can gasp.
Treat the stabilizer choice like a primer choice: it sets what runs off and what your site can hold. Check local permits and read the label the way you read a VOC data sheet.
A natural label still needs a permit review and a careful label read. Match the stabilizer to your watershed’s sensitivity and your site conditions.
Stabilizer Permits, Cure Times, and Testing Your Choice
Permits give you an early sign of whether a stabilizer fits your site. Check permit reciprocity with neighboring jurisdictions before you schedule work, especially when a project crosses county lines.
Before you commit, test the product on a small patch. Use painter’s tape to mark the area and keep your drop cloth clear of the test spot.
If you plan to add a primer, stain, varnish, or polyurethane topcoat, test that full system on the same patch. Check the VOC level when you work indoors or in a tight space.
Wait 48 hours, then check for tackiness or runoff after a light rain. Compare the film strength with a simple boot heel push.
Watch cure time closely, because humidity can stretch a quick cure label into three days. Drying time and cure time are different, and the topcoat may feel dry while the stabilizer is still soft underneath.
Field testing gives you better information than any spec sheet. I have seen fast labels fail on a damp day, and I have seen a slow batch behave well once the surface was sanded to the right grit and kept clean.
Field tests beat spec sheets every time—damp days expose fast labels, and clean grit saves slow batches.
For a finish coat, note the sheen you want, whether gloss, satin, or matte. Watch for lap marks, brush strokes, and a wet edge that sets too fast before you commit to the whole project.
Test first, get the permit second, and apply third. That order keeps you from sanding off a bad coat or redoing the job next month.
Frequently Asked Questions
Can Stabilizers Be Used on Frozen or Wet Soil?
Stabilizers should not be used on frozen or wet soil because they will not bind properly. Frozen ground prevents proper curing and adhesion, while excess moisture dilutes the mix and weakens the bond.
For a practical check, squeeze a handful of soil; if it holds together or smears your glove, wait at least 24 to 48 hours of dry weather before applying. This simple moisture test saves product and gives you a better soil stabilizer result.
If rain is forecast, cover the area or reschedule, since wet conditions will almost always reduce performance.
What Is the Typical Lifespan of Chemical Stabilization?
The typical lifespan of chemical stabilization is usually 1 to 5 years, though it varies wildly with the binder, application rate, and site conditions. Product longevity depends heavily on degradation factors like traffic, weather, and soil type.
Before you rely on it, pull a small core sample and check for loose fines; if it crumbles, plan a reapplication. For a practical field check, wet a patch and watch how quickly it sheds water, because poor water resistance often signals breakdown.
If you are comparing options, ask for a dust control binder with a proven track record in your soil. Always test it on site, do not just assume it will last.
Do Stabilizers Work on All Soil Types?
No, stabilizers do not work on all soil types. Soil chemistry dictates success, so clay often responds while sand usually does not.
You cannot assume a universal fix. Always run a small application test first, mixing a batch at the supplier rate and applying it to a 2 ft by 2 ft patch.
Let that patch cure for 24 hours before you commit. Check for set, dusting, and loose material, then adjust the rate or stop.
Guessing wastes time and money on any soil stabilization job. Test first, and you will know what the ground will accept.
How Soon Can Traffic Resume After Application?
Traffic can resume after application only when the coating reaches full cure, which may take hours to days. Cure time depends on soil type, stabilizer chemistry, weather, and dampness, so check the manufacturer specs before opening the area.
As a practical example, many water-based sealers accept foot traffic after 4 hours and vehicle traffic after 24 hours, but verify your product’s dry time. Test a small area for tackiness and moisture before letting cars roll.
Keep the surface dry and protected from rain during the cure window, since cool or humid conditions can stretch the schedule. Use the recoat window as a related search term if you need the exact timing for your product.
Are Stabilizing Solutions Safe for Groundwater?
Stabilizing solutions are not guaranteed safe for groundwater without product-specific testing and local approval. Leaching risk varies by chemistry, soil, depth, and water table.
Before you treat a repaired sill or deck post, pull the SDS and ask the supplier for leachate testing data. Keep mixing and cleanup at least 50 feet from a well, and never rinse leftover product into soil or a storm drain.
Check local regulations and manufacturer specs, then confirm with a groundwater test before regular use. If data is missing, choose a different product or get groundwater testing before you proceed.
Rounding Up
Stabilizing solutions come as chlorides and polymers, and the right type and use depend on your soil and job, not hype. Test your soil first so you are not throwing money into a hole.
Write down your fines today before choosing a chloride or polymer. Compare chloride and polymer costs today for your use.
Chlorides cost like $1.50 a yard, so ask whether a budget fix for dusty gravel roads will wash out. Ask which polymer will survive rain and heavy trucks.
For a related topic, read soil testing.