
What Are Textured Ceiling Compounds? Types, Uses and How to Choose
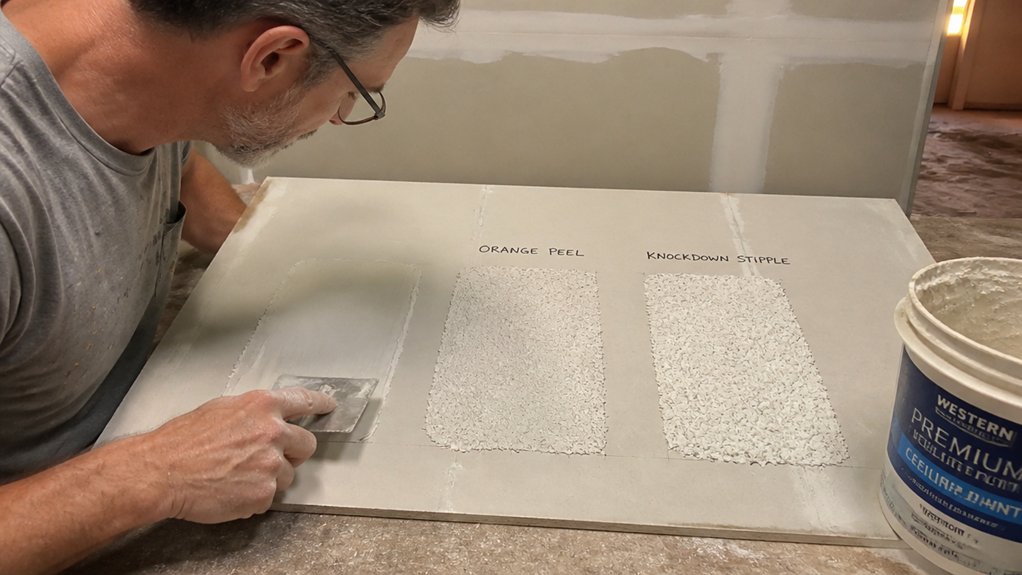
If your ceiling looks patchy or dated, you may not need a full skim coat. What are textured ceiling compounds? They are sprayable drywall mud or powder that can hide flaws and add style, but the wrong type or spray setup can make the job messy.
This guide covers types, uses, and how to choose, including orange peel, knockdown, and popcorn for your room and budget. You will also see hopper gun costs, pro pricing, and which option is easiest for DIY.
Read on for surface prep tips, comparisons, and a clear pick for your next ceiling project.
Quick Answer
- Textured ceiling compounds include powder mixes, premixed joint compound, and popcorn acoustic texture with polystyrene or vermiculite.
- Orange peel, knockdown, and popcorn are the main finish types, each offering distinct visual and tactile appeal.
- Popcorn texture carries the heaviest wet weight (up to 1.5 lbs/sq ft), requiring structural checks before application.
- Choose orange peel for easy patching, knockdown for modern warmth, and popcorn for sound absorption in noise-prone rooms.
- Coverage varies significantly: orange peel covers 600 sq ft per 50 lb bag, knockdown 400 sq ft, popcorn 200 sq ft.
The 3 Textured Ceiling Compounds You’ll Meet
Before you load a spray gun, identify which ceiling compound you have. The three common types are powder mix, premixed joint compound, and popcorn acoustic texture.
Popcorn texture contains polystyrene or vermiculite, so read the bag even though those materials are not flammable in the mix. Powder mix comes in bags that hold 40 to 50 pounds, and you add water at the job site.
Premixed joint compound arrives wet in a bucket, and you thin it before spraying. Popcorn texture is thicker and chunkier than the other two, so it needs its own spray setup.
Storage life matters because old material can clog a gun or leave a weak patch. Sealed dry powder lasts for years, and wet compound can turn crusty in a few months.
Don’t let old material clog your gun or leave a weak patch. Dry powder lasts years; wet compound turns crusty in months.
I have found old buckets in the back of a garage and learned to test a small batch first. Mix a small amount, spray a scrap board, and check the texture before you commit to the ceiling.
Lay a drop cloth and tape trim with painter’s tape before you start, then sand high spots with 120 grit paper before primer. Use a low VOC primer if the room has poor airflow, and let the patch reach full cure time before you judge the finish.
Follow the bag’s drying time, and keep a wet edge when you spray so you do not leave lap marks. Overlap each pass, and back brush heavy spots to smooth brush strokes.
If you plan to paint, apply a primer made for the compound, then a topcoat at the sheen you want. Matte hides ceiling flaws better than gloss or satin.
Keep stain, varnish, and polyurethane on the woodwork and off the ceiling. For orange peel or knockdown, use standard joint compound, and for popcorn, buy the acoustic mix made for that texture. Ready-mixed popcorn patch products offer a pre-mixed alternative for small repairs that mimic the bumps without requiring a full spray setup.
Orange Peel vs. Knockdown vs. Popcorn: What Each Finish Looks Like
Run your hand over a finished ceiling and you will feel the difference right away. Orange peel feels like fine sandpaper, knockdown feels like smooth, lumpy stucco, and popcorn feels like a bumpy sponge that has seen better days.
Orange peel is the subtle, clean choice: tiny bumps hide flaws without drawing attention. Knockdown is flatter, with soft, irregular islands that suit modern and Mediterranean rooms and forgive small mistakes.
Popcorn has a chunky retro look, with a soft lumpy surface. Removing it later is a dusty job, and it often calls for asbestos testing before you start.
For ceiling prep, lay a drop cloth and tape off edges with painter’s tape before you sand with a medium sanding grit. Orange peel is the easiest texture to patch, while knockdown takes more care to match.
When you paint a textured ceiling, use a primer and a topcoat, and choose a matte or satin sheen to soften the bumps. Check the label for drying time and cure time before you recoat, and keep a wet edge to avoid lap marks.
For a quick, low maintenance finish, I would pick orange peel. Popcorn only makes sense when you need sound absorption, and even then I would think twice. For applying these finishes, rubber texture rollers require a wet, pliable layer underneath to prevent the pattern from sliding.
Pick the Texture for Your Room’s Vibe and Purpose
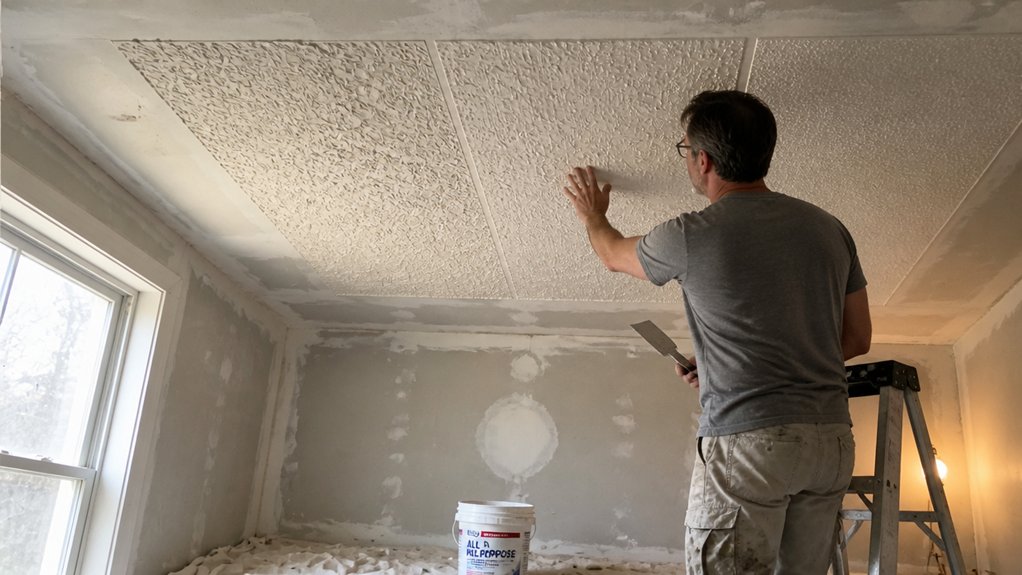
Choose a ceiling texture that fits the room’s mood and purpose. Think of it like picking a shirt for the space: the surface should suit how the room looks and how it gets used.
In a busy kitchen or a kid’s playroom, orange peel keeps the surface subtle and hides small flaws. Lay a drop cloth and set painter’s tape at the walls before you start so the job stays clean.
Heavy knockdown gives a ceiling stucco style warmth and a modern Mediterranean feel. Use it where you want a little texture and can accept a slightly rougher surface.
For a bedroom or office where you want quiet, popcorn has a lumpy acoustic coating that muffles sound. It costs style points and makes future removal a headache, so weigh that before you choose it.
When you paint any textured ceiling, sand repaired spots with the right sanding grit and wipe away dust before you apply primer. Prime the texture so the topcoat covers evenly and holds up.
Use a matte or satin sheen for most ceilings, and use gloss only where extra washability matters. Keep a wet edge as you roll to avoid lap marks and brush strokes.
Respect drying time versus cure time before you use the room again. Choose a low VOC primer if odor is a concern, and keep the room ventilated while it dries.
If you are finishing wood trim in the same room, protect it with painter’s tape and apply stain, varnish, or polyurethane after the ceiling work. Wipe the trim clean and sand lightly between coats so the finish looks even. Spatter-resistant, low-odor flat paints work well here, as they minimize cleanup and keep the room comfortable during application.
Visual Impact Matters
Texture is the biggest visual choice you will make for a ceiling. Match the texture to the room’s mood and light.
Orange peel keeps contrast low, so it suits small rooms and busy patterns without shouting. Knockdown has flat peaks that bounce light around and soften glare in bright living rooms while adding subtle depth.
Popcorn dulls light and can make a room feel dated and closed in. Think about the feel you want before you pick a texture.
For a calm, clean room, choose orange peel. For modern warmth, knockdown is the better fit.
Skip popcorn unless you are after a retro look, and even then check the result before you commit. Plan your paint with a primer and a topcoat so the texture holds up.
Pick a matte or satin sheen to control glare, and use paint with a low VOC rating to keep odors down. High gloss can show flaws, so choose a sheen that softens them.
Follow the drying time and cure time on the can, and use painter’s tape and a drop cloth to protect the room. If you sand a repair, use the right sanding grit before you apply primer.
Use the ceiling light and the room’s mood as your main guide. That approach will give you a ceiling you can live with. For intricate ceiling patterns, rubber texture rollers work well with plaster, glazes, and chalk paint to produce crisp, consistent imprints.
Room Function & Acoustics
Every room has a feel, and the ceiling texture you pick should match that feel and support the room’s use. Popcorn ceilings trap sound waves and give you some sound absorption, which helps in home theaters, bedrooms above garages, and rooms where noise leaks.
Orange peel gives a cleaner look, but it offers little acoustic help, so it fits dining areas fine. Knockdown is a middle ground: it looks stylish, but do not count on it for sound control.
A 13 lb box of popcorn covers about 200 sq ft and costs roughly 20 to 30 dollars. That is cheap quiet for a noisy room, and the coverage is easy to estimate for a standard ceiling.
If you want acoustic help, choose popcorn and plan to keep it. Scraping it off later makes a mess and costs you time, and your ears and back will feel the work.
Before you paint any ceiling, lay a drop cloth and tape the trim with painter’s tape. For the drop cloth, pick a leak-resistant backing like the Trimaco Butyl II two-layer canvas to prevent paint from soaking through to the floor. Sand glossy patches with 120 grit, spot prime bare spots, and keep a wet edge to avoid lap marks and brush strokes.
Choose a matte or satin sheen for the look and cleaning you want, and use a gloss only if the room can handle the shine. Check the VOC level if indoor air matters, and let each coat dry for the stated drying time.
Wait for the full cure time before you judge the finish, and on wood trim use a stain or varnish to change the color. Polyurethane adds a clear topcoat, and a primer helps bare wood take the topcoat evenly.
Apply the topcoat with even brush strokes, and keep the same care in mind when you finish the trim. That small step keeps the ceiling and trim looking clean together.
Will Your Ceiling Hold the Weight? Check These Three Things First
Before you carry a texture sprayer up a ladder, check that the ceiling can hold the extra weight. I have seen homeowners skip this step and end up with a cracked ceiling.
Check the floor joist spacing and the board thickness first. Then check the weight of the texture mix you plan to spray.
If the joists are spaced wide or the board is thin, add support before you start. A heavy texture coat can pull on old drywall or plaster and cause cracks.
Set a drop cloth and use painter’s tape to protect nearby walls. Once the ceiling passes these checks, plan your primer and topcoat and choose a matte or satin sheen for the room. Since moisture can weaken bonds, remember that high humidity above 70% may slow curing and stress the ceiling materials.
Floor Joist Spacing
Check the ceiling framing before you spray a heavy popcorn texture. The ceiling can hold only as much weight as its joists and board can support without too much deflection.
Check the joist spacing code for your area, since most homes set joists 16 or 24 inches apart. Spacing at 24 inches usually needs thicker board to carry the extra load.
Deflection is how much the joists or trusses bend under weight. Spraying a heavy texture beyond the rating can cause permanent bowing and cracks.
Measure the joist centers and use a straightedge to check for dips before you mix anything. A short check now can save you a costly repair later.
Cover the floor with a drop cloth and protect the walls with painter’s tape before you start. Let any primer or topcoat reach its full drying time and cure time before you judge the ceiling.
A matte or satin sheen can hide small surface flaws and reduce visible lap marks and brush strokes. Choose a product with low VOC when the room is occupied, and use the sanding grit listed by the maker before you apply primer.
If you roll a coating over the ceiling, keep a wet edge and work in small sections. Fix spacing and deflection problems first, then apply your texture.
For textured ceilings, use a shield with a built-in drip guard to catch splatter and protect your floors during application.
Board Thickness Type
Board thickness is the one thing almost nobody checks before spraying texture on a ceiling. You are about to add pounds of wet compound overhead, so the drywall has to carry that weight. To reduce the risk of sagging, consider using a lightweight joint compound that is up to 35% lighter than traditional options.
With half inch standard board on 24 inch joist spacing, the ceiling can sag before you even start spraying. I have seen it look fine for a day and then droop like a tired hammock.
Check the joist spacing and the board thickness before you set up your drop cloth and painter’s tape. Half inch standard board is safe only when joists are 16 inches apart or closer.
Five eighths inch board handles 24 inch spacing without sag. A half inch board rated for sag resistance is a good middle ground, but read the label first.
Spray texture adds moisture, so give it the full drying time before you apply primer. Check the VOC level if you are spraying indoors, and keep the room ventilated.
After the texture dries, sand any ridges with 120 grit paper before the primer goes on. Apply a primer made for ceilings, then finish with a topcoat in a matte or satin sheen.
If the board is thin and the spacing is wide, you will be scraping texture off the floor. Measure first, and do not learn that lesson the hard way.
Texture Weight Load
Texture adds weight to a ceiling, so check the structure before you spray. For 24 inch joist spacing, use 5/8 inch drywall because 1/2 inch can sag under the load.
Fix existing cracks before texture because the added weight stresses weak spots. Popcorn acoustic texture can weigh up to 1.5 pounds per square foot when wet, so account for that load.
Texture gives only a small soundproofing benefit. On an older or bouncy ceiling, choose a light orange peel texture and skip heavy popcorn.
Set up drop cloths and painter’s tape before you spray, and protect nearby wood trim. Use a low VOC primer for the ceiling, then apply a topcoat with a sheen that fits the room, such as matte, satin, or gloss.
Work with a wet edge to avoid lap marks and brush strokes, and follow the drying time versus cure time on the label. If you sand between coats, use the right grit and clean up dust before the next coat.
For wood trim in the same room, use stain, varnish, or polyurethane with the same care. Keep the finish work clean so the texture and paint dry evenly. Store any leftover texture or paint in airtight seal containers to prevent drying out between coats.
What It Takes to Spray Each Compound: Gear, Mixing, and Coverage
A clean hopper gun and the right mix make sprayed texture go smoothly. Rent a hopper gun for about $40 a day and set the compressor to 25 to 35 PSI.
Protect the room first with a drop cloth, and mask trim with painter’s tape. Without a proper hopper gun, you waste material and get a lumpy mess.
Mix in this order: add water first, then powder, and stir to the consistency of heavy cream. Too thick and the gun clogs; too thin and the mix splatters like a sneeze.
For orange peel, use one part water to four parts compound. For knockdown, cut the water by 20% to get a thicker spatter.
Coverage changes with the texture: orange peel covers about 600 sq ft per 50 lb bag, knockdown about 400, and popcorn about 200. Check the mix with a finger test; if it folds back on itself, it is ready.
Mix only what you can spray in one session because the compound thickens as it sits. Let the texture dry to the touch before you prime, and allow the full cure time before sanding with 120 grit or adding a topcoat.
Choose a low VOC primer for a closed room. Use a satin or matte topcoat on walls; gloss works well on trim.
If you brush or roll the primer, keep a wet edge and watch for lap marks and brush strokes. Clean your tools between coats so dried bits do not end up in the finish. For pneumatic sprayers, selecting a model with interchangeable nozzle sizes like 4 mm, 6 mm, and 8 mm gives you the flexibility to switch between fine orange peel and heavier popcorn textures without changing guns.
Should You Rent a Hopper Gun or Hire a Pro?

Renting a hopper gun makes sense when you can control the mess, timing, and cleanup. Rental costs about $50 to $100 per day, and you still need an air compressor, drop cloths, and painter’s tape.
The rental looks cheap, but a first spray job often adds extra days and overspray cleanup. For a medium room, plan on $150 to $250 total for DIY, while a pro typically charges $400 to $800 per room.
A pro usually finishes a room in four to six hours and leaves a more even texture. A beginner may need one to two days for setup, spraying, drying time, and fixing lap marks or patchy spots.
A pro finishes a room in four to six hours with even texture; a beginner needs days for fixes.
Fill and sand patches with 120 grit before you spray, then follow the label for drying time and cure time before you apply primer and topcoat. Choose a matte or satin sheen for ceilings because gloss shows flaws, and check the VOC level if you are working indoors.
I have sprayed my own ceiling, and it looked like a dalmatian with acne. If you are patient, methodical, and willing to practice on scrap drywall, DIY can save money.
If you want a clean result in a larger room, hire a pro. For a small closet or patch, rent the hopper gun and keep your work area tight.
So, Which Textured Ceiling Compound Should You Choose?
For most ceilings, thin all purpose joint compound with water for orange peel or knockdown. I have used pricier spray texture powders, and they work fine, but the all purpose compound is cheap, forgiving, and works with any spray technique.
Check a few practical details before you start. Prime the drywall before spraying, because bare drywall can pull moisture from the compound and leave blotches.
Repair patches need a skim coat first so the texture blends with the surrounding ceiling. Mix the compound to a heavy cream consistency and stir it well before you fill the hopper.
Lay drop cloths and apply painter’s tape to protect walls, trim, and floors before you start. Coverage runs about 600 sq ft per bag, so buy what you need and avoid extra bags.
Use popcorn texture only to match an old ceiling, and test old material for asbestos before you disturb it. Rent a hopper and practice on cardboard until your spray pattern looks even.
Let the texture dry fully, then check the label for drying time and cure time before you apply a topcoat of ceiling paint. Use a matte or satin sheen for the ceiling paint, and choose a low VOC paint; gloss shows flaws more easily.
Frequently Asked Questions
Can Textured Ceilings Be Painted After Application?
Textured ceilings can be painted after application once the texture is fully dry and cured. Prime the surface first to lock down texture, improve adhesion, and keep the finish uniform.
For a practical schedule, let new texture cure for 24 to 48 hours, then apply one coat of a quality water-based primer. Use a 3/8 inch nap roller to work the primer into the bumps without flattening them.
Finish with two thin coats of flat paint, because flat paint hides texture imperfections and reduces sheen variation. This same approach works well on a popcorn ceiling if the texture is sound and clean.
How Do I Repair a Damaged Textured Ceiling Patch?
To repair a damaged textured ceiling patch, clean the area, apply setting-type joint compound, and match the existing texture before priming and painting. Scrape loose material and feather the edges with 120-grit sandpaper so the patch sits flush.
Apply compound in thin coats, letting each coat dry fully, usually 24 hours, then sand lightly. Test your stomp, spray, or knockdown pattern on scrap cardboard first; this ceiling texture matching step prevents a visible patch.
Thin the compound slightly for spraying, keep the tool pressure and distance consistent, and prime the repaired area before painting. Let the primer dry per the label, then paint wall to wall for an even sheen.
Will Textured Ceilings Hide Existing Cracks or Stains?
Textured ceilings can hide existing cracks or stains only partially, not reliably. Fine hairline cracks often disappear under a knockdown or popcorn texture, but larger moving cracks will telegraph through and reappear.
Stains are not blocked by texture alone, so water or smoke marks can bleed through the finish. Before texturing, scrape loose material, fill cracks with setting compound, and scuff-sand the patch with 120 grit.
Apply a stain-blocking primer and let it dry about 45 minutes before spraying texture. That stain-blocking step is the reliable part of crack concealment and stain blocking.
What Is the Cost Difference Between Texture Types?
The cost difference between texture types comes down to material and especially labor, with popcorn cheapest upfront and spray textures usually beating hand-applied finishes on price. Popcorn has low material cost, but scraping or patching it adds labor, so budget for prep before you compare bids.
Orange peel and knockdown land in the mid-range for drywall texture cost, and knockdown often needs a second pass to knock down ridges. For a quick real-world check, spray a 4 by 4 foot test panel, let it dry 24 hours, then sand lightly with 120-grit before judging the finish.
Can I Apply Texture Over an Existing Popcorn Ceiling?
You can apply texture over an existing popcorn ceiling, but the rough old surface will compromise the new texture and leave you with a result you will likely regret. I would skip it and plan for popcorn ceiling removal instead, because a skim coat gives you a clean, predictable base.
That removal work is messy, so plan for containment and a proper sanding grit like 120 to 150 on the dried skim coat before priming. Let the skim coat dry fully, typically 24 hours, then sand lightly and apply one coat of high hiding primer.
Rounding Up
Textured ceiling compounds include popcorn, orange peel, and knockdown, and each type has a different best use. Before you choose, measure your ceiling load first.
Compare the options with the space in mind: knockdown for living spaces, orange peel for rentals, and popcorn left to the 1970s. Rent a hopper if you are brave, and hire a pro if you are not.
Do not wing the mixing, because my sore neck and splattered kitchen taught me that lesson the hard way. Your ceiling, your call.
Related topic: ceiling load measurement.


