What Are Waterproof Fillers? Types, Uses and How to Choose

A failed waterproof repair usually shows up as swollen trim, cracked grout, or a repair that never fully cures. So what are waterproof fillers, and which types, uses, and choosing rules actually fit your project? This guide covers waterproof versus water resistant fillers, surface prep, primer and topcoat needs, and cure time so your repair holds up outdoors or in wet areas.
For wood, masonry, pools, and damp spots, you will see which filler to pick and where polyester should stay out. We will also cover sanding, cleaning, and topcoat steps that protect the repair from UV and moisture. Read on to match the filler to the exposure, not the label.
Quick Answer
- Waterproof fillers withstand submersion; water-resistant fillers only handle splashes, preventing rot and swelling.
- Epoxy filler excels for wood, decks, and structural repairs; cement works for pools and foundations.
- Choose by surface: wood needs epoxy, masonry cement, tile polyurethane or epoxy for flexibility.
- Proper surface prep, including cleaning and sanding, ensures filler bonds and prevents premature failure.
- Full cure time, typically 24 hours for epoxy, is mandatory before topcoating or exposing to water.
Waterproof vs. Water-Resistant: What’s the Real Difference?
Waterproof and water resistant fillers are different products, and mixing them up can leave you with a swollen windowsill after a wet weekend. Waterproof testing dunks a cured filler in standing water for days, and water resistant filler handles a splash.
Waterproof filler survives submersion; water-resistant only shrugs off a splash—choose wrong, and your windowsill pays.
Condensation is a separate problem, since moisture can build up behind a filler that does not breathe. Check the breathability limits before you seal a damp basement.
Warranty terms depend on which product you choose, so read the coverage before you buy. A cheap latex wood filler can fail in two seasons, but epoxy filler holds up for years.
For spots that face direct rain or standing water, use true waterproof filler and apply a topcoat after it cures. Sand bare wood with 120 grit, wipe off the dust, fill the area, then apply a primer and finish.
Work in small sections and keep a wet edge to avoid lap marks and heavy brush strokes. Respect drying time and cure time, especially before you add stain, varnish, or polyurethane.
Choose a sheen that fits the job, such as gloss, satin, or matte, and use painter’s tape and a drop cloth to protect nearby surfaces. Use a low VOC topcoat in closed rooms, and let it air out before you seal the area.
For repairs subject to ground movement, select a high-elasticity sealant that flexes with ground shifts to prevent cracking.
The 5 Main Types of Waterproof Fillers (and What They Excel At)
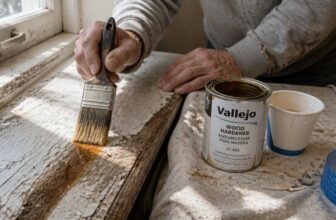
Epoxy is the strongest waterproof filler for wood and structural repairs. It shrinks very little, bonds well, and reaches full strength after about 24 hours, so plan your drying time and cure time around that wait. Deep fills beyond 6 mm generally require multiple layers, with curing between each coat.
Polyester filler dries in about 15 to 25 minutes, which helps when you need to keep moving. It suits auto body and metal patches, and solvent cleanup gives a stronger bond while water cleanup is easier and has lower VOC content.
Cement filler works on masonry, pools, and wet areas. It stays stiff, so sand it with the right grit before you apply a topcoat or stain.
Acrylic latex filler cleans up with water and works for easy indoor repairs. Use painter’s tape and a drop cloth to protect nearby surfaces, then feather the filler before you paint.
Foam filler fills large gaps and blocks drafts and pests. Trim it after it cures, then cover it with a topcoat or varnish where the surface needs protection.
Before you paint or finish a repair, sand the filler with 120 to 220 grit paper and wipe off the dust. Apply a primer that suits the material, then pick a topcoat sheen such as gloss, satin, or matte.
For wood, test stain, varnish, or polyurethane on a scrap piece first. Read the label for drying time and cure time, and choose a product with low VOC when indoor smell matters.
Keep a wet edge when you brush and avoid lap marks by working in small sections. Brush strokes show more under gloss, so use a fine brush and light coats.
Let each coat dry before you add the next one. Sand lightly between coats if the label says to.
When Filler Fails: Rot, Submersion, and Structural Loads

Some fillers fail when water gets in, when soil touches the repair, or when the repair carries structural load. I learned that with a deck post I patched using polyester filler, which crumbled into a soggy mess by autumn.
A soft nudge told me that patch had become a structural problem. Water had been rotting the wood underneath, so the filler soaked up moisture like a sponge.
The rule I use now is simple. Filler can close a surface hole, and it cannot rebuild a punky wood core.
If the wood feels soft, stays wet, or touches soil, cut out the rot and replace it with sound wood. Epoxy and cement based fillers will not rescue that kind of damage.
For submerged areas such as pool tile or foundation cracks below grade, use hydraulic cement. Mix it to the label directions and give it the full cure time before you cover it with tile or coating.
For a beam or joist that carries load, cut out the rotted wood and sister in new lumber. Treat filler as a cosmetic patch for small surface defects.
If you plan to paint the repair, sand with 120 grit, wipe off the dust, and prime any bare wood. Choose an exterior topcoat with a satin or matte sheen, check the VOC rating, and follow the label drying time and cure time.
When you brush that topcoat, keep a wet edge and watch for lap marks and brush strokes. Lay a drop cloth and mask edges with painter’s tape before you start.
For an exterior clear finish, use a stain or varnish made for the job, or a polyurethane with UV protection. If you have any doubt about rot, replace the wood and save the filler for small cosmetic work.
Epoxy-based formulas and fiberglass-reinforced fillers can handle brief moisture exposure on wood or metal, but they are still not a substitute for removing rotted, load-bearing sections.
Choosing the Right Waterproof Filler for Wood, Masonry, or Tile
Choosing the right filler begins with matching its formula to the surface and to how wet the spot will get. For wood, use an epoxy that comes in two parts and mix it exactly as the label says; it gives the strongest defense against damp. On masonry, a cement filler or an acrylic latex filler grips the porous surface and stands up to damp. On tile, use a flexible polyurethane or epoxy filler so movement at the joint does not crack the repair. Before you buy, check cleanup and VOC level because water cleanup works for cement and latex, while epoxy needs solvent. Compare cost as well: epoxy runs $15 to $30 per quart, latex often costs under $10, and epoxy usually lasts longer outside. Read both drying time and cure time on the label, and keep water off the repair until the cure time has passed. Epoxy sets in about 25 minutes and latex in a few hours, so do not rush exposure. Prep the area with a drop cloth and painter’s tape, then sand the repair with the sanding grit the filler maker recommends. If the filled spot will get a topcoat, test your primer, stain, varnish, or polyurethane on a scrap first, and check the sheen you plan to use. For a topcoat over cured filler, keep a wet edge to avoid lap marks and brush strokes, and use a brush that suits the paint. A gloss or satin paint can show sanding scratches, while a matte paint hides them better. For exterior masonry and concrete repairs, look for a self-leveling cement crack filler that pours directly into gaps and resists weather without needing to be painted.
Epoxy for Decks, Cement for Pools: Picking by Exposure Level

Exposure level decides which filler holds up. Use epoxy for a deck that sees rain, snow, and barefoot traffic, and use cement for a pool that holds water all day.
For deck repairs, epoxy bonds well and shrinks very little. Test for dampness before you start, because moisture under the patch can ruin the repair and cost you a weekend. Two-part epoxies provide high tensile strength unmatched by single-component options.
Mask the repair edges with painter’s tape and set a drop cloth before mixing. Sand the dry patch with 80 grit, then smooth it with 120 grit so a stain or polyurethane topcoat can sit evenly.
Epoxy has a 24 hour cure time, so plan around that and let the patch cure fully before a topcoat. Keep the patch free of lap marks and brush strokes by working a wet edge and checking the sheen and gloss after the finish dries.
For pools, cement handles standing water and pressure. It can go underwater, but surface prep decides whether it holds, so clean and roughen the area before you apply it.
Seasonal spots like a porch or shed also take epoxy. Watch the application temperature, keep filler shrinkage low, and let the repair cure before you apply varnish or a satin or matte topcoat.
Check the product label for VOC limits and follow the drying time versus cure time directions. Match the filler to the water exposure, then finish the repair with the same care you would use for primer and topcoat.
Prep the Surface and Apply the Waterproof Filler in 5 Steps
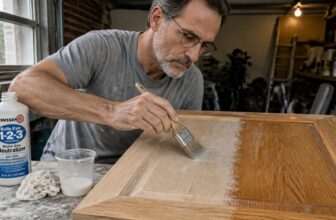
- Lay down a drop cloth and use painter’s tape to protect nearby edges, then clean the area so dust and grease are gone. Sand the surface with the sanding grit the filler maker recommends, and wipe off the sanding dust before you open the can.
- Check the temperature range on the label and keep the room within it. Stir the waterproof filler well, then apply a thin, even coat with a putty knife.
- Press the filler into the surface and scrape off the excess. Let the first coat dry for the listed drying time, then sand it smooth with fine grit.
- Apply a second thin coat if the label calls for it, and keep your passes even to avoid lap marks. Allow the filler to cure for the full cure time before you sand, prime, or topcoat.
- Sand the cured filler flush and wipe the surface clean. If you plan to stain, varnish, or polyurethane over it, keep a wet edge and avoid heavy brush strokes; then choose a sheen such as matte, satin, or gloss and check the VOC level for your space. For smoother application and easier cleanup, choose a knife with a mirror-polished blade that resists rust and helps compound glide.
The payoff is a strong bond that holds.
Why a Topcoat Is Mandatory for Outdoor Waterproof Filler Jobs
Outdoor filler jobs often fail because the filler never gets a topcoat. UV rays break down the filler surface, so it chalks, cracks, and loses grip on the surface beneath.
Paint will not stick well to that rough surface, even after sanding with the right grit. Before you call the repair done, apply a topcoat made for outdoor use and choose the sheen you want, whether gloss, satin, or matte. Oil-based options remain the preferred choice when you want a traditional finish with deep, repairable richness.
Use a primer when the filler maker says to, and respect drying time and cure time before you recoat. Keep a wet edge, avoid lap marks and heavy brush strokes, and use painter’s tape and a drop cloth to protect nearby surfaces.
A topcoat made with exterior polyurethane or varnish helps the repair last. It also gives paint a sound surface to bond to when the next coat goes on.
UV Exposure Risks
UV rays break down the polymer bonds in epoxy filler and turn it chalky, brittle, and cracked over a few seasons. Testing shows most fillers fail badly after 1,000 hours of direct sun, and uncoated filler can fade to a sickly gray in months.
Fine cracks let water sneak in, chalking turns the surface to powder and erodes the filler, and weak adhesion lets the filler pull away from the wood or substrate. A proper topcoat is your sunblock.
Sand the cured filler with 220 grit, wipe off the dust, and apply an exterior primer if the label calls for it. Then apply two coats of exterior paint, keeping a wet edge and watching your brush strokes so lap marks do not show.
Check drying time and cure time on the label, and choose a satin, matte, or gloss sheen that suits the surface. If you plan to use clear varnish or polyurethane instead of paint, pick a product labeled for UV resistance. UV inhibitors are essential in any clear coat for outdoor use, as they prevent the sun from degrading the finish and the filler beneath it.
Low VOC paint is easier to use indoors or in a shop, and a drop cloth and painter’s tape save cleanup. Stain and clear finishes still need UV protection, so read the label before you buy.
Do not skip the topcoat and expect the filler to last. Read the label on any stain, varnish, or polyurethane and confirm it has UV blockers.
Paint Adhesion Basics
Bare filler outdoors needs a topcoat to hold paint, even if you sealed every crack with waterproof epoxy. Without that topcoat, UV and dampness will break the bond and peel the paint away.
Check the filler or epoxy recoat window before you start. Epoxy takes paint best within 24 hours; after that, sand the surface with 80 or 120 grit to give the next coat a grip.
Apply the topcoat at a steady wet film thickness of about 4 to 6 mils. Thin spots will fail fast, so keep your brush strokes even and watch for lap marks as you work.
Use two coats of exterior acrylic and follow the label for drying time, recoat time, and cure time. Two thin coats beat one thick coat because each coat can bond and cure properly. Temperature swings ranging from –10°F to 120°F can stress the film, so confirm the paint you choose can handle your local extremes.
Treat the topcoat as the final step, and do not skip it or rush it. Keep painter’s tape and a drop cloth handy so the job stays clean and the finish looks right.
Frequently Asked Questions
Can Waterproof Fillers Be Painted Over?
Yes, you can paint over waterproof fillers, but matching the color and confirming full cure are key. For epoxy filler, scuff the surface with 220 grit sandpaper, wipe away dust, and apply two thin topcoats directly.
For latex filler, apply a suitable primer first so the paint bonds evenly and does not dry patchy. Always let the filler cure fully before painting, or you may trap dampness and crack the finish.
If you are researching painting over waterproof sealant, test a small area first and keep coats thin for a smooth result.
How Long Do Waterproof Fillers Last Indoors?
Waterproof fillers used indoors can last 10 to 20 years or more when applied correctly. Epoxy is the standout performer, handling indoor dampness and normal wear without complaint.
That lifespan depends on surface prep and application conditions. A thick, sloppy fill can crack early even if the product is tough, so keep beads modest and let each pass cure.
For best results, apply two thin coats rather than one heavy bead, and scuff cured epoxy with 120-grit before recoating. Allow 24 hours between coats in cool rooms.
Properly prepped, this waterproof sealant becomes something you forget exists.
Will Waterproof Filler Adhere to Wet Surfaces?
No, waterproof filler will not adhere reliably to wet surfaces. For a sound bond, the substrate must be clean, sound, and fully dry before you apply the filler.
Let damp patches dry for at least 24 hours, then sand the area with 80-grit paper to remove chalky residue and open the grain. Check for moisture with a cheap pin meter or a plastic sheet taped down overnight; if condensation appears, wait longer.
Work the filler in firmly with a flexible knife, and avoid overworking it as it skins. If you are chasing wet surface adhesion, fix the moisture source first, because no filler will compensate for trapped damp.
Can I Use Waterproof Filler on Plastic or PVC?
Yes, you can use waterproof filler on plastic or PVC if you choose the right product and prep the surface. Most two-part epoxy fillers bond reliably to rigid PVC, but plastic adhesion can be tricky, so test a small spot first.
For flexible PVC, skip acrylic fillers because they may crack. Sand the area with 120 grit to give the filler a mechanical key, then clean off dust before applying.
Apply a thin coat and let it cure fully, usually 24 hours for a two-part epoxy. A PVC repair compound works well for small cracks and holes, and you can sand it smooth once cured.
What Temperature Range Is Safe for Applying Filler?
The safe temperature range for applying filler is generally 50°F to 80°F, though always confirm the label for the specific product. Most fillers should not go on below 40°F or above 90°F because temperature extremes wreck adhesion and alter curing time.
I have seen cracking in cold weather and bubbling in heat, so work in a stable, moderate shop whenever possible. For a practical check today, apply a thin test patch and let it cure for the label’s stated time, often 30 to 60 minutes, before sanding with 120-grit paper.
Keep the substrate and the filler at room temperature for at least 24 hours before use. This wood filler application temperature guidance also applies to glazing putty and similar patching compounds.
Rounding Up
Waterproof fillers are selected by matching the filler to the flood, with epoxy for decks and rot repair and cement for pools. Check the surface prep before you apply anything, because prep the surface or you are just decorating a problem.
Write down your topcoat plan, since that topcoat is non-negotiable. Compare the filler to the job: epoxy is your beast for decks and rot repair, but it costs around $40 a quart, while cement is your pool buddy and should not be asked to flex.
Related topic: topcoat selection.