
What Are Wax Polishes for Wood? Types, Uses and How to Choose

Dull wood after all that surface prep is a letdown. Wax polishes for wood can restore soft sheen without refinishing, but the wrong type can feel sticky or wear fast.
This guide covers types, uses, and how to choose so your next project gets the right finish the first time. You will see why hard waxes suit tabletops, when paste beats liquid, and how thin coats plus cure time keep results clean.
Test a small patch, let it haze, then buff gently before the full piece. Stick around for the details so you pick the right wax with confidence.
Quick Answer
- Wax polishes are wood finishes offering sheen, protection, and easy application, chosen by wax type and use.
- Carnauba wax gives the hardest, glossiest film; beeswax offers satin sheen; paraffin is a cheap filler.
- Paste wax lasts longer with more carnauba; liquid wax suits quick fixes and light topcoats.
- Apply thin coats in circles, let haze, buff firmly, and repeat for durable, scratch-resistant results.
- Match wax to cured finish (oil-based varnish yes, waterborne polyurethane no) and test sheen first.
Beeswax, Carnauba, or Paraffin: Which Wax Polish Is Best?
Beeswax, Carnauba, or Paraffin: Which Wax Polish Is Best?
If you are standing in the hardware aisle with three tins of wax, carnauba gives the hardest film and the highest gloss. It melts around 180°F and holds up on tabletops, but it is tough to buff by itself, so I blend it with a softer wax.
Beeswax is easier to apply and has a mild honey smell. It suits most furniture, and it is a good choice for children’s toys when you check that the product has low wax toxicity and comes from a reliable hive source.
> Beeswax applies easily with a mild honey scent, suits most furniture, and works for toys from reliable, low-toxicity sources.
Paraffin is soft and dull on its own, so use it as a cheap filler in a blend. It comes from petroleum, and I avoid it for most furniture because I do not like the source or the feel.
For a satin or matte sheen on pieces with light use, I reach for beeswax. For a gloss finish on a tabletop or another surface that takes hard use, I use carnauba in a blend and buff it in thin coats.
Before you wax a sealed surface, sand to the sanding grit your finish plan calls for and wipe off all dust. If you plan to paint or varnish, use the primer and topcoat your finish plan calls for and let them cure before you wax.
Use a drop cloth and painter’s tape to protect nearby surfaces, and test any stain or varnish on scrap first. Apply wax thin and work small areas so you keep a wet edge and avoid lap marks.
Wax has a short drying time, but its cure time is longer, so let the film set before you judge the sheen or stack pieces. If you plan to add a polyurethane or varnish topcoat, remove the wax first and sand lightly.
Wax can stop a topcoat from sticking, and brush strokes in the topcoat will show once it dries. Check the label for VOC content and sourcing when you buy.
Cheap wax often has fillers or unclear origin, and that can affect how it buffs and how it holds up. Buy from a seller who lists the wax type and origin. For commercial options, look for products that use food-grade beeswax or microcrystalline wax to ensure safety and durability on surfaces like butcher blocks and antiques.
Paste Wax vs. Liquid Wax Polish: What’s the Real Difference?
Paste wax and liquid polish differ in solvent load and buffing effort. Those two factors affect performance more than the package form does.
Paste wax usually lasts longer on an heirloom table because it has more carnauba and less solvent. That mix builds a tough film that resists scratches.
Liquid wax is already thinned and spreads fast, which helps on shelves you dust every week. It leaves less protection and evaporates faster, so check the VOC content and use it as a light topcoat over a cured finish.
My rule is paste wax for surfaces that see sweat and handling, and liquid wax for quick fixes. Paste wax takes about ten minutes of buffing, and your arm will feel it, while liquid wax is a swipe and go.
Keep both on the shelf if you can. If speed matters most, use liquid wax for weekly dusting, but save paste wax for furniture you want to protect for years.
When you refinish, sand to 220 grit, apply stain, and seal with varnish or polyurethane. Keep a wet edge to avoid lap marks and heavy brush strokes, and let the topcoat reach full cure time before waxing. For a quicker metallic accent on trim or hardware, metallic gilding wax can be buffed over a cured finish to add subtle shimmer.
Drying time can be short, but cure time is what matters before you wax. Wax can soften a gloss finish toward satin or matte, so test a small area and check the sheen in good light.
On painted furniture, let the primer and topcoat reach full cure before you wax. Use a drop cloth and painter’s tape to protect nearby surfaces and keep the wax off bare wood.
How to Apply Wax Polish for a Durable, Streak-Free Finish
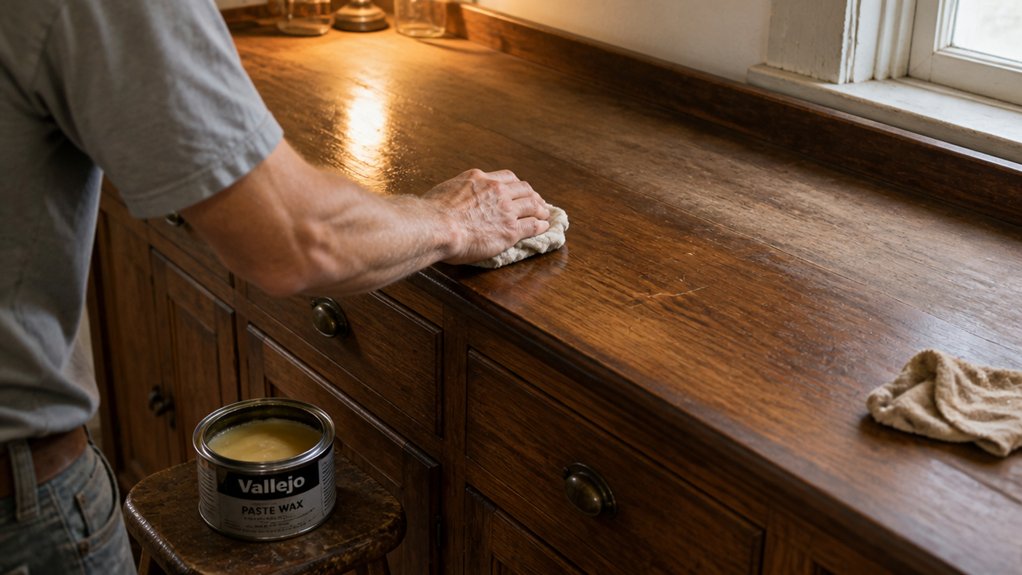
Wax goes on best with patience and a small amount of product. Use a soft, lint free cloth or a clean applicator pad, and check that it does not shed fibers.
Pick up a small amount about the size of a pea, then rub it into the wood in tight circles that follow the grain. Keep the coat thin and even so the wax can haze and dry without build up.
Most wax problems come from applying too much or rushing the wait. Let the wax haze for 10 to 15 minutes, check the solvent label for drying time, and open a window if the VOC smell is strong.
Buff the haze with a clean dry cloth using firm, even strokes, and turn the cloth often. Too much pressure smears the wax, and too little leaves haze behind.
For a durable finish, apply two thin coats and let the first coat dry before you add the second. A second coat after a few hours gives better protection than one heavy coat and helps you avoid lap marks.
If the wood has a topcoat such as polyurethane or varnish, let it cure before waxing because wax over a fresh finish can trap solvent and soften the film. On bare wood, sand to 220 grit, remove the dust, and choose the sheen you want, whether satin, matte, or gloss.
If you are waxing painted wood, let the paint cure and protect hardware with painter’s tape. A drop cloth catches dust, and light sanding with 320 grit can smooth out brush strokes before you apply wax. Beyond wood finishing, a brush comb is essential for cleaning your applicators between coats to keep bristles effective and extend their lifespan.
How Often Should You Rewax? Maintenance Tips That Prevent Buildup
Most wax finishes tell you when they need attention. Watch for a dull, cloudy haze, a tacky feel, or dust that sticks in patches.
Those signs mean it is time to strip the old wax and start fresh. For rewax frequency, match the schedule to how the piece gets used.
On carvings, shelves, and display cases, I reapply every six months at most. On tables and chairs that get daily use, I reapply every three months and buff well.
A thin coat beats a thick coat every time. Most of what I apply comes off on the buffing cloth, and that is how you prevent buildup. Instead of stripping frequently, you can simply wash and buff the surface to prepare it for a fresh, thin reapplication.
If you are unsure, wait longer before you rewax. Before you add wax, check the existing topcoat and sheen.
Satin and matte finishes show haze faster than gloss. If the piece has a polyurethane or varnish topcoat, keep the wax thin and work with the grain.
Use a sanding grit that matches the job if you need to smooth a spot, and wipe away dust before you apply anything. Keep your brush strokes even when you apply a finish, and mind the wet edge on larger surfaces.
Keep wax away from stain, primer, or polyurethane until the product has fully cured. Follow the drying time and cure time on the label, and keep VOC levels in mind if you work indoors.
Lay a drop cloth and use painter’s tape to protect nearby surfaces while you work. If you apply a stain or varnish later, keep a wet edge and avoid lap marks.
When to Skip Wax: Finishes That Resist It (and Why)

Wax does not bond well over primer or every topcoat, and forcing it can leave a sticky film or a dull, blotchy surface. Waterborne polyurethane is too slick for wax to grip, so the wax smears and stays uneven.
Varnish and stain made with oil can take wax after a full cure, but not before. The solvent can soften the film, and a short drying time is only the start of cure time. Oil-based formulas dry harder and more abrasion resistant, but they can also cause yellowing on pale woods that wax will further amplify.
Skip wax on soft lacquer. Buffing can pull the finish and leave lap marks or brush strokes that show through the sheen.
If wax is already on a resistant surface, try mineral spirits or a mild detergent. Work gently on a small area and keep the drop cloth and painter’s tape away from fresh finish.
Test a small corner first. If the wax beads up, skip it and use a polish that matches the sheen, whether gloss, satin, or matte.
Use a fine sanding grit only when the finish calls for it, and keep a wet edge when you apply the next coat. Check the VOC label and let the finish cure before you judge the final sheen.
Your wood will forgive you. A small test saves a lot of work.
Frequently Asked Questions
Can I Use Wax Polish on Painted Wood?
Yes, you can use wax polish on painted wood, but test a hidden spot first. Clean the surface thoroughly because paint durability suffers when dirt and grease stay behind.
If the paint is glossy, scuff-sand it lightly with 320-grit paper to give the wax a mechanical key. Wipe off the dust, then apply a thin coat of furniture wax with a soft cloth and let it dry for about 20 minutes before buffing.
For better protection, add a second thin coat and buff again. This approach also works as a furniture polish on cured, painted trim and cabinets.
Does Wax Polish Work on Metal Surfaces?
Yes, wax polish works on metal surfaces as a protective topcoat, though it is not a substitute for metal polish. It forms an anti-corrosion barrier that slows tarnishing on brass, copper, and steel.
For a practical finish, apply a thin coat with a foam pad, let it haze for 10 to 15 minutes, then buff with a clean microfiber cloth. Do not expect a wood-grade shine; you will get a decent, low-maintenance finish that needs reapplication every few months.
Clean the metal first with a degreaser, because wax will not bond to oil or grime. Use thin coats and buff fully to avoid a sticky film.
How Do I Remove Old Wax Buildup?
To remove old wax buildup, wipe the surface with mineral spirits, then buff it dry with a clean cloth. Work gently in a ventilated area and test a hidden spot first, because wax removal safety matters.
For a practical check, let the mineral spirits flash off for about 15 minutes before judging the finish. If you still feel a slick film, repeat with a fresh rag rather than flooding the wood.
Remember that waxes sit on the surface while oils penetrate, so use different tactics for oiled finishes. A related search for this process is old wax removal, and a light buff with a clean cloth keeps the surface even.
Is Wax Polish Safe for Food-Contact Surfaces?
Wax polish is not universally safe for food-contact surfaces unless you choose a proven food-safe product. Check the label for a food-grade wax finish rather than an unknown blend.
For a wooden bowl or butcher block, apply a thin coat of pure beeswax or carnauba wax, let it dry for 24 hours, then buff off the excess. Wait until the film is fully cured and no tack remains before food contact.
If you cannot confirm the ingredients, skip it and use a known food-safe finish instead. Keep the coat thin and reapply only when the surface looks dry.
Can Wax Polish Fix Deep Scratches or Gouges?
Wax polish cannot fix deep scratches or gouges because it only conceals fine surface flaws. For deep damage, use a gouge filler or repair stick matched to the finish, then level it carefully.
A practical tip: fill small gouges with tinted hard wax or epoxy, let it cure fully, then sand level with 320 grit before applying a finish coat. Keep wax polish for surface shine and minor flaw concealment, not structural repair.
If you need scratch color matching, choose a dedicated repair product rather than wax. Work in thin layers and allow overnight curing on hard fillers.
Rounding Up
Wax polishes for wood make a good finish feel like silk on oiled or bare wood, not on polyurethane. Check whether your finish is oiled, bare, or polyurethane before you reach for a tin.
Compare a paste with carnauba for durability against liquid goop and skip the liquid. Test your buffing routine and do not skip it, since buffing is 90% of the job.
Write down a rewax limit of twice a year, max. Ask whether wax is a raincoat, not armor, and buy a $15 tin.
Carnauba wax is a related topic to read next.


