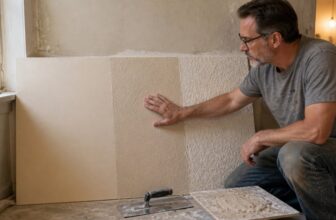
What Are Paint Scrapers? Types, Uses and How to Choose
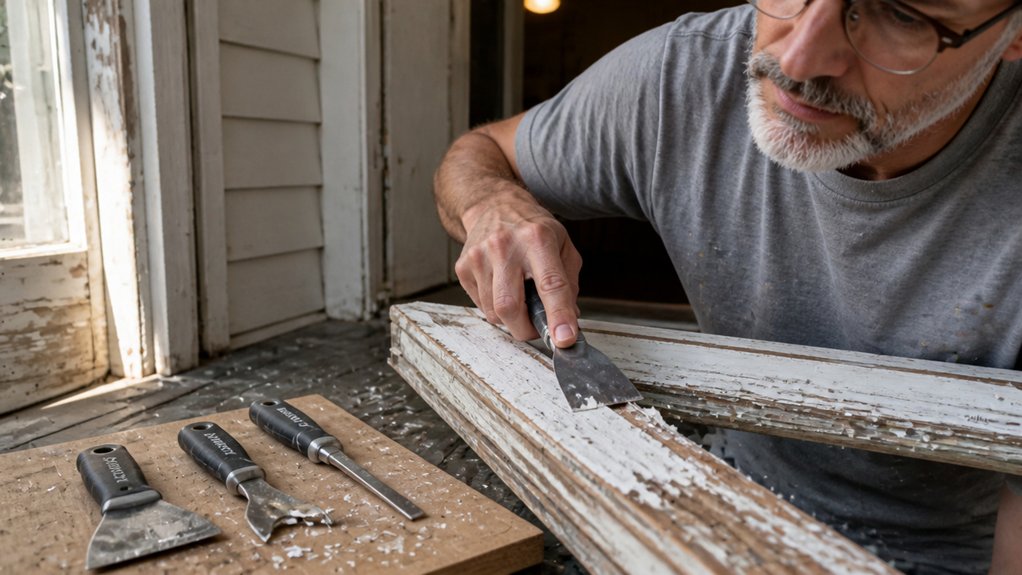
If old paint, varnish, or gunk is turning your trim project into a surface prep headache, this guide to what paint scrapers are, their types, uses and how to choose one is for you.
Matching the blade to the job matters more than buying the fanciest tool.
A flat steel blade suits big flat walls, while square ended and triangle scrapers handle stubborn epoxy and tight molding.
Keep the angle low and watch for gouging so you protect the trim and your wrist.
Stick with us for the nitty gritty on grips, blade edges, and smarter paint removal.
Quick Answer
- Paint scrapers are hand tools with blade shapes for removing paint from surfaces.
- Types include flat, triangular, square-end, round, and shave hook blades.
- Use flat blades on walls, triangles for trim, and square ends for thick buildup.
- Blade material matters: steel for nails, carbide for clean surfaces, stainless for damp areas.
- Choose ergonomic rubber grips for comfort, and always use a low 10-degree edge angle.
Which Paint Scraper Fits Your Surface?
You have probably scraped paint off a surface that was not flat and watched a straight blade gouge the wood. I have, and that is why I keep a round scraper for curved trim and handrails.
Its beveled edge follows contours and gives you a controlled scraping motion without digging in. This tool works well for paint removal on rounded profiles such as cabinet edges, where a flat blade can dig in and tear the surface.
Press the edge into the paint, glide along the curve, and lift the flakes cleanly. The circular shape has no corners that catch and gouge your workpiece.
Before you start, lay a drop cloth and use painter’s tape to protect nearby surfaces. If you are stripping old varnish or polyurethane, keep the scraper at a low angle to remove the finish without cutting into the wood.
On large flat walls, use a flat blade because it covers more area faster. For gentle curves and decorative details, the round scraper gives you better control and a cleaner strip. Shave hooks are especially useful for curved molding and detailed profiles because their sculpted shapes reach areas flat blades cannot.
After scraping, sand with the right grit and remove dust before you apply stain, primer, or topcoat. Give the finish enough drying time before you recoat, and check the label for full cure time.
If you plan to brush on varnish or polyurethane, keep a wet edge to avoid lap marks and brush strokes. Pick a low VOC product if fumes are a concern, and choose the sheen you want, whether gloss, satin, or matte.
Flat vs. Triangle vs. Square-Ended: Which Matches Your Surface?
Choose a scraper by the paint thickness and the shape of the surface. Blade shape has a bigger effect on the job than the brand name.
A flat blade works best on even walls and siding. It holds an edge well and sharpens easily, so it suits a peeling primer or topcoat on drywall.
A triangle scraper fits corners, grooves, and trim. Its three edges let you rotate to a fresh edge when one dulls, which helps around painter’s tape lines and detailed profiles.
Use a scraper with a square end for thick, heavy buildup. It cuts fast but dulls faster, so keep a file nearby and plan to sharpen more often.
Paint adhesion problems guide the choice. Peeling paint on flat drywall calls for a flat blade, while stubborn epoxy on old doors needs the force of a square end.
For detailed moldings and profiles, a triangle scraper follows the shape and lets you clean each nook without gouging the wood. Tape off nearby finished areas with painter’s tape and use a drop cloth to catch chips.
Before you scrape, know what finish is on the surface. A varnish or polyurethane topcoat can chip in hard flakes, and a stain may have soaked into the wood. Stainless-steel blades resist rust and corrosion for repeated scraping jobs on damp or exterior surfaces.
Sand rough scraped edges with sandpaper at 120 grit, then wipe the dust before you apply a new coat. If you plan to recoat, choose a primer with low VOC and check the drying time and cure time before sanding.
When you apply the new topcoat, keep a wet edge to avoid lap marks and brush strokes. A gloss, satin, or matte sheen will show surface flaws, so smooth the wood before the finish goes on.
Keep the blade flat to the surface and check your progress often. A sharp edge and the right shape will save you time on the next coat.
Carbide or Steel Blades: What Should You Choose?
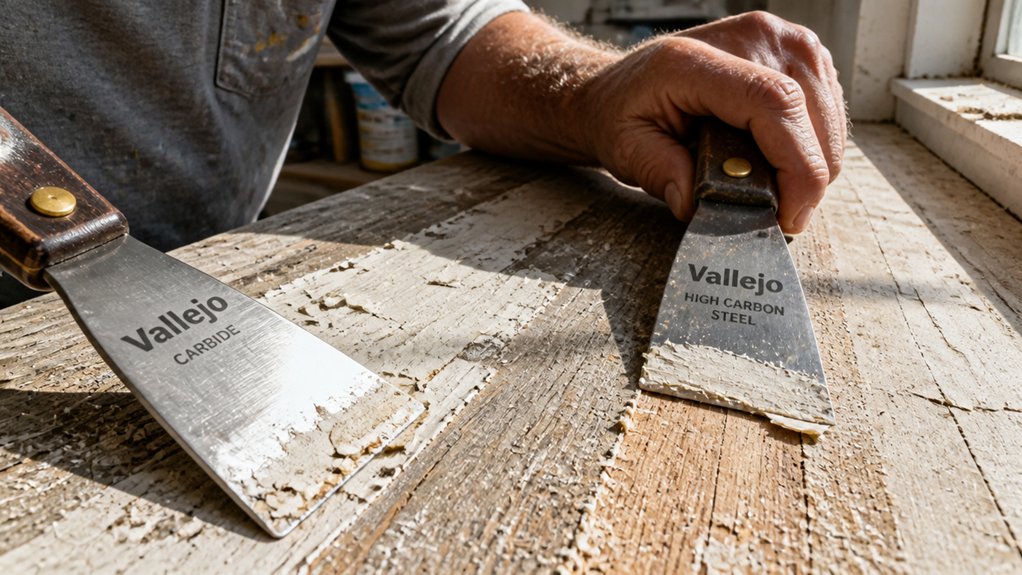
Steel blades are the workhorses you grab when scraping paint, varnish, stain, or polyurethane and the surface may hide nails. Carbide is the upgrade, but one hidden nail head can chip or shatter that expensive edge, and I have seen it happen during a pass.
Steel takes those hits and dents instead of snapping. You can file it sharp again in a few minutes, which helps when you are removing heavy buildup before primer and topcoat.
Carbide stays sharp through a whole wall if the surface is clean and you keep the scraper flat. It slices off finish with a firm feel, but a stray nail or bit of grit can chip it.
For most repaints, I reach for steel because a $12 blade costs less than a $25 carbide replacement. Start with steel, and keep carbide for trim that is clean and free of nails. If your work involves curved surfaces, a shavehook with multiple steel profiles offers better control than a single flat scraper.
After scraping, sand with the right grit to smooth the surface and dull the old finish. Use a drop cloth and painter’s tape to protect the room, then apply stain, varnish, or polyurethane as your finish calls for.
Keep a wet edge to avoid lap marks and heavy brush strokes, and pick a sheen such as gloss, satin, or matte. Check drying time and cure time, and choose a low VOC primer and topcoat if fumes matter.
How Handle Size and Grip Affect Control on Long Jobs
Handle size and grip decide how long you can scrape and how much control you keep. A bigger handle lets you push through thick primer or topcoat with less hand strain.
A slim grip helps you work inside tight corners. Match the grip to the job and to your hands.
Rubber grips help during sweaty sessions. Wood grips give you dry, precise control for stain, varnish, or polyurethane work.
A comfortable handle also helps finish work after scraping. When you sand with 120 grit and wipe off the dust, a grip that fits keeps your brush strokes even along the wet edge and helps you avoid lap marks.
Check drying time and cure time before you add another coat. Painter’s tape and a drop cloth protect the area, and a handle that fits your hand keeps you working without a cramp. Balanced weight distribution between handle and bristles ensures stability during extended scraping sessions.
Ergonomic Grip Options
Long jobs can turn your hand into a claw. Handle size and grip shape affect how long you can work with control.
I have learned that the right ergonomic grip keeps your hand relaxed while you guide a scraper or brush. Handles with a rubber coating absorb vibration and resist slipping when your palm gets sweaty.
Padded handle wraps add a soft layer that spreads pressure across your fingers and saves your joints during a long siding job. When you sand primer or a topcoat, that padding helps you keep steady pressure with 120 grit paper.
Glove compatibility matters more than you might think. A bulky work glove on a skinny handle forces a death grip, so match the handle girth to your glove and hand size.
For long hauls, pick a scraper with a thick handle that has a rubberized grip. That grip helps you keep control through a slow scraping job and through finish work with stain, varnish, or polyurethane. Matching your tool handle to the viscosity of the finish also reduces fatigue, since synthetic bristles resist stiffening and keep their shape when you push heavy-body paints.
Set up a drop cloth and painter’s tape before you start, then keep your tools within easy reach. A comfortable grip helps you keep a wet edge and steady brush strokes while you watch drying time and cure time on a satin topcoat.
Pressure and Leverage Dynamics
Handle size changes how much force you can put into a scraper and how long your hand lasts. A larger handle gives you more room to push on old paint, varnish, or polyurethane without digging into your palm.
Use a smaller scraper in tight window trim where a fat grip will not fit, and tape off the glass with painter’s tape first. Spread a drop cloth below the window to catch chips and dust.
For fine control, move your hand closer to the blade. For heavy buildup, put both hands on a longer handle and use your body weight to add force.
Rubber grips help you hold the scraper steady without white knuckles, especially when you are working over a large surface. A 12 inch handle costs about $15 and holds up much better than a cheap plastic one.
After scraping, sand the wood with the right sanding grit so the primer and topcoat can bond well. Wipe off dust before you apply finish, and keep a wet edge when you brush so you do not leave lap marks or heavy brush strokes.
Choose a gloss, satin, or matte sheen for the topcoat after the stain or varnish has dried. Check the label for VOC level and follow both drying time and cure time before you use the piece.
Match handle length to the job: use a big grip on broad siding and a small grip for fine trim details. That approach keeps your hand comfortable and your scraping under control.
For larger projects, consider anchoring the workpiece on a spray turntable to reduce strain and maintain a consistent working angle.
Fatigue Reduction Strategies
Your palm starts hurting by the second hour because handle size controls how much force you must transfer through your grip. The shape of the grip decides whether that force tires your tendons or gets the scraping job done.
Use a wide handle with a rubber coating to spread pressure across your palm. On vertical surfaces, that kind of handle can cut fatigue by up to 40 percent. Ergonomic handle designs under 90 grams reduce wrist strain during extended use.
A thin grip makes you pinch and throws off your wrist alignment, which speeds up cramping. When you scrape trim with a triangle scraper, switch hands every 15 minutes to keep control sharp.
Schedule rest breaks of five minutes every hour, then stretch your fingers and shake out your hands. A drop cloth and painter’s tape protect nearby surfaces while you work, and they also keep your cleanup short before the topcoat goes on.
Pick sanding grit that matches the old finish, and remove dust before you apply primer. A satin or matte sheen hides small surface flaws better than gloss on a garage door, and low VOC products can make an indoor workspace easier to handle.
When you apply stain, varnish, or polyurethane, keep a wet edge to avoid lap marks, and work with the grain to reduce brush strokes. Follow the drying time and cure time on the label, since a tacky coat can ruin your work.
Spend $10 extra on a cushioned wide handle. Your forearms will thank you.
Quick Scraper Guide by Surface Material
Match the scraper to the surface before you start. A carbide tipped triangle scraper works well on wood trim, but it can chip on a metal door frame.
Use a light touch and let the blade do the work. On painted trim, score the edge with a utility knife first, then lift the paint without digging into the wood.
Keep a drop cloth down and tape off nearby walls with painter’s tape. If you plan to recoat, sand the area with the right sanding grit, wipe off dust, and apply a low VOC primer before the topcoat. Multi-surface masking tape with medium adhesion can help protect adjacent trim and glass from scraper slips.
Check the sheen of the old finish so the new coat matches, whether it is gloss, satin, or matte. Check the label for drying time, then wait for the full cure time before heavy use.
For stain, varnish, or polyurethane, test a small spot first and keep a wet edge to avoid lap marks. Clean your scraper between passes so brush strokes and old finish do not get pushed into the grain.
Material-Specific Pairing
Before you scrape, match the blade to the surface under the paint. A sharp edge and the right material will save you from gouges and wasted time.
I learned this while removing latex from soft pine and gouging the wood with too much pressure. For drywall, use a flat steel blade and keep the edge clean so you do not tear the paper face.
Carbide can chew through drywall paper in a hurry, so save it for tougher surfaces. On metal, use a carbide edge to cut rust and epoxy, but watch for friction that makes the blade grab.
For masonry, skip hand scrapers and use an electric scraper to handle the grit and dust. After scraping wood trim, sand with 120 grit, wipe off dust, and apply a stain or primer before your topcoat.
For wood trim, use a triangle scraper, light pressure, and a steel blade. For plastic siding, use a flat scraper with a carbide edge at a low angle.
For concrete, use an electric scraper with a carbide edge, and expect dust. Set a drop cloth and use painter’s tape on nearby trim before you start.
Check drying time and cure time before you apply varnish or polyurethane. If you plan to apply a topcoat, choose the sheen you want, such as gloss, satin, or matte, and check the VOC level if fumes matter in your space.
Keep a wet edge while brushing to avoid lap marks and brush strokes. Match the blade to the surface and work at a steady pace. For heavier jobs on wood trim or metal, a variable-speed belt sander can speed up the prep work before you refinish.
Blade Edge Safety
When you scrape old varnish or polyurethane from trim before sanding and topcoat, that blade can save you from another filler session. Treat it like a friend and it will bury itself in your thumb, and I have the scar to prove it. Control the blade angle to keep your fingers safe. Keep the edge flat on the surface, never tilt it toward your fingers, and pull toward open space. A dull edge is sneaky because it makes you push harder, and that extra force causes slips. A sharp carbide blade cuts cleaner with less force than a worn steel blade. For tight spots, a triangle scraper costs about $8 and turns to a fresh edge, so you spend less time fighting a dull blade. Use a drop cloth and painter’s tape to protect the surrounding finish while you scrape. A clean scrape helps the new stain and topcoat sit evenly, whether you want a satin, gloss, or matte sheen. Sanding timing guidelines suggest waiting for a chalky texture before you move on. After scraping, sand with the right grit before primer so the next coat bonds well. Keep your brush strokes even and work a wet edge to avoid lap marks when you apply the finish. Follow the drying time and cure time on the varnish or polyurethane can before you sand or recoat. Respect the blade and keep it sharp, and it will treat you well. Skip that care and you may end up at urgent care.
How to Scrape Drywall and Trim Without Gouging
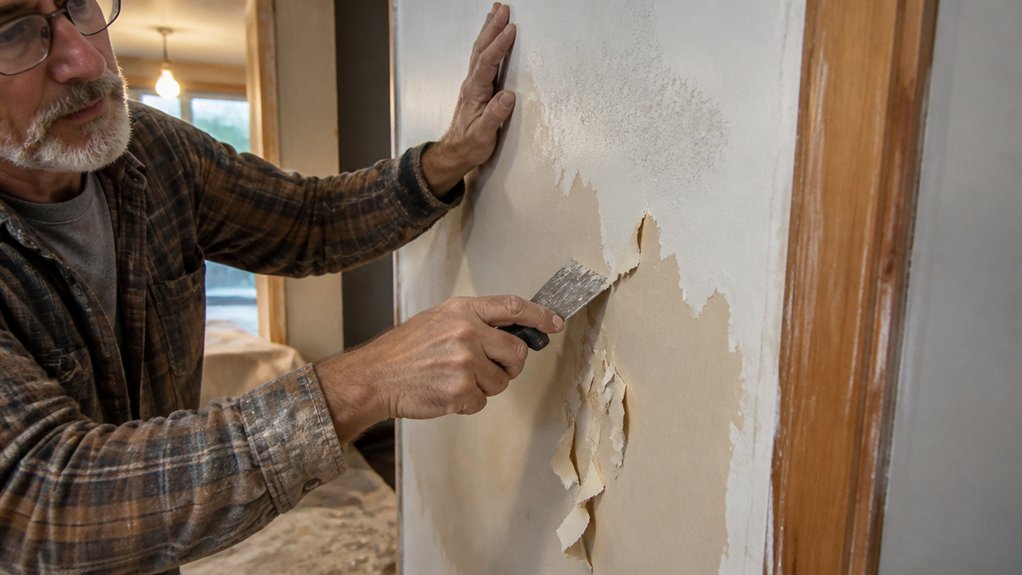
Gouging drywall happens when the blade bites in at a steep angle. Keep the scraper nearly flat, around 10 degrees, and let the tool do the pushing.
Gouging happens when the blade bites at a steep angle—keep it nearly flat, about 10 degrees, and let the tool push.
Use light pressure and short pulls, and stop before the blade digs into the paper. Sand any rough edges with 120 grit first, because high spots catch the scraper and tear the surface.
Trim needs a gentler touch, especially on curves. Use a triangle scraper there and follow the same shallow angle and light pressure.
Tape off nearby wood with painter’s tape and lay a drop cloth before you start. Wipe off sanding dust before you apply primer so the topcoat can bond.
Work in short strokes and check the surface every few passes. Long drags lift paper and leave lap marks that show under a satin or matte sheen.
Use a low VOC primer indoors, and let it cure before you sand lightly and add your topcoat. On wood trim, brush with the grain and keep a wet edge to hide brush strokes.
Frequently Asked Questions
Can I Sharpen Carbide Scraper Blades at Home?
Yes, you can sharpen carbide scraper blades at home with a diamond stone or carbide grit abrasive. Standard files will not cut carbide, so use light pressure and follow the original bevel rather than trying to reshape it.
For a practical start, make 10 to 15 light strokes on a 400 grit diamond stone, then check the edge under good light. This is carbide reconditioning, not a full regrind, so stop as soon as the dull edge cleans up.
Keep the tool flat to preserve geometry and clean the stone often. A few careful passes today will save the blade for another scraping job.
What Is the Best Scraper for Removing Spray Paint?
The best scraper for removing spray paint is a carbide scraper for flat panels, paired with a hook scraper for tight edges. A carbide scraper stays sharp and slices through spray paint’s thin film without dulling on tough spots.
For control along trim and seams, a hook scraper wins because its hooked edge pulls paint instead of gouging the substrate. Keep the blade at 15 to 20 degrees and use light pressure; on rattle-can overspray, one pass lifts the film before it powders.
A paint scraper with a replaceable carbide blade is the practical choice for most spray paint removal jobs. Test the edge on a hidden spot first, then work in sections to avoid digging into the surface.
Do Electric Scrapers Work on Interior Drywall?
Yes, electric scrapers work on interior drywall, but control the tool or the vibration can gouge the paper and gypsum.
Keep the blade at a shallow 15 degree angle and let the tool do the cutting instead of forcing it. For a cleaner job, pair the scraper with a HEPA vacuum attachment to capture gypsum dust at the source.
That dust control matters because fine powder settles on every nearby surface. A drywall scraper is handy for removing loose compound, but test a small section first and adjust speed before committing to a full wall.
How Do I Prevent Rust on Steel Scraper Blades?
To prevent rust on steel scraper blades, wipe them dry immediately after each use and apply a thin coat of blade oil. After wiping, let the blade air-dry for 10 minutes, then buff on one thin coat of camellia oil or paste wax.
Store the blades in a dry toolbox or a sealed case with a silica gel packet, never in a damp basement. For extra corrosion protection, avoid stacking wet scrapers and inspect the edges before every job.
This simple routine keeps steel scrapers sharp and rust-free, and it fits naturally into a painter’s tool care routine.
Are Paint Scrapers Safe to Use on Fiberglass Surfaces?
Paint scrapers are safe to use on fiberglass surfaces only with a low angle and feather-light pressure that protect soft gelcoat. Treat the tool like a gelcoat scraper, not a putty knife, and keep the carbide blade nearly flat.
A practical starting point is a 15 to 20 degree angle with light pressure, testing first on a hidden area. Let the scraper do the work and stop immediately if you feel the blade catch or dig.
For stubborn paint, soften it with a compatible stripper and use light passes rather than force. That approach keeps paint scrapers safe on fiberglass surfaces while preserving the finish.
Rounding Up
Paint scrapers are tools for trim and flat walls, and the types, uses, and how to choose them depend on handle length and surface. Check the surface first: use a carbide triangle scraper for trim and steel for flat walls.
Test on scrap before touching the wall, and compare short handles for control with long handles for back pain. Write down that you need two scrapers, not one, and plan to sharpen steel twice a job before you buy.
A carbide triangle is money well spent for trim work. Related topic: scraper sharpening.