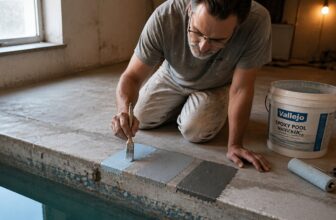
What Are Paving Paints? Types, Uses and How to Choose
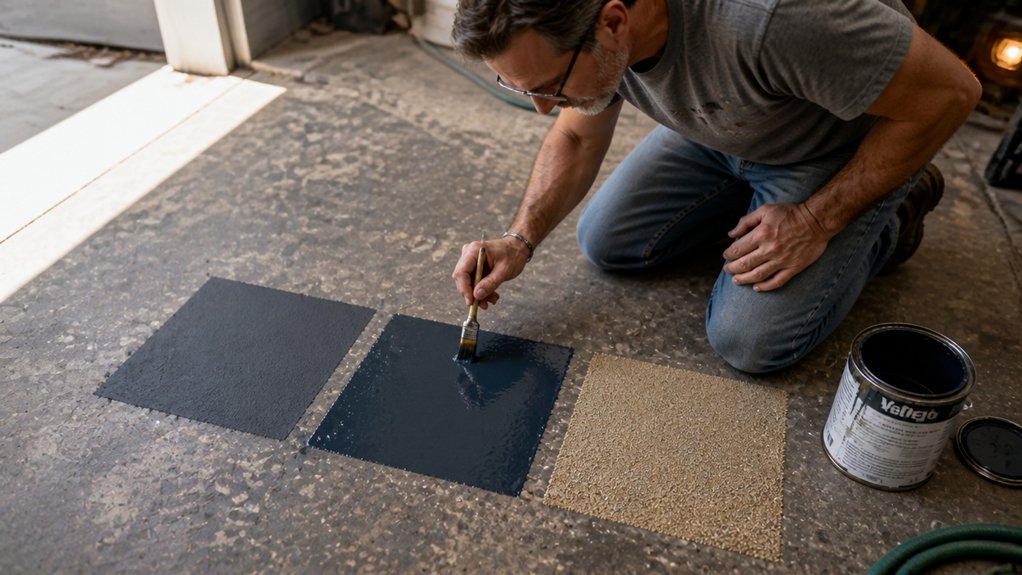
Worn parking lot lines and faded crosswalks make one question urgent: what are paving paints, and which types, uses, and selection factors actually matter?
Paving paints are tough coatings for asphalt and concrete, and this guide covers the five main types plus how to choose.
You will see how traffic, climate, drying time, and surface prep change performance.
A quick tip: prep and cure time often matter more than the paint label, and cost per year of service beats upfront price.
We will compare waterborne, solvent, thermoplastic, epoxy, and tape so you can pick the right coating without the headache.
Quick Answer
- Paving paints are durable coatings for asphalt and concrete markings like parking lots and crosswalks.
- Main types: waterborne acrylic, solvent-based, epoxy/MMA, thermoplastic, and preformed tape.
- Choose thermoplastic or epoxy for heavy traffic; waterborne suits low-traffic lots or mild climates.
- Surface prep—cleaning, priming, and crack filling—is critical for paint adhesion and longevity.
- Compare cost per year of service, not just upfront price; thermoplastic lasts 4–6 years versus 1–3 for waterborne.
What Are Paving Paints and Where Are They Used?
Paving paint is a tough coating for asphalt and concrete markings, and I use it for parking lots, crosswalks, and bike lanes. The lines keep traffic safe and give drivers a clear path.
Stripe width follows federal specs, such as 4 to 6 inches for edge lines, so markings stay consistent from Omaha to Orlando. Pick a paving paint made for the surface and the traffic load, then read the label for primer needs.
Stripe width follows federal specs, so markings stay consistent from Omaha to Orlando. Pick paint for the surface.
On old or chalky pavement, a primer can help the topcoat bond and last. A low VOC formula helps where fumes or nearby buildings are a concern.
Sun, tire wear, and salt spray fade pigments, so cheap paint may look washed out in eighteen months while a better product can hold color for five years. Choose a gloss or satin sheen for easy cleaning, or a matte finish when you want to hide scuffs.
Drying time tells you when you can open a lane, and cure time tells you when the film has fully hardened. When you roll long lines, keep a wet edge to avoid lap marks, and use painter’s tape and a drop cloth for small areas near curbs or bays.
For touch ups, use light brush strokes and let the coating flow out so marks blend. Match the material to the traffic load, and the marking will stay crisp and useful. Oil stains completely repel water-based paving paint, so aggressive degreasing is required before any coating will adhere.
The 5 Main Types of Paving Paint Explained Simply
Paving paint comes in five main types, and the right one depends on traffic, climate, and budget. Start with a compatible primer and use a topcoat that suits the surface and the look you want.
Waterborne acrylic dries quickly, has low VOC levels, and is easier to clean up. It works well for light use, but stripe visibility can fade faster, so keep an extra can for repairs.
Solvent paints handle cold, wet roads and grip better on worn asphalt or concrete. They smell strong and need good ventilation, plus drying time and cure time both matter before you drive on them.
Epoxy and MMA coatings cure hard and last for years, but they need careful mixing and the right application tools. They give you strong color choices and a durable topcoat, though the surface must be clean and primed first.
Thermoplastic melts when hot, sets thick, and can carry reflective beads for night visibility. It is usually 90 to 120 mils thick and outlasts the other options in heavy traffic. UV-stable pigments retain approximately 90% of their hue after five years to prevent fading in sun-exposed markings.
Preformed tapes are a fast fix for small jobs and markings that will not stay long. They save time, but they do not last in busy lots.
For any of these paints, scuff slick concrete with 80 grit sandpaper, use painter’s tape and a drop cloth, and keep a wet edge on large areas to avoid lap marks. Sheen matters too: gloss and satin clean up better, while matte hides scuffs.
Choose the paint to match the job, and expect cheaper paint to mean more repainting. Check the label for drying time, cure time, and VOC content before you buy.
Waterborne vs. Solvent Paving Paint: Cost and Climate Compared?
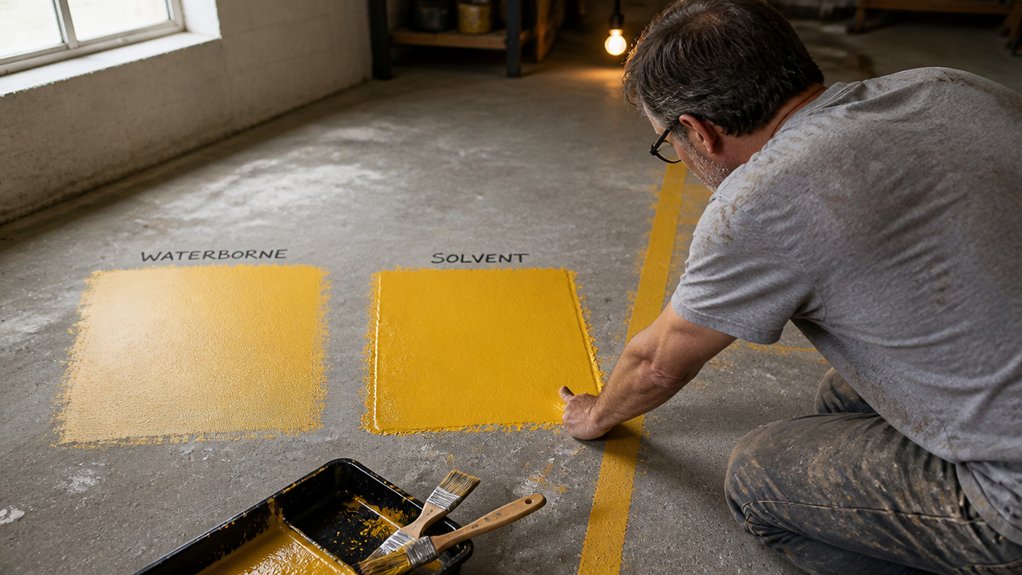
Waterborne paving paint usually has lower VOC and costs less upfront. Paint made with solvent costs more upfront but holds up better in cold, wet weather.
You may save a few bucks per gallon with waterborne, but that saving can disappear if the line wears thin and needs repainting every year. Waterborne latex only lasts up to 3 years on roads with low traffic.
In a rainy northern state, I would lean toward solvent for its toughness, because a line that fades by spring is no bargain. Surface prep and topcoat matter as much as paint type.
Clean the surface, apply a compatible primer if the label calls for it, and protect curbs and cars with painter’s tape and drop cloths. Keep a wet edge when brushing so you do not leave lap marks.
Load the brush evenly and lay off brush strokes in one direction. Respect drying time vs cure time, because paint that feels dry can still lift under tires.
Road lines are usually matte, so sheen choices like gloss or satin matter less than film build, though built-in primers can simplify bonding to porous pavement. For metal rails near the pavement, use the sanding grit the label recommends.
If you are finishing nearby wood, use stain before varnish or polyurethane, and keep those products off pavement. Follow the label for recoating, and keep traffic off until the paint cures.
Cost Differences
Solvent based paint usually has the lower sticker price, often 10 to 20 percent less per gallon. That low price can mislead you once you add labor, repainting, and disposal.
I have seen waterborne paint cost less over a full life cycle on low traffic lots because it needs fewer restripes. It also fits easier when local VOC rules tighten.
Regional pricing changes the answer. Solvent based paint often costs less in states with cold weather, while waterborne paint wins where VOC rules are strict.
Solvent based paint runs about $25 to $35 per gallon, and it holds up in damp cold. You will restripe sooner because the film wears faster under traffic.
Waterborne paint runs about $30 to $45 per gallon, dries fast, and holds color well. It does not like freezing temperatures, so store it and apply it within the label range.
Waterborne paint is easier to recycle in some programs, while solvent based paint creates a disposal headache. Waterborne paint also has a faster cure time, so you get less downtime and save labor hours.
For a wood finish, price the whole system: primer, topcoat, and the sheen you want, whether that is gloss, satin, or matte. Check drying time versus cure time, then test on scrap to watch for lap marks, brush strokes, and a wet edge that closes too fast.
If you work in a mild climate, waterborne paint is often worth the extra cost. In a colder area, buy solvent based paint and budget for touch ups.
When using solvent-based paving paints, a mineral-spirits solvent can help thin the paint and clean brushes and equipment, though you must account for its combustible nature and disposal requirements.
Climate Performance
If winter laughs at your plans, solvent paint usually holds up better on pavement. It bonds and cures in cold, damp conditions that leave waterborne acrylics struggling.
That is why northern crews choose solvent paint for parking lots and low traffic roads. Start with a clean surface and the right primer, then apply the topcoat within the window the label gives you.
In a hot climate, solvent paint loses its edge. It softens under strong sun, while waterborne paint resists fade and peeling better.
Cost matters too. Solvent paint is cheaper per gallon, but waterborne paint is close enough that climate should guide your choice. Below 40°F, solvent-based options also avoid the endless wait for curing that plagues waterborne formulas in cold weather.
Pay attention to drying time and cure time, because a coating can feel dry before it has fully cured. Solvent paint also carries more VOC, so check local rules and ventilate the area.
For parking lot markings, a matte or satin sheen often hides scuffs better than gloss. Keep a wet edge to avoid lap marks, and roll large areas to keep brush strokes out of the finish.
Use painter’s tape for crisp edges on smaller jobs, and keep a drop cloth handy for overspray. Match the paint to your season and your surface.
The same thinking helps with wood finishes: prep, primer, topcoat, and sanding grit all affect how stain, varnish, or polyurethane holds up. Respect the label, and you will get fewer surprises.
Long-Term Value
You already know this from finish work: the cheap paint often costs you time later. Road striping works the same way when traffic and weather wear the topcoat.
Waterborne paint may carry low VOC and clean up easily, and it can look like a bargain at 15 cents per linear foot. On a busy road, though, it can wear through and need another coat every year.
Solvent based paint handles cold wet weather better, yet it still fades and loses gloss. Compare products by life cycle cost, including repaint labor and lane closure downtime.
Treat the stripe like a topcoat over a prepared surface, because primer and surface prep matter as much as the can. Check drying time and cure time, then keep a wet edge and plan your brush strokes to avoid lap marks on a test panel.
A gloss, satin, or matte sheen may look good in the shop, but tires and rain will show the truth. Road paint has a harder job than stain, varnish, or polyurethane on a porch, so scuff a test panel with the right sanding grit, set a drop cloth, and tape off a small patch with painter’s tape.
For a quiet lot, waterborne paint can be fine and may save money upfront. For roads with thousands of cars daily, pay more for thermoplastic or epoxy and let the longer service life pay you back. Higher pressure ratings like 3000 PSI deliver finer atomization and smoother coats, which is why professional-grade sprayers are often specified for large-scale paving projects.
How Long Each Paving Paint Lasts on Roads and Lots
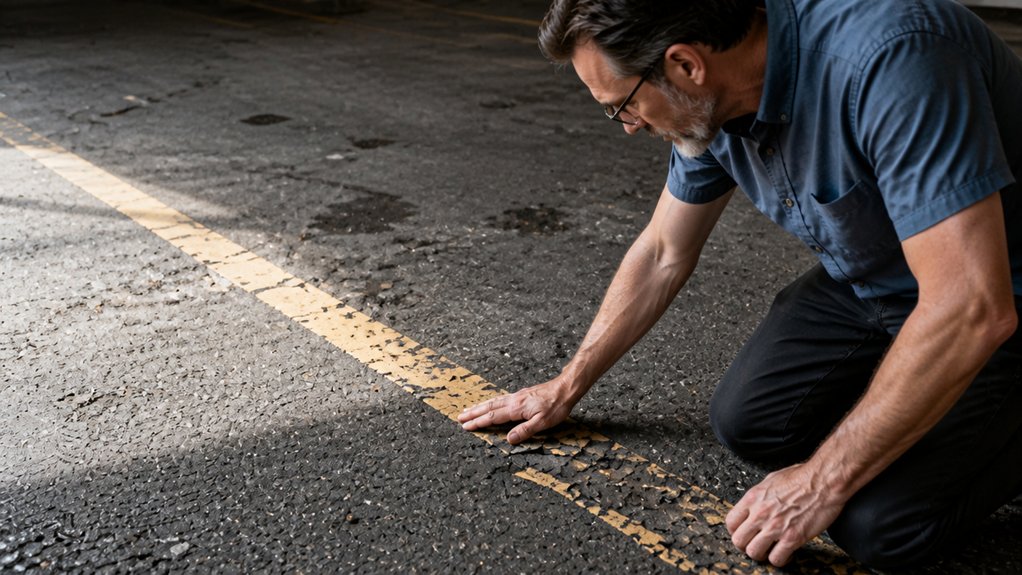
Paint lifespan depends on traffic, climate, surface, and product type. Long term testing shows wear patterns decide repaint timing as much as calendar time.
Waterborne paint lasts 1 to 2 years on roads and 2 to 3 years in parking lots. Solvent paint lasts 1 to 3 years on roads and 2 to 4 years in parking lots.
Thermoplastic lasts 4 to 6 years on roads and 5 to 7 years in parking lots. Plural component paint lasts 3 to 5 years on roads and 4 to 6 years in parking lots.
Use these numbers as a starting point, then check the actual wear on your road or lot. Heavy truck traffic and freeze thaw cycles can shorten any of these numbers.
Waterborne paint dries fast and has low VOC levels, so it suits quick work with short traffic control. Solvent paint can bite into old surfaces and last longer in some conditions, but it needs more drying time and cure time before traffic returns.
Thermoplastic needs heat and special equipment, and it gives a thick, glossy line that stands up to heavy wear. Plural component paint mixes two parts at application, so it sets quickly and holds up well on busy lots.
Surface prep matters more than a fancy label, and sanding grit is for wood and finish work. Clean off oil and dirt, patch cracks, and use a primer where the surface is porous or stained.
For lot striping, keep a wet edge on small jobs and avoid lap marks. Use painter’s tape and a drop cloth near curbs and doors, and lay brush strokes in one direction for a clean line.
Check sheen and gloss after the topcoat cures, because a glossy finish shows wear sooner than satin or matte. Follow VOC rules and the maker’s drying time versus cure time, even when the paint says it is ready for traffic. Prioritize durability and features like UV stability and abrasion resistance to extend the lifespan of any paving paint application.
When to Choose Thermoplastic or Plural Component Paint
Thermoplastic and plural component paint are the durable choices for roads and lots where cheap latex wears out. Use them for steady traffic or when you need retroreflective beads that last through winter.
Thermoplastic goes down hot at 90 to 120 mils and locks glass beads into a thick plastic shell. Plural component epoxy or MMA sets in minutes, so you can reopen a lane fast; check drying time and cure time before traffic hits it.
Both hold up at busy intersections and cut the yearly ghost line problem. Add grit to either one for an anti skid texture on crosswalks, which gives shoes and tires more bite. For extreme heat applications like exhaust systems, ceramic coatings can handle up to 2000°F intermittent without degrading.
Treat the job like a finish job: clean the surface, use the right primer if the product calls for it, and apply the topcoat within the maker’s window. Check VOC limits before ordering, and do not judge these coatings by furniture sheen such as gloss, satin, or matte.
If you touch up by hand, keep a wet edge, watch lap marks and brush strokes, and use painter’s tape and a drop cloth to protect nearby surfaces. On concrete, prep matters as much as sanding grit does on wood, and you should clean old stain, varnish, or polyurethane off tools before the next batch.
Pick thermoplastic for durable lines on asphalt; pick plural component for concrete or when you need a fast reopening. You pay more up front, but your crew spends less time repainting and less time patching worn lines.
How to Match Paving Paint to Traffic Volume, Substrate, and Snowplow Risk
Two questions settle most paving paint choices before you open a can: how many tires roll over the surface each day, and what material you are painting. Start with traffic count, because heavy use above about 10,000 vehicles a day calls for thermoplastic or epoxy.
Concrete needs extra care because smooth, low porosity slabs give thermoplastic little to grip. Use an epoxy system or spend time on surface prep, and add a primer that suits the coating.
Snowplow risk changes the plan. A steel blade can peel thick thermoplastic unless you specify an inlaid product, so choose a thinner flexible paint on plowed roads.
Application timing matters too. Waterborne paint may not cure in cold weather, while solvent based paint handles damp days better.
For a durable topcoat, check whether you need gloss, satin, or matte sheen and confirm the VOC limit for your area. Keep sanding grit, drop cloths, and painter’s tape on hand so prep and cleanup do not slow the job.
Work with a wet edge to avoid lap marks and brush strokes, and give the coating the full drying time before cure time. Follow the label for temperature and recoat windows, then plan for plow season before you buy.
If you opt for an acrylic-based paving paint, verify that the ceramic-fortified resin provides the chip and abrasion resistance your pavement sees daily.
Why Temperature and Surface Prep Make or Break Adhesion
Adhesion is where paving paint fails most often. Temperature and surface prep decide whether it holds.
Cold asphalt below 50°F makes the paint skin over before it can bond. You may get a topcoat that looks fine and peels by spring.
Dampness on the surface blocks the bond, so the paint sits on water. Wipe the area dry and let it reach the temperature range on the label.
Loose debris, oil stains, and old sealers act like a release layer for striping paint. Scrub the surface, rinse it, and let it dry fully.
Use the primer and crack filler the product data sheet calls for. Skipping them costs more later when the topcoat lifts.
Respect the curing windows in the product data sheet. Drying time and cure time both matter, and cool or humid air slows them down.
Check the VOC level and sheen on the label before you buy. A gloss, satin, or matte finish will still fail over a dirty substrate.
Mask edges with painter’s tape and set a drop cloth before you open the can. On larger areas, keep a wet edge and avoid lap marks in the topcoat.
For wood trim or a wooden edge, use the right sanding grit and test stain, varnish, or polyurethane on a scrap piece first. Brush strokes show more in high gloss finishes, so work with the grain and keep the coat even.
Clean the surface, check the thermometer, and follow the label for primer, topcoat, and cure time. Stop if rain is coming or the surface is still damp.
How to Compare Paving Paint Costs Over Time: Not Just Upfront Price
Before you grab the cheapest can of paving paint, figure out the cost per year of service.
That number shows the real cost because labor and maintenance add up fast.
Waterborne paving paint may cost $50 a bucket, but it can fade in two years on a busy lot.
Thermoplastic costs about three times the upfront price, yet it can last five times longer.
Price per gallon hides the work: surface prep, primer, topcoat, and crew time.
Scuff slick spots with 80 grit before primer so the topcoat can bite.
A coating with low VOC and a satin or gloss sheen may cost more, but it can cut reapplication trips.
A matte finish can hide small flaws, while gloss shows scuffs more clearly.
Check drying time versus cure time before you schedule traffic.
Fast drying helps, but a full cure protects the film from tire marks and lap marks.
Use painter’s tape and drop cloths to keep coating off edges and nearby surfaces.
Keep a wet edge while rolling or brushing so brush strokes and overlaps blend.
Schedule stripe crews and repaint work on a calendar.
Frequent short trips cost more than one durable coating, so budget for the long run.
On heavy traffic, choose thermoplastic even with the higher initial price.
Compare cost per year before you buy, and pick the coating that needs fewer return visits.
For high-traffic zones like ramps and pool decks, verify that the coating meets ADA wet COF standards to avoid premature wear and liability.
Frequently Asked Questions
Can I Apply New Paving Paint Over Old Markings?
Yes, you can apply new paving paint over old markings, but only after proper preparation and testing.
Old markings can trap dirt, chalk, or incompatible paint, so clean and abrade them before recoating. Use a compatibility test on a small patch: clean the marking, sand with 80 to 120 grit, wipe dust, and apply a thin coat of the new paving paint.
Let it cure for the product’s stated recoat time, often 4 to 6 hours, then check adhesion with a firm thumbnail scrape. If the test coat lifts or wrinkles, use line marking removal instead of painting over it.
For reliable paving paint adhesion, avoid thick cover coats and follow the label’s recoat and drying times.
How Long Must New Pavement Cure Before Striping?
New pavement must cure at least 7 to 14 days before striping, and cooler weather can stretch that window. Treat the schedule as a minimum, not a finish line, because trapped moisture under traffic paint causes peeling and tracking.
A practical field check is to tape a 12 inch square of plastic to the pavement for 24 hours and look for condensation underneath. If moisture appears, give it more time and retest before calling the striping crew.
Keep vehicles off the fresh surface, and use a moisture meter if you want a number to pair with that plastic sheet test. For road marking work, confirm pavement and air temperatures are above 50°F, then follow the manufacturer’s dry and recoat times.
Do I Need to Sealcoat Before Painting a Parking Lot?
You do not need to sealcoat before painting a parking lot, but sealing first can be smart when the surface is sound and properly cured. Let fresh sealcoat cure for 24 to 48 hours before applying line marking paint, because paint will not stick to a damp or tacky film.
Check pavement porosity first: new asphalt absorbs paint more readily than a sealed surface, so it may need a primer or an extra coat. For a practical test today, pour a small cup of water on the pavement and watch how fast it soaks in.
If it beads and sits, the surface is sealed and less absorbent; if it disappears quickly, plan for extra paint or a primer.
What Is the Ideal Temperature Range for Applying Paint?
The ideal temperature range for applying paint is generally 55 to 85°F surface warmth for most paints. Treat pavement like a sponge: it will not absorb properly when too cold.
Thermal curing also demands humidity control, so check the dew point before you start. For a practical check today, use an infrared thermometer and confirm the surface is at least 5°F above the dew point and stays above 55°F through the final coat.
That is your paint application timing, so do not rush it. Keep the surface warmth steady and avoid coating cold pavement just because the air feels mild.
Are Reflective Glass Beads Included in All Paving Paints?
No, reflective glass beads are not included in all paving paints. Many standard line paints lack them, so check the technical data sheet before specifying a product.
For night visibility, beads are usually deliberately added to thermoplastics or epoxies, or broadcast as a drop-on aggregate while the coating is still wet. A practical tip: test a small area and broadcast beads at roughly 1 lb per 100 sq ft before the film skins over.
If you need consistent retroreflectivity, ask suppliers for a preloaded bead product or a compatible drop-on grade. Search “retroreflective additive” when comparing options, and confirm the bead size and application rate match your paving paint system.
Rounding Up
Paving paints are coatings matched to surface punishment, with waterborne acrylic for quiet cul-de-sacs and thermoplastic for tire-eating highways. Check the traffic punishment before you buy, then remember that the cheapest can of paint upfront can become the priciest headache two winters later, especially with a snowplow involved.
Write down your prep steps and follow them, since prep matters more than promises. Compare waterborne acrylic with thermoplastic against your actual site and traffic, then pick the paint type that fits the punishment rather than your wallet’s first whim.
Ask what repainting less will require from your future self, and choose smart instead of repainting often. Parking lot striping.