
What Are Pool Paints? Types, Uses and How to Choose
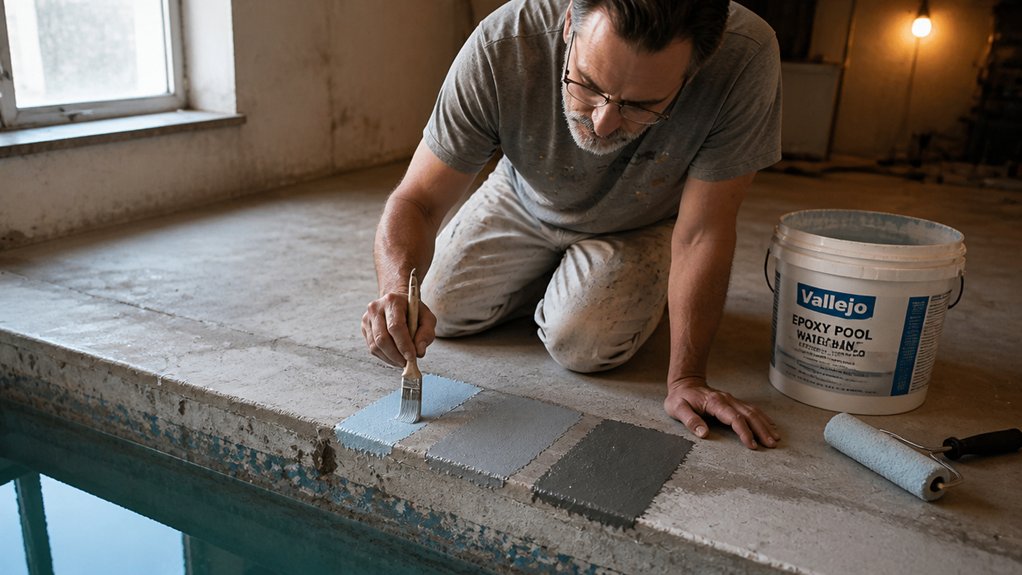
What are pool paints, and why does the wrong one peel, chalk, or force a costly redo? This guide covers types, uses, and how to choose so you match the coating to your pool and budget.
We compare acrylic, epoxy, and rubber by budget, lifespan, and surface match. You will also see why surface prep and cure time matter before you fill the pool.
It is practical guidance for DIYers and homeowners who want a finish that lasts, not a quick patch. Keep reading to compare options and pick the right coating with confidence.
Quick Answer
- Epoxy pool paint lasts 6–8 years, resisting chemicals and algae best.
- Acrylic paint is cheaper but needs repainting every 2–3 years.
- Rubber paint offers mid-range performance, requiring a conversion coat before epoxy.
- Match new paint to old coating via solvent swab test to prevent peeling.
- Cure times vary: epoxy 7 days, acrylic 3 days, rubber 5–7 days before filling.
How Long Each Pool Paint Type Lasts: Durability Compared
Epoxy pool paint lasts much longer than acrylic pool paint. In normal use, epoxy gives you about 6 to 8 years, while acrylic gives about 2 to 3 years.
That difference changes your repaint schedule. You may repaint acrylic three times before epoxy needs a second coat.
Epoxy also forms a harder topcoat that resists chemicals and algae. That cuts down on scrubbing and water treatment, so maintenance is easier.
Acrylic stays softer, so it can chip and stain sooner. It asks for more cleaning and more touchups from you.
Epoxy costs more up front, but the cost spread over 7 years can beat buying cheap paint twice. If you dislike repainting, epoxy is the better choice for a pool surface.
Acrylic makes sense for a quick fix or a tight budget. Check the label for VOC content and the recoat window before you start.
Surface prep matters as much as the paint. Use the sanding grit and primer the maker recommends, protect fittings with painter’s tape, and lay a drop cloth over the deck.
Keep a wet edge while you roll or brush, and watch for lap marks and brush strokes in the sheen. Pick the sheen you want, such as gloss, satin, or matte, and follow the label for drying time vs cure time.
Do not fill or use the pool until the maker says the paint is fully cured. Deck stain, varnish, and polyurethane follow their own recoat rules for wood and other surfaces.
Match each product to its surface and use, and the finish will hold up better. That approach saves you work and money over the life of the pool.
For the longest performance, high-solids paint at 70% or more can extend epoxy’s lifespan up to 8 years with proper preparation.
Epoxy vs. Rubber vs. Acrylic: Which Pool Paint Fits Your Surface?
Picking the wrong pool paint wastes money and time. For most pool surfaces, I choose epoxy because it lasts up to 8 years and holds gloss well.
Picking the wrong pool paint wastes money and time. Epoxy lasts up to 8 years and holds gloss well.
Acrylic costs less and lasts 2 to 3 years, so it works for a quick seasonal repaint. Rubber sits in the middle, but you must watch the recoat window and apply a conversion coat over old rubber before epoxy will stick. Curing provides full hardness and chemical armor only after the surface reaches a tack-free state, so never rush the process.
Run an adhesion testing kit on old paint before you buy a topcoat. Scuff the surface with the right sanding grit, then wipe it clean and let it dry.
Lay a drop cloth and use painter’s tape at the tile line. Use the right primer for the surface, and keep a wet edge to avoid lap marks and brush strokes.
Check the VOC level if fumes matter, and know the drying time and cure time before you recoat. Pick a sheen you can live with: gloss holds up best, while satin and matte show wear sooner.
Pool paint is a different product from stain, varnish, or polyurethane. For concrete or steel, use epoxy; for a budget job or unknown coatings, use acrylic.
Use rubber only if it is already there. Acrylic fades fast, and rubber can chalk even though it handles chemicals well.
Best Pool Paint for Fiberglass, Concrete, or Steel Pools
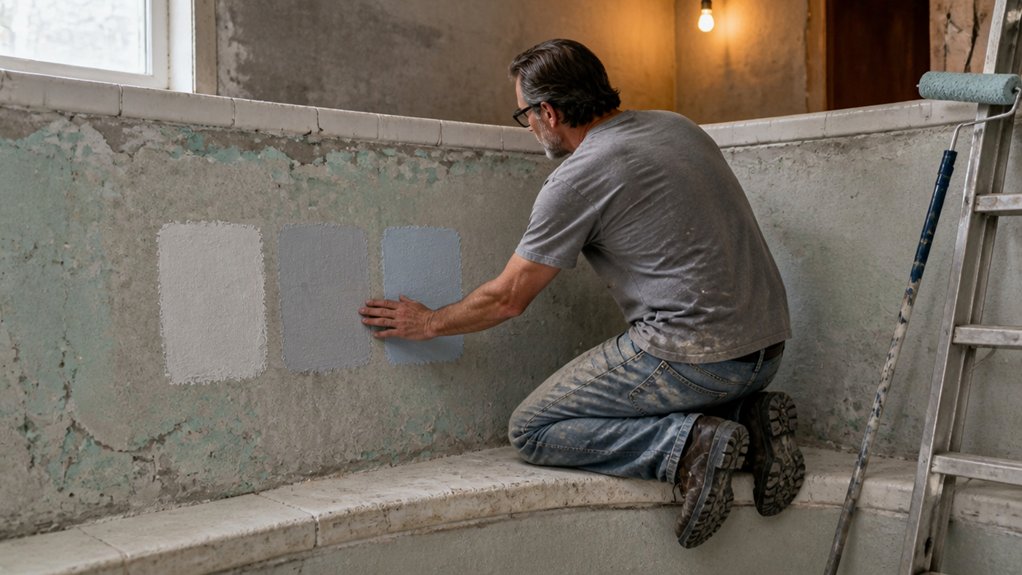
Epoxy is the paint I reach for on fiberglass, concrete, and steel pools because the surface sets the rules. It bonds well to fiberglass, builds a thick film that keeps moisture away from steel, and fills small pores in concrete.
Use a two part epoxy on fiberglass so the film can flex without cracking. For concrete, choose a high build epoxy that fills the pores and can last about eight years with proper prep.
For steel, start with an epoxy primer, then apply the epoxy topcoat to block rust. Use the sanding grit listed on the product label, wipe away dust, and keep a wet edge while you roll.
Watch for lap marks and brush strokes, and check the drying time and cure time before you recoat. Acrylic will peel from steel in a season, and recoating every two years gets old fast.
Epoxy costs more upfront, but it saves you labor later, so check the VOC rating and choose a gloss or satin sheen before you buy. Use a drop cloth and painter’s tape to keep the job clean, and treat the higher cost like good boots in a blizzard. Because epoxy primers demand careful measurement, follow the mix ratio exactly to avoid a tacky film or poor adhesion.
How to Test Existing Pool Paint Before Repainting
Test the old pool paint before you buy new paint. Rub a small chip with a solvent swab to see what coating you have.
A paint chip that dissolves in denatured alcohol points to acrylic. A 75/25 mix of mineral spirits and xylene points to synthetic rubber, and pure xylene points to chlorinated rubber.
If the chip resists all three solvents, treat it as epoxy. Match the new paint to the old coating so the topcoat bonds well.
A wrong match can cause poor adhesion and a second repaint. Use a compatible primer when the old coating and the new paint call for it.
Before you sand, set a drop cloth and use painter’s tape to protect the pool edge. Check the old sheen, then choose a topcoat with a sheen that suits the pool, such as gloss, satin, or matte.
Sanding grit and brush strokes can affect the final look, so test a small patch first. Watch the wet edge and follow the drying time and cure time on the label. Water-based, low-odor formulas can help minimize fumes during application, similar to the safe strippers that avoid harsh solvents like methylene chloride.
Solvent Swab Testing
If your pool is due for a repaint, test the old coating before you buy primer or topcoat. The wrong paint over the wrong base can peel, so spend a few minutes with cotton swabs and three solvents on a small hidden patch.
Dip one swab in denatured alcohol and rub the patch. If the coating softens, it is likely acrylic.
Let the alcohol flash off, then try mineral spirits and xylene on fresh swabs. These solvents can help you spot rubber types and other soft coatings. For oil-based paints, stains, and varnishes, Klean-Strip Paint Thinner is a heavy-duty option that can also help clean neglected equipment.
If the patch stays hard after all three solvents, treat it as epoxy and choose a compatible primer. It also helps you pick a topcoat with the right sheen, whether you want gloss, satin, or matte.
The same swab test can help you on wood trim before you strip and recoat with stain, varnish, or polyurethane. Note the result and keep it with your paint records for the next repaint.
Solvent swab safety matters every time, so work outdoors and wear gloves. Keep sparks and flames away, and set up a drop cloth or painter’s tape to protect nearby surfaces.
Do not dump leftovers down the drain. Collect used solvent in a sealed jar and dispose of it through your local household hazardous waste program.
Check the label for VOC content, then follow the drying time and cure time before you recoat. Apply the finish coat with a wet edge and watch your brush strokes so the finish looks even.
Ten minutes of testing can save you a failed topcoat, lap marks, and uneven sheen. Do the swab test before you choose sanding grit, prime, and apply the finish coat.
Selecting the Right Match
Swab results tell you what coating is on the surface, so you can match the new paint to the old coat. Read the swab first, then choose a compatible primer and topcoat.
Epoxy gives a hard finish with good durability, but epoxy will not stick to rubber without a conversion coat. Apply the conversion coat first if the swab shows rubber, or the epoxy will fail.
Look for patchy color fading because it means the old coat is failing. Sand the failing finish with the right sanding grit instead of painting over it.
Before you roll the new coat, wash the surface, etch it if needed, and rinse well. Lay a drop cloth and set painter’s tape to protect edges and floors.
Match the solvent findings exactly: epoxy over epoxy, rubber over rubber. If you put the wrong coating over the old one, the new coat will peel.
Keep a wet edge as you apply the paint, and use steady brush strokes to avoid lap marks. Check the VOC level and the sheen you want, whether gloss, satin, or matte.
Plan repainting for dry, warm days and stay above 60 degrees Fahrenheit. If you use stain, varnish, or polyurethane nearby, keep them off the fresh coating until it cures, and respect drying time and cure time.
Match the swab, prep the surface carefully, and the new topcoat will last. Skip the prep and you will repaint next season.
Also ensure the application temperature stays between 50°F and 90°F, as improper temperatures prevent proper curing and adhesion of water-based coatings.
Applying Epoxy, Rubber, and Acrylic Pool Paint
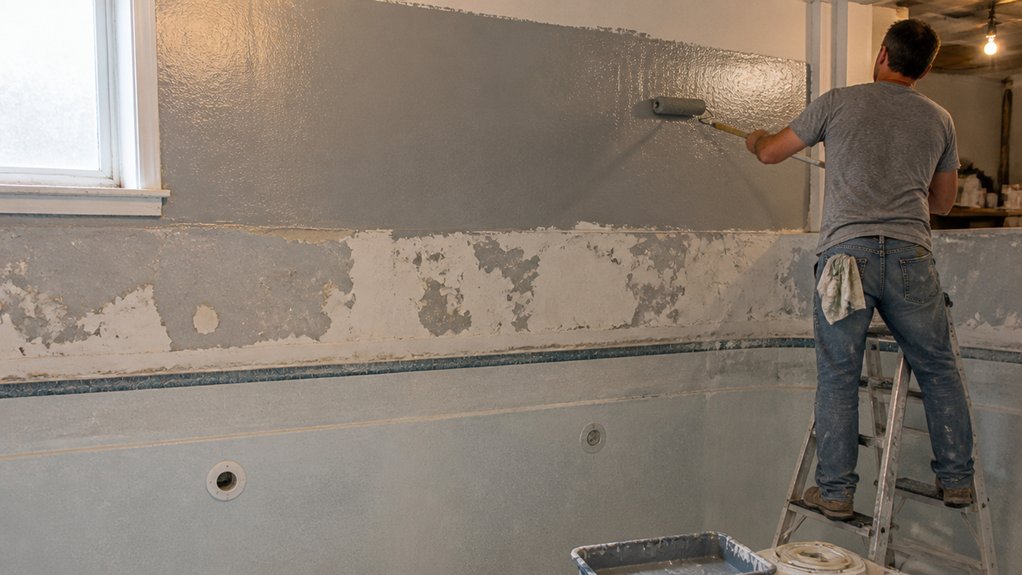
Pool paint goes on like any coating, but each type has its own habits, and the prep work decides how well it holds. Match the surface prep to the product before you open the can.
Epoxy comes as two parts, and once you mix them you have about two to three hours of working life before the mix thickens. Keep a wet edge as you roll, because lap marks show up fast in the gloss or satin sheen.
Give epoxy a rough surface first, then vacuum and wipe the floor clean before you apply the primer. Let the concrete dry fully, since trapped moisture can lift the topcoat and leave you with peeling.
Cure time for epoxy runs about seven days, though drying time may feel faster on a warm day. Do not confuse the two, because foot traffic and water exposure need the full cure. Heat resistance ratings often max out around 300°F to 400°F for enamels, but pool paints prioritize water resistance over thermal limits.
Acrylic tolerates damp concrete better than epoxy, which helps in humid climates. Still, check the surface with a moisture meter and follow the label for any maximum reading.
Use a primer made for the product, and keep a drop cloth and painter’s tape handy around the pool edge. Sand rough spots with the sanding grit the label recommends, then remove the dust before the topcoat.
Paint made with rubber needs walls that are completely dry and a quick recoat overnight. Plan your brush strokes and roller passes so you keep a wet edge and avoid lap marks.
Check the VOC level if indoor air or odor matters, and pick a sheen you can live with on the pool wall. Matte hides surface flaws, while gloss and satin are easier to wipe down.
Old stains and patchy concrete need more prep than a clean surface, so do not skip the cleaning step. If you rush the prep, any paint will fail, and you will be decorating a leak.
Pool Paint Cure Times: When to Fill the Pool?
The most common pool paint mistake is filling too soon. I have seen good epoxy jobs blister because the owner did not wait a full week.
Cure time is the waiting period before water contact, and it matters more than the paint can’s dry time. Epoxy needs seven full days of cure before you add water. Ideal temperature range for curing sits between 50–85°F with humidity below 70%.
Acrylic paint cures in three days, which suits damp weather when you follow that minimum. Rubber based paint needs five to seven days, and early water can spoil the satin sheen.
Epoxy has a recoat window of 16 to 72 hours, so plan each coat back to back. The final cure still needs the full seven days before water touches the topcoat.
Check the label for the VOC rating, recoat time, and cure time, then mark those dates on your calendar. Use painter’s tape to label the fill date on the pool edge so you do not rush the job.
A little extra waiting protects the finish and saves you a repaint. Fill after the full cure time and let the paint do its job.
Pool Paint Coverage and Cost: Calculate Gallons Per Type
Measure the pool wall and floor area before you buy paint, then check the coverage rate on the label for the type you plan to use. That square footage sets the gallon count, and a little extra saves a trip when you are near the deep end.
Epoxy covers about 300 to 350 square feet per gallon, chlorinated rubber covers about 300 to 400, and acrylic covers about 350 to 400. Use the lower number on a rough or porous surface, and use the higher number only when the surface is smooth and ready for topcoat.
Lay a drop cloth and use painter’s tape to protect the coping and fittings. Sand rough spots with the grit the paint label recommends, then apply the primer and let it cure before the topcoat.
Stir the paint, work in small sections, and keep a wet edge so you do not leave lap marks or heavy brush strokes. Check the label for VOC level, drying time, and cure time, and pick a gloss, satin, or matte sheen that suits the pool. Zero VOC epoxy formulas offer a low-odor option that still provides industrial-grade stain and wear resistance.
Acrylic costs the least, chlorinated rubber sits in the middle, and epoxy costs the most. Epoxy’s higher price can buy up to 8 years of service, while acrylic usually lasts 2 to 3 years.
Coverage Per Gallon
Coverage per gallon tells you how much paint thickness one coat will leave on the pool shell. Check the product data before you buy buckets, because the number changes with the coating type and the surface.
Epoxy usually covers 300 to 350 sq ft per gallon on a recoat. A thicker build can reach about 500 sq ft per gallon on painted surfaces, so check the surface condition first.
Rubber paint covers 300 to 400 sq ft per gallon. Acrylic covers 350 to 400 sq ft per gallon and works for tight budgets. Manufacturer baseline coverage should be adjusted down for unprimed or porous surfaces.
Divide the pool’s total square footage by the coverage number to get the gallons for one coat. Add one extra gallon for mistakes, spills, and touchups.
Sand rough spots with 80 to 120 grit, then apply primer to bare patches before the topcoat. Keep a wet edge while you roll to prevent lap marks and heavy brush strokes.
Check the VOC limits and pick a gloss, satin, or matte sheen that fits the pool area. Let the drying time pass before a recoat, and let the full cure time pass before the pool goes back in service.
Use a drop cloth and painter’s tape to protect the deck and fittings. Stain, varnish, and polyurethane belong on wood, so keep them out of pool work.
Measure the pool twice and buy the gallons your math calls for. Do not trust your eyes on a dry pool because the color and sheen shift when wet.
Cost Tiers Compared
Acrylic pool paint is the lowest cost option, chlorinated rubber sits in the middle, and epoxy is the top tier. You pay more for service life and film build, so use service life when you set the budget.
Prices per gallon run about $50 to $80 for acrylic, $80 to $120 for chlorinated rubber, and $120 to $180 for epoxy. Add primer and a topcoat to the estimate, plus drop cloths and painter’s tape for masking.
Acrylic needs a recoat every 2 to 3 seasons, so over 6 years you buy it about three times. Epoxy can stretch to 8 years, so one epoxy job covers that same span with fewer coating days.
Coverage matters too: a 500 square foot pool needs about 2 gallons of acrylic at 350 to 400 square feet per gallon. High build epoxy covers about 500 square feet per gallon, so the same pool may need only about one and a half gallons, and you should add an extra gallon for touch ups.
Keep a wet edge while you roll so lap marks and brush strokes do not show in the topcoat. Check drying time against cure time before you refill the pool, and follow the VOC limit for your area.
Scuff glossy spots with 80 grit, then apply the primer and topcoat the maker recommends. Gloss, satin, and matte sheens change how the finish looks, and surface prep controls how those sheens read.
If you are flipping the house, choose acrylic. If you own the pool and plan to stay, epoxy makes more sense because it spreads the cost over more years.
Choosing Pool Paint: Speed vs. Durability?
Most pool owners face this choice, and the practical answer depends on how soon you want to swim. If you want the pool filled and ready within a week, use acrylic, but plan to repaint in two or three summers.
If you want to avoid repainting for six to eight years, epoxy is the stronger choice. It costs more and takes more work, but the satin sheen holds up well when you follow the recoat window.
Acrylic dries in about three days and can go over a surface that is still a little damp. It is cheap and fast, yet it fades, loses gloss, and will need a fresh topcoat before epoxy would.
Epoxy needs dry conditions, careful surface prep, the right primer, and a sanding grit that matches the coating. The recoat window is strict, usually 16 to 72 hours, and missing it means sanding before the next coat, so check the VOC level and ventilate the area.
Paint with a rubber base sits in the middle on price and performance, but it still falls short of epoxy’s service life of about eight years. Compare the drying time and cure time before you choose, because a tacky film and a cured film behave differently under foot traffic.
Acrylic gives you about four hours of wet edge for recoating, so plan your brush strokes and lap marks carefully. Epoxy gives you a wider window, but you still need to watch the clock and keep the drop cloth and painter’s tape in place until the job is done.
If you want low fuss now, choose acrylic. If you want low fuss later, choose epoxy, and I would take the epoxy headache once rather than paint with acrylic twice.
Frequently Asked Questions
Can I Paint Over Old Epoxy Without Stripping It?
You can paint over old epoxy without stripping it when the existing coating is intact and well bonded. Clean away grease and dust, then scuff the surface with 80-grit sandpaper so the new paint can grip.
Test a small area with an adhesion test before committing to the full job. If the tape pulls up failed spots, strip those areas rather than painting over weak epoxy.
Apply your first coat within the product’s recoat window, often 16 to 72 hours, or sand again for mechanical tooth. For a durable epoxy floor coating, follow the label’s recoat time and avoid heavy coats that trap solvents.
Will Pool Paint Fix Hairline Cracks or Spalling?
Pool paint will not fix hairline cracks or spalling. It can hide faint hairline cracks, but spalling and structural damage need proper repair before coating.
Crack bridging is not a paint trick. Grind loose concrete and open cracks into a V groove with a diamond cup wheel, then patch with hydraulic cement and let it cure 24 hours.
Use a primer and the recommended two coats, but do not rely on paint to span moving cracks or rebuild weak concrete. If you see spalling, remove all unsound material first; otherwise the coating will fail.
What Happens if Rainwater Hits Uncured Epoxy?
Rainwater hitting uncured epoxy can cause white blotches, blushing, and weakened adhesion. Treat the damage as contamination, not a cosmetic issue.
Let it dry for seven dry days, then sand the affected area with 80 grit until the white haze is gone. Wipe with clean water or denatured alcohol and let it flash off before recoating.
Clean and recoat after removing all amine blush, or use an epoxy primer if the surface stays tacky. I would wait seven dry days before filling, so do not risk trapping moisture under a patch.
Is Epoxy Safe for Saltwater or Chlorine Pools?
Epoxy is safe for saltwater and chlorine pools when applied as a proper pool epoxy coating over a correctly prepared surface.
For a long lasting finish, apply two coats and sand the first coat with 80 grit once it is tack free. Most systems let you recoat within 24 hours, so plan the work around that window.
Epoxy handles chlorinated water and saltwater well, and its chlorine resistance outlasts acrylic by years. Expect up to 8 years versus acrylic’s 2 to 3, which means fewer recoats and less labor.
Check your product’s data sheet for exact dry times, but that 80 grit sanding step is a simple way to improve adhesion today.
How Soon Can I Swim After the Pool Is Filled?
You can swim after the pool is filled once the coating is fully cured and water chemistry is balanced, usually 7 days for epoxy and 3 days for acrylic.
Confirm the cure window with the product data sheet, then test pH, free chlorine, and total alkalinity. For a practical check, target pH 7.4 to 7.6, free chlorine 1 to 3 ppm, and total alkalinity 80 to 120 ppm.
Epoxy needs the longer curing time, so keep swimmers out for the full 7 days even if the surface feels dry. Acrylic may be ready sooner, but do not rush the pool startup or skip chemistry testing. If conditions are cool or humid, add a day and retest.
Rounding Up
Pool paints come in acrylic, epoxy, and rubber, so choose by cost and lifespan. Check your pool surface and write down whether it is concrete before you shop.
Compare acrylic and epoxy by fade time and lasting power. Ask whether your concrete pool needs the longer-lasting coating.
Acrylic is the weekend warrior choice but fades; epoxy runs $100-plus and laughs at summers, so remember you do not need perfection, just patience. Pick epoxy for longevity, acrylic for a quick fix, and rubber only if you hate yourself.
Pool paint uses.


