How to Apply Infrared Paint Strippers: Step-by-Step Guide
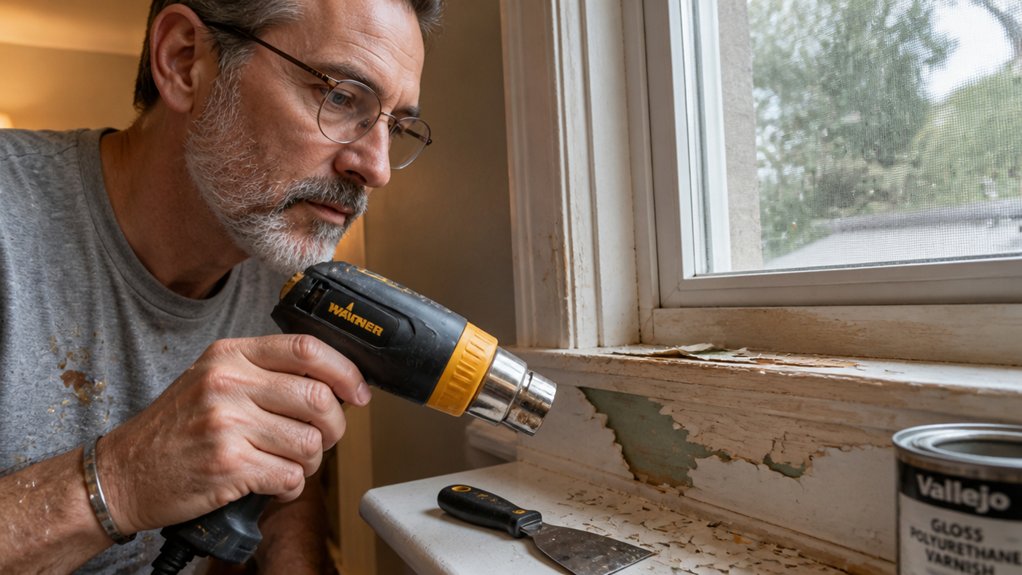
Stripping old paint with an infrared heater is the fastest way to get back to bare wood without the mess of chemicals. You can remove multiple coats in minutes, but only if you respect the tool and the technique.
The trick is working in tiny sections, holding the heater steady, and scraping at the right angle to protect the grain. This guide covers the full process, from choosing the right heat setting to handling the primer and bare wood before your new finish. You will also learn how to avoid scorching, manage drying time between passes, and prep the surface for a clean top coat.
Once you master the rhythm, it becomes a smooth, almost therapeutic process. Here is the step by step breakdown from setup to final cleanup.
Quick Answer
- Set up ventilation with two fans and seal plastic sheeting for dust containment.
- Remove hardware, mask glass, and test for lead before heating any surface.
- Hold infrared heater one inch away for 5–60 seconds until paint softens.
- Scrape with a 30-degree blade, working in small sections with the grain.
- Dispose of lead waste in double-bagged, labeled bags per local regulations.
What to Know Before Infrared Paint Stripping
Before you plug in that new infrared tool, accept one basic fact: this is a marathon, not a sprint. You are not blasting paint off with a torch. You are coaxing it loose, section by stubborn section, like easing old varnish away from wood grain.
The two numbers that rule this job are infrared wattage and heat dwell time. Wattage is your brute force, so more watts soften paint faster, but they also make the unit heavier to carry. Dwell time is how long you hold the heater in place, usually 10 to 60 seconds.
If you get impatient and yank it away early, you will just scrape half-soft paint like a chump. Trust the timer, because it is smarter than your twitchy trigger finger.
Keep your drop cloth down and painter’s tape on any trim you want to protect. Softened paint lifts easier when you work a putty knife with the grain, just like you would with a finish scraper.
Remember that you are dealing with heat, so check the surface temperature with your hand before you sand. Use a finer sanding grit, like 120, to smooth the wood after stripping, and blow off dust before you apply any primer.
A good primer seals the bare wood and gives your new topcoat something to bite into. Watch the drying time versus cure time on your varnish or polyurethane, because rushing a cure leads to lap marks and brush strokes.
Keep a wet edge as you coat, and work in sections to avoid uneven sheen. Whether you pick satin, gloss, or matte, the finish will look flat if you rush the stripping step.
Finally, mind the VOC levels in your paint and stripper, and work near an open window or fan. Infrared is clean and low-fume, but the remaining debris is still dust and old finish, so sweep up before you start coating. To protect delicate wood such as cedar, rely on a medium-wave unit that spreads heat evenly and prevents scorching.
Gear Up and Prep Your Workspace for Paint Debris

Before you fire up that infrared stripper, suit up like you’re handling a tricky job. Safety glasses, heat-resistant gloves, long sleeves, and a respirator indoors are non-negotiable, since old paint can release nasty fumes and dust. Lay a drop cloth or plastic sheeting under the work area to catch the falling debris, and keep a fire extinguisher close by. You don’t want a surprise flare-up mid-project, especially on a quiet afternoon. For heavy-duty debris, consider a 6 mil polyethylene sheet rated for sharp debris and demolition dust to protect the floor beneath.
Then, do a quick surface prep pass. Remove knobs and hinges, wipe off dust with a tack cloth, and use painter’s tape to mask off anything you don’t want heated. This keeps the stripping smooth and the mess contained, so you’re not chasing scraps later. Check your sanding grit before you start, too, because rough edges after stripping need a medium grit like 120 to smooth out, not a fine one that just polishes the paint.
Safety Gear Essentials
My garage looks like a hazmat team’s yard sale before I even plug in the heat gun, and that’s exactly how it should be. You need heat resistant gloves, not the flimsy grill kind, so get silicone-backed ones for about $15.
They save your knuckles when you scrape off that blistering paint, and they let you keep a steady hand with the scraper. For extra dexterity during detailed scraping, powder-free nitrile gloves under your heat-resistant pair can keep oil and debris off your skin without adding bulk. Check your respirator fit before you start, because a loose mask lets in fumes and fine sanding dust.
Do the seal test by covering the vents and inhaling, and the mask should suck tight against your face. That takes ten seconds and beats coughing all night after you’ve laid down a coat of low-VOC primer.
Long sleeves and safety glasses round out the kit, no exceptions, even if you’re just touching up a satin topcoat. I skip cheap gear, since burned fingers ruin a good rhythm when you’re cutting in a wet edge.
Suit up like you mean it, and the job stays boring, which is exactly what you want. You’ll focus on avoiding lap marks and brush strokes instead of nursing a blister, and that makes the final sheen look clean and even.
A drop cloth and painter’s tape finish the setup, and you’re ready to work. Pick the right sanding grit before you start, from coarse to fine, so you don’t fight the surface later.
Drying time matters for recoat, but cure time matters for durability, so read the can and plan your coats. Stay patient, keep your gear on, and the finish will speak for itself.
Ventilation and Containment
Open the windows and set up two box fans to create a strong cross breeze. Place one fan at one end blowing in and another at the opposite end blowing out, so the airflow pushes fumes and dust away from you. This matters most when the paint starts blistering, because the air gets thick fast while you scrape.
Containment is where you win the cleanup battle. Lay down thick plastic sheeting with overlapping edges and tape them to the floor to catch every flake before it turns into dust that drifts around your garage. Use painter’s tape along the edges for a tight seal, and keep a drop cloth handy for any drips or spills. This simple setup keeps the mess in one spot, so when you finish, cleanup takes five minutes instead of five hours. For the sheeting itself, a pre-taped masking film with a built-in adhesive edge can speed up sealing the plastic to baseboards, carpet, and floors.
Surface Prep Checklist
Airflow is sorted and floors are tarped, so now you can focus on the surface itself. Loose hardware like knobs, hinges, and locks will only get in your way, so pull them off first.
Give the wood a quick brush-down to clear dust and debris; you don’t want to bake grime into fresh heat. Check for rot or protruding nails and fix those now, not mid-job.
Set up bright workspace lighting so you can see bubbling or peeling spots clearly, and keep your tool storage within arm’s reach. Hunting for a scraper while paint cools is a mistake you can avoid with a little setup. Keep a paint can opener handy so you can pry lids and reseal cans without damaging the rims.
For windows, mask off the glass with aluminum mats to protect the panes while you strip the sash. Ten minutes of prep here saves an hour of frustration later, so do it right the first time.
Use a drop cloth under your work area to catch chips and dust, and have painter’s tape ready for any trim you want to protect. If you’re stripping down to bare wood, start with a coarse grit like 80, then move to 120 for a smooth base before you apply primer.
Primer seals the raw wood and gives your topcoat something to grip, so don’t skip it. Choose a satin or gloss sheen for trim and doors, since they wipe down easier than matte.
Keep a wet edge while painting to avoid lap marks, and remember that drying time is not the same as cure time. You can recoat after a few hours, but wait a full week before heavy use or cleaning with strong solvents.
Stain or varnish works well for a natural look, but polyurethane offers tougher protection against scratches and moisture. Work in thin coats and sand lightly between them with fine grit, like 220, to keep the finish smooth.
Low-VOC products reduce fumes indoors, so read the label and ventilate the room while you work. Finally, check your tools are clean and your rags are disposed of safely, since oily rags can catch fire on their own.
Inspect the Wood and Mask Off Protected Areas

Before plugging in that infrared stripper, inspect the wood surface carefully for rot, soft spots, loose boards, or protruding nails. Fixing those issues now beats dealing with charred spots or a snagged scraper later, and this check sets up your entire job.
A quick pass with your fingers or a putty knife will reveal weak areas, and old putty or filler will soften nicely under heat, so plan to scrape it out. For heat-sensitive edges like glass, hardware, or trim, lay down aluminum protection mats or painter’s tape to keep them safe from scorching. Since this method relies on heat rather than chemicals, it is crucial to verify the finish is not lead-based, as water-based strippers offer a safer alternative for hazardous coatings.
| Check | Why It Matters |
|---|---|
| Rot or soft spots | Heat can char them fast, ruining the surface |
| Loose nails | They snag your scraper and dull the blade |
| Old putty or filler | Infrared softens it, making removal easy |
| Heat-sensitive edges | Mask with aluminum mats or painter’s tape |
After masking, pick a scraper with a sharp blade that matches the wood profile, like a curved edge for moldings or a flat one for panels. Let the tool glide with light pressure instead of forcing it, and keep a wet edge while you work so the softened finish stays consistent.
Before you start, set down a drop cloth to catch debris and check that your work area has good ventilation, especially if you’re using a low-VOC stripper later. Once the old finish is off, sand with 120-grit for bare wood, then 220-grit before applying primer, and you’ll have a clean base that takes stain, varnish, or polyurethane evenly.
Keep your strokes smooth and overlap them slightly to avoid lap marks, and remember that drying time matters more than cure time at this stage. Work in small sections, wipe dust off with a tack cloth, and you’ll finish with a surface that’s cleaner than when you started.
Position the Heater and Time Each Pass Correctly
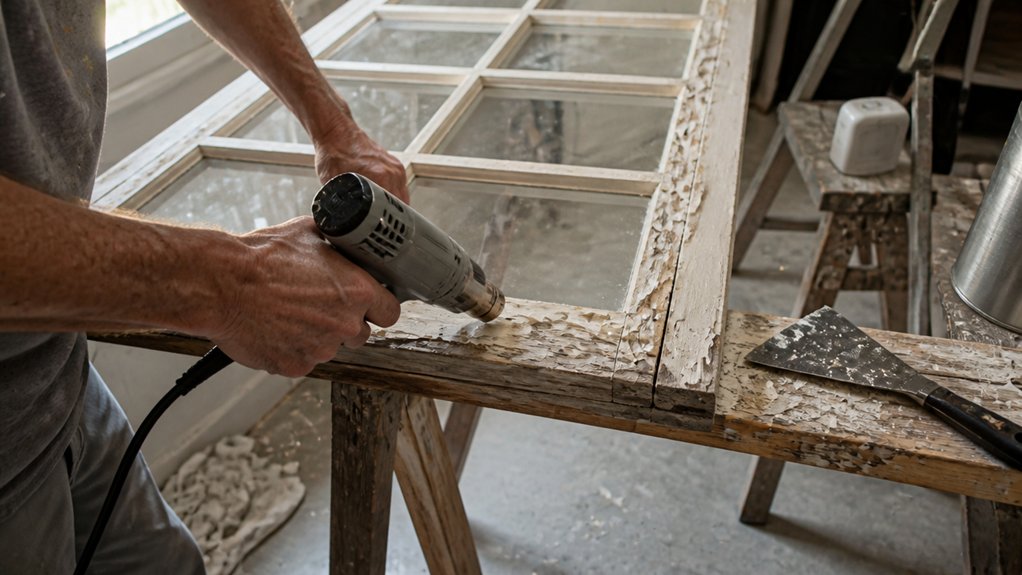
Once the wood is prepped and taped, position the heater and time your passes before you scrape. This step decides whether the job flows smoothly or turns into a cycle of re-heating and frustration.
Keep the heater about an inch off the surface for quick passes, or let the fixed plates rest flat when you’re dealing with thicker paint. Your timing depends on the heater model and the paint depth, so start with the manufacturer’s guide and adjust from there.
On my Cobra, I hit about 5 seconds per pass, but I stretch to 30 seconds on the 1100 when the layers are stubborn. Don’t heat a patch bigger than you can scrape in one go, or you’ll watch it cool into a sticky mess.
Work small sections, keep a steady pace, and your rhythm will come fast. Use a drop cloth underneath to catch drips, and keep painter’s tape edges clean so you don’t damage the surrounding finish. A dull edge can force you to press harder, increasing the risk of slips that gouge the wood.
Test your timing on a scrap area first, especially if you’re unsure about the paint depth. If you’re burning the wood, pull the heater back slightly or reduce the time.
Once you’ve scraped a section, sand it with 80 grit to smooth any residue before priming. This prevents lap marks later when you apply the primer and topcoat.
Remember that drying time differs from cure time, so don’t rush the varnish or polyurethane. Check the sheen you want, whether matte, satin, or gloss, and pick your topcoat to match the room’s light.
Scrape Softened Paint Without Damaging the Wood

Let the scraper do the work, not your arm. Match the blade to the wood’s shape, so a flat pull scraper works on flat panels and a curved profile scraper follows trim and moldings.
Hold the blade at about 30 degrees to the surface. Use long, even strokes to lift thick ribbons of softened paint, and you will not gouge the grain.
Work with the wood’s direction, never across it, to keep the surface smooth. If you hit a stubborn patch, reapply a little paint stripper and wait a few minutes instead of pressing harder. A hammer cap can help loosen stubborn residue with gentle taps, but avoid heavy hammering that can warp the blade.
This method makes sanding easier since you remove the bulk of the old finish first. You can then sand with 120 grit, followed by 180 grit, to prep the bare wood for primer and topcoat.
Clean up any residue with a damp cloth and let the wood dry fully before priming. Use a low-VOC primer to seal the grain, then apply your satin or matte topcoat with a brush, keeping a wet edge to avoid lap marks.
Drying time matters more than you think, so wait overnight before a second coat. A drop cloth and painter’s tape protect the surrounding trim, and a quick stir of the varnish or polyurethane avoids brush strokes in the finish.
Pull Scraper Control
Most people ruin wood with the scraper, not the heat. Grip it lightly and trust the tool, because control comes from finesse, not force.
Pull the blade toward you with a steady, sweeping motion. Keep the blade angle low, nearly flat against the surface, and let your wrist stay loose.
If you tense up, you will gouge the wood. The softened paint should lift itself, so you are guiding the scraper, not chiseling with it.
Short pulls work better than long, angry strokes. A clean scrape whispers, while a gouge screeches, so listen to the sound.
Reheat stubborn spots instead of muscling through them. Stop the moment you feel resistance, because that is the wood telling you to back off.
When the heat and scraper work together, the old finish peels away clean, like a wet edge rolling on primer.
Use a satin or matte topcoat afterward to protect the bare wood, and give it the full drying time before you sand between coats.
Keep a drop cloth under your work and painter’s tape on any trim you want to keep clean.
Trust the heat, and the scraper becomes a whisper. Low-pH formulas are better suited for delicate surfaces like plaster if you need a chemical alternative.
Profile Matching Blades
Every wood surface has its own fingerprint, and a flat blade just smears paint into the grooves instead of lifting it out. Profile matching blades solve this by mirroring the exact curve of your trim, like crown molding or beadboard.
This lets you scrape paint without gouging the grain, so you keep the detail intact. Grab a flexible scraper set for around $25 and press them gently into the profile.
For tricky coves or custom shapes, heat a steel blade and bend it to match, then cool it fast. You’ll feel the difference right away: smooth pulls, zero splinters.
Don’t force the blade; let the softened paint release on its own. On flat areas, stick with a standard pull scraper and a fine sanding grit like 120.
But for carved details, profile blades are your best friend, especially when you’re working with a primer coat before your topcoat. Try one on a door frame with old varnish or polyurethane, and you’ll never go back.
Use short strokes and keep a wet edge as you move, so you avoid lap marks in the finish. The right sheen, whether satin or gloss, will show off the clean lines you’ve saved.
Just lay down a drop cloth and tape off the glass first. With a little patience, you’ll strip the old paint without touching the wood’s soul. Woven fabrics with interlocked fibers offer similar lint-free durability for finishing the bare wood with a fresh coat.
Remove Paint From Moldings, Trim, and Carved Details

Stripping paint from moldings, trim, and carved details is where infrared heaters truly shine, but it’s also where patience becomes your main tool. I work in tiny sections, heat for five seconds, scrape, then repeat, and that steady rhythm keeps me from burning the wood or my temper.
Carved rosettes test your grip, window muntins feel like a hundred mini-projects, and deep grooves hide paint like a grudge. You’ll curse, then grin, then curse again, but when that soft, clean wood appears under the old varnish, it’s pure victory.
Check your infrared wattage comparison before you start, because lower wattage means slower, safer heat for delicate profiles. Also verify your extension cord gauge, since a thin cord starves the heater and makes the job crawl.
Match your scraper to each curve, and let the heat do the heavy lifting instead of forcing the blade. Use a 5-in-1 tool for flat runs, but switch to a curved carbide scraper for the cove details.
Lay down a canvas drop cloth to catch the paint flakes, and keep a wet edge on any primer you touch up later. Sanding grit of 120 works well for smoothing the bare wood before you apply a fresh stain or polyurethane finish.
Work in good light, and wipe the surface with a tack cloth after scraping to remove dust before any topcoat. The low VOC heat softens old oil paint quickly, but it won’t blister the wood if you keep the heater moving.
For tight spots like muntins, I heat for three seconds and scrape with a stiff putty knife held at a shallow angle. Drying time matters less here than the heat soak, so don’t rush the cool-down before you sand.
A satin sheen hides small imperfections on trim better than gloss, so pick your finish after you see the bare wood. If you’re staining instead of painting, test a hidden spot first to check how the old wood accepts the color.
Keep your scraper sharp and your grip loose, and the carved details will come clean without gouging. That’s the whole trick.
After Stripping: Sanding, Disposal, and Lead Safety
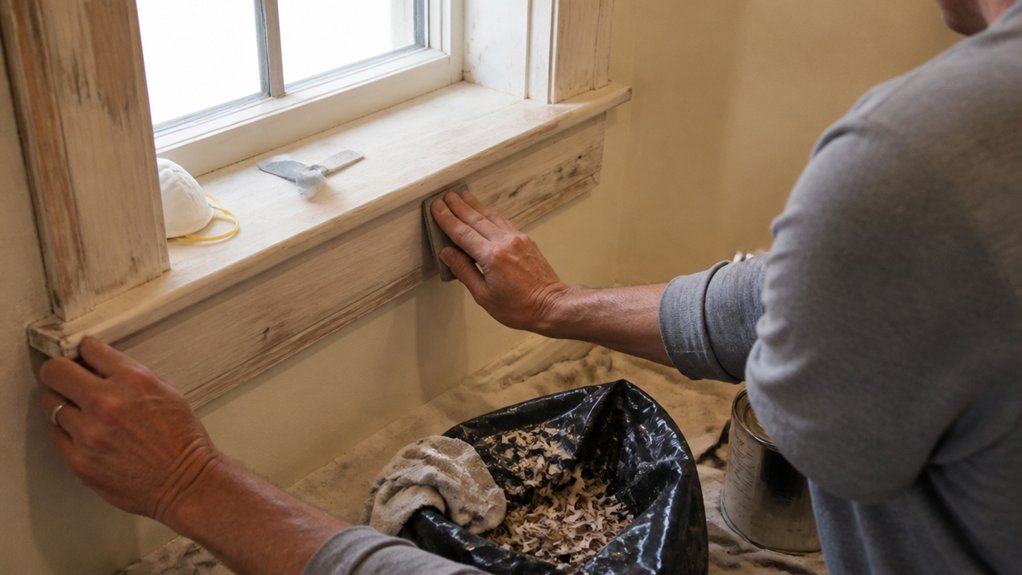
Once the scraping is done and the bare wood is visible, the job moves into cleanup mode. Start with a light sanding using 120-grit paper to smooth any leftover fuzz. Don’t press hard, or you’ll burnish the wood and make it too slick for the next coat.
If your house was built before 1978, test any suspicious dust for lead before you vacuum anything. Infrared stripping keeps fumes low, but the dust still carries risk. For waste storage, fold the plastic sheeting you laid down, roll it inward, and tape it shut like a sealed package.
Double-bag everything, label the bags clearly, and check your local dump’s paint disposal rules. Most charge a small fee for lead paint waste, so call ahead to avoid surprises. A clean sweep means containing all dust and debris, not just the big chunks.
Use a vacuum with a HEPA filter for the final pass, then wipe the surface with a tack cloth. This removes the fine particles that can ruin a smooth topcoat later. You want a clean, dry surface before you apply primer or stain.
Remember that sanding dust can settle into corners and cracks, so check the floor and nearby trim too. Take your time here, because any leftover lead dust is a hazard for kids and pets. Proper disposal is part of the job, not an extra step.
Frequently Asked Questions
Can Infrared Stripping Damage Interior Drywall?
Yes, infrared stripping can damage interior drywall, and I would avoid it there entirely. The intense radiant heat can scorch the paper face and even ignite the gypsum core if you linger too long, which is a genuine drywall fire risk.
Instead, reserve your infrared tool for wood trim or doors, where you can control the temperature more easily. A safer approach for interior walls is a chemical stripper or a heat gun set low, but test on a hidden spot first.
If you do use infrared on wood near drywall, keep the lamp moving constantly and maintain a six inch gap. Also, watch for hidden moisture behind paint, as it can flash to steam and blister the drywall. For related advice, search “heat gun burn marks on plaster” to see common mistakes.
What Is the Best Way to Clean Scrapers?
The best way to clean scrapers is to work while the residue is still warm, wiping the blade with a rag or wire brush. Heat softens the paint or varnish, so it releases easily if you scrape onto cardboard first, then wipe the metal clean.
For scraper edge upkeep, sharpen often with a fine stone or file to keep the cutting action smooth. A dull edge forces you to press harder, which drives residue into the grain and makes cleaning twice as hard.
Try keeping a heat gun nearby and warm a small section before each pass; this cuts drying time and prevents sticky buildup. For stubborn spots, dip the blade in mineral spirits or a citrus-based cleaner, then wipe dry with a lint-free cloth.
Finally, store scrapers with a light oil coat to prevent rust, and never let wet residue sit overnight. This routine works for both cabinet scrapers and putty knives, and it pairs well with the related task of cleaning sanding blocks.
Can I Use This Method on Painted Brick?
No, you shouldn’t use this method on painted brick. Painted brick’s porosity traps dampness and heat, which can lead to spalling and surface failure over time.
You’ll also encounter uneven softening across the painted layer, plus serious heat retention that makes the process unpredictable. For masonry, stick to chemical stripping or media blasting, both of which handle the substrate’s uneven absorption far better.
If you attempt a heat-based approach anyway, test on a small, inconspicuous patch first. Use a low setting and keep the tool moving to avoid scorching, but expect paint softening to vary by brick density.
For a safer, faster finish, try a gel stripper with a 24 hour dwell time, then scrape gently with a plastic scraper. That gives you control without the thermal risks.
How Do I Store an Infrared Stripper Safely?
To store an infrared stripper safely, let the unit cool completely for at least 30 minutes after unplugging, then wipe the housing with a dry cloth to remove dust and resin residue.
Allow the metal face to reach room temperature, not just the handle, because residual heat can ignite stored rags or damage the case’s foam lining.
Place the tool in a sealed, hard-sided case with a desiccant pack, and keep that case off concrete floors to avoid moisture wicking into the electrical components.
For long-term storage, wrap the power cord loosely, never tightly coiled, and inspect the plug and cord for cracks before each use.
A related term is “heat gun storage,” but infrared units need extra care since their ceramic face is brittle.
One concrete tip: store it with the face pointing upward and place a small cardboard spacer between the trigger guard and the handle to keep the switch from being depressed in transit.
Will Infrared Heat Set off a Smoke Detector?
Yes, infrared heat can set off a smoke detector if the alarm’s sensor catches fumes from heated materials. That said, most false triggers come from dust or moisture, not the radiant heat itself.
Position your detector away from the direct line of sight of the infrared unit, ideally on a ceiling or wall at least 10 feet from the heat source. For a quick test today, wipe the sensor cover with a dry microfiber cloth and open a window before firing up the unit. If you’re heating a room with fresh paint or varnish, those airborne solvents will trip an ionization alarm fast.
I’d also pair this with a heat detector instead of a standard smoke alarm in a workshop, since it responds to temperature spikes, not particles. And always ventilate for at least 30 minutes after heavy use, because the smoke from scorched dust is real, so don’t dismiss that wispy smell.
Rounding Up
Applying infrared paint strippers means trading toxic fumes for a hot metal box, and that is a fair trade. Lead paint becomes ash and scrapings rather than an airborne threat.
Rent one for about $45 a day, and practice on a scrap board before starting real work. Check the unit’s heat settings with a scrap test to see how quickly bubbles form.
Give the first pass time, because it will feel slow, then watch the paint peel off like a sunburned tourist. Finish the job in an afternoon, and feel like a genius, or at least a very warm one.
Read next on safe lead paint disposal and cleanup.