How to Apply Matt Varnishes: Step-by-Step Guide
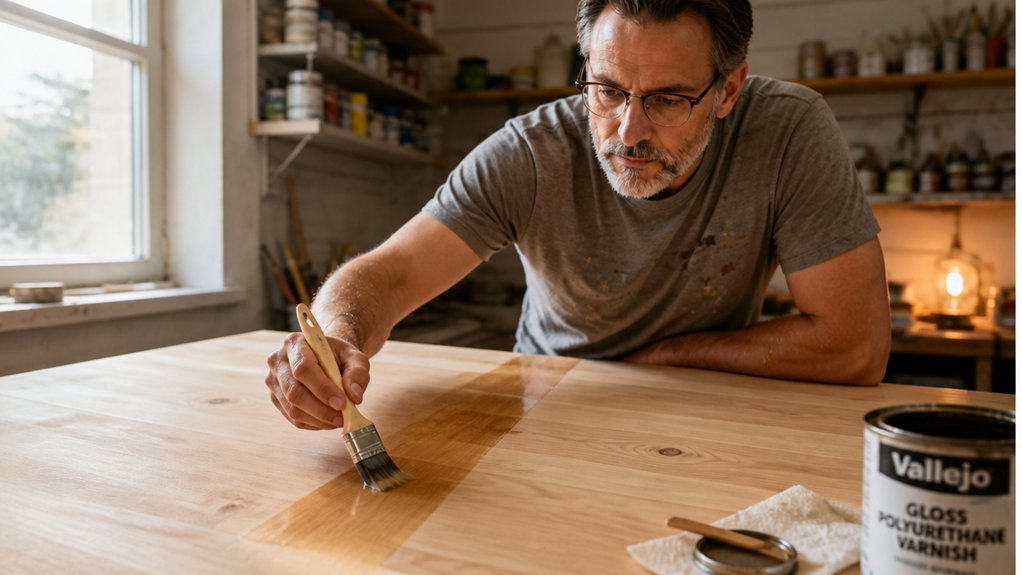
Matt varnish fails for one reason more than any other: rushed surface prep. If you want a smooth, low-sheen finish that actually lasts, the work happens before the brush ever touches the wood.
This guide walks you through the full process, from sanding with the right grit to nailing the recoat window. You’ll learn how to check moisture levels, avoid bubbles, and apply three thin coats without the guesswork.
By the end, you’ll know exactly how to get a flawless matt finish on your next project. Let’s start with the prep steps that make or break the final result.
Quick Answer
- Sand bare wood along the grain with 180–240 grit; check moisture below 12% before starting.
- Apply three thin coats with a flagged brush, moving in one direction with the grain.
- Maintain a wet edge; avoid overbrushing to prevent blotchy matte finish and lap marks.
- Sand between coats with 220 grit, but skip if within the recoat window and still soft.
- Wait full cure time (up to a week) before heavy use; test tackiness with a knuckle first.
Prep Timber So Varnish Actually Bonds
You’re setting yourself up for failure if you skip the prep, because varnish won’t stick to dirty or rough timber. For bare interior wood, sand with 180 to 240 grit paper, always moving along the grain, never in circles or against it.
Those cross-grain scratches will show through a matte finish like a stain on a white shirt. Check the moisture content before you grab the varnish can, using a cheap moisture meter from the hardware store.
Anything above 12 percent means the wood is too wet, and the finish will fail as the timber dries out. New exterior timber needs four to six weeks of weathering before you apply a drop of varnish, so be patient.
Rushing this step leads to peeling within months, and you’ll be stripping it all off again. Use a satin or gloss topcoat for durability, but know that the sheen won’t hide poor prep.
Prep right, sand straight, and confirm dryness, then apply your varnish with a wet edge to avoid lap marks. Skip any of this, and you’re just adding a coat of future problems. Water-based varnishes suit porous surfaces like timber, while solvent-based options work best on slicker materials.
Pick the Right Day and Workspace

The day you choose for varnishing matters more than the brand in the can. I have watched a perfect finish turn into a mess of bubbles and dust by picking the wrong one.
Check the forecast like it is part of the job, because it is. You are fighting three things: high humidity, slow drying, and surface temperature.
Humidity over 85 percent will stall water-based matte varnish and leave sticky spots that ruin the sheen. Damp air stretches drying time from two hours to overnight, and that is when dust loves to land.
Keep the surface temperature between 10°C and 35°C, and watch the dew point so moisture does not condense on your timber after brushing. Pick a windless spot indoors if possible, away from vents and open windows.
A bug landing mid-coat is a lesson you will only learn once. Calm, dry, and cool conditions give you a clean satin or gloss finish every time.
Use painter’s tape to protect edges and a drop cloth to catch drips before they dry. Sand between coats with fine grit like 220 to keep the surface smooth, and always keep a wet edge to avoid lap marks.
Remember that drying time is not the same as cure time, so wait a full day before heavy use. Low-VOC water-based varnish still needs the same patience as oil-based polyurethane. Heat and low humidity can accelerate drying by roughly 30 percent, but beware that thinning with water speeds drying at the cost of a softer final film.
Stir and Thin Matt Varnish Without Bubbles

Pour the varnish only after you have dealt with bubbles at the source. Shaking the can traps air, so stir slowly with a flat paddle instead.
Pour the stirred varnish through a synthetic mesh strainer into a clean cup. This catches dried bits and clumps that would otherwise leave rough spots in your finish.
Shaking creates foam and air pockets, so always stir rather than shake. Skipping the strainer lets dust and bubbles through, so filter every pour.
Over-thinning weakens the film and slows the cure, so add thinner in small amounts, about 5% at a time. For water-based matt varnish, skip thinning entirely because it flows straight from the can.
Oil-based varnish needs only minimal thinning, or you trade durability for no real benefit. Keep the wet edge active while brushing to avoid lap marks and brush strokes.
Work on a drop cloth and use painter’s tape for clean edges. Let the topcoat dry fully before handling, and remember that cure time is longer than drying time. Water-based formulas stay crystal clear and non-yellowing, making them ideal for light woods and low-odor rooms.
Stir, strain, and leave the thinner alone. Your matte finish will stay smooth and bubble-free.
Brush On Thin, Even Coats

With your varnish stirred, strained, and in a clean cup, you have already done the hard part. Now you need to get it onto the wood without creating a mess.
Load your brush moderately, then lay down thin coats moving with the grain using long, smooth strokes. Do not overbrush once it starts to set, because that creates streaks and brush strokes you will regret.
A thick coat drips, sags, and dries unevenly, while thin coats dry faster and lay flatter. Always blend back into the still-wet edge so you avoid lap marks showing through.
Even coverage matters more than one heavy pass, so do three light coats instead, especially on vertical surfaces like cabinet doors or table legs. This approach also helps you manage drying time versus cure time, since each thin layer cures more predictably. To achieve this, choose a brush with flagged synthetic tips that distribute the varnish evenly and prevent overloading.
Your patience now pays off later in a smooth, even sheen, whether you are using varnish, polyurethane, or a water-based topcoat. Keep a drop cloth down and painter’s tape on edges if you want crisp lines, and sand lightly between coats with fine grit like 220 to remove dust nibs.
Before you start, check the VOC level on the can and work in a ventilated area, since strong fumes can ruin your finish and your health. Remember, a thin, even coat with a wet edge will give you a cleaner result than a thick one every time.
Time Your Varnish Recoats: Sand or Skip

Timing your recoats is about watching the varnish, not the clock. Most mistakes happen because a coat feels dry to the touch but isn’t ready for another layer.
Curing time varies with the conditions in your shop. At 80% humidity, a label that says “recoat in 2 hours” stretches to 4 or 5 hours, easy.
You test by pressing a knuckle into a hidden corner. If it feels tacky or leaves a mark, wait longer, and keep the wet edge alive when you do apply the next coat.
For a water-based polyurethane, use 220 grit sanding between coats if you want intercoat adhesion, but skip sanding if you are within the recoat window and the surface is still slightly soft. Water-based formulas offer about 5% expansion capacity, which helps prevent the cracking that can occur if you sand too aggressively or apply a rigid film too soon.
Always wipe the surface with a tack cloth after sanding to remove dust. Brush strokes and lap marks show up fast if you rush, so keep a steady pace and lay down thin, even passes.
Use primer first on bare wood or stain, then topcoat. Check the sheen you want, whether gloss, satin, or matte, and match the recoat timing to the exact product you bought.
VOCs matter for ventilation, not for timing, but low-VOC varnishes often cure slower. Keep a drop cloth down and painter’s tape on edges before you start, so you can focus on the film, not the cleanup.
Drying time means the surface is dry to touch, but cure time means the film reaches full hardness. That full cure can take a week, so avoid heavy use or stacking items on the piece until then.
Apply the Final Coat, Then Clean Up
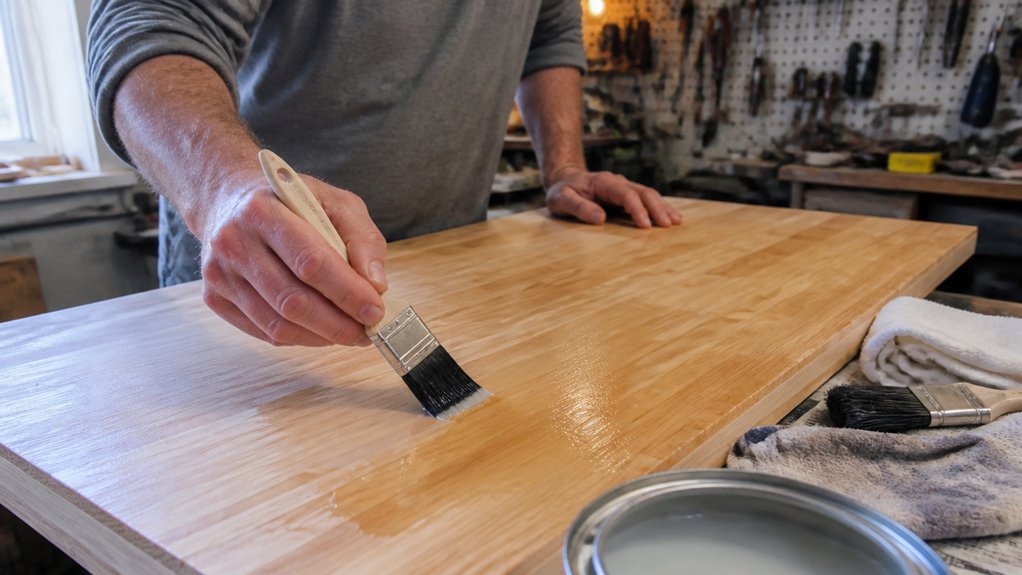
The final coat is your payoff for all the prep work, so stay focused and don’t rush it. Use your cleanest brush for this pass, and load it lightly to lay down a thin, even layer of varnish or polyurethane.
Move in one steady direction along the grain, and keep a wet edge as you go to avoid lap marks and brush strokes. A sloppy finish here means sanding down and starting over, so take your time with each stroke.
Once the topcoat is dry to the touch, check the drying time on the can, but remember that cure time is longer. Clean your brush right away with the right solvent, and wipe the rim of the varnish can before sealing it to prevent a crusty mess. For optimal protection on porous woods, consider a sealer that penetrates at the cellular level to build a flexible, breathable shield.
Pour leftover finish back into its original container, but never dump it down the drain. Lay your brush flat to dry on a drop cloth, and store your painter’s tape and sanding grit for the next project.
Final Coat Strategy
The final coat is where your prep work pays off, and the reward is a finish that looks smooth and even. I skip thinning entirely for this pass and use my cleanest brush to get the best durability, not just a nice appearance.
Keep the coat thin, because a heavy hand leads to runs and an uneven sheen. Always make one pass in one direction, going with the grain and never backtracking. A clean brush like the Gamblin Gamvar Varnish Brush with flagged bristles helps ensure even coverage without streaks.
Once the coat is set, leave it alone. Overbrushing ruins your gloss level control and can turn a matte finish into a blotchy mess.
You will know you are done when the surface feels smooth and not sticky. That is your sign to stop, set the brush down, and move on to cleanup.
Trust the process, and your topcoat will cure into a surface that resists scratches and looks great. Use a drop cloth and painter’s tape during this step to keep the wood stain and varnish areas clean.
Brush Cleaning Basics
The finish may look perfect, but the job isn’t complete until your brush is clean. Brush cleaning is the unglamorous, non-negotiable final step that protects your tools and your next project.
For oil‑based varnish or polyurethane, use mineral spirits; for water‑based paint or stain, grab warm soapy water. Work the solvent through the bristles from the heel up to the tip, then rinse and repeat until no color bleeds out.
Rushing this step ruins brushes, so don’t skip the final reshape. After washing, wipe the bristles dry, press them back into their original shape, and wrap the head in paper to hold the form while it dries.
| Type | Cleanup Step |
|---|---|
| Oil‑based varnish or stain | Rinse in mineral spirits, then wash with dish soap and warm water |
| Water‑based paint or topcoat | Rinse under warm water, then wash with mild detergent |
| Any brush | Wipe dry, reshape, wrap in paper, store flat |
Never pour dirty mineral spirits down the drain. Let the sediment settle overnight, strain the clear liquid into a sealed jar, and reuse it next time; that’s practical solvent management, not stinginess.
A clean brush keeps its edge, so your next topcoat lays down evenly without brush strokes or lap marks. Ten minutes of care now saves you a new brush purchase and the frustration of shedding bristles in your finish.
For brushes with stubborn, hardened residue, consider a heavy-duty soak cleaner like Krud Kutter to loosen dried paint before your regular rinse.
Leftover Varnish Storage
Saving leftover varnish is a classic trap, and I’ve ruined more cans than I’d like to admit by ignoring the basics. You’ve applied the final coat, cleaned your brushes, and now you’re staring at that half-full can.
Don’t let it become a skinned-over mess. Pour the leftover varnish into a clean, airtight container, and never pour it back into the original can, because that introduces dried bits and shortens the shelf life.
Label the container with the date and type of finish using a marker, so you’ll know exactly what you’re grabbing in six months. Store it in a cool, dark spot, like a basement shelf, not your garage’s sunlit window where UV rays can break down the resin.
That airtight seal keeps oxygen out, which is varnish’s main enemy, and it also prevents moisture from getting in and causing cloudiness. Tight-fit metal lids with rubber gaskets are a proven way to block both oxygen and moisture. I’ve salvaged good polyurethane for touch-ups this way, saving cash and keeping my satin sheen consistent on later repairs.
Spend two minutes now to avoid a crusty disaster later, and you’ll always have a reliable finish for small projects or spot fixes. A quick tip: wipe the rim of the container clean before sealing, because any dried residue can break the seal and let air sneak in.
Frequently Asked Questions
Can I Apply Matt Varnish Over Oil-Based Varnish?
Yes, you can apply matt varnish over oil-based varnish, provided you prepare the surface correctly. Start with a compatibility test on a small, hidden area to confirm the topcoat won’t lift or react with the old film.
Clean the surface with a mild degreaser and a tack cloth, then lightly sand with 220-grit paper to create tooth. Don’t skip this step, because a glossy base will cause the matt layer to peel or fish-eye.
After sanding, wipe away all dust and apply two thin coats of matt varnish, waiting at least 4 hours between them. Test your final coat on scrap wood first to see if the sheen level satisfies you, since matt finishes vary by brand and can look slightly satin over a dark base. Use a high-quality synthetic brush to avoid bubbles, and keep the room dust-free for a smooth result.
How Do I Fix Brush Marks in My Final Coat?
To fix brush marks in your final coat, lightly sand the surface with 320 grit sandpaper and reapply a fresh, thin topcoat. Use a sanding block to keep pressure even and avoid cutting through the film, especially on edges and corners.
If you sand too aggressively, you’ll expose the previous layer, so work in short, circular motions and wipe the dust off with a tack cloth before recoating. Choose a self-leveling enamel or water-based polyurethane to help the new coat flow out and hide any remaining ridges.
Always thin the paint by about 10 percent with the manufacturer’s recommended solvent, and apply with a high-quality synthetic brush. Let the drying time stretch to at least four hours between coats, and consider a final “flow coat” with a foam roller for a smoother result.
Why Does My Varnish Look Cloudy After Drying?
Your varnish looks cloudy after drying because trapped moisture is scattering light inside the film. This happens when you apply the coating in damp conditions, on a cool surface, or over dew that condensed overnight.
Wait for a stretch of stable, dry weather with relative humidity below 60%. Also, warm the wood and the varnish can to about 20°C before brushing, which prevents that milky blush from forming.
If you already have the cloudiness, lightly sand the surface with 320 grit and apply one thin recoat coat, but only after the temperature has been steady for 48 hours. The same issue appears in shellac and lacquer, so check your dew point forecast before any clear finish.
What Is the Best Way to Remove Dried Varnish Drips?
The best way to remove dried varnish drips is to combine controlled scraping with careful sanding, choosing your approach based on how fresh and thick the drip is. Start by using a sharp paint scraper or chisel held at a low angle to pop off the bulk of the raised drip, working from the edges toward the center to avoid gouging the surrounding finish.
For the remaining residue, switch to a sanding block with 120-grit paper and sand in long, even strokes until the surface feels flush, then refine with 220-grit to blend the repair into the original sheen. If the drip is unusually hard or old, warm it with a heat gun set to low, keeping the tool moving constantly to soften the varnish without blistering the coating beneath.
A fast drying solvent, like denatured alcohol, can help soften stubborn drips before sanding; apply it with a cotton swab and let it sit for two minutes. Finish by hand polishing the area with 400-grit wet paper and a bit of mineral oil, which gives you a seamless patch ready for a new topcoat. This method also works for lacquer runs, so you can use the same technique across different clear finishes.
Can I Recoat Matt Varnish After 24 Hours Without Sanding?
Yes, you can recoat matt varnish after 24 hours without sanding, but only if you are still inside the manufacturer’s specified recoat window. Most water based varnishes allow a full recoat within 24 to 48 hours, while oil based options often need a longer wait before the next coat can bond properly.
Check the technical data sheet first, because exceeding that window means the surface has fully cured. In that case, a light sanding with 220 grit is the reliable way to guarantee grip. Do a quick adhesion test by applying a small patch and letting it dry, then scratch it with a fingernail to confirm the film stays intact.
If the test fails, sand lightly and wipe off the dust with a tack cloth. This “overcoating” step prevents peeling and saves you from stripping the whole finish later.
Rounding Up
Applying matte varnish means building thin coats, sanding between them, and letting the varnish level out on its own. Patience, not magic, gets you a mirror smooth finish, much like teaching a cat to fetch.
Check your first coat for drips or rough spots before it fully cures. Sand lightly with fine grit between each coat, then wipe off the dust with a tack cloth.
Test your final coat on scrap wood to confirm the matte sheen matches your project’s look. Compare dry times between coats so you never rush the reapplication.
If the wood feels self-conscious, it’s time to seal it and stop staring. A related topic to read next is cleaning brushes after oil based varnishes.