How to Apply Wax Polishes for Wood: Step-by-Step Guide
Wax polishes for wood often get skipped because people grab aerosol cans that leave silicone behind and fail fast. The paste wax method is the better route, and it pairs perfectly with a proper finish routine using primer, sheen, and cure time knowledge.
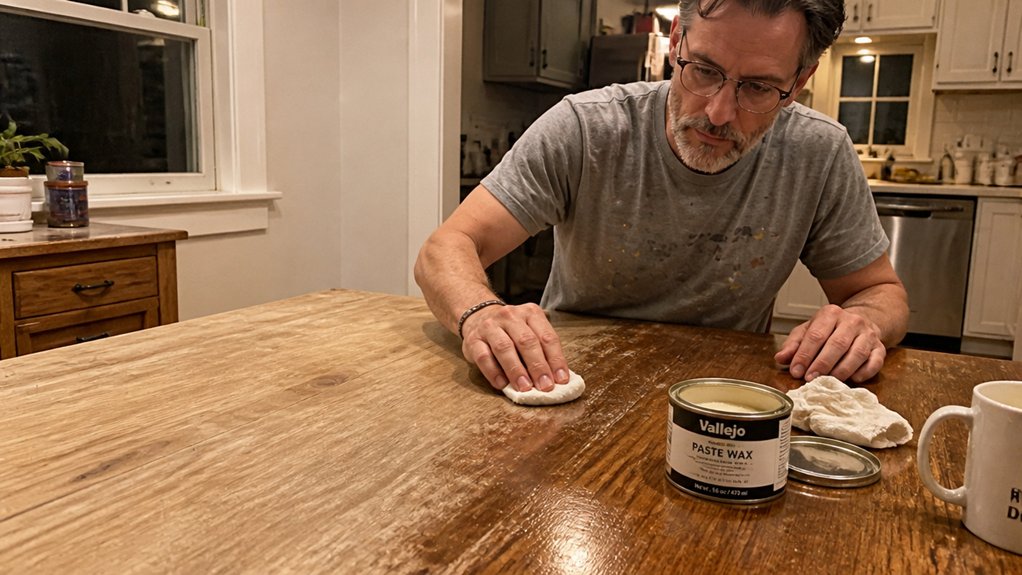
You do not need fancy tools, just 220 grit sandpaper, mineral spirits, and a lint free cloth. Apply a thin coat in circles, let it haze for 15 minutes, then buff to a soft glow.
Two thin coats beat one thick mess, and yearly rewaxing keeps the surface protected. In this guide, I break down each step from surface prep to final buffing, so your project stays clean and refinish friendly.
Quick Answer
- Prepare bare wood by sanding to 220 grit, then wipe with mineral spirits to remove dust and grease.
- Apply a thin, even paste wax coat with a lint-free cloth using circular motions, then straight grain strokes.
- Let the wax dry 15–20 minutes until hazy, then buff with a clean cotton cloth in firm circles.
- Apply two thin coats, waiting overnight for full cure before light use to ensure maximum durability.
- Rewax every 6–12 months for high-touch surfaces, buffing dull areas instead of fully stripping wax.
Why Paste Wax Beats Liquid and Aerosol Polishes
Paste wax is the better choice for finishing wood, and I say that after years of working with all three types. Liquid and aerosol polishes might look like a quick fix, but they often leave behind silicones that soak into the finish and ruin future refinishing work.
Paste wax beats liquid and aerosol polishes, which leave silicones that ruin future refinishing work.
Those sprays promise a fast shine, but you are really coating the surface with a sticky layer, not cleaning it. I have seen the damage show up later, when fresh varnish or polyurethane refuses to stick or blotches appear.
Liquid polishes rely on strong solvents to stay fluid, and that strength is a real risk. A careless pass can eat through shellac or soften a fresh topcoat before you notice.
Paste wax uses gentler solvents like mineral spirits, which gives you more control and a slower, steadier working time. It is forgiving on the wood and does not sneak up on you.
Think about how each product behaves in practice. A spray can is fast and flashy, but overspray gets on everything, including your drop cloth and painter’s tape, and the wet edge dries before you can buff it out.
Paste wax goes on with a rag, lets you keep a wet edge easily, and dries predictably so you can polish it to a satin or matte sheen without lap marks or brush strokes.
The durability also differs. Spray polishes often contain VOCs that flash off quickly, but the film they leave is thin and short lived.
Paste wax builds a tougher layer that handles daily wear, and you can reapply it without worrying about stripping the old finish or damaging the stain underneath.
For a beginner, paste wax is simply easier to manage. You can feel how much is on the rag, you control the pressure, and you avoid the mess of dripping liquid or airborne mist.
It also cuts down on sanding worries, since you can buff a waxed surface lightly with fine grit without pulling up color or leaving swirl marks.
So skip the aerosols and the spray bottles. Grab a tin of paste, apply it in thin coats, and buff it out with a clean cloth.
You get a durable, clear finish with no chemical roulette, and your next refinishing job will thank you. Food-grade beeswax serves as a safe, non-toxic active ingredient in many paste formulas, making them suitable for kitchen surfaces and food-contact areas.
Choose the Right Paste Wax for Your Wood Type
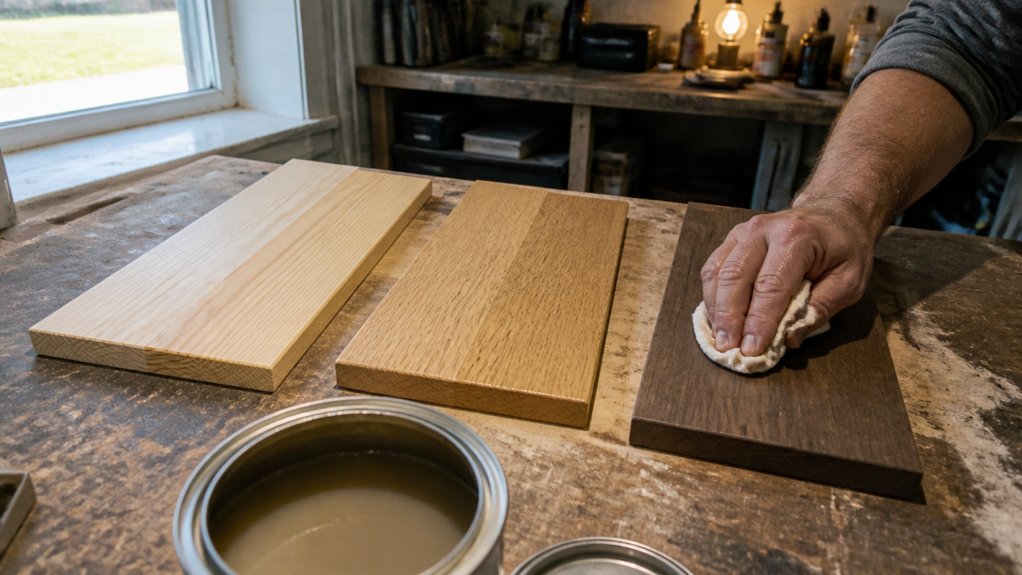
Switching to paste wax is a smart move for your future refinishing work. The first step is matching the wax color to your wood.
Dark woods like walnut or mahogany need a pigmented wax. A light wax will leave whitish specks in the pores, which looks bad. For maple or pine, stick with a natural or light wax.
Paste wax only works on stable, clear finishes like shellac, lacquer, or varnish. Bare wood is a trap: the wax sinks into the grain and won’t come out. I learned that the hard way on an oak table, and it left a cloudy mess under the varnish.
Before you apply wax, make sure the topcoat is fully cured, not just dry to the touch. Drying time for varnish can be a day, but cure time takes weeks. Waxing too early traps solvents and dulls the sheen.
Sand the finish lightly with 400 grit before waxing, and wipe off the dust with a tack cloth. This gives the wax a surface to grip without scratching the gloss.
Use Goddard’s or Renaissance Wax for reliable results. Apply a thin coat with a soft cloth, work in small sections, and keep a wet edge to avoid streaks. For detailed moldings or carvings, a gilding wax with fine metallic powders can add a subtle sheen, but stick to a neutral paste wax for overall protection.
Test the wax on an inconspicuous spot first, like the underside of a drawer. This checks for color shift or adhesion problems before you commit.
Buff the wax with a clean, dry cloth once it hazes over, usually after 15 to 20 minutes. A second thin coat adds depth, but don’t pile it on or you’ll get a sticky finish.
For a satin look, buff lightly; for a higher gloss, buff harder. Avoid painter’s tape near the waxed area until it’s fully hardened, because tape can pull up the wax film.
Wax is low in VOCs compared to spray lacquer, so it’s a friendlier option for indoor work. Just keep rags in a sealed metal container, since oily cloths can self-ignite.
Match the wax to the wood’s tone, seal the surface properly, and test before you go all in. That’s the whole trick.
Prep Your Wood Surface So the Wax Actually Adheres
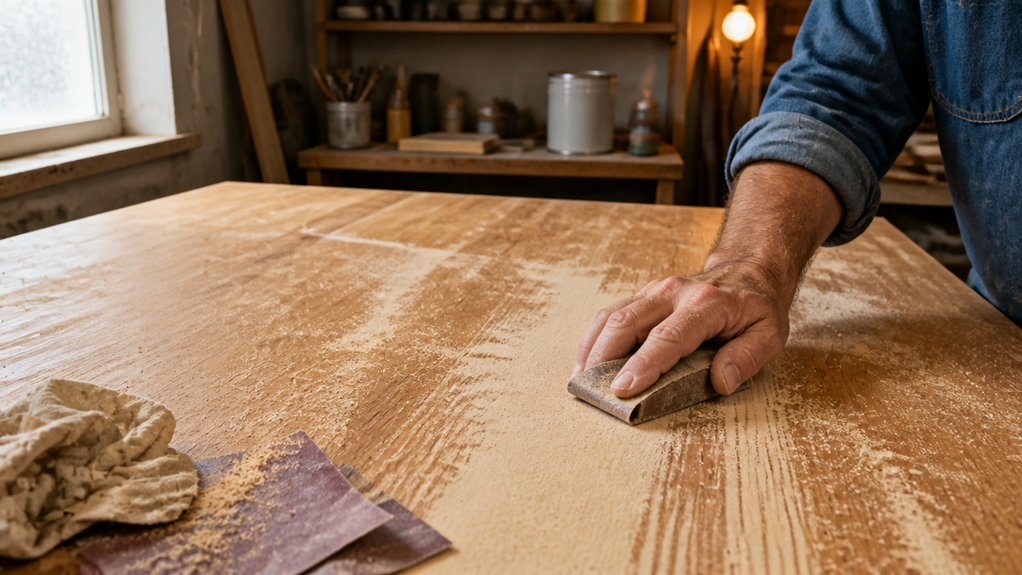
Wax will only stick to a clean, stable surface, so start by wiping the wood down with mineral spirits on a soft cloth. Let it flash off completely, because grease, dust, or old polish will block the wax and cause it to peel later.
Check for cracks or loose finish first, since wax won’t repair damage that’s already there. If the surface feels rough, sand lightly with 220-grit sandpaper just enough to open the pores, then vacuum the crevices with a brush attachment.
Run an adhesion test on a hidden spot by applying the wax, letting it dry, and buffing to see if it grabs. Make sure the finish is stable, like shellac or varnish, because bare wood will soak up wax like a sponge.
Fifteen minutes of prep here beats an hour of fixing a blotchy mess later.
Fifteen minutes of prep here beats an hour of fixing a blotchy mess later.
For extra safety, use painter’s tape to mask off adjacent areas and lay a drop cloth if you’re working near a floor.
If you’re waxing over a topcoat, confirm the sheen is cured, not just dry to the touch, since a soft film will grab the wax unevenly.
Use a clean cloth and apply thin coats, keeping a wet edge to avoid lap marks or brush strokes in the final polish.
High-VOC solvents like mineral spirits need good airflow, so open a window and let the room breathe.
Once the wax cures, buff it to the sheen you want, whether satin or gloss, and you’ll get a durable finish that actually adheres.
Keep in mind that raw linseed oil takes 48 to 96 hours to dry, so if you use it as a base coat here, factor in that longer cure time before applying wax.
Apply Paste Wax in Thin Coats Without Gummy Buildup
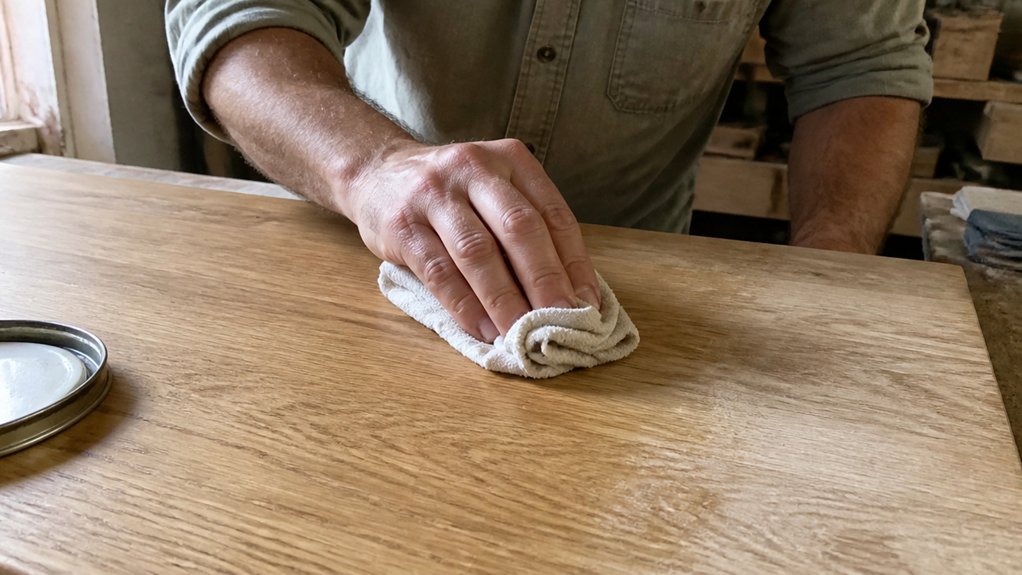
Apply paste wax in a thin, even coat like you’re finishing a topcoat, not frosting a cake. A heavy layer leaves a sticky mess that grabs dust and turns buffing into a losing battle.
Grab a golf-ball-sized lump of paste wax for an average tabletop or cabinet door. Rub it on lightly with a clean cotton cloth, working in the direction of the grain.
Let it dry until it loses its wet gloss and turns to a dull sheen, which usually takes 15 to 20 minutes. Then buff with a fresh cloth until the surface feels smooth, not tacky.
If you want more depth, add another thin coat after the first one is fully buffed. Two light passes always beat one thick slathering, and you avoid that gummy buildup that ruins a clean finish. Carnauba wax provides a durable, mirror-like shine when buffed properly with metallic powders.
Wipe off any excess wax before it dries, especially around edges and corners where it tends to pool. A little patience here saves you from scrubbing with mineral spirits later.
Thin, Even Layers
The secret to a flawless wax finish is using very little product. Treat wax like a good cologne: a small amount works perfectly, while too much just makes a mess.
Always apply wax in thin, even layers to prevent buildup. This keeps the surface looking clean and avoids a sticky, cloudy finish.
Here’s a simple method for even application. First, load a golf-ball-sized lump of paste wax into a soft cloth.
Rub it into the wood using tight, circular motions, then switch to straight strokes along the grain. Work on a section of about one square foot before moving on to the next area.
Let that first coat dry to a dull sheen, which usually takes 10 to 20 minutes. Then buff lightly with a clean cloth. If the surface still looks dry or uneven, apply a second thin layer the same way. Maintenance-free cleaning with a vacuum and citrus cleaner keeps the waxed surface in top condition between coats.
You’ll know you did it right when the surface feels slick, not tacky. This approach also cuts down on lap marks and brush strokes if you ever switch to a liquid wax or varnish.
For best results, work in a dust-free space and keep your buffing cloth clean. A final gloss or satin sheen can be enhanced with a light buffing, just like you’d do for a polyurethane topcoat.
Remember that drying time is short, but cure time before heavy use is longer, so give the wax a day to harden fully. This method saves your elbow and protects your wood, so take your time with each thin layer.
Avoid Gummy Residue
Gummy residue means you laid the wax on too thick, and it’s a fixable mistake, but you can skip it altogether. I’ve wiped, waited, and cursed at that sticky mess that grabs dust like a magnet, so thin coats are your lifeline.
A golf-ball-sized wax lump wrapped in cotton, rubbed lightly, beats a thick smear every time. Heavy coats cause residue, so buff sooner and use less product, or strip silicone contamination with mineral spirits and start over.
Silicone in liquid polishes ruins wax adhesion, so stick to paste wax for a reliable bond. Sticky spots happen when the coating won’t cure, so re-wax thinly and buff hard to restore a clean surface. Ergonomic non-slip grips prevent hand fatigue during that extended buffing, just as they help with seized lids.
Residue removal is simple: dampen a cloth with mineral spirits, wipe gently, and let the piece dry before recoating. My rule is two thin coats, dry overnight, then buff hard for a satin sheen instead of sludge.
This works with a paste wax topcoat over stain or polyurethane, and you avoid lap marks by keeping a wet edge. Prime bare wood with a sanding grit of 220 before waxing, and use a drop cloth and painter’s tape to protect the surrounding finish.
The sheen comes from the buffing action, not the wax volume, so your elbows do the work, not the can. Drying time is a few hours, but cure time is overnight, so wait before you touch it.
You’ll get a clean, hard film that resists fingerprints and dust, not a sticky mess. Keep the wax at room temperature to spread evenly, and work in small sections for control.
That’s the practical fix: less wax, more buffing, and patience. Your finish will look like a pro did it, and your arms won’t ache from scrubbing residue off.
How Long Should You Let Wax Dry Before Buffing?
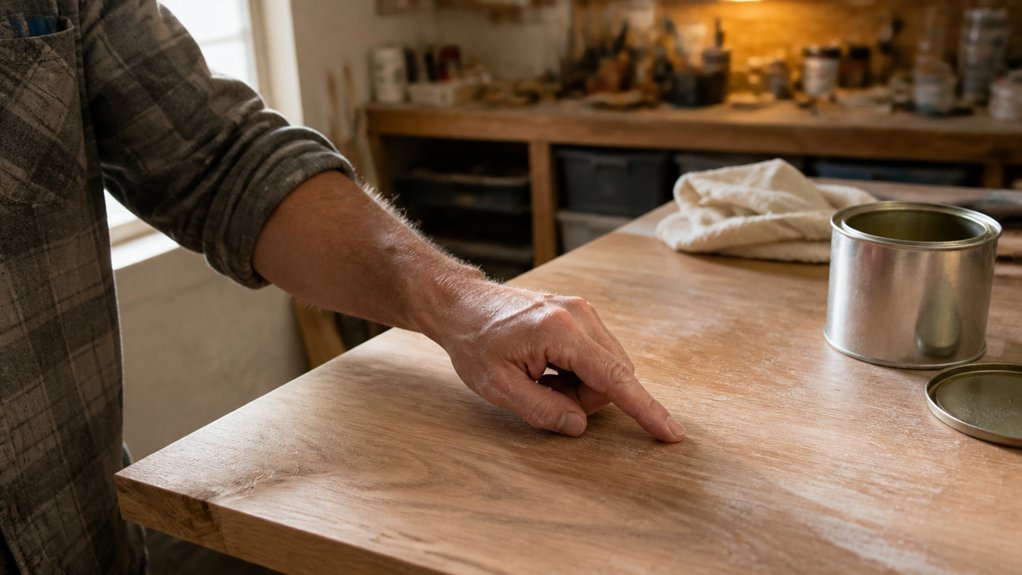
Wait until the wax sheen turns from glossy to dull before you buff, which usually takes 10 to 20 minutes for most paste waxes. I rushed this my first time and ended up with a smeary mess that took twice as long to fix.
Drying time depends on temperature, humidity, and how thick you laid the wax on. High humidity is the sneaky one, because damp air can cloud the wax into a hazy film that forces you to strip it and start over.
Check for a dull, matte haze before you touch the surface. That haze tells you the solvent has flashed off and the wax is ready to buff.
Thicker layers take longer to dry, so don’t pile it on. A thin, even coat is the goal, and it hardens much faster than a heavy glob.
Cool, dry rooms speed up solvent evaporation, which is why a garage in winter is better than a humid bathroom. If the wax is still tacky after 30 minutes, you over-applied and need to wipe off the excess with a clean cloth.
Overnight hardening gives the best buffing base, because the wax cures fully and the high spots buff to a smooth, even gloss. Use a soft cotton cloth and a light touch, and you’ll get a clean shine without swirls.
Patience here saves elbow grease later, so wait for that matte haze and don’t test the surface with your finger. When you do buff, work in small sections and keep the cloth moving in straight lines.
Remember that wax has a drying time and a cure time, which are not the same. Drying is when the solvent leaves, and curing is when the wax fully hardens, so overnight is your friend for the toughest finish.
If you’re working over a fresh topcoat like polyurethane or varnish, give that base coat its full cure time before waxing. Wax on a soft finish will smear and trap dust, so check the manufacturer’s label for both drying and cure times.
Use a drop cloth to protect the floor and painter’s tape on trim if you’re waxing a piece nearby. No need for primer here, but clean the surface with a tack cloth so the wax adheres evenly.
For a faster alternative on small wooden buttons, zero-prep formulas skip mixing and apply straight from the bottle.
Buff, Polish, and Maintain the Wax Finish
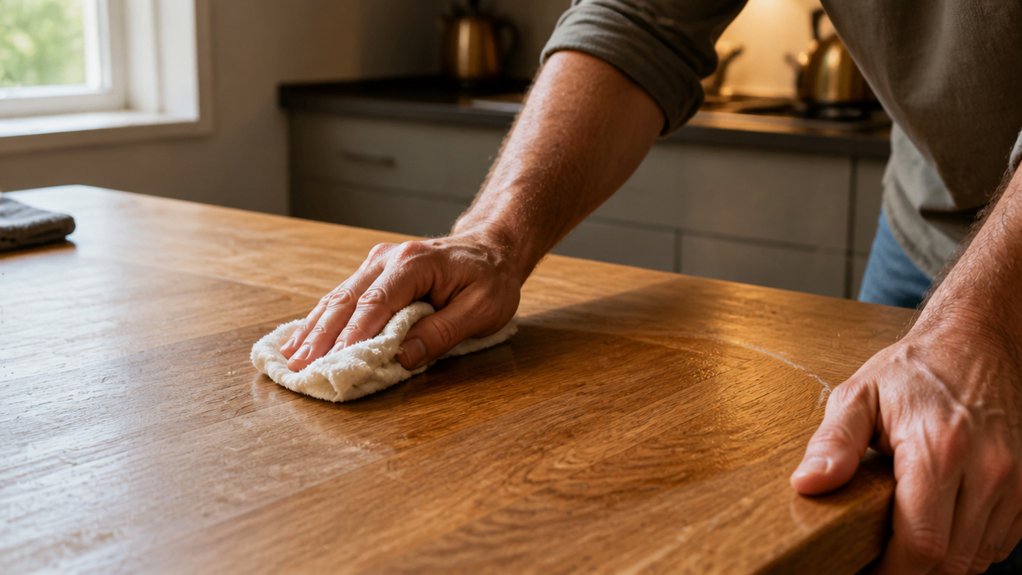
Buffing is the payoff step, so take your time with it. Wait for the surface to develop a matte haze, then use a clean cotton cloth and work in small, firm circles to lift the excess wax.
Wait for the matte haze, then buff in small, firm circles with a clean cloth—steady hand, not a frantic scrub.
Press just enough to remove the film without scrubbing hard, because too much pressure strips the wax and too little leaves smears. I have ruined a few finishes that way, so think of it as a steady hand, not a frantic scrub.
Keep the sheen alive with a feather duster once a week, which is lazy maintenance and perfectly fine for a busy home. When the surface dulls after months of coffee cups and hands, or the topcoat looks tired, it is time to rewax.
Plan to rewax every 6 to 12 months for high-touch pieces like tabletops, but carved or display items can stretch to two years. Use a paste wax with a satin sheen for most furniture, and avoid high-gloss hard waxes if you want an easy touch-up later.
Before rewaxing, clean the surface with a damp rag and let it dry fully, then apply a thin layer of wax following the grain. Let it haze over for about 20 minutes, then buff again with a fresh cloth to bring up the gloss.
Do not skip a light sanding with 320-grit sandpaper on bare wood before waxing, because that opens the pores for better adhesion. Primer is not needed for wax, but if you are finishing raw wood, seal it with a thin coat of sanding sealer first.
For painted or stained pieces, check that the topcoat is fully cured, since wax applied over a soft varnish or polyurethane can trap moisture and cloud the sheen. Work in small sections to keep a wet edge, and avoid lap marks by overlapping your strokes slightly.
Keep your buffing cloth clean and free of lint, and wash it after every use so old wax does not scratch the next job. A drop cloth under the piece catches drips during rewaxing, and painter’s tape protects edges you do not want to touch.
Dust often, buff gently, and rewax before the surface looks sad, and the finish will stay rich for years. You will thank me later when the wood still glows instead of turning hazy.
For a durable, non-toxic option on kitchen pieces, consider a food-safe beeswax blend that suits surfaces where people eat directly off the wood.
Frequently Asked Questions
Can I Wax Antique Wood With Original Finish?
Yes, you can wax antique wood with its original finish, but only if that finish is intact and well adhered. I always start by testing a hidden spot with a small dab of wax, then wait 24 hours to confirm there’s no clouding or softening of the old varnish or shellac.
For safety, use a microcrystalline wax rather than a liquid polish, since it’s gentler and won’t penetrate cracks as aggressively. Apply a thin coat with a soft cloth, let it haze for about 15 minutes, then buff with a clean lint-free rag.
Avoid waxing over worn or flaking areas, as it can trap dirt and make future restoration harder. Stick to one coat per year, and use a paste wax with no silicone. If you’re unsure, a gentle wipe with mineral spirits first helps reveal how porous the surface truly is.
How Do I Remove Old Wax Before Reapplying?
To remove old wax before reapplying, wipe the surface with mineral spirits on a soft rag, which acts like a solvent cleanse for your wood. For stubborn buildup, switch to 4/0 steel wool dipped in the same mineral spirits, working with the grain to lift the old finish.
Let the mineral spirits evaporate completely, which usually takes 30 to 60 minutes depending on temperature and humidity. After that, check for any residue by running a clean finger across the wood; if it feels slick, repeat the wipe with a fresh rag.
A concrete tip is to use a plastic scraper for thick wax layers before touching steel wool, as this avoids scratching the wood underneath. For harder finishes like paste wax, a light sanding with 220 grit after stripping helps open the pores for a fresh coat. Always test on a hidden spot first, and remember that mineral spirits and stripping techniques work best when you stay gentle to avoid damaging the surface.
Is It Safe to Wax Wood With Water Stains?
No, it is not safe to wax wood with water stains, as the trapped moisture under the finish will continue to cloud the surface and can lift the grain over time. Water stains must be fully eliminated and the wood dried to a stable moisture content before any wax or polish touches it.
For a typical tabletop, allow the wood to dry for at least 48 hours in a warm, ventilated room after the stain appears. Lightly sand the stained area with 220-grit sandpaper to remove raised fibers, then check if the mark is truly gone.
If the stain persists, use a solvent-based wood bleach to draw out the water-soluble residue, then wipe with a clean cloth and let it dry another 24 hours. Only after this, apply a thin coat of paste wax with a soft cloth, buffing in circular motions.
Do not skip drying, because sealing dampness with wax invites mildew and darkens the blotch permanently. For stubborn cases, consider refinishing with a sanding sealer instead, as it penetrates better than wax alone.
What if My Wax Turns White After Drying?
If your wax turns white after drying, you are seeing white bloom or a cloudy haze, which is usually a wax blush caused by humidity or moisture trapped beneath the surface. This milky film is not a stain, so do not panic; it is fixable with the right approach.
To remove it, wipe the affected area with a clean cloth dampened with mineral spirits, working in small circles to dissolve the waxy residue. Let the wood dry completely for at least 24 hours in a warm, dry room before you attempt to rewax.
When you rewax, apply a very thin coat using a lint-free cloth, and buff with the grain after 10 to 15 minutes. For stubborn cases, a second thin coat after 24 hours will usually restore the finish, but avoid thick layers, which invite future blush.
If you are dealing with a paste wax product, check the label for a “blush remover” alternative, which works on the same principle as solvent wiping. Keep the room’s relative humidity below 50 percent during application to prevent recurrence.
Do I Need to Sand Between Wax Coats?
No, you do not need to sand between wax coats, and doing so will ruin the finish. Sanding is for paint or varnish, not wax, because the abrasive cuts through the soft film and destroys adhesion, leaving a cloudy, patchy mess. Instead, apply thin coats with a lint-free cloth, letting each layer dry for the manufacturer’s recommended time, typically 20 to 30 minutes.
After drying, buff with a clean, dry cloth using firm circular motion until you feel a smooth, slick surface. Your buffing technique does the smoothing work, so skip any grit entirely, even 400-grit, because it will embed particles into the wax.
For a durable finish, use three coats total, waiting a full 24 hours after the final buff before heavy use. If you need to refresh, simply apply another thin coat and buff again, since wax layers bond chemically when applied wet-on-dry. This approach also works for “paste polish,” a related term, so trust your cloth, not sandpaper.
Rounding Up
Applying wax polishes for wood takes thin coats and patient buffing, not force. Check your tin’s consistency first, and if it feels tacky, soften it with a warm cloth before you start.
Test a small hidden area with a thin layer. Let it dry until it dulls, then buff with a soft cloth until the surface feels smooth, not greasy.
Compare your buffed result against the grain’s natural direction. Rub along it only, and wipe away any excess once more if streaks appear.
Ask yourself if that six-month reapply window fits your room’s humidity. This finish is a shield, not a suit of armor, so reapply every six months, and your wood will outlive my excuses.
Keep it simple, keep it dry, and let the grain do the talking. Read about applying paste filler before wax for open-pored woods.