How to Apply Kitchen Paints: Step-by-Step Guide

Applying kitchen paints starts with one hard truth: skip the prep and your cabinets will peel within months.
The fix is simpler than you think once you know your surface, from wood to laminate to vinyl wrap.
You will need the right primer, a 120 then 220 grit sanding pass, and a thorough degreaser scrub before any color goes on.
Thin topcoats are non negotiable, with a 24 hour dry time between each and a full three week cure before heavy use.
This guide covers the exact primers, supplies, and brush techniques to avoid streaks and failed finishes.
Stick with me, and your kitchen will look professionally painted without the expensive contractor bill.
Quick Answer
- Strip doors, label hardware, and degrease all surfaces before sanding to ensure adhesion.
- Sand wood with 120 grit then 220 grit; lightly scuff laminate with 220 grit only.
- Apply shellac-based primer on laminate; use water-based primer plus knot sealer on wood.
- Brush thin topcoat layers, drying 24 hours each; wait three weeks for full cure.
- Use satin or semi-gloss low-VOC paint for moisture resistance and easy cleaning.
Step 1: Identify Your Cabinet Type and Gather Supplies
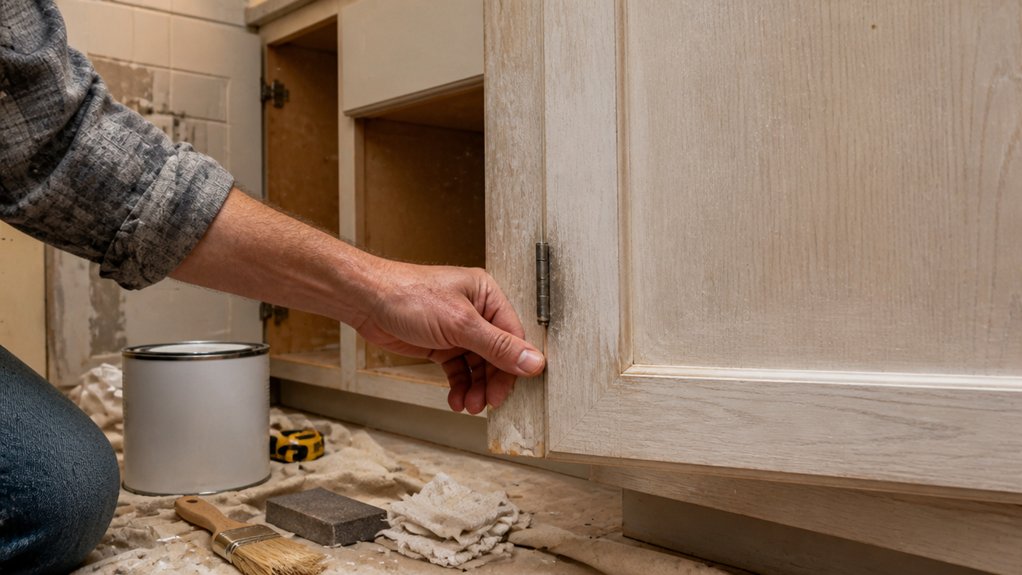
Before you paint, identify your cabinet material. Getting this wrong means the finish will fail, so check for wood, laminate, or vinyl wrap.
Wood is your best bet because it grips paint well. Laminate needs a shellac-based primer first, or the topcoat will peel. Vinyl wrap is not worth painting at all, since it sheds paint quickly.
For a medium kitchen, budget about £160 to £170 for decent paint, or £320 to £330 for pro-grade materials. You will need five litres each of primer and topcoat.
Spend the extra money on quality. Use a satin or eggshell sheen for easy cleaning, and pick a low-VOC paint to keep fumes down. Water-based acrylics dominate the current market for their fast cure times and minimal odor.
Sand wood with 120 grit, then 220 grit before priming. For laminate, scuff it lightly with 220 grit to help the primer bond.
Apply primer with a brush and roller, keeping a wet edge to avoid lap marks. Let the primer dry fully, then sand lightly with 220 grit.
Brush on the topcoat in thin, even strokes, working from top to bottom. Avoid going back over wet paint, or you will leave brush strokes.
Drying time is about two hours, but cure time is seven days before you can hang doors back. Use a drop cloth and painter’s tape to protect countertops and walls.
Clean your brushes with soapy water if you used water-based paint. Check the final coat for drips or missed spots, and touch up with a small brush.
Step 2: Remove Doors, Clean With Degreaser, and Sand Every Surface

Your cabinets are sanded and your supplies are sorted. Now strip the doors off, hinges and all, and label each one so you can put them back in the right spot later.
Use a degreaser on every surface, since grease ruins paint adhesion faster than anything else. Scrub hard, then rinse with water and open a window for ventilation.
Follow this order: remove doors, drawers, and hardware, and stash screws in labeled bags. Wipe all surfaces with degreaser, rinse, then fix any dents with wood filler and let it dry completely.
Sand everything, including doors, frames, and edges, starting with a 120 grit medium sandpaper. Move to a 220 grit fine paper for a smooth finish, and don’t skip the spots behind hinges. A tack cloth with anti-static properties will trap dust particles internally so they don’t redistribute onto your freshly sanded surface.
Sanding roughens the surface so the primer and topcoat grab on properly, whether you plan a satin or matte sheen. Wipe off all the dust with a tack cloth, and you’re ready for primer.
Remember that drying time for filler is not the same as cure time, so wait the full amount before sanding. Use a drop cloth under your work area to catch dust and debris, and keep painter’s tape handy for any edges you want to protect.
You’re aiming for a slick, clean base, because brush strokes and lap marks show up fast on poorly prepped wood. Take your time now, and the paint will lay down smooth without extra coats.
Step 3: Match Primer to Your Cabinet Material, Then Seal Knots and Gaps

Now that your surface is clean and sanded, the next step is to pick a primer that actually bonds to your cabinet material. Then you’ll seal any knots or gaps before the topcoat goes on.
For laminate, use shellac-based primer; plain wood works best with water-based primer. Softwood needs a knot sealer, while hardwood wants a full surface seal.
Fill gaps with wood putty, let it dry completely, then sand it smooth with fine grit, around 220. This keeps the topcoat from soaking in unevenly and prevents brush strokes from showing later.
Match the primer to your material using this quick guide: laminate gets shellac-based primer with light sanding, softwood gets water-based primer with knots sealed, and hardwood gets shellac-based primer with the whole surface sealed.
Painted wood takes water-based primer after you fill cracks, and vinyl plastic should skip painting altogether, since primer won’t stick reliably.
Store leftover primer in a labeled tin so it stays usable for touch-ups after the job dries.
Use painter’s tape and a drop cloth to protect adjacent areas, and clean your brushes with wet rags right away, because dried paint is a mess you don’t want to tackle.
Keep a wet edge while rolling or brushing primer to avoid lap marks, and remember that drying time is quick, but full cure time takes longer, so wait before sanding.
Primer seals the wood, reduces VOC absorption, and gives your topcoat a smooth, even base for gloss, satin, or matte sheen.
Match the primer, seal those spots, and you’re ready for a clean finish. For slick surfaces like laminate, some water-based bonding primers can grip without sanding while still offering stain-blocking resins for a durable base.
Step 4: Apply Thin Paint Coats and Wait Three Weeks for Full Cure

For the best finish, brush on a thin first coat and let it dry overnight. Repeat this until the coverage looks even, because rushing turns a decent kitchen into a sticky, brush-marked mess. I learned that the hard way when my cabinets ended up looking like a toddler’s art project.
Use the thin coat technique with a light brush load, dipping only the tip. Paint in long, even strokes and overlap slightly to prevent lap marks and visible brush strokes.
Let each coat dry a full 24 hours, even if the surface feels tacky sooner. Drying time and cure time are not the same, so never skip this step. Semi-gloss finishes are recommended for their scrubbable and moisture-resistant properties, which are ideal for kitchen environments.
Wait three full weeks for the topcoat to cure completely before normal use. Humidity, paint quality, and room temperature all affect curing, so adjust your schedule accordingly.
During that wait, avoid touching the surfaces and skip frying bacon, since grease will ruin the finish. Patience here beats perfectionism, and your cabinets will reward you with a smooth, even sheen.
Frequently Asked Questions
Can I Paint Over Plastic or Vinyl-Wrapped Cabinets?
Yes, you can paint over plastic or vinyl-wrapped cabinets, but only with careful preparation and the right coating system. Many homeowners do it successfully, though factory laminate and vinyl surfaces are notoriously slick, so adhesion is your biggest enemy.
To give paint a fighting chance, scuff the entire surface with 220 grit sandpaper, then wipe it down with denatured alcohol to remove any grease. Apply a bonding primer specifically made for high gloss surfaces, such as a shellac based or a specialty adhesion primer, before your topcoat.
Use a high quality acrylic urethane paint and keep it thin, applying three light coats instead of two heavy ones. Allow each coat to dry fully for at least four hours, then cure for a week before handling. If the wrap is peeling or bubbling anywhere, do not paint over it, replace that door instead. A related search term is “furniture flipping on MDF,” which often yields similar prep advice. For rentals or quick flips, you can paint, but for long term durability, replacement is still a safer bet.
How Long Should Degreaser Sit Before Wiping Off?
A degreaser should sit for 10 to 15 minutes before wiping off, as this dwell time lets the solvent fully penetrate and break down baked-on grease. Rushing this step is the most common mistake I see, since a short contact time only lifts the surface oil and leaves a stubborn film behind.
After the wait, wipe in one direction using a clean microfiber cloth, and flip the cloth often so you are not redepositing grime. For heavy kitchen cabinet grease, apply a second coat and let it sit for the full 15 minutes; this extra soak often eliminates the need for harsh scrubbing.
Always follow with a tack cloth or a solvent wipe before priming, because any invisible residue will cause fisheyes in your paint. This same timing works for degreasing agents on metal doors, but reduce the dwell time to 5 minutes on bare aluminum to prevent etching.
What Sandpaper Grit Works Best on Laminate Cabinets?
For laminate cabinets, 120 to 150 grit sandpaper works best to create a mechanical key for paint. Use a sanding block to keep pressure even, and always sand in the direction of the grain to avoid visible swirls.
A light touch is critical here; let the abrasive do the cutting. Pressing hard on laminate can gouge the melamine layer, which is nearly impossible to repair smoothly. After sanding, wipe the surface with a tack cloth to remove all dust, then apply a high-adhesion bonding primer.
You will know the surface is ready when it feels like fine frosted glass, not slick plastic. For tricky edges or trim, consider a fine sanding sponge, it conforms better than flat paper. This prep method ensures your topcoat bonds firmly and resists chipping for years.
Do I Need to Prime Previously Painted Wood Cabinets?
No, you do not strictly need to prime previously painted wood cabinets, but I strongly suggest it for a lasting finish. A light sanding with 120 grit, followed by a quality bonding primer, dramatically improves adhesion and seals any bare spots or stains.
Skipping primer on older paint can lead to peeling, especially where the old coating is glossy or chipped. In a greasy kitchen, use a shellac-based primer like Zinsser BIN to block oils and tannins before your topcoat.
This extra step adds about an hour, but it prevents costly rework later. For best results, let the primer dry fully for one hour, then apply two thin coats of your chosen paint. Search for “cabinet refinishing” for more detailed prep guides.
Can I Speed up the Three-Week Paint Curing Time?
Yes, you can speed up a three week paint curing time, but only by a few days, not a full week or more. Use a dehumidifier to pull moisture from the air and a box fan for gentle airflow, yet never blast heat directly on the film.
That heat causes the surface to skin over while the lower coats stay soft, which leads to wrinkling and poor adhesion. Aim for 50 percent humidity and steady air movement, and you might cut five days off the schedule for a water based acrylic.
For oil based alkyds, add a cobalt drier to the paint before application, but only if the can allows it, and keep the room at 70°F. You still must wait at least two full weeks before heavy use or stacking items on the surface.
Sanding with 320 grit after 48 hours helps off gas solvents faster, then recoat or topcoat as needed. Search for “paint cure accelerator” if you want commercial products, but they rarely outperform simple airflow and patience.
Rounding Up
Apply kitchen paints by sanding, priming, and painting in thin coats, then waiting the full three week cure before normal use. Patience beats any shortcut, and a thick coat will only cause drips, uneven drying, and premature failure.
Check the label on your paint can for the exact recoat window, and write down the date you finished the final coat on a sticky note. Compare your sanding effort against the manufacturer’s grit recommendation, then test a thin coat on a spare board to see how it levels.
Ask yourself honestly if you waited the full cure time before touching the cabinet doors. Rest assured that thin layers and that three week wait are what keep your finish hard and washable.
Next, read about choosing the right primer for greasy kitchen surfaces.