How to Apply Brick and Masonry Paints: Step-by-Step Guide

If your brick paint is blistering within a year, the problem is almost always trapped moisture, not the paint quality. Applying brick and masonry paints starts long before the roller touches the wall, and skipping the moisture test risks sealing in disaster. Your surface needs to read below 15% on a moisture meter, then dry for days before you even think about a primer.
You also need to check the pH with a swab kit, since alkaline brick demands a specialty sealer like Loxon. Use a 3/4 inch nap roller, load it heavy, and back brush immediately to work paint into the mortar joints.
Plan for 20% extra paint to cover that thirsty surface, and keep reading for the full breakdown on tools, cure time, and technique.
Quick Answer
- Test brick moisture below 15% in multiple spots; wait days after washing before painting.
- Use alkali-resistant masonry primer on fresh or efflorescence-prone surfaces up to pH 12.
- Apply 4 mils wet film with a 3/4-inch roller; cut in edges with a 3-inch brush first.
- Roll horizontally, then back-brush lightly; overlap wet edges to prevent lap marks.
- Budget 20% extra paint for rough absorption; wait 2 hours between coats, days for cure.
Prep the Brick: Clean, Dry, and pH-Test Before Painting
The secret to long-lasting brick paint is the prep work you finish a full week before opening the paint can. Start by testing moisture in several spots with a meter, not just one area.
Readings above 15 percent mean you’re sealing moisture into the wall, which guarantees blistering later. Brick dries unevenly, so after rain or a pressure wash, give it days, not hours, to dry out.
If readings top 15 percent, you’re sealing moisture in—blistering is guaranteed. After rain, let brick dry for days, not hours.
If you’re unsure, tape a plastic sheet over the brick overnight and check for condensation in the morning. If you see any moisture, wait longer and test again.
Painting damp brick is a mistake you’ll pay for when the topcoat bubbles and peels. Use a primer designed for masonry once the surface is dry, and match your topcoat sheen to the exposure, like satin for exterior durability or matte for interior features.
Keep the wet edge moving when you roll on the finish, and avoid lap marks by working in full sections. Lay down a drop cloth and use painter’s tape along edges before you start.
Respect both drying time and cure time: the paint may feel dry in hours, but full cure takes days. Dry first, paint last, and your brick will look solid for years. For surfaces with fresh mortar or lime, ensure your primer is alkali-resistant up to pH 12 to prevent chemical reactions that ruin the finish.
Pick Primer and Paint for Brick’s pH and Porosity
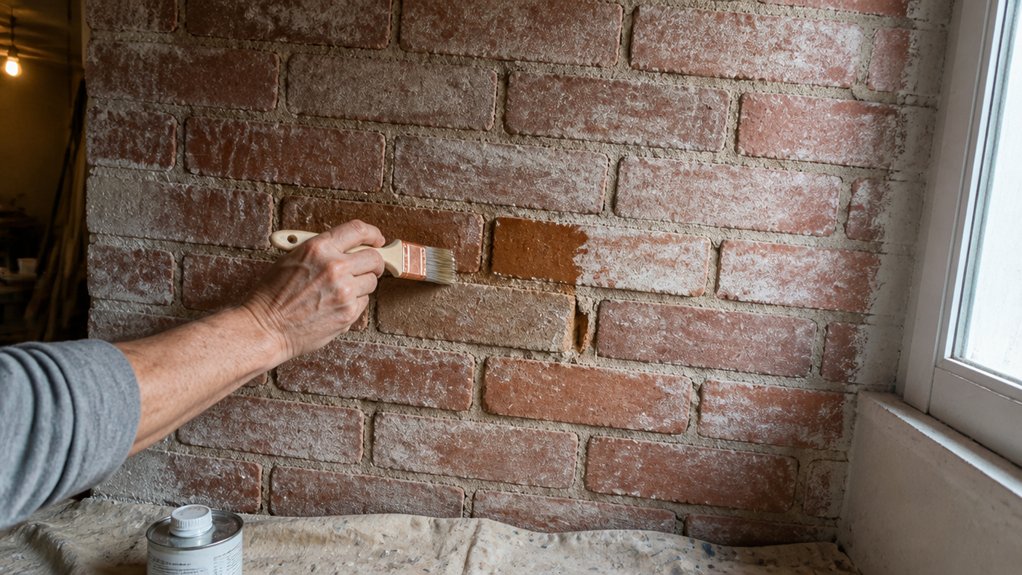
Brick’s pH and porosity decide whether your paint job lasts, so you need a primer that handles both, not just whatever’s on sale. I’ve watched plenty of people grab standard primer, only to see it blister weeks later.
That blistering is alkaline burn, showing up as white crust, peeling, and a sad, chalky mess. For fresh or efflorescence-prone brick, use a high-pH sealer like Loxon.
For cracked, super-porous surfaces, an elastomeric primer fills and flexes better. Check the mil thickness on your primer, because thin coats vanish into brick’s pores faster than my patience at a paint store.
You want at least 4 mils wet, and skimpy coverage will bite you later. Match your topcoat to the same system, so acrylic over acrylic for most jobs, and never oil-based paint over alkaline surfaces.
Before you roll anything, test the pH with a simple swab kit, then buy a sealer that matches the reading. Measure your wet film thickness with a gauge as you go, and keep a wet edge to avoid lap marks.
Use a drop cloth and painter’s tape to protect the surrounding areas, and work in sections so the primer stays workable. Drying time for primer is usually a couple hours, but cure time runs a week, so wait before you topcoat.
For the topcoat, a satin or matte acrylic sheen hides surface unevenness better than gloss, and low-VOC options keep the fumes down. Your brick will thank you quietly, which is about all you’ll get from masonry. Since brick’s high alkalinity demands a pH-matched sealer to prevent future burn-through, verify your primer’s chemical compatibility before application.
Apply Brick Paint Like a Pro: Tools, Strokes, and Coverage

Two coats of paint on brick protect the surface as much as they add color, and the tools you choose decide whether the result looks clean or patchy. Use a 3/4-inch roller nap to push paint into all the pores and mortar joints, then load the roller heavily and work in long, top-to-bottom strokes to avoid lap marks.
Cut in first with a 3-inch brush around edges, corners, and the roofline before rolling. Roll horizontally across the brick, then back-brush lightly to fill any gaps. Make mock-up samples on a hidden wall, since wet paint looks different than it does after drying.
Start with brushwork in the corners, roll across, then back-brush to seal every gap.
Respect the dry time of at least two hours between coats; rushing this step drags the first layer and ruins the finish. On rough brick, plan for about 20% more paint than your square footage suggests, because the surface soaks up more topcoat than drywall or wood. A drop cloth and painter’s tape protect the trim and ground, and a low-VOC paint keeps the work area safer while you paint.
For the best sheen, choose a satin or matte finish that hides imperfections but still wipes clean. Primer is not always needed on brick, but a stain-blocking primer helps if you are covering old marks or efflorescence. Use a wet edge technique, keeping your strokes overlapping while the paint is still wet, to prevent visible brush strokes and uneven coverage.
Drying time matters for recoating, but cure time matters for durability, so keep foot traffic off the wall for a few days. Sand any drips with a fine grit once the topcoat is fully dry, then touch up those spots with a small brush. Long, consistent strokes and a steady pace give you the smooth result you want without extra fuss. Denser fibers prevent pooling and stippling, which is especially helpful when working on semi-smooth brick that has minor surface imperfections.
Frequently Asked Questions
Can I Paint Brick That Was Previously Painted?
Yes, you can paint brick that was previously painted, provided you prioritize adhesion and surface preparation. The old coating must be sound, meaning it’s not flaking, chalking, or peeling, so start by scraping loose areas and testing a patch with painter’s tape.
Clean the brick with a stiff brush and a mild TSP solution, then rinse thoroughly and let it dry for at least 48 hours. Lightly sand the surface with 120 grit paper to create a mechanical tooth, which boosts grip for your new topcoat.
Use a high quality acrylic latex masonry paint and apply two coats, waiting four hours between them. If the old paint is glossy, scuff sanding is essential, and a bonding primer can further improve durability. For best results, work on a dry day above 50°F, as this ensures proper curing and prevents blistering.
How Long Will Exterior Brick Paint Last?
Exterior brick paint will last 10 to 20 years with a quality masonry paint, though that range assumes proper surface preparation and a full two-coat system. The biggest durability killers are moisture behind the brick and poor adhesion from painting over chalky or dusty surfaces.
Inspect your painted brick every spring, looking for faint color loss or powdery residue when you rub a dark cloth across it. If you see that, clean the wall with a stiff brush and a low-pressure wash, then apply a breathable top coat before winter sets in.
For a concrete example, use a 100 percent acrylic latex masonry paint with a weatherproof finish, and always allow 48 hours of dry weather after application. A related term is “elastomeric coating,” which bridges hairline cracks and extends service life on older homes, but it requires a primer first. Don’t wait for peeling; fading is your cue to recoat.
What Sheen Is Best for Exterior Brick Paint?
The best sheen for exterior brick paint is satin or semi-gloss, as both repel dampness and make future cleaning far easier than flat options.
Satin offers a subtle, low light reflection that still lets the brick’s natural texture show, while semi-gloss gives a tougher, more water-resistant film if you face heavy rain or splashback.
Avoid matte finishes on brick; they trap moisture in the pores and show chalking faster. For a practical move, apply two coats of a 100% acrylic satin paint, waiting 4 hours between coats at 70°F.
Use a 3/4 inch nap roller for rough brick, and back-brush each section to work the paint into every crevice.
Related term: masonry paint often comes in these same sheens, so check the label for “exterior grade” before buying.
Can I Change From a Dark to Light Brick Color?
Yes, you can absolutely change from dark to light brick, but it takes a bit more patience than painting the same tone. You will likely need two extra coverage coats to hide the old color completely, so plan for at least four total coats of exterior masonry paint.
Before you start, priming dark brick with a quality primer is crucial, as it stops the deep pigment from bleeding through your lighter finish. Use a high build latex block filler or a masonry primer, then let it cure for a full 24 hours before your first topcoat. For the final coats, roll on a satin or flat acrylic paint, and always test a small patch first to confirm the color shift works with your mortar. A related term you might search is “brick refinishing,” which covers similar color changes and surface prep techniques.
How Do I Fix Paint Peeling on Brick?
To fix paint peeling on brick, you must remove all loose paint and thoroughly clean the surface before anything else.
Use a stiff wire brush or a power washer with a 1500 psi nozzle to strip the failing coating, then let the wall dry for a full 48 hours of sun. Perform a moisture test with a plastic sheet taped over the brick; if condensation forms underneath after 24 hours, or a moisture meter reads above 15%, you must wait for drier weather.
Prime the bare brick with a breathable, alkali-resistant masonry primer, and apply two topcoats of a high-quality elastomeric paint or a masonry acrylic. Never use standard house paint on brick, since it traps vapor and guarantees future peeling.
Sanding residue and efflorescence with 60-grit paper improves adhesion, but the real trick is timing: repaint only when the brick feels dry to the touch and readings sit under 10%. This approach, often called masonry coating restoration, will save you from repeating the job next season.
Rounding Up
Applying brick and masonry paints starts with surface prep, primer, and paint, and each step must be followed in order. You need to test the pH of the brick with a kit and check for efflorescence before you ever open a can.
Grab a quality acrylic primer designed for masonry and apply it with a roller, not a brush, to lock down the porous surface. Check the weather forecast and aim for a dry, mild day, since moisture and heat will wreck your cure time.
Compare your paint’s coverage rate on the label against the square footage you measured, then buy one extra gallon to avoid a patch-up run. Write down the exact primer and paint products you used, so touch-ups match perfectly later.
If you skip this, you will be scraping regret off the mortar, and repainting sooner than you like. Read next about choosing between elastomeric and standard acrylic masonry paints.