How to Apply Radiator Enamels: Step-by-Step Guide
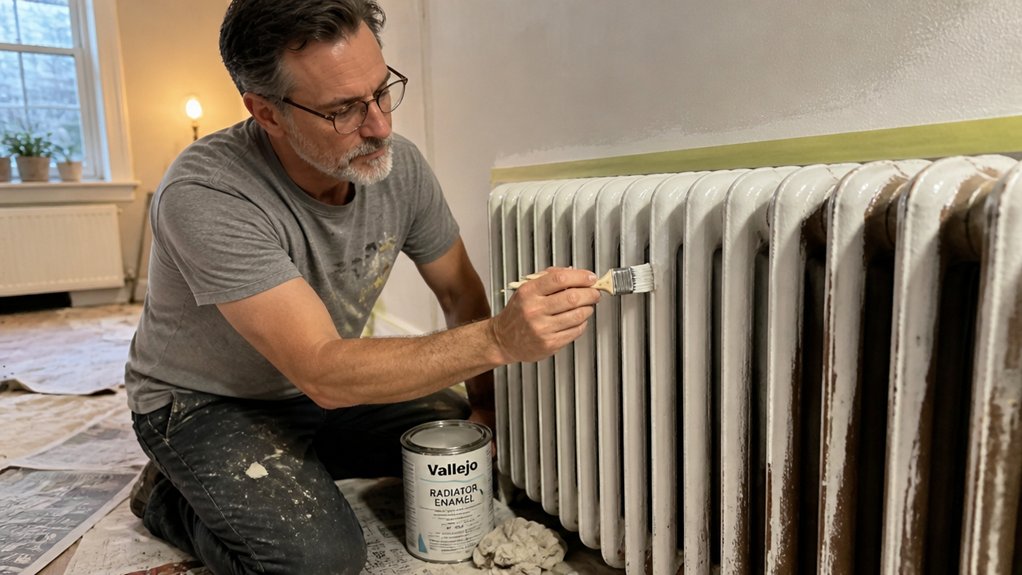
Radiator enamel is your best defense against chipped, yellowing paint on metal that heats and cools daily. The trick is using a flexible coating, not general purpose spray paint, so it moves with those temperature swings without cracking.
Getting the surface right matters more than the paint itself, starting with sanding to a dull finish and a rust inhibiting primer. You will apply two thin coats from about 30 centimeters away, letting each layer tack up before the next.
Cure time is nonnegotiable, so keep the heat off for at least 48 hours. This guide walks you through every step, from prep to the final coat, so you get a finish that lasts.
Quick Answer
- Prepare radiators by sanding with 120-grit, then 220-grit, and removing all dust.
- Apply a rust-inhibiting primer in thin, even coats before painting.
- Use radiator enamel, sprayed 25–30 cm away, in two to three thin coats.
- Maintain a wet edge and overlap each spray pass by one-third for even coverage.
- Wait 24–48 hours before heat; full cure requires several days minimum.
Why Radiator Enamel Beats General-Purpose Paint
Using leftover general-purpose paint on a radiator is a mistake you will fix twice. That paint lacks the heat resistance to survive the constant 60°C cycles, so it bakes, cracks, and peels into flakes you will scrub off the floor by mid-winter.
Radiator enamel is made for this job because it flexes with the metal as it expands and contracts. You also get yellowing prevention, which keeps a white topcoat bright instead of turning butter-yellow after one heating season.
Radiator enamel flexes with the metal as it heats and cools, and it won’t yellow after one season.
Before you apply the enamel, sand the old surface with 120-grit paper and wipe off the dust with a tack cloth. Use a primer designed for metal so the enamel bonds properly, then brush on two thin coats of satin or gloss finish. Typical enamel top-out ranges from 300°F to 400°F, so verify the temperature rating on the can matches your system’s output.
Keep a wet edge as you work to avoid brush strokes and lap marks, and check the drying time versus the full cure time. The paint may feel dry in a few hours, but it needs several days to harden fully before you crank the heat.
Pay attention to VOC levels if you are working indoors, and lay down a drop cloth with painter’s tape on the trim. A few extra pounds on a proper tin of radiator enamel beats repainting, sanding, and masking the same job twice.
Prep Bare Metal: Clean, Sand, and Prime
Bare metal is a blank canvas, and you have maybe two chances to get it right before the enamel fails you. I skipped a step once, and my radiator ended up looking like a leopard with mange, so let’s prep smart.
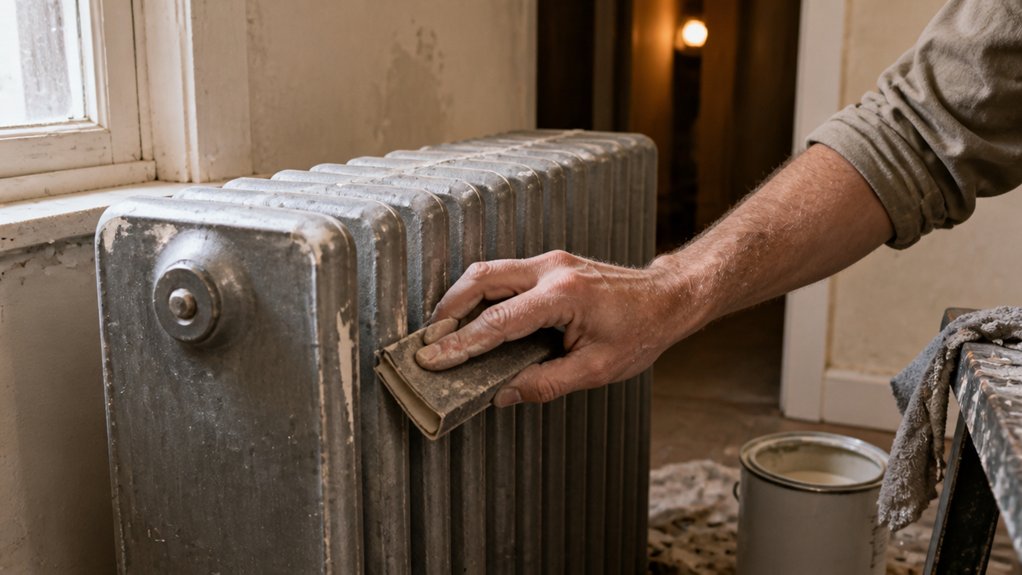
First, remove rust with a wire brush or a chemical rust remover, because sanding alone will not kill deep corrosion. Then sand the surface down to a smooth, dull finish, which gives the paint something to bite into.
Use 120-grit sandpaper for the initial pass, then switch to 220-grit for a finer sheen before priming. Wipe off all the dust with a tack cloth after sanding, or you will paint over a mess that shows up as rough spots under the topcoat.
For primer, pick a red oxide or rust-inhibiting type, and do not cheap out here. A decent can costs about £10, but it will stop flash rust from ruining your weekend and give the enamel a solid base.
Apply the primer in thin, even coats, keeping a wet edge so you avoid lap marks. Let it dry fully according to the label, usually a few hours, before you touch it with paint.
That dull, primed surface is your key to a smooth final result with the gloss or satin enamel you choose. Get this prep right, and the topcoat goes on like a breeze without brush strokes or peeling. For those tight fin rows, a stubbier angled brush reaches behind pipes and flanges without scratching the primed surface.
Brush vs. Spray: Choosing Your Radiator Paint Applicator
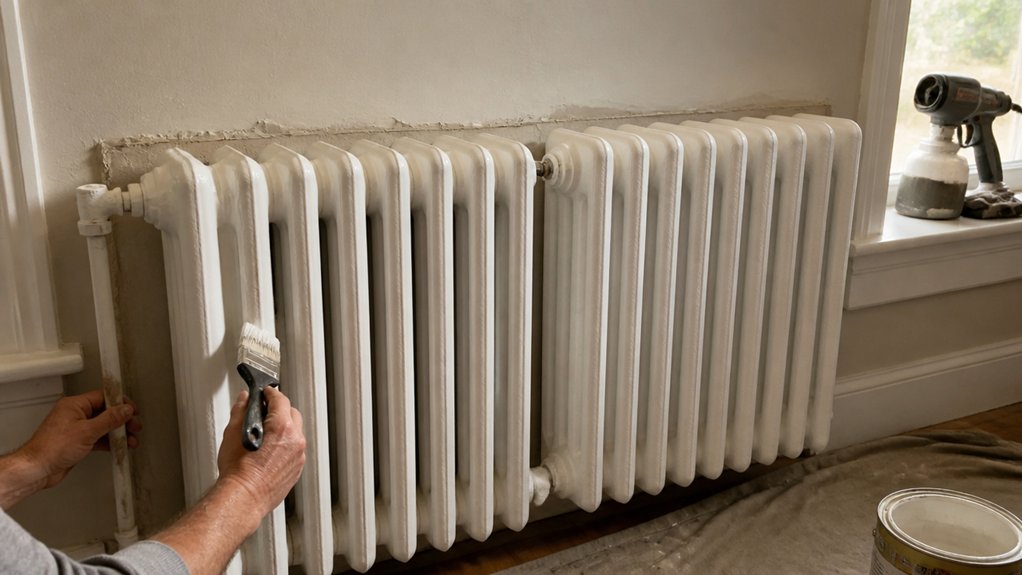
Painting a radiator with a brush risks visible brush strokes and a blotchy finish, while a spray can or spray gun lays down a smooth, factory-like coat in minutes. I lean toward brushes for most woodwork because they last decades with proper cleaning, but for radiators, spray is the clear winner.
A spray gun gives you the best control over overspray and the finest finish, though a 400ml aerosol can works well for small jobs. Brushes are cheap and precise near valves and corners, but they are slow and you will fight drips and lap marks.
Spray cans are fast and even, but they are messy, so cover everything within three feet with a drop cloth and painter’s tape. Spray guns need a compressor and some patience to master, but they deliver a true topcoat with no brush strokes. To keep pressure steady at the gun, stick with a 3/8-inch hose no more than 20 feet long for high-pressure setups.
For a DIYer, grab a 400ml aerosol for about £8 and practice on cardboard first to get your wet edge right. Pay attention to drying time versus cure time, and use a primer before the topcoat for better adhesion and rust protection.
If you want a smooth satin or gloss sheen, spray every time; if you are painting one tiny radiator and do not mind some texture, a brush will do. I still pick spray, because the finish looks like it came from the factory, and you avoid the sanding and re-coat hassle.
How to Apply Radiator Enamel: Coats and Spray Technique
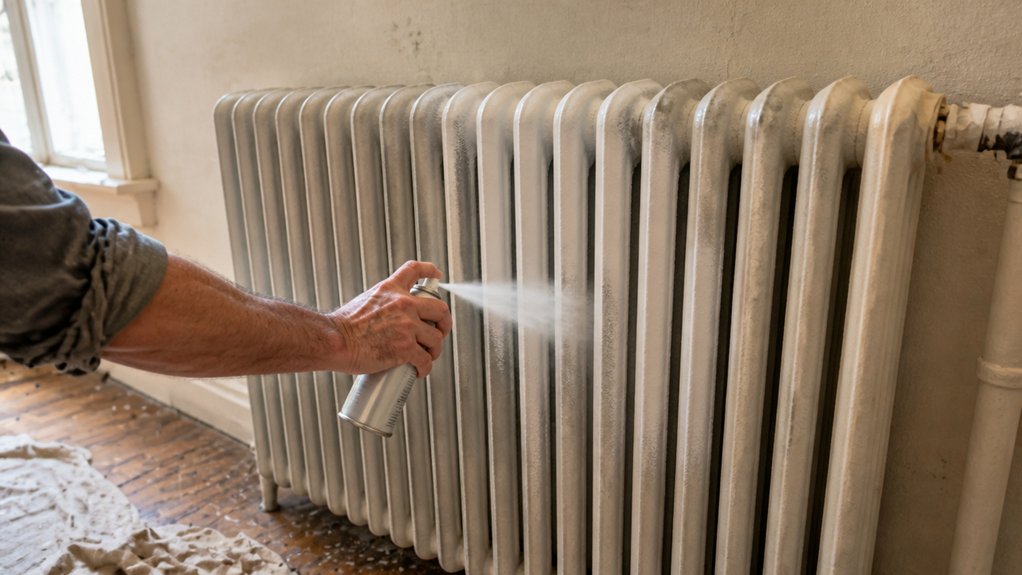
Getting the coats on right is where the finish comes together, so let’s focus on that. You have your brush or spray can, but the real trick is knowing how many layers to apply and how to put them down cleanly.
This is the difference between a smooth, even finish and a streaky mess you’ll regret. I’ll break down the coverage math, the spray technique that keeps you looking competent, and the drying times so you don’t leave fingerprints in the paint.
First, plan for two to three thin coats of radiator enamel, not one thick one. A heavy first coat will sag, drip, and trap brush strokes.
Thin coats dry faster, level out better, and build a tougher surface. You want full coverage after the second coat, with a third only if you see bare spots or want a higher sheen.
If you’re brushing, use a high-quality synthetic brush and lay the paint on with long, smooth strokes. Work fast to keep a wet edge, because enamel dries quickly and will show lap marks where you stop and start.
For spray cans, hold the can about 25 to 30 centimeters from the surface and keep it moving in steady, overlapping passes. Start each pass before the radiator and finish after it, so you don’t pile paint at the edges.
Never stop moving the can mid-pass, or you’ll get a blotchy patch. Keep the nozzle parallel to the surface and don’t tilt the can at an angle.
Spray in a sweeping motion, side to side, and let each pass overlap the previous one by about a third. This gives an even coat without runs.
Shake the can for a full minute before starting, and between coats, to mix the pigment properly. If you don’t, you’ll get a dull, uneven color.
After the first coat, let it dry to the touch according to the label, usually 20 to 30 minutes, before spraying the second. The paint should be dry enough that it doesn’t smudge, but not fully cured.
Full cure takes days, and the paint stays soft enough to dent for a while. Don’t touch a radiator for at least 24 hours after your final coat, and give it a week before you lean anything against it.
Use a drop cloth and painter’s tape to protect the wall and floor behind the radiator, since overspray drifts more than you expect. Mask off the valve stems and any chrome parts you don’t want covered.
If you’re painting a bare metal radiator, prime it first with a metal primer to stop rust and give the enamel something to grip. Sand any rough spots with 220-grit sandpaper before you prime, and wipe off the dust with a tack cloth.
Between coats, you can lightly sand with 320-grit if you see any dust nibs or drips, but only after the paint is fully dry. This keeps the final surface smooth, but don’t sand too hard or you’ll cut through to the primer.
Match your enamel sheen to the room’s look: glossy for easy cleaning, satin for a softer glow, or matte if you want low reflection. High-gloss enamel is the most durable and hides fingerprints better than you’d think.
For VOCs, use a low-VOC water-based enamel if you’re sensitive to fumes, and open a window for air flow. Solvent-based enamel is tougher and levels better, but it smells stronger and takes longer to dry.
The key is patience and even coats. Work in good light, take your time between coats, and you’ll get a professional-looking finish that lasts.
For a durable, high-heat option that withstands radiator temperatures, consider a heat-resistant paint like Rustins Quick Drying Radiator Enamel, which is specifically formulated for radiator surfaces and hides scuffs while maintaining heat efficiency.
Coats and Coverage
Coating a radiator seems simple until you do it. The real trick is layering thin coats, not piling on one heavy coat and hoping for the best.
You want two to three thin layers instead of a single thick one. Coat thickness controls how evenly the paint dries and cures, so thin wins every time.
Start with a light tack coat that barely covers the metal. This gives the paint something to grip, similar to how a primer works.
Next, add your main coat. Cover the surface fully, but keep it thin and even to avoid brush strokes or lap marks.
A third coat is optional, but it adds durability. Use it on radiators that see wear or heat cycling.
Check the coverage number on the tin, say 7 square meters per liter. Divide that by three, because real-world coverage always runs short. Porous or textured surfaces can reduce coverage by an additional 10 to 20 percent, so adjust your estimate accordingly.
Keep a wet edge as you work and move in even passes. Watch for drips, and let each coat dry before the next one.
Pay attention to drying time versus full cure time. A radiator heats up fast, so give the finish several days before you turn it on.
Use a satin or gloss sheen for easy cleaning. Flat matte finishes trap dust and show fingerprints on metal.
Work in a ventilated space and check the VOC level on the can. Low-VOC paint is worth the extra cost indoors.
Cover the floor with a drop cloth and mask off the wall with painter’s tape. Radiators are messy to reach, and you’ll thank yourself later.
Aerosol Spray Technique
Shaking the can until you hear the mixing ball rattle is your first step, just like priming a pump. Hold the can about 30 cm from the radiator and spray in steady, slightly overlapping passes.
Light coats are the key, because you are building layers instead of dumping wet paint on. Wait for each coat to tack up before you add the next one, or you will get runs and sagging.
Check the date on the aerosol can before you start, because old paint sprays clumpy and uneven. A fresh can gives you a smooth, consistent wet edge that dries to an even sheen.
When you finish spraying, turn the can upside down and blast it until clear gas comes out. That clears the nozzle and keeps it from clogging for your next job.
For disposal, let the can fully depressurize by pressing the nozzle until nothing comes out. Then recycle it with your metal cans, and check your local rules for VOC content.
Cover the floor with a drop cloth and mask off anything you do not want painted with painter’s tape. Work in a ventilated area, because aerosol fumes are strong and you want proper drying time, not a headache.
Move your arm from the shoulder, keep a steady pace, and do not hover over one spot. Patience is the whole trick, so breathe, stay smooth, and let each pass dry before you consider a topcoat. For a reliable finish on metal surfaces, use a product with an any-angle spray tip to avoid wrist contortions during overhead applications.
Drying and Recoat Times
Once the last coat is on, the clock starts ticking. This is where most people mess up, so don’t rush recoat times or you’ll ruin the smooth finish.
Here’s the breakdown for each product.
Rust-Oleum aerosol is touch dry in 20 minutes. Recoat after 1 hour minimum, and hard dry takes 24 hours.
Rustins liquid enamel is touch dry in 1 hour. Recoat after 4 hours, and if you used an oil-based undercoat, wait 24 hours.
Concept spray needs 5 minutes flash-off between coats. Air dry 1 to 2 hours at 25°C, then apply 2 coats total.
Watch humidity effects because damp air stretches drying times way out. Forced air drying can speed things up, but keep it gentle since too much heat causes blistering. If you do use gentle forced air, remember that overheat protection is a key safety feature on many heat guns to prevent damage.
My rule is to wait longer than you think. Don’t turn the radiator on for a few days, because patience beats a redo.
Radiator Paint Drying Times: Before You Turn Heat On
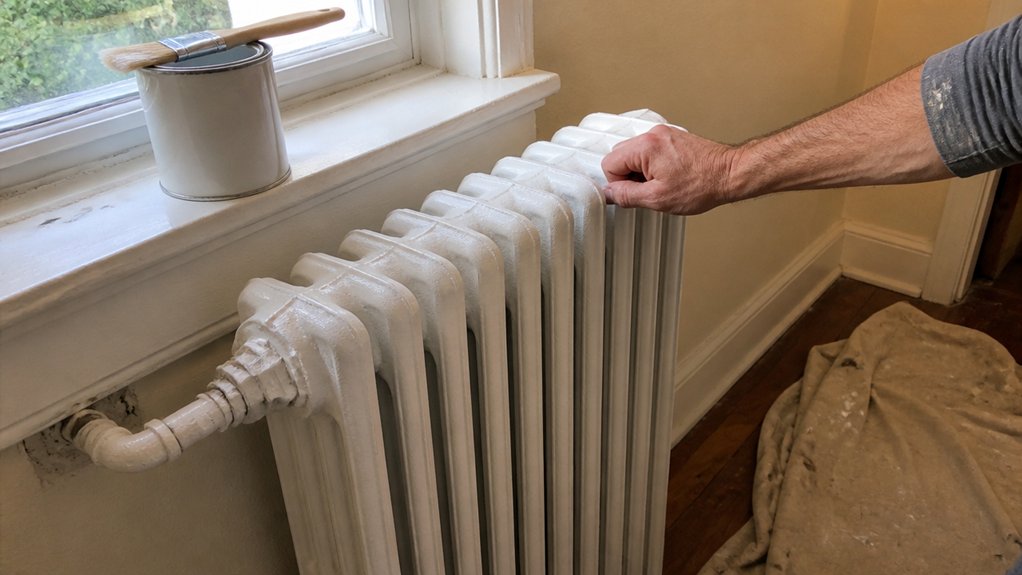
You’ve just finished painting your radiator and now you’re tempted to crank the heat. Resist that urge, because turning it on too soon will blister the fresh enamel and ruin your work.
Each paint type has its own drying time before heat is safe. Oil-based enamel needs at least 24 hours, while aerosol enamel requires a full 48 hours. Water-based enamel takes the longest, needing 3 to 5 days to fully cure, though a spray booth cure can cut that down to 4 hours at 25°C.
Temperature plays a big role in how the paint dries. Cold rooms slow down the drying process, while warm, dry spaces speed it up. Even if the paint feels dry to the touch, you should still wait a full 48 hours before you turn the boiler on.
That extra wait is your insurance against ugly cracking and peeling later. You’ve put in the effort with your drop cloth, painter’s tape, and even coats, so don’t skip the final step. Give it the weekend, and the enamel will set properly without brush strokes or lap marks showing up.
Check the sheen you chose, whether gloss, satin, or matte, and keep the room ventilated to lower VOC fumes. The paint’s cure time matters more than its dry time, so let the solvent fully evaporate before heat hits the surface. Your nose will thank you, and so will the finish. Accelerating this cure with a product like a CA glue activator can rapidly speed up solvent evaporation, but only for compatible adhesives, not enamel paints.
Ventilation, Safety Gear, and Cleaning Up After Painting
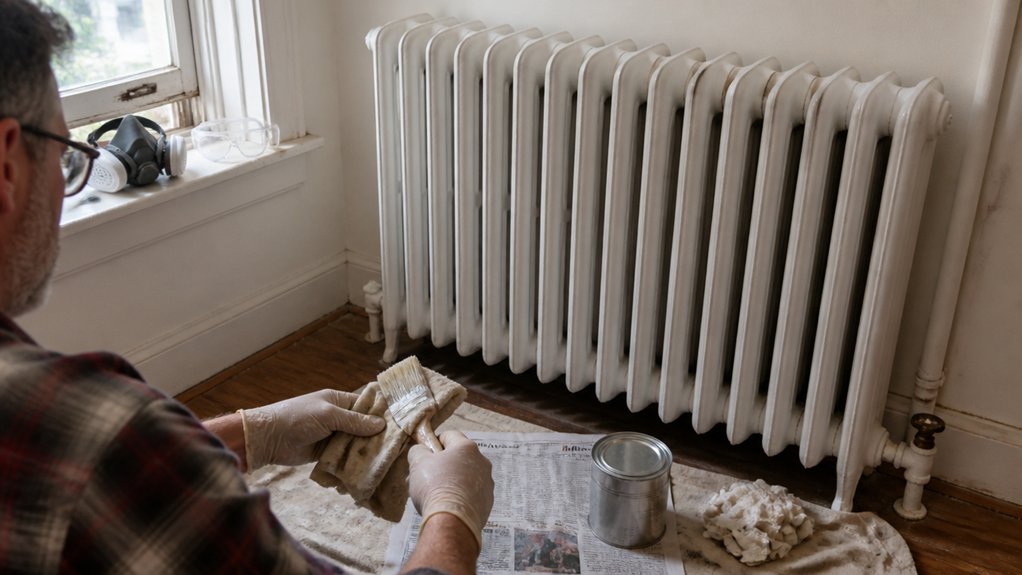
Open a window before you open the paint can. These enamels put off fumes that can leave you dizzy, and a cross-breeze is your best friend.
Point a fan out one window and crack another on the opposite side of the room. That airflow pulls the VOCs away from your face, so you can work without a headache building behind your eyes.
Grab a pair of nitrile gloves and a respirator with organic vapor cartridges. A dust mask won’t cut it, and your lungs will remind you for hours if you skip the real thing. Nitrile is latex-free and resists damage from solvents, making it a reliable barrier for this kind of work.
Wear long sleeves and safety glasses too, especially when you’re cutting in along trim with a brush. Paint splatter on skin is irritating, but in your eyes it’s a trip to the sink and a lost wet edge.
Lay down a drop cloth before you even mix the topcoat. Canvas or plastic both work, but tape the edges with painter’s tape so you don’t trip over wrinkles while you’re focused on a straight line.
When you’re done, clean your brushes within minutes, not after lunch. Enamel hardens fast, so grab the right solvent for your paint type, whether that’s mineral spirits or warm soapy water for latex.
Dip the brush in solvent, work the paint out from the ferrule to the tip, then rinse and reshape the bristles. For rollers, scrape off the excess with a putty knife, then wash them until the water runs clear.
Wipe down any drips on the floor right away with a rag and solvent, because dried paint on a drop cloth is a mess you’ll scrape for a week. Let the brushes air dry flat, and store them wrapped in paper so they keep their shape for the next coat.
Check the paint can for the cure time, not just the drying time. You can touch it in a few hours, but it won’t fully harden for days, so keep the drop cloth down until then.
Close the windows once the fumes are gone, and toss the used rags in a metal trash can with a lid. Oily rags can self-ignite, so never ball them up in a pile on the bench.
That’s the whole routine: ventilation first, gear on, and clean up before the paint wins. Do it in that order, and you’ll finish with a smooth satin sheen and no regrets.
Ventilation & Airflow
Ventilation is the part of radiator painting that keeps the job safe and the finish clean. Solvent-based enamels release fumes fast, so you need to move air out of the room before they build up.
I always open a window across from the radiator to pull vapors away, and I keep a second window open for intake. That cross breeze stops paint from drying unevenly, which matters more than most DIYers think.
My airflow setup takes two minutes and never fails.
Open two windows at opposite ends of the room, one for the fresh air to enter and one for the dirty air to leave.
Put a box fan in the outlet window, blowing outward, and never aim it at wet paint, because that pushes solvents onto the finish and causes lap marks.
Keep the door closed so the draft follows one path out, instead of drifting into the hallway.
After I spray the primer and topcoat, I leave that fan running for 30 minutes before I touch anything.
The wet edge on the enamel sets faster with steady airflow, and the drying time shortens without rushing the cure time.
Your lungs absorb less VOC, and the satin or gloss sheen stays smooth, with no brush strokes or blotches.
I also lay a drop cloth under the radiator before I start, because overspray and drips land there no matter how careful you are.
Painter’s tape on the wall edges keeps the line crisp, but good ventilation is what keeps you steady while you work. For extended exposure to solvent fumes, you should use respirator cartridges that are NIOSH approved for organic vapors to reduce inhalation risks.
Protective Gear Essentials
Protective gear is what keeps you safe from fumes, splashes, and airborne particles. I have skipped a mask once and spent the evening seeing double, so learn from my mistake and do not cut corners.
Start with gloves, since solvent exposure through your skin is a real risk. Nitrile gloves cost about £5 a box and resist solvents without breaking down like latex does. Vinyl gloves will melt fast, so they are not worth the money.
For respirators, paper dust masks are useless against solvent fumes. You need a half-mask respirator with organic vapour cartridges, such as a 3M model for around £25. It seals snugly, filters out benzene and other VOCs, and you can adjust the straps so it does not fog your glasses.
Ventilation matters just as much as the mask. Open a window and run a fan, but point the fan so it pulls air away from you, not straight back into your face. After painting, wash your hands with soap and water, then throw the gloves in the bin.
Spending £30 on the right gear now beats wheezing later or ruining a finish with dust or brush strokes. Keep a drop cloth down, use painter’s tape for clean edges, and remember that drying time is not the same as cure time before you add a topcoat.
Safe Cleanup Methods
When cleanup time rolls around, the two biggest concerns are fumes and leftover paint. Open your windows wide and set up a fan blowing out, and always wear a respirator when you’re working with solvent-based enamel.
That respirator is non-negotiable because the VOCs in those paints are serious. For leftover paint, never pour it down the drain.
Pour solvent into a sealed metal can and take it to a local hazardous waste site. Clean your brushes in White Spirit, then rinse them with warm soapy water.
To keep brush bristles soft between coats, wrap them in foil or cling film. When you finish with aerosol cans, flip them upside down and spray until clear gas comes out.
That clears the nozzle so it won’t clog for next time. Wipe down your work surfaces with a damp rag, then wash your hands thoroughly.
Use a drop cloth under your work area to catch drips, and keep your painter’s tape handy for edges. Cleanup is boring, but if you skip it, your brush will dry into a hard brick.
Wash brushes right after you finish a coat, and don’t wait for the paint to set. For solvent-based finishes, allow proper drying time before you store anything.
Remember that drying time and cure time are not the same, so plan ahead. A quick wipe with a damp rag on your paint cans prevents crusty rims and makes sealing easier.
If you’re working with varnish or polyurethane, clean your tools right away, because those films harden fast. Keep your topcoat sheen in mind, whether gloss, satin, or matte, and match your cleanup to the product.
Use sanding grits like 220 for between coats, and clean that dust off before you wipe down. When you spray a finish, keep a wet edge to avoid lap marks and brush strokes in the final coat.
Do the cleanup in steps, and you’ll be done faster than you think. Just stay consistent, and your tools will last through many projects.
Frequently Asked Questions
Can I Paint Over a Radiator That Is Still Warm?
No, you should not paint over a radiator that is still warm, because the heat will ruin surface adhesion and cause the coating to fail prematurely. Let the radiator cool down completely to room temperature before you even open the paint can, otherwise the enamel won’t flow out or adhere properly.
Once it’s cool, wipe the metal down with a degreaser or mineral spirits to remove any dust and oily fingerprints. Warm surfaces make the solvent evaporate too fast, which extends paint curing time and leaves ugly blotches and brush marks that are hard to fix.
For best results, use a heat-resistant radiator enamel and apply two thin coats, waiting the manufacturer’s recommended recoat time between them. A quick tip: check the surface with the back of your hand, if it feels even slightly warm, wait another hour. This patience pays off with a smooth, durable finish that won’t yellow or crack under heat cycles.
How Do I Remove Old Flaking Paint From Radiators?
To remove old flaking paint from radiators, you need to combine mechanical scraping with chemical stripping for a clean, rust-free surface. Start by using a wire brush or a stiff scraper to lift every loose flake, working carefully around the fins and valves where paint tends to chip.
After that, apply a chemical paint stripper, like a gel or paste, to stubborn areas and leave it for the time listed on the label, usually 20 to 30 minutes. Once softened, scrape again, then sand the entire radiator with 120-grit sandpaper to feather the edges and smooth bare metal.
Wipe down the surface with a tack cloth to remove dust, then immediately apply a rust-inhibiting primer designed for high-heat metal. For best adhesion, use a zinc-rich primer and let it dry fully for at least 24 hours before painting with a radiator enamel. This two-step process prevents future peeling, and you can also search for “stripping radiator paint without damage” for extra tips.
What Primer Works Best on Rusty Bare Metal?
The best primer for rusty bare metal is Rustins Red Oxide Primer, provided you remove all loose scale first. This zinc phosphate formulation converts light surface rust and gives your enamel a mechanical key to grip.
For the process, wire brush or sand with 80 grit to get down to a sound, stable surface before applying two thin coats. Let each coat dry for about 16 hours, then bake the metal at 100°C for one hour to fully cure the primer.
Without that heat cycle, the primer stays soft and topcoat adhesion will fail, so don’t skip it. This etching primer also works well on galvanized iron, but avoid it on aluminum. For a colder workshop, extend the drying time to 24 hours before curing.
Can I Use Radiator Enamel on Baseboard Heaters?
Yes, you can use radiator enamel on baseboard heaters, but only if you treat the surface like a professional would. The key is metal adhesion: clean the baseboards with a degreaser, then lightly sand with 220 grit to give the paint something to bite into.
After that, apply a quality metal primer and let it dry fully, not just tacky. Heat curing matters, so run the heaters at a low setting for 24 hours after the final coat. Don’t skip priming, or you’ll see peeling within a season.
For best results, use two thin coats of enamel, waiting at least 4 hours between each. This approach also works for hot water pipes, so search for high heat paint if you need a broader option. Patience here beats a quick redo.
How Long Should I Wait Before Turning Heat Back On?
Wait at least overnight before turning the heat back on, but ideally allow a few days for the enamel to fully cure. I wouldn’t rush it, since premature heat can trap solvents and cause bubbles or discoloration in the finish.
For best results, keep the room around 65 to 70 degrees Fahrenheit for the first 24 hours. After that, you can raise the thermostat gradually, by about 5 degrees per hour, to avoid shocking the coating.
A practical trick is to touch the painted surface lightly with your knuckle; if it feels tacky, keep waiting. Curing can take up to a week depending on humidity, so check the label on your can for the manufacturer’s recommended drying window.
If you’re short on time, use a low-heat fan to improve air circulation, but never point a space heater directly at the wood. Patience now will save you from recoating later.
Rounding Up
Applying radiator enamels starts with a clean, dry surface and a quality enamel chosen for metal.
Sand lightly, wipe off dust, then brush on thin coats, keeping each layer even and drip free.
Check your tin for the exact recoat window, and test your first coat on a small corner before continuing.
Write down the full cure time and keep the heat off during drying, because rushing leads to runs and marks.
Patience is your secret weapon here, so let every coat harden fully before the next pass.
Next, read about how to prepare radiators for repainting to get the base right.