What Are Satin Interior Wall Paints? Types, Uses and How to Choose

Scuffed hallways and fingerprinty kids rooms often point DIYers toward satin interior wall paint. It is the practical middle ground between eggshell and semi gloss, with enough binder to resist marks without a wet mirror look.
For kids bedrooms and hallways, satin wipes clean with soap and water, though semi gloss still wins in kitchens. A microfiber roller and a wet edge make it forgiving for beginners.
This guide covers satin interior wall paint types, uses, and how to choose, including surface prep, coats, cure time, and where not to use it.
Read on before you buy your next gallon.
Quick Answer
- Satin paint sits between eggshell and semi-gloss in sheen, offering durability with soft light reflection.
- Its tight pore structure resists stains, fingerprints, and mildew, making it easy to wipe clean.
- Best for medium-traffic rooms like kids’ bedrooms, hallways, and low-moisture bathrooms.
- Avoid satin in high-moisture kitchens and showers; use semi-gloss or gloss instead.
- Proper prep includes sanding patches, priming, and maintaining a wet edge to prevent lap marks.
Satin Paint Sheen Level Explained (and What It Means for Walls)
Satin paint sits between eggshell and semi gloss in the sheen range. It has about 35 percent pigment volume concentration, which gives it enough binder to resist scuffs without a wet mirror look.
Paint makers once sold similar finishes as dull gloss. They pitched them to people who wanted durability without a disco ball shine.
The sheen reflects light and makes colors look richer and more dimensional than flat or matte paint. That same light also shows wall dents, patches, and roller marks.
Satin offers moderate stain resistance, easy wipe cleaning, and a soft glow for most rooms. It is less protective than semi gloss, so use semi gloss on high traffic trim and doors.
Prep the wall before you paint. Sand patched spots with 120 grit paper and wipe off the dust.
Use a primer on bare drywall or patches, then apply the topcoat. Lay a drop cloth and tape off trim with painter’s tape.
Work in small sections to keep a wet edge and avoid lap marks. Rolling gives a more even finish than brushing, which can leave brush strokes.
Drying time means the paint feels dry; cure time means it has hardened fully. Choose a low VOC paint if odor matters, and let the topcoat cure before you judge the sheen.
For wood trim, use a wood finish such as stain, varnish, or polyurethane. Pick satin for walls when you want a cleanable finish with a gentle glow. Top-rated satin options often feature acrylic latex bases for breathability on older walls.
Satin Paint vs. Eggshell vs. Semi-Gloss: Choose by Room
Choosing a paint sheen comes down to two things: how much wear a room sees and how often you want to clean the walls. I have painted enough rooms to know that the finish has to match the job.
I will give you a guide for each room and a chart to compare satin, eggshell, matte, and higher gloss finishes. Before you open a can, set a drop cloth and tape off the trim with painter’s tape.
Use the sheen that fits the room’s traffic and cleaning habits. Check the label for VOC level if fumes matter to you. For high-traffic areas like kitchens and hallways, look for a scrub resistance rating of 5-H or higher to ensure the paint holds up to frequent cleaning.
Room-by-Room Guide
Satin paint is a solid middle choice for most rooms. It has enough sheen to resist moisture and stand up to cleaning, and it hides small marks better than flat paint.
In kids’ bedrooms and busy hallways, satin is tough and wipeable. It also hides fingerprint smudges better than flat or matte finishes.
In bathrooms, satin resists damp air, but use semigloss near the shower. Semigloss has a higher sheen and sheds water better in wet zones.
For living rooms and dining areas, satin gives you washability with a soft sheen. Flat paint shows scuffs, and eggshell can be harder to clean.
Accent wall lighting picks up satin’s subtle sheen without a hard glare. Check the label for low VOC paint if indoor air quality matters to you. Pre-tint VOC levels under 5 g/L ensure color stability in low-VOC acrylic bases.
Prep the room with a drop cloth and painter’s tape before you open the can. Sand glossy spots with 220 grit, wipe the dust, and apply a primer where the old finish is bare or stained.
Cut in edges with a brush and keep a wet edge to avoid lap marks. Roll or brush in small sections, and watch your brush strokes so the topcoat lays out evenly.
Respect drying time before recoating and cure time before heavy use. For wood trim, sand to 220 grit, apply stain if you want color, then seal with varnish or polyurethane.
Do not use satin on ceilings or high impact trim. Ceilings usually do better with flat ceiling paint, and trim needs a harder enamel or a clear polyurethane topcoat over a compatible paint.
Sheen Comparison Chart
Before you pick a sheen, get your surface ready. Use the right sanding grit, apply primer, and lay down painter’s tape and a drop cloth so the topcoat has a clean start.
Matte is the flattest finish, but it cleans poorly and works best in low traffic areas. Eggshell costs less and is forgiving, and it hides small wall flaws.
It offers decent durability for low traffic living rooms, but it handles dampness poorly. Satin has moderate washability and good finish longevity.
It resists stains and holds up better in busy rooms, though it shows wall flaws and needs smoother surface prep. Semigloss is the toughest choice for kitchens and baths because it takes scrubbing.
Its high gloss shows every bump, so it is rough on uneven walls. Apply any sheen with a wet edge to avoid lap marks, and watch your brush strokes on trim.
Check the label for VOC level and drying time, and remember that cure time matters before you clean or tape off. For wood projects, use stain, varnish, or polyurethane to build protection.
If you want the easiest balance of looks and durability for most walls, choose satin. Semigloss wins in rooms that stay wet and need scrubbing. For hostile masonry surfaces, look for a formula with alkali resistance that supports a pH above 12.0 to prevent paint failure.
Best Rooms and Surfaces for Satin Paint on Interior Walls
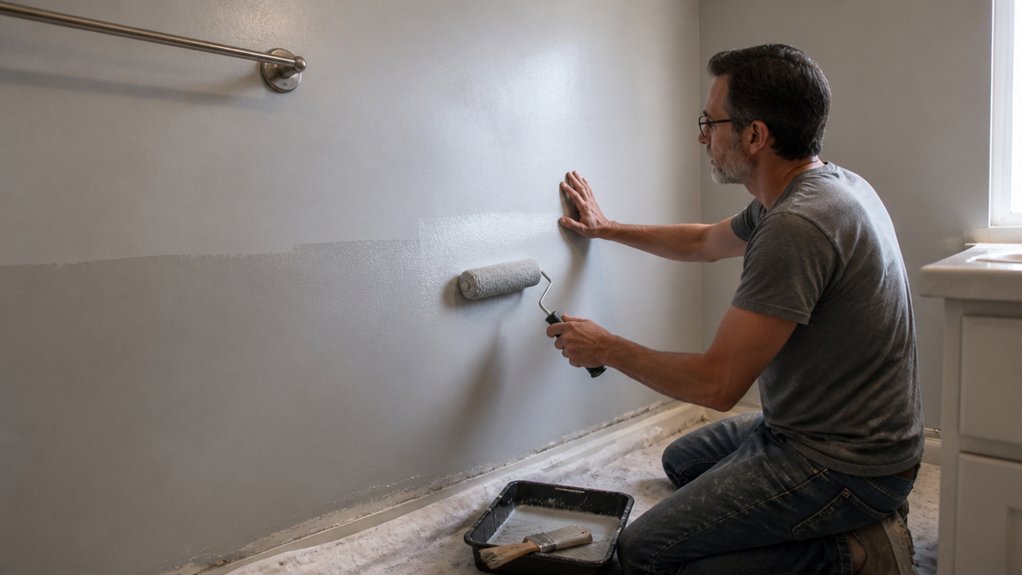
Most rooms in your house can handle satin paint, but the best return on your effort comes in a few specific spots. Those spots are the ones where life gets messy: kids’ bedrooms, busy hallways, and kitchens with daily cooking splatters.
Satin’s tight pore structure shrugs off fingerprints and mild grease better than flat paint. It also avoids the high shine of a gloss finish, so the wall looks clean without looking wet.
Satin’s tight pore structure shrugs off fingerprints and mild grease, avoiding gloss-level shine for a clean look.
Kitchens and bathrooms are a natural fit because moisture resistance helps with steam and humidity. Splashes wipe up easily after the topcoat has cured.
For trim and doors, satin brings out color depth better than flat and gives woodwork a subtle lift. Use painter’s tape along edges and keep brush strokes light so the finish stays smooth.
In living rooms and offices, the gentle sheen adds warmth and makes walls feel polished yet cozy. That sheen is easier to wipe down than flat paint, which helps in rooms that get daily use.
Satin will not fix rough drywall, so sand repairs with the proper sanding grit and set out painter’s tape and a drop cloth before you start. Apply a low VOC primer where needed, keep a wet edge to avoid lap marks and heavy brush strokes, and respect both drying time and full cure time; for medium traffic areas, I choose satin when I want durability and looks. In high-moisture zones, self-priming formulas with mildewcide provide an extra layer of defense that keeps the finish clean and resistant to damp environments.
Where to Skip Satin Paint (and What to Use Instead)
Satin is a poor choice in three places. Skip it on high traffic surfaces like cabinets, on walls that get direct sun and reflect like a mirror, and on most ceilings where it shows every flaw.
For cabinets, sand with 180 to 220 grit, apply primer, and use a semi gloss or gloss topcoat for durability. On sunny walls and flawed ceilings, choose flat paint to hide defects or matte paint for a softer look.
Lay a drop cloth and set painter’s tape before you start, and keep a wet edge to avoid lap marks and heavy brush strokes. Check the VOC level and follow the drying time and cure time on the label before you recoat. For fast repairs on cabinet chips, a semi-gloss touch-up pen or spray paint provides a durable finish without a full repaint.
High-Impact Surfaces
For doors that get slammed daily, baseboards in a busy hallway, and a kids’ toy chest, use semi gloss or gloss paint. Matte and satin are too soft for these surfaces, and I have repainted a hallway baseboard twice in one year because I learned that the hard way.
Semi gloss and gloss carry more binders, so they form a harder shell that resists scuffs and fingerprints. For trim, durability comes down to sheen level and resin content, and more gloss gives better defense against wear.
Use semi gloss on doors, cabinets, and baseboards because it is washable and resists chipping. Use gloss on furniture or a toy chest that sees heavy, rough play.
A water based alkyd enamel works well for trim because it dries like oil and cleans up easily. Apply a primer first, sand with the right sanding grit, and keep a wet edge to avoid lap marks and brush strokes.
This enamel has a low VOC option, and you should know the difference between drying time and cure time. Lay a drop cloth, use painter’s tape, and keep the topcoat away from dust and from stain, varnish, or polyurethane work nearby.
If the surface gets knocked, kicked, or slammed, use a glossier sheen. Your future self will thank you when the topcoat still looks good. For cabinets, a semi-gloss finish resists dirt and allows easy cleaning, making it a practical upgrade over satin in that high-impact spot.
Sunlit Wall Concerns
Satin looks rich on trim, but it can create strong glare on a wall that gets direct sun. The higher sheen reflects light and shows lap marks, patches, and drywall bumps.
For walls that get strong afternoon sun, use eggshell or a soft matte topcoat. These lower sheen finishes scatter light and hide small flaws without the wet shine.
South sun and west sun hit hardest, so pay attention to living rooms and other spaces with bright walls. Prime bare drywall first, then sand the primer with 120 grit before the topcoat.
Keep a wet edge as you roll and work in small sections to avoid lap marks. Use painter’s tape and a drop cloth, and plan your drying time around the full cure time on the label.
Keep satin on trim in those bright rooms and use eggshell or matte on the broad wall area. A gallon of quality eggshell runs $40 to $60, close to satin, and saves you trouble fixing small marks.
Check the VOC level and recoat within the window listed on the can. Gloss and satin show brush strokes and lap marks more than matte, so keep those sheens on trim where they are easier to control.
For a smoother finish on those sunlit walls, a 3/8-inch nap roller cover deposits a uniform film that helps reduce stippling and lap marks.
Ceiling Considerations
Satin paint on a ceiling looks good in the can and causes problems once the light hits it. The sheen catches glare and shows every ridge, lap mark, and brush stroke you left behind.
Flat or matte paint is the better topcoat for most ceilings because it hides those flaws and keeps the light soft. Save satin and gloss for walls and trim where washability matters more.
Texture matters because popcorn and knockdown ceilings throw light in different directions. Satin turns those bumps into bright spots and makes the ceiling look worse.
If a bathroom ceiling gets mildew, satin can make sense because you can wash it. In dry rooms, use flat and skip that extra sheen.
Flat paint usually costs less than satin, often by $20 to $30 per gallon. Put that savings into a good primer and a proper topcoat instead of shine you do not need.
Check the label for VOC content and give the room time to dry. Drying time and cure time are different, so read the can before you move furniture back in.
Before you paint, lay a drop cloth and tape the trim with painter’s tape. Sand patches with 120 grit paper and prime bare spots so the topcoat sits evenly.
Keep a wet edge as you roll the ceiling and work in small sections to avoid lap marks. Let the first coat dry fully before the second coat, and keep your brush strokes even while the paint is still wet.
If you are also finishing woodwork, keep stain, varnish, and polyurethane in a separate work zone. Those finishes need their own drying time and cure time, and they do not belong on a ceiling paint job.
For heavily textured surfaces, remember that popcorn and acoustic ceilings absorb 10–15% more material than flat drywall, so plan your paint quantity accordingly.
Why Satin Paint Holds Up Better Against Moisture and Stains
Satin paint is my first choice for walls that see moisture and stains, and its sheen sits between matte and gloss. The finish has a tight pore structure that works like a microscopic raincoat, so bathroom humidity is less likely to cause bubbling or peeling.
For stain resistance, satin is a strong performer. Coffee spills, jam smears, and muddy dog tails wipe away with a damp cloth and a little soap and water, leaving no shadow behind.
Flat paint soaks up stains like a sponge, and scrubbing can drive the mark deeper. Satin has added binders that create a slicker surface, which makes grime easier to remove.
In steamy rooms, satin resists mildew better than flat paint. It also cleans easily with soap and water and holds up longer than eggshell in damp zones. Mold resistance is a key reason satin outperforms other finishes in high-humidity environments.
Before you apply a satin topcoat, patch and sand the wall with 120 grit sandpaper, then wipe off the dust. Lay a drop cloth and use painter’s tape to protect trim, because prep work saves you extra work.
Use a stain blocking primer on water marks or heavy stains, then let it dry for the full drying time on the label. The primer seals the surface so the satin topcoat can do its job.
Apply satin with a synthetic brush or a short nap roller and keep a wet edge to avoid lap marks and visible brush strokes. Two thin coats work better than one heavy coat, so follow the recoat time on the label and let the finish reach cure time before heavy cleaning.
Check the VOC level if odor or indoor air quality matters to you. For wood trim or furniture, use varnish or polyurethane, and save satin wall paint for drywall.
Choose satin for kitchens, baths, and other damp rooms where walls take abuse. Your walls will hold up better, and you will keep your sanity when messes happen.
Match Satin Paint to Your Room’s Traffic and Cleaning Needs
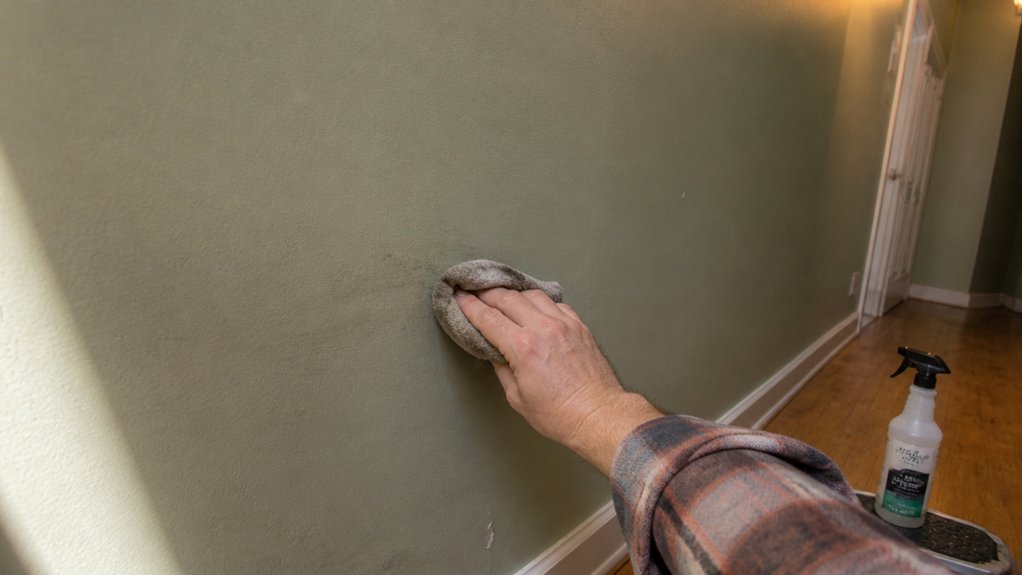
Satin paint works well in rooms with medium traffic and regular cleaning, and it can save you a lot of scrubbing. I learned that on the job and at home when my hallway looked like a crime scene after one muddy dog winter.
Satin sits between matte and gloss in sheen, so it hides some marks while still wiping clean. Use it in kids’ bedrooms, hallways, and bathrooms with low moisture.
For kitchens and other heavy grime zones, use semigloss or gloss. Before you buy a gallon, test the sheen in the room where it will go.
For kitchens and heavy grime zones, semigloss or gloss is your best bet—just test the sheen in the room first.
Hold a sample board at eye level in natural light and check whether glare bothers you. As a painter and finisher, I also check the sheen on wood trim because matte, satin, and gloss read differently on wood.
For a wall test, sand the patch with 120 grit paper, apply primer, and then paint two coats of topcoat. Let the topcoat dry for the maker’s recoat time, then wait the full cure time before you judge the sheen.
Drying time and cure time are different, so read the label and do not test too soon. Use painter’s tape and a drop cloth to protect the floor and edges while you work.
Keep a wet edge while brushing to avoid lap marks and heavy brush strokes. For better leveling, use a brush or roller made for the paint and keep the room at the label’s recommended temperature.
On the sample board, dab on mustard, coffee, and grease, then scrub with a sponge. If the paint cleans up without leaving a ghost mark, satin is a good match for that room.
If you are also testing wood trim, try stain, varnish, or polyurethane on a scrap piece. Check the VOC level on the wall paint label and follow the maker’s safety and ventilation instructions.
Choose the sheen based on the mess you expect to clean and the cleaning method you will use. That way your paint choice fits the room and your weekly routine.
Apply Satin Paint Without Lap Marks or Brush Strokes
Satin sits between gloss and matte, and it shows lap marks and brush strokes easily. Keep a wet edge as you roll, and overlap each section before the paint starts to set.
Work in small sections and move at a steady pace so the paint stays workable long enough to blend. On a satin sheen, keep the whole wall on the same schedule and avoid stopping in the middle of a section.
A microfiber roller cover with a 3/8 inch nap gives smooth coverage and limits stipple on a satin topcoat. Match the nap to the surface, and keep the cover loaded so you do not press hard to spread the paint.
For edges and trim, use a synthetic brush and lay off the paint with light, even strokes. If you finish wood with stain, varnish, or polyurethane, use the same light strokes and keep the brush moving with the grain.
Do not roll the surface too much, because extra pressure and repeated passes make streaks in the finish. Sand with the sanding grit your primer or topcoat calls for, wipe off dust, and set out a drop cloth and painter’s tape before you open the can.
Check the label for drying time and cure time, and choose a low VOC product if fumes are a concern. Let each coat dry for the full drying time before you sand or apply the next coat, and wait for the cure time before you judge the sheen.
Compare Satin Paint Brands: Behr, Benjamin Moore, and More
Satin sits between matte and gloss, and these three brands come up most often for that sheen: Behr, Benjamin Moore, and Sherwin-Williams. I have used all three on walls, trim, and wood, and each one has a clear place in my kit.
Behr Marquee is the value pick and it holds up well to scrubbing in my durability tests. Plan on two coats over a good primer, because the first coat can look thin, and keep a wet edge to avoid lap marks.
Behr Marquee scrubs well and saves money, but needs two coats over primer and a wet edge to avoid lap marks.
Its VOC level is in the middle of the group, and the price near $40 per gallon makes it easy to choose for a rental or a quick room refresh. Use a quality brush and keep your brush strokes tight so the satin sheen looks even.
Benjamin Moore Regal Select costs $70 or more per gallon, but it brushes out smooth and hides small wall flaws. The lower VOC level helps in a closed room, and the finish levels out well if you work at a steady pace.
Sherwin-Williams Cashmere sits between the other two on price and has a creamy feel under the brush. It stands up to scrubbing better than I expected, though you still need to watch drying time versus cure time before you tape off or move furniture back.
Set a drop cloth before you start, and use painter’s tape on trim you want to keep clean. For most rooms, use Behr and put the savings into primer and sanding supplies.
For a smooth wall or fine woodwork, pay for Benjamin Moore and take your time with sanding grit and topcoat. For bare wood, use stain, varnish, or polyurethane after sanding, and keep the work area clear.
Frequently Asked Questions
Can Satin Paint Be Used on Ceilings?
Yes, satin paint can be used on ceilings if you match the sheen to the surface and accept its reflective finish. It works best on smooth, sound drywall because the light bounce will reveal ridges, patches, and roller marks.
For a rough or flawed ceiling, use a flat paint instead, since it hides defects better. If you proceed with satin, sand repaired spots with 220-grit paper, spot prime them, then apply two thin coats with a 3/8-inch microfiber roller.
Keep the room well lit while painting so you catch lap marks early. This ceiling paint finish can look crisp in bathrooms and kitchens, but it demands careful surface prep.
How Long Does Satin Paint Take to Cure Fully?
Satin paint takes about two weeks to cure fully, reaching maximum hardness and durability.
Until then, handle it gently and avoid heavy cleaning, stacking items, or pressing furniture against the surface. A practical tip: wait at least seven days before light use, then clean with a soft damp cloth only.
Apply two thin coats rather than one thick coat, follow the label’s recoat window, and sand lightly with 220 grit between coats if needed. This satin paint cure time matters more in humid weather, so keep airflow steady and avoid cool, damp rooms.
Plan your project around that full cure, and you will get better resistance to wear and moisture.
Does Satin Paint Require a Primer Before Application?
Satin paint does not always require a primer before application, but I strongly recommend one for bare drywall or glossy surfaces. A quality bonding primer boosts adhesion and gives you a more even finish.
For glossy trim, scuff it with 180 grit sandpaper, wipe off the dust, then apply one coat of primer and let it dry for about an hour before painting. Skipping primer on those tricky surfaces risks blotchiness and uneven sheen.
If you are coating previously painted walls that are clean and sound, you can often skip the extra step. Just test a small area first, and remember that proper surface prep matters as much as the paint itself.
Can Satin Paint Be Tinted to Any Color?
Satin paint can be tinted to any color available in a tintable base, provided the paint store uses the correct colorant system for that product. Ask for a sample pot mixed in your chosen shade, then brush it onto a primed scrap board or a small wall patch and let it dry for 24 hours.
Apply two coats at the same spread rate you plan to use, because paint sheen matching affects color depth variation and glossier surfaces appear lighter. This quick test shows how the tint reads in your room light before you commit to the full wall.
For reliable results, use the same base and brand as the final gallon and check the sample in daylight and lamplight.
How Do I Clean Satin Painted Walls Safely?
To clean satin painted walls safely, use gentle wiping with a soft sponge and mild soapy water, then rinse lightly. For tougher stains, use a diluted vinegar solution on a microfiber cloth.
Work in small sections and keep pressure gentle to protect the satin finish. A practical tip is to test any cleaner on a hidden spot and let it dry for 24 hours before treating the full wall.
Avoid abrasive pads, scouring powders, and harsh solvents because they can dull or scratch the paint. This same approach works for cleaning satin enamel walls, a useful synonym.
Rounding Up
Satin interior wall paints are the practical Goldilocks finish, not too flat and not too shiny, for walls that scrub clean without car hood glare. Check kitchens, bathrooms, and kid zones today, then write down Satin for those walls.
Compare Behr and Benjamin Moore prices before you buy, and either brand works if you ask for quality paint. Skip satin for ceilings or flawless drywall, then test a thin coat on a wall where eggshell hides sins better.
Buy for function, not pretty, paint it thin, and breathe. Related topic: eggshell finishes.