How to Apply Yacht Varnishes: Step-by-Step Guide
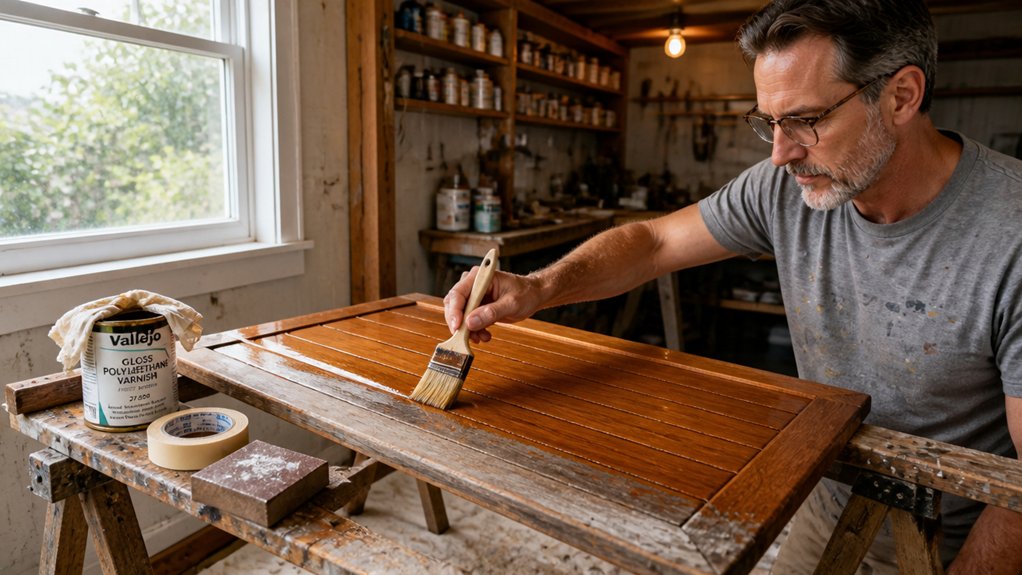
A dull, cloudy yacht varnish finish usually comes down to one thing: surface prep, not the brush. Getting a flawless, deep gloss starts long before you wipe on that first coat.
This step by step guide covers stripping, sanding, and the exact thinning and coating schedule you need. You will also learn how to check the dew point, so humidity never ruins your hard work.
I will walk you through every grit, wipe, and coat to get a professional finish at home. Let us get your wood ready for a finish that actually lasts.
Quick Answer
- Strip failed varnish fully before applying new coats to prevent adhesion failure.
- Sand bare wood from 80 to 220 grit, then wipe with solvent.
- Apply a thinned first coat, dry overnight, then sand with 220 grit.
- Brush with grain in long strokes, overlapping a third, maintaining wet edge.
- Check dew point gap under 3°C; stop if humidity threatens finish.
What Should You Know Before Varnishing Wood?
Varnishing is mostly preparation, not brushing.
Varnishing is mostly preparation, not brushing. Skip the prep, and you seal in mistakes.
If you skip the prep, you will seal mistakes into the wood that are hard to fix later.
Start by checking the direction of the wood grain.
Your brush should always follow that grain, because going against it leaves streaks and frustration.
Pick a natural-bristle brush for varnish, not a cheap foam one.
A good brush holds the varnish evenly and lays it down smooth, while foam traps air and leaves bubbles.
Before you open the can, inspect the surface for peeling, scratches, or old finish that is failing.
Test a small spot to make sure the new varnish will stick to the old coating instead of beading up.
Sand with a fine grit like 220 to rough up the surface just a little.
Wipe off the dust with a tack cloth, then apply your first thin coat.
Keep a wet edge as you work, and do not go back over a section that has started to dry.
That is how you avoid lap marks and brush strokes in the final sheen.
Use a drop cloth and painter’s tape to protect the area, and check the label for VOC levels if you are indoors.
Drying time is shorter than cure time, so wait the full cure period before putting anything on the surface.
For exterior projects, confirm the product contains UV inhibitors to prevent sun damage and premature cracking.
How Do You Prep Bare Wood for the First Coat?
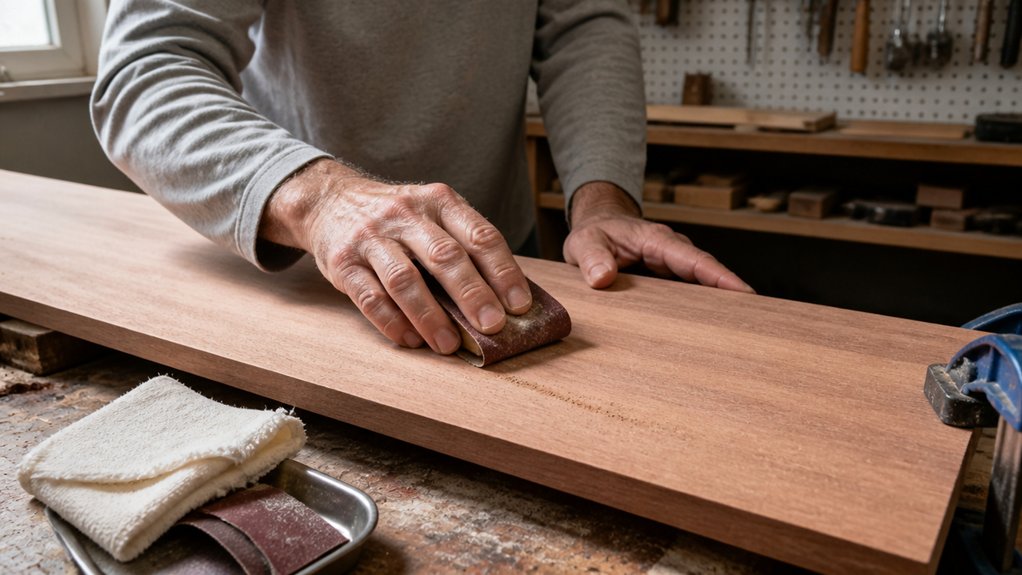
You’re looking at bare wood and thinking, let’s just slap on some varnish and be done. Stop right there, because prep is where you win or lose the finish.
First, wipe the surface with a solvent like mineral spirits to remove oils, dirt, and any hand grease. This step opens the pores so the wood can accept the finish evenly.
Next, sand with 80 to 120 grit, which roughs up the grain so your varnish or polyurethane can bite in deep. Don’t skip grits or jump to fine paper, because that seals the pores shut and causes poor adhesion later.
After sanding, vacuum or brush off every speck of dust, then do a final wipe with a clean rag soaked in mineral spirits. That lifts the fine residue sanding leaves behind, and you should let it dry fully for about ten minutes.
You want the wood thirsty, not wet, so make sure the surface feels dry to the touch. Now you’re ready for a thinned first coat, which acts like a primer to seal the grain before your topcoat.
For that first coat, mix in about 10 percent solvent to thin the varnish, which helps it soak in and avoids brush strokes or lap marks. Once that coat dries, sand lightly with 220 grit, clean off the dust, and apply your full-strength finish.
Keep a wet edge while brushing, work in long strokes, and choose a satin or matte sheen if you want to hide minor flaws. Remember, drying time is just a few hours, but curing to full hardness takes days, so don’t rush the next coat. To maximize durability on exterior brightwork, consider an oil-based formula that flexes with seasonal wood movement.
Test Old Varnish and Strip It If Cracks Appear
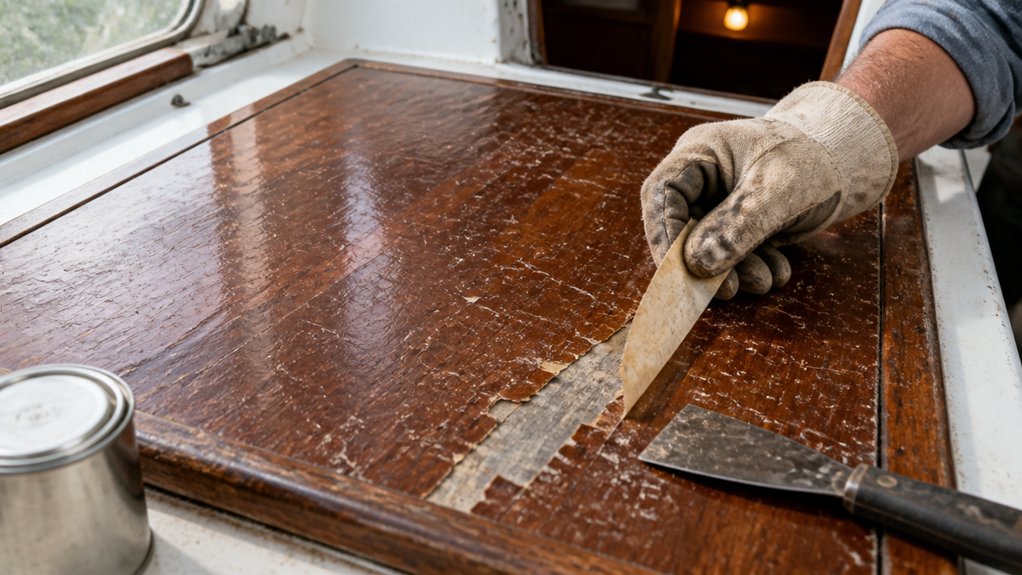
Before you sand anything, check whether the old varnish is still bonded to the wood. Drag a knife blade across the surface; if it flakes off like broken glass, the finish is already failing.
For a more reliable crack test, press a strip of clear painter’s tape onto a suspicious spot and pull it off fast. Whitish flecks stuck to the tape mean the varnish is letting go underneath, so sanding it would just push the problem deeper.
If you see separation or peeling at the edges, don’t try to patch it. Strip everything down to bare wood with a chemical stripper, then sand with 80-grit paper to open the grain for a fresh coat.
That first pass with 80-grit also removes any leftover residue and gives the new stain or primer something to bite into. Wipe the dust off with a tack cloth, then move up to 120-grit before applying your chosen topcoat, whether that’s varnish, polyurethane, or a satin or gloss finish. Oil-based formulas dry harder and are more abrasion resistant for high-traffic areas.
Keep the drying time and cure time straight on the can, and maintain a wet edge while brushing to avoid lap marks. A clean, well-prepped surface is the only way to stop the next coat from cracking too.
Inspect Adhesion First
Check adhesion before you do any sanding or cleaning.
A soft thumbnail dent or whitish patches means the coating is delaminating from the wood.
Don’t try to patch over that, and don’t recoat over it.
That’s like painting over rot, and it will fail the same way.
Use a strip of painter’s tape and press it onto the varnish, then pull it off fast.
If the varnish flexes, flakes, or lifts with the tape, you need to strip it down to bare wood.
A weekend with a chemical stripper and a drop cloth beats a full redo next spring.
You want a clean, bare surface so your new primer and topcoat can bond properly.
If the old finish is sound, a light sanding with 120 grit will give the new varnish something to grab.
But if it fails the tape test, don’t skip the strip, no matter how good the surface looks.
Check adhesion first, and you’ll save yourself from peeling, lap marks, and a wasted season.
Once you strip and recoat, let the varnish cure fully before you put anything on it.
For the recoat, use a brush with pure white natural bristles to ensure smooth, even release and avoid streaks that can trap air under the new coat.
Crack Test Methods
A scrape test with your thumbnail only tells you part of the story.
For a real check, press a dull knife across the old finish at a 45 degree angle to see what’s underneath.
If the blade digs in and lifts chips, that points to adhesion failure.
Look for tiny spiderweb lines, dull patches, or edges curling back like sunburned skin.
Run your palm flat over the surface to feel for roughness or flaking.
If it feels gritty or lifts, the old varnish or polyurethane has already lost its bond with the wood.
I’ve seen glossy coats that look smooth but hide cracked layers beneath.
They seem ready for a fresh topcoat, but they fail within one season once moisture gets in.
Trust the knife test over the shine, because cracks let dampness sneak into the wood.
That old coat is done, so strip it down to bare wood with a chemical stripper or heat gun.
A carbide scraper blade stays sharp far longer than standard steel, making the stripping work easier on stubborn residue.
Use 80 to 120 grit sandpaper to remove the residue and smooth the surface before you prime.
Apply a stain or primer to seal the grain, then build your new finish in thin coats to avoid lap marks.
Drying time is not the same as cure time, so wait the full period before heavy use.
If you skip the strip now, you’ll be redoing this whole routine in six months.
Better to spend a weekend on prep than lose several weekends to a failed finish later.
Do it right, and your new coat will hold up for years.
Total Strip & Sand
I trust the knife test before I ever pick up a sander. If the blade digs into soft, crumbling varnish, or worse, slides under a layer that lifts neatly, that is your cue to stop.
Don’t patch it, and don’t pretend the damage is cosmetic. Cracks mean the coating is dead, and a total strip is the only sane move.
Plan on full removal with one of these methods. Use a belt sander with 36-grit paper on flat decks, and a heat gun plus scraper for curves and corners.
Chemical strippers work, but they are messy and pricey. Expect to pay about $40 a gallon, and you will burn through two gallons on a small dinghy.
After stripping, sand the bare wood to 120-grit. Then wipe the surface down with solvent to remove dust and oils.
No shortcuts here. If it cracks, strip it completely, because your new varnish or polyurethane topcoat will only bond well to a clean, sound base.
That extra effort pays off in the finish’s sheen and durability. Ten years down the line, you will be glad you did the job right the first time.
Varnish Brushing: Long Strokes, Then Tip Off at 45
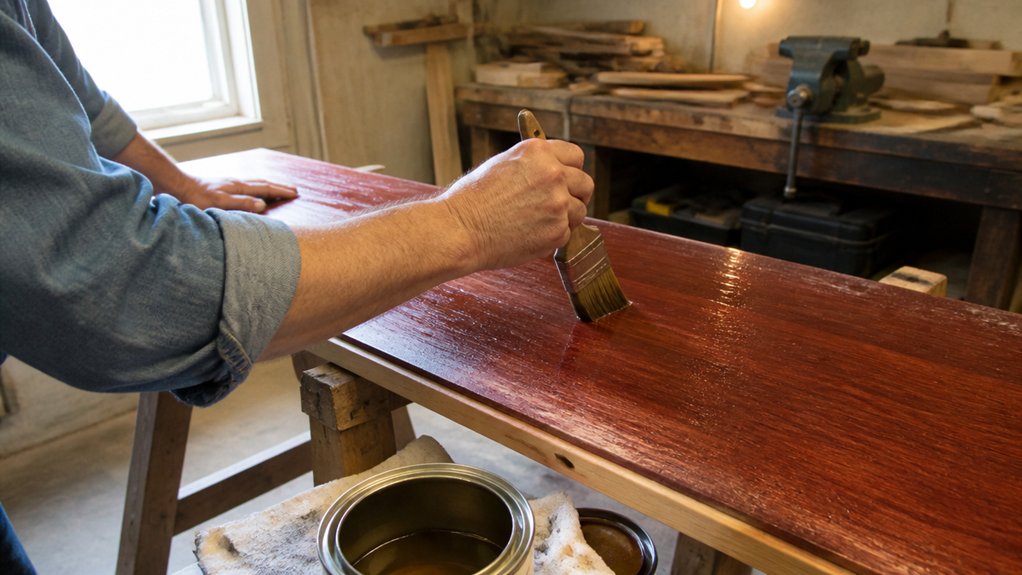
Hold the brush firmly and load it fully, then lay down one long, continuous stroke along the grain. Keep the brush moving and never break contact until you run out of varnish, so the next pass melts into the previous one without lap marks.
Short, choppy movements trap air and leave brush strokes that show up once the finish dries. Pull the brush instead of pushing it, and overlap each pass by a third to keep a consistent wet edge.
When the section is covered, switch to the tip-off step. Hold the brush at a 45° angle, barely touching the surface, and drag it lightly over the whole area in the same direction with no extra varnish.
This levels the film and removes any ridges, leaving a smooth, even coat. Two strokes per section, one long pull and one light tip-off, and you are done.
Work in manageable sections so the varnish stays wet while you tip off. If the surface starts to tack up, stop and move to a fresh area rather than forcing the brush.
Use a high-quality brush with fine bristles, and avoid cheap foam brushes that leave bubbles and uneven texture. For best results, apply varnish in a dust-free room with decent airflow, and wait for the full drying time before sanding between coats with 220 grit.
To prevent cracks from premature sanding, allow a full day cure before any sanding, as thick varnish coats require extended open time.
How Many Varnish Coats You Need and When to Sand
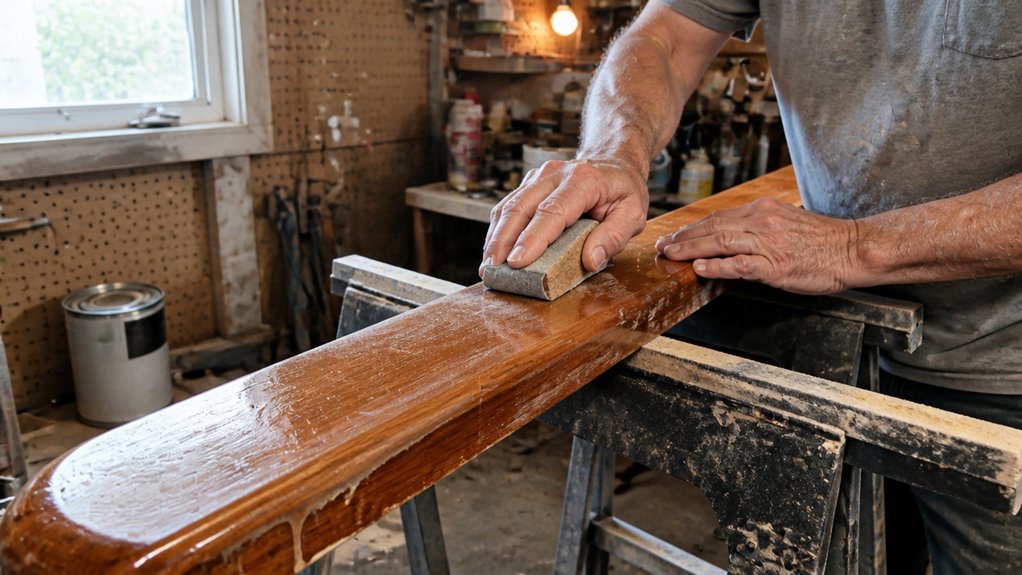
Varnish is a real commitment, and most systems need four to ten coats to stand up to sun and salt. That is a lot of brushing, and I won’t pretend otherwise.
The number of coats matters far more than people expect. I have watched five-coat jobs fail in two seasons, while eight-coat finishes shrug off harsh weather for years.
Five coats fail in two seasons; eight shrug off harsh weather for years.
Sanding time is the secret, and you cannot skip it. Start with a thinned first coat: mix in about 15% thinner, let it dry overnight, then sand with 220 grit.
That rough feel after the first sanding is normal, so do not panic. For coats two through six, sand each one with 220 grit, wipe the dust off with thinner, then recoat.
You are building a glassy base this way, and each layer bonds better than the last. When you hit coats seven and eight, switch to 320 grit, use a lighter touch, and take your time.
For the final coat, skip sanding altogether unless you have a drip to fix, and then use 400 grit very gently. Keep your wet edge moving to avoid lap marks, and use a good brush to minimize stroke lines.
Drying time is not the same as cure time, so wait the full cure before putting the piece into service. Use a drop cloth and painter’s tape to protect surrounding areas, and pick a varnish with low VOCs for safer indoor work.
A matte or satin sheen hides minor flaws better than a high gloss, but gloss shows off a perfect build. Ten coats beats four, every time, so plan for the long haul.
For outdoor wood and brutal UV exposure, UV blockers in marine-grade varnish provide essential protection against sun damage.
Don’t Varnish in Damp Heat Without Safety Gear
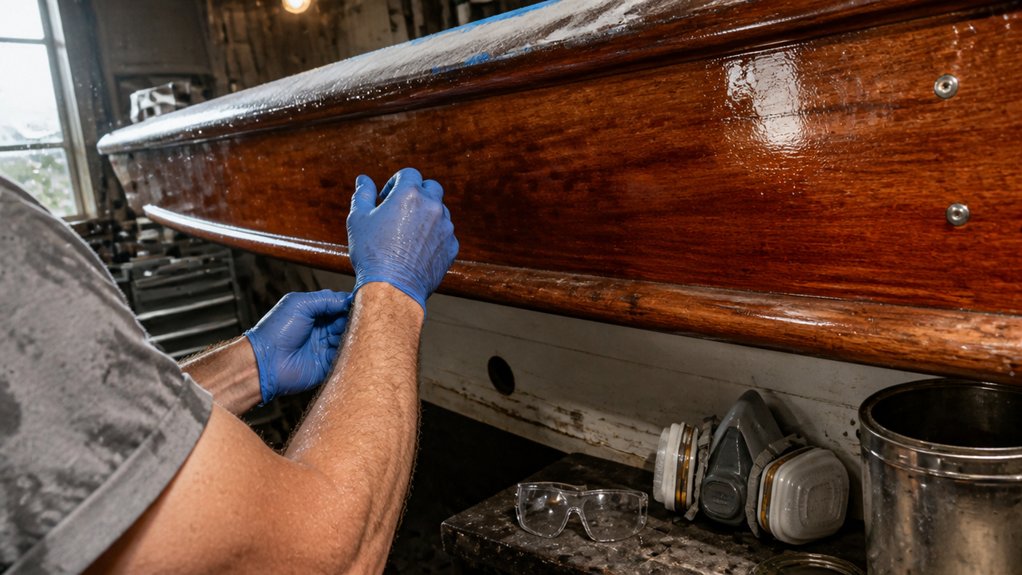
Before you open that can of varnish, set up your workspace. Crack open every hatch and door you can find, because solvent fumes hit harder in damp heat than you expect.
Check the dew point before you mix anything. If you are within 5°F of it, the humidity will mess with your finish, so wait for a dryer window.
Grab your safety glasses, gloves, and a solvent mask rated for VOCs. These are non-negotiable, even for a quick coat. For reliable protection, a cartridge with a bayonet connection ensures a proper seal against harmful fumes.
Use a drop cloth to catch drips, and keep your varnish can covered between passes. Damp heat shortens your wet edge, so work in smaller sections and keep brush strokes overlapping quickly.
Remember that drying time is not the same as cure time. Let the varnish sit overnight before you sand with 220 grit, and don’t rush a second coat until the first is fully dry to the touch.
Keep a rag handy to wipe off any lap marks while the film is still wet. If you spot a run, smooth it with a dry brush before it skins over.
Ventilation Before Starting
Before you even uncap that can of varnish, look around and check your airflow. Your lungs and your finish will both suffer if you skip this step, and I’ve made that mistake once: my brightwork came out fogged like frosted glass. Proper ventilation means more than cracking a hatch, so set up real fume extraction, not an afterthought.
Put a box fan at the entry point, pulling fresh air across your work area. Place a second fan at the far end, blowing solvent fumes outside, and keep both fans clean so they do not recirculate dust.
You should smell varnish faintly, not strongly, and your eyes should not sting. If they do, stop, air the space out, and wait until you can breathe easy.
Give the room ten minutes of cross-ventilation before you mix your batch, especially with high-VOC products like polyurethane. During the job, maintain that wet edge and avoid brush strokes by moving steadily with the grain.
Wear a respirator with organic vapor cartridges, not just a dust mask, because the solvent fumes hit hard when you lean over the work. Perform a user seal check before each use to ensure the facepiece fits without gaps, as a leak can let air bypass the filter. After you finish, keep the fans running for a few hours while the varnish dries; drying time is not the same as cure time, so keep the space aired until the surface is fully cured.
Treat ventilation like your first coat of primer: skip it, and you will sand out flaws or breathe in trouble later. Set the fans, check your nose, and then start, because no gloss or satin sheen is worth a lungful of fumes.
Dew Point Awareness
Dew point is the temperature at which moisture in the air starts condensing on surfaces. If your wood surface sits within 3°C of that number, you’re asking for a ruined finish.
That’s why I always check the numbers before mixing varnish, no matter how good the day feels. A simple moisture meter on the wood and a dew point chart for the air are cheap insurance.
I once varnished a transom on a muggy afternoon, and the topcoat bloomed white by morning. That was a weekend of sanding with 80 grit, then 120, then 220, just to get back to bare wood.
The real killer is that the air can feel dry while the surface is still cool enough to pull water out of it. So don’t trust your gut, trust the meter and the chart.
If the humidity is high and the temperature is climbing, stop and check before you lay down a single coat. Varnish needs a dry, stable surface to flow into a clean wet edge, and any moisture under it will cloud the sheen.
You don’t need a fancy setup, just a thermometer, a humidity reading, and a few minutes of math. That keeps your gloss clear, your drying time predictable, and your weekend free for the next step, like applying a satin topcoat over the varnish.
The rule is simple: if the gap between surface temp and dew point is under 3°C, put the brush down. If it’s above that, you can work, but keep the painter’s tape handy and avoid sudden temperature swings that shift the dew point mid-coat.
This isn’t about being paranoid, it’s about being consistent. A little verification up front saves you from stripping a cloudy finish and redoing the whole job with a fresh can of polyurethane.
Full Protective Gear
Every serious varnishing session starts with the right gear to keep solvent fumes away from your lungs and skin. Damp heat makes those fumes cling like a bad houseguest, so I never skip the basics.
First, check your gas mask fit by covering the intake and inhaling. If the mask collapses against your face, the seal is good; a loose fit in humid weather will give you a headache fast.
Wear a cheap vapor barrier suit over your clothes. This crinkly jumpsuit stops varnish and solvent from soaking through, acting like a raincoat for your skin.
Double-layer nitrile gloves for sanding and finishing work. Thin ones tear on sharp edges or dried polyurethane, so two pairs give you a safer buffer.
Use over-the-glasses safety glasses that seal around your eyes. Squinting through a wet edge of varnish in a dusty shop is not worth the irritation.
Older finishes like varnish and polyurethane release VOCs while drying. Even with low-odor options, the solvent cloud is real, and full cure time can take weeks, so protection matters at every stage.
A drop cloth and painter’s tape keep your workspace safe, but they don’t protect your body. Suit up first, then worry about lap marks and brush strokes.
If you skip the gear for one quick coat, the headache and nausea will remind you why that’s a bad trade. Gear is cheap, and lung damage isn’t, so varnish another day if you’re not prepared.
Frequently Asked Questions
Can I Use a Spray Gun Instead of a Brush?
Yes, you can use a spray gun instead of a brush, but it demands a proper setup and a steady hand. You must thin the varnish to the correct viscosity, often around 10 to 15 percent with mineral spirits, or you will get runs and sags.
A HVLP sprayer works best for clear finishes, but practice on scrap wood first to dial in your fluid and air pressure. I recommend brushing for tight corners and edges, as spray overspray can easily create a rough, pebbled texture.
For a smooth result, apply two thin coats, sanding lightly with 320 grit between each. If you choose to spray, keep the gun moving at a constant distance of about 8 inches, and always filter the finish to avoid nozzle clogs.
How Long Should I Wait Between Coats in Humid Weather?
In humid weather, you should wait 24 hours between coats, and possibly longer for oil-based products. High moisture in the air slows solvent evaporation, so a wet layer can stay soft underneath even when the surface feels dry to the touch.
Check the recoat window on your can, then add at least half that time. For latex paints, a 24 hour wait beats the label’s 4 hour rule when dew point is close.
Test the film with 220 grit sandpaper; if it powders into fine dust, you are safe to proceed. If it gums or rolls into balls, give it another 6 to 12 hours.
Use a dehumidifier or warm the room slightly to accelerate curing, but avoid fans blowing directly on the surface, which can trap moisture. Remember that stain and clear finishes often need even longer, sometimes 48 hours, before a second coat in muggy conditions.
What if I Miss a Spot and It Dries?
Missing a spot and letting it dry is not a fatal mistake, so you can fix it without stripping the whole project. I would start by sanding that missed area with 220 grit paper, just enough to feather the edges and remove any raised grain.
After that, apply a fresh recoat over the entire surface, not just the spot, to blend the repair seamlessly into the surrounding finish. This avoids a visible patch line, which happens when you only touch up the dry miss.
For best results, wait until the recoat is tacky but dry to the touch, usually about 30 minutes for most varnishes, then add a second coat if needed. This method works for spar urethane, polyurethane, or marine varnish, and it keeps your yacht’s finish looking smooth and flawless.
Can I Apply Varnish Over Epoxy or Oil-Based Finishes?
Yes, you can apply varnish over epoxy or oil-based finishes, but only after confirming compatibility. I never skip adhesion testing, especially over oil-based products, since a poor bond leads to peeling and costly rework.
Epoxy is generally a stable base, but you must scuff it with 220 grit sandpaper and wipe off the dust with a tack cloth. For oil-based finishes, sand thoroughly with 180 grit, then apply a small test patch of varnish in an inconspicuous spot.
Wait at least 48 hours after sanding to ensure the old finish has fully cured and off-gassed. If the test patch adheres firmly after a week, proceed with two thin coats of varnish, waiting 24 hours between coats.
How Do I Fix Brush Marks or Bubbles After Drying?
To fix brush marks or bubbles after drying, sand the surface smooth with 220-grit sandpaper, then apply a fresh, thinner coat to blend the repair. Use a paint conditioner or flow additive to reduce surface tension and eliminate future imperfections.
For stubborn brush marks, dampen a cloth with the appropriate solvent and wipe the finish to soften the edges before sanding lightly. This solvent recovery trick works wonders on lacquer or oil-based varnishes, but test it on a hidden spot first.
Always apply thin, even coats and let each one dry completely, usually 2 to 4 hours for water-based paints or overnight for alkyds. Keep a wet edge while brushing, and use a high-quality synthetic brush to minimize streaking.
Finally, check your paint’s temperature range; applying in temperatures below 50°F or above 85°F often causes bubbles or pinholing as trapped air escapes too slowly. If bubbles persist, sand to bare wood and restart, as filling over them will only trap moisture.
Rounding Up
Applying yacht varnishes means laying four thin coats and tipping off at 45 degrees, with sanding between coats to fix any mistakes.
Your first coat will likely screw up, so sand it, recoat it, and move on without drama.
Check the humidity forecast today and skip any damp days, since moisture ruins the finish.
Write down your brush choice and buy a decent one, because a good brush saves your nerves.
Test the finish like a raincoat buttoned tight, ensuring each coat seals fully against salt spray.
The reward is a glossy deck that laughs at salt, exactly as the article describes.
Read next about sanding techniques for multiple coats.