What Are Oil-Based Wood Primers? Types, Uses and How to Choose
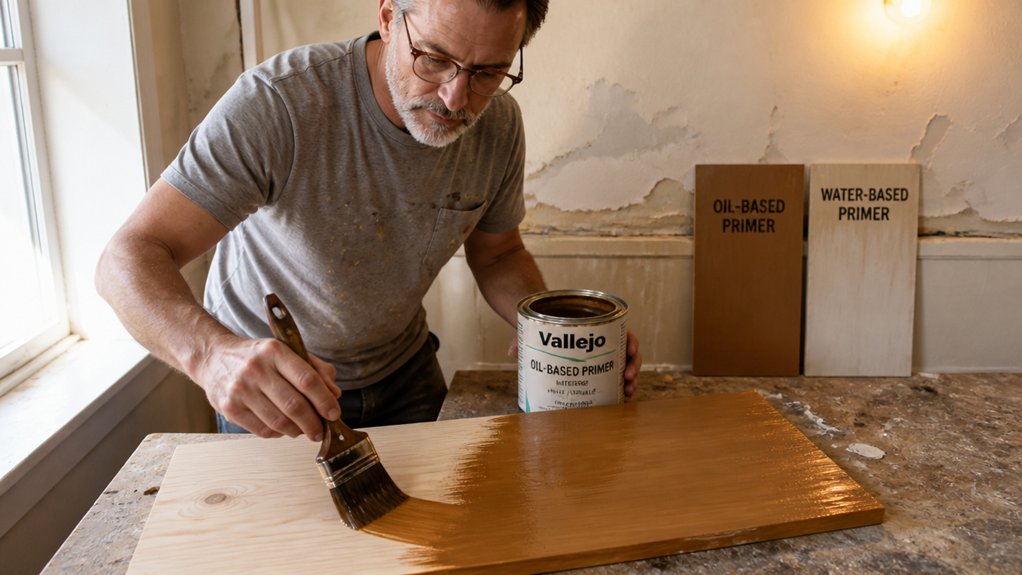
If bare exterior wood keeps staining or peeling, oil-based wood primers are often the fix. This guide covers the types, uses and how to choose the right primer for your project.
You will see why they seal knots and tannins, plus where alkyd and spot primers fit. We will also cover surface prep, drying time, cleanup and application steps that prevent peeling.
Skip the guesswork and pick oil for durability, not convenience. Keep reading for the practical details before your next coat.
Quick Answer
- Oil-based primers seal wood tannins and knots, preventing bleed-through better than latex.
- Alkyd primers are the standard choice for bare exterior wood, drying in 2–4 hours.
- Use linseed oil primer on weathered, chalky wood for deeper penetration and less flaking.
- Apply oil primer only to dry wood (moisture under 15%) to avoid peeling.
- After curing, sand with 220 grit before applying any topcoat.
Why Oil-Based Wood Primer Beats Latex (And When It Doesn’t)
Many pros still reach for an oil primer on bare exterior wood because it penetrates and holds up. It seals knots and tannins and blocks bleed through for years, while latex primer is cheaper and cleans up with water but tends to sit on the surface.
Many pros still reach for oil primer on bare exterior wood because it penetrates, seals knots, and holds up for years.
Latex flexibility helps on some surfaces, yet it does not bond well to chalky weathered wood. If you are coating bare wood that will face weather, an oil primer gives the topcoat a stable base.
The downsides are real: solvent primer has strong VOC fumes and you need mineral spirits for cleanup. Drying time is slower, though some alkyd primers dry to the touch in about an hour, and you should check cure time before sanding or recoating. For projects in restricted areas, look for low-VOC oil-based options that still provide stain blocking without the harsh fumes.
Wood grain raising is lighter with oil primer than with latex, so you can use a finer sanding grit and do less sanding. Lay down a drop cloth, tape off edges with painter’s tape, and keep a wet edge so your brush strokes blend into the last pass to avoid lap marks.
Choose an oil primer for bare exterior wood or for tough stains that might bleed into the topcoat. Choose a latex primer for interior drywall or for repaints where you want easy water cleanup and fewer VOC fumes.
A primer sets the base for your topcoat, and your gloss, satin, or matte sheen choice matters less than good adhesion. If you plan a clear finish, use varnish or polyurethane over the wood stain and follow the label for recoat windows.
The 5 Oil-Based Primers You’ll Actually Use
For bare wood, an oil primer gives your topcoat a solid base and helps seal the surface. Most jobs call for an alkyd primer, the workhorse option, with a drying time of about 2 to 4 hours.
If you are sealing knots or nail heads, use a spot primer made for those repairs so resin does not bleed through. Linseed oil primers penetrate deep into weathered wood and can test your patience with long drying times.
Pick your primer around your topcoat schedule: a fast drying alkyd can take a recoat in about an hour, which suits an impatient painter. Apply thin coats and keep a wet edge so you avoid lap marks and heavy brush strokes. While oil-based formulas offer strong sealing, water-based acrylics provide a low-VOC alternative with adequate grip and fewer fumes.
Before you start, sand bare wood with 120 to 150 grit, wipe off the dust, and protect floors with a drop cloth. Use painter’s tape on trim and check the label for a low VOC product if fumes bother you.
Choose the topcoat sheen you want, whether gloss, satin, or matte, and apply it after the primer has dried for the stated time. Drying time tells you when you can recoat, while cure time tells you when the film has hardened enough for gentle use.
For most wood projects, a standard alkyd primer covers about 90 percent of the work, so buy a mid range can and save the extra money for your stain, varnish, or polyurethane topcoat. You will finish sooner and get a more even finish with less fuss.
Match the Primer to Your Wood’s Condition

Check the wood moisture before you open any primer. A moisture meter reading above 15% means the wood is too damp for an oil based coating.
Let the wood dry, then test again. Damp wood can trap moisture under the film and cause peeling later.
For smooth new lumber with mill glaze, scuff the surface with 120 grit sandpaper and wipe off the dust. A standard alkyd primer can then grab the wood and give your topcoat a stable base.
On weathered or chalky wood, use a linseed oil primer because it soaks into the grain. That deeper bite helps the topcoat bond and reduces the chance of flaking.
Knots and sap spots need a dedicated oil based sealer before the main primer coat. Spot prime those areas and let the sealer dry for the full drying time listed on the label.
Lay a drop cloth and tape off edges with painter’s tape before you start. Brush the primer with even brush strokes and keep a wet edge to avoid lap marks.
Give the primer its full drying time before you apply the topcoat in your chosen sheen. Respect the cure time too, especially before you sand, stain, varnish, or apply polyurethane over the finished work.
For routine checks, a pinless moisture meter can scan surfaces quickly without leaving pinholes, helping you confirm drying progress before recoating.
Apply Oil-Based Wood Primer in 5 Simple Steps
Five steps may sound like a lot, but this part is easier than choosing the right primer. Lightly sand the wood with 120 grit paper to dull the gloss and give the primer a surface to bite.
Five steps might seem like a lot, but this part is easier than picking the right primer.
Wipe off the sanding dust with a tack cloth so the surface is clean. Pick a quality synthetic bristle brush for the primer since synthetic bristles hold up well with oil based products. Oil-based penetrants are the ideal base type for interior wood finishing with uniform grain, ensuring consistent stain acceptance.
Load the brush with primer without soaking it, then cut in along the edges. Roll the flat areas with a thin, even coat and keep a wet edge so lap marks do not form.
For spray application, thin the primer about 10 percent, use a tip about one and a half millimeters, and keep a wet edge to avoid lap marks. Check the label for drying time and cure time before you sand or apply the topcoat.
Let the primer dry for about four hours, or overnight if the air is cool and humid. Sand it lightly again with 220 grit to smooth brush strokes and small dust nibs, then wipe off the dust.
Apply your topcoat after the primer has dried to the point the label recommends. A satin or matte sheen can hide small surface flaws better than high gloss.
Where Oil-Based Primer Fails: Knots, Tannins, and Moisture
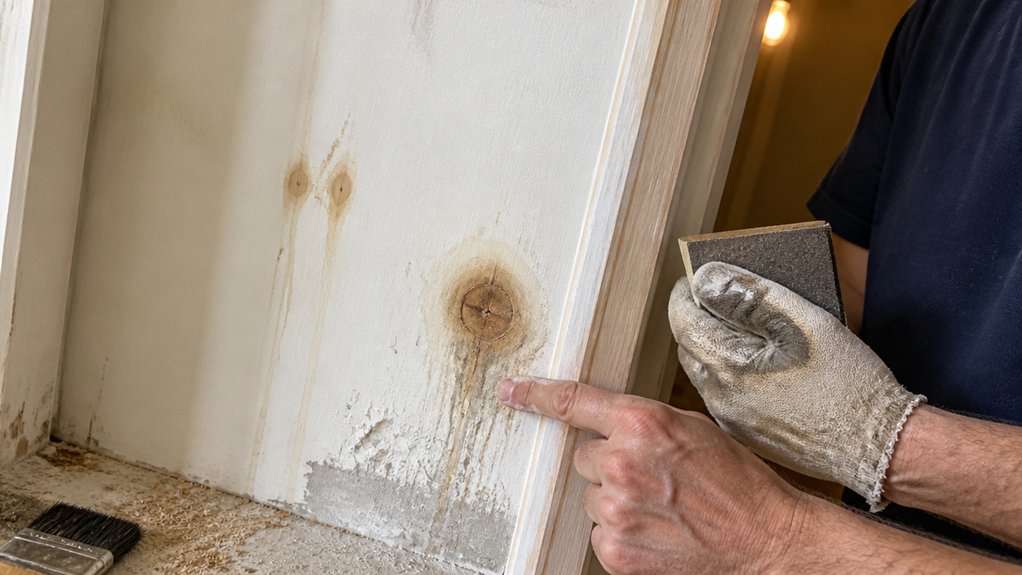
Oil primer has limits on cedar and pine. On a cedar shed, two coats still let dark tannin streaks show through until I added a topcoat.
For tannin blocking, oil primer works well on fresh lumber. It does not stop every stain, so plan on a stain blocking topcoat or a shellac spot treatment where streaks appear.
Oil primer seals most knots okay, but severe pine knots need shellac. Sand the knot to bare wood with 80 grit, spot prime with shellac, and let it dry before the topcoat.
Moisture is the biggest failure point. Oil primer forms a film that traps dampness, so it peels faster than latex on wet wood.
I watched a deck fail within one season because the wood stayed damp under the primer. Use oil primer only on dry, bare wood, and check moisture before you start. Zinsser Cover-Stain blocks water and smoke on dry surfaces, delivering up to 400 square feet of coverage per quart.
For damp sites, use a water based spot primer or a shellac spot primer. Sand with 80 to 120 grit, wipe off dust, and keep a wet edge to avoid lap marks and heavy brush strokes.
Set up a drop cloth and mask edges with painter’s tape before you open the primer. Prime when the wood is dry and the air is within the product’s VOC and temperature limits.
Let each coat dry fully. Follow the label for drying time and cure time before you apply varnish, polyurethane, or a topcoat with the sheen you want, such as gloss, satin, or matte.
Frequently Asked Questions
Can Oil-Based Primer Be Applied Over Latex Paint?
No, you should not apply oil-based primer over latex paint unless you test and prep carefully because it can weaken the latex coating’s adhesion. The safer route is a high-quality latex bonding primer for most interior walls and trim.
If you must proceed, sand the glossy latex with 120-grit paper until it feels dull, then wipe off all dust before priming. Apply a thin coat and let it dry according to the label, often four to six hours, before judging adhesion.
Oil-based primer over latex paint can work on some hard surfaces, but it is rarely worth the risk. Stick with latex paint compatible products unless a bonding primer is specified for the substrate.
How Long Must Oil-Based Primer Cure Before Topcoat?
Oil-based primer should cure at least 24 hours before topcoat, and 48 hours is safer for reliable adhesion. Rushing the recoat can cut adhesion significantly, especially with heavy coats or cool conditions.
Humidity and temperature affect curing more than the label often suggests, so keep the room warm and ventilated. As a practical check, sand the cured primer with 220-grit paper until it feels uniformly dull before applying your topcoat.
Check the product data sheet for primer drying time, since humidity and temperature can extend it. When in doubt, give the primer the extra day and sand before topcoat.
What Is the Shelf Life of Unopened Oil-Based Primer?
The shelf life of unopened oil-based primer is typically 2 to 3 years when stored correctly. Look for shelf life testing results on the can, and keep the container above freezing since storage temperature affects the primer’s condition.
As an experienced painter, I would still shake it well before use, then stir with a flat stick to blend settled pigment. A practical check today is to shake for two full minutes and stir for another minute before applying the first coat.
If you are searching for oil-based primer shelf life, treat that can date as your guide and discard primer that has skinning, lumps, or a sour solvent smell.
Can Oil-Based Primer Be Used on Interior Woodwork?
Oil-based primer can be used on interior woodwork. It seals pine knots and blocks resin bleed better than most water-based primers, which is why I still reach for it on stained trim.
For adhesion on interior trim, scuff glossy surfaces with 120-grit sandpaper and wipe the dust before priming. Apply one thin coat and let it dry 24 hours before sanding lightly with 220-grit or topcoating.
Cleanup requires mineral spirits, so work in a ventilated space, keep rags out of closed bins, and look for the related search term solvent-based primer.
Does Oil-Based Primer Prevent Mold and Mildew Growth?
No, oil-based primer does not inherently prevent mold and mildew growth. Its moisture barrier helps block dampness, but that is only part of the battle.
For interior woodwork, use a mold-resistant primer with additives and apply two coats for reliable coverage. Scuff sand previously painted trim with 120-grit paper, wipe off dust, then let each coat dry for the manufacturer’s recoat time before sanding lightly.
Do not expect oil-based primer alone to stop mildew growth in damp areas. If moisture is chronic, fix the source first and consider a dedicated mold-inhibiting coating for long-term protection.
Rounding Up
Oil-based wood primers are not magic but close for sealing stains, tannins, or old paint on wood. Check the wood for stains, tannins, or old paint before you grab latex first.
Match the primer to the problem, not the hype. For bare, rough, or stained surfaces, reach for Zinsser Cover-Stain, seal the deal, sand lightly, and topcoat.
Latex first is like a raincoat over a wet shirt: covered but soaked underneath. Write down whether the surface is bare, rough, or stained so you can compare primer choices.
You’re done after the topcoat. Read next about latex primer selection.