What Are PVA Sealers? Types, Uses and How to Choose

A dusty floor or chalky wall can ruin your primer and topcoat. PVA sealer is the simple fix, and this guide, What Are PVA Sealers? Types, Uses and How to Choose, covers the basics.
You will see D2, D3, and D4 options, where each works, and how mixing ratios affect sealing and bonding. You also get coverage specifics and surface prep tips that prevent a weak, dusty finish.
Keep reading to pick the right PVA sealer for your walls, floors, or plaster patch and build a base for the next coat.
Quick Answer
- PVA sealers are water-based emulsions that prime porous masonry and control dust indoors.
- They suit interior surfaces only; moisture, rain, and UV degrade the film outdoors.
- Dilution ratios range from 1:4 to 1:1, depending on substrate porosity and dustiness.
- D2, D3, and D4 grades vary by water resistance; D3 handles most interior jobs.
- Coverage drops 20–35% on porous surfaces; allow 24 hours for full cure before topcoating.
What Is PVA Sealer for Concrete and Masonry?
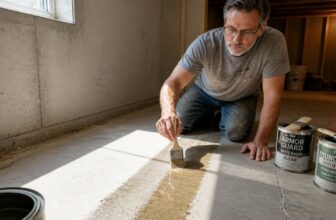
PVA sealer is a water based polyvinyl acetate emulsion that soaks into porous masonry and locks down dust on a garage floor. It also gives plaster or paint a grippy surface for better adhesion, much like a light sanding pass with 120 grit.
Think of it as a primer for porous surfaces that need dust control before a topcoat. Mask nearby trim with painter’s tape and lay a drop cloth first, because the sealer can splash when you brush it on.
Think of it as a primer for porous surfaces that need dust control before a topcoat. Mask trim and lay a drop cloth first.
Use PVA sealer indoors only. Keep it away from exterior walls and any area that stays damp.
For joint preparation, brush on a diluted coat and let it dry to a clear film. Check the label for drying time, and give it the full cure time before you apply a topcoat.
Work with a wet edge and steady brush strokes to avoid lap marks, then apply your topcoat in the sheen you want, such as matte, satin, or gloss. The sealer will not harden concrete or bond two sealed surfaces together.
At least one surface must be porous so the PVA can soak in and form that bond. Grab a bottle for dust control and priming inside, and leave the exterior work to a product made for wet conditions.
PVA sealer is for masonry and plaster, so keep stain, varnish, and polyurethane for wood jobs. If VOC levels matter in the room, check the label before you open the bottle.
For large interior areas, mix the emulsion at a 1:5 water ratio to ensure even coverage without runoff.
D2 vs. D3 vs. D4: Which Grade Fits Your Project?
D2, D3, and D4 sit on the shelf, and the wrong pick can mean a redo or a failed joint that you blame on the weather. I have been there, staring at delaminated joints and wishing I had checked the glue first.
D2 is a basic interior sealer with no water resistance once dry, so keep it out of kitchens and bathrooms. D3 dries waterproof and works well for window trim, door frames, and shelving.
D4 adds resin for a stronger PVA bond and faster set, which helps on stair treads and other parts that carry weight. All three grades lose strength within 12 to 18 months if the bottle stays unsealed, so check the date before you buy.
For most interior projects, grab D3. Pay extra for D4 when you need speed or serious grip, and save D2 for priming floors or jobs that do not carry structural loads. Full cure and peak bond strength typically take 24 hours at room temperature, so plan your schedule around that before clamping.
Before you glue up, lay a drop cloth and mask the edges with painter’s tape, then sand with the right sanding grit and remove the dust. Apply a primer, then a topcoat, and pick a sheen such as gloss, satin, or matte for the look you want.
Check the VOC level if the room has poor airflow, and keep a wet edge to avoid lap marks and visible brush strokes. Let the drying time and cure time guide your schedule, then test any stain, varnish, or polyurethane on scrap before you finish the project.
Top PVA Uses: Priming, Dust Sealing, Bonding
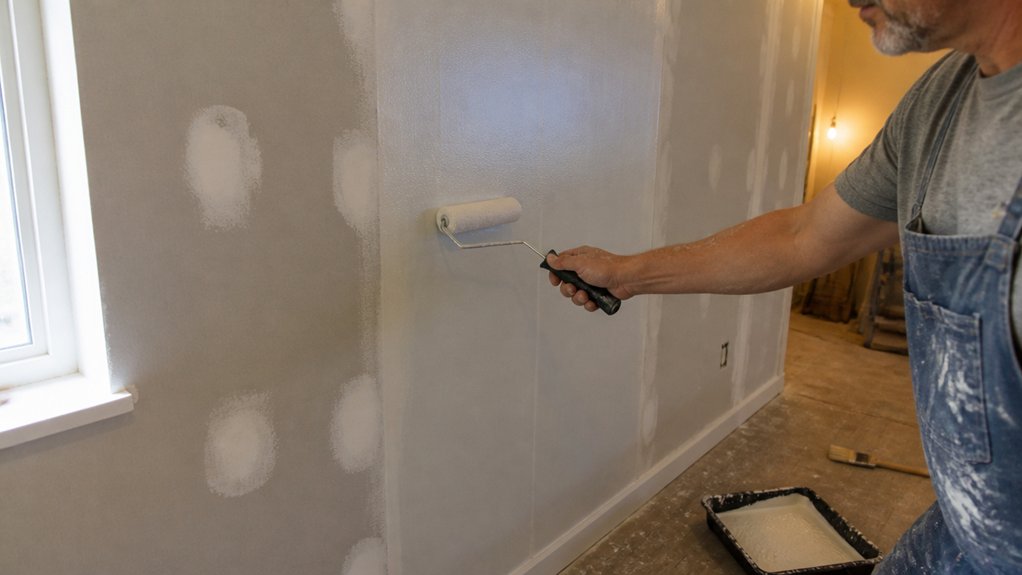
PVA earns its place on the job because it works as a primer, a dust sealer, and a bond coat. Use it as a primer by mixing one part PVA with four parts water, then apply it to porous plasterboard or cement sheet before your topcoat.
PVA earns its place on the job as a primer, dust sealer, and bond coat. Mix one part with four parts water for porous surfaces.
For dust sealing, use the same 1:4 mix and roll one or two coats onto interior concrete. Keep a wet edge and work in sections so you avoid lap marks and brush strokes in the drying film.
For bonding, brush on neat PVA while it is still tacky and press fresh plaster into place. Lay a drop cloth and use painter’s tape to protect edges before you start mixing.
PVA is not a waterproofing product, and constant damp will break down the film. Check the storage date and use it within about a year of opening so the bond stays reliable. For porous drywall, reduce the manufacturer’s coverage claim by roughly 20% to account for high surface absorption.
Choose a D3 PVA for bonding jobs, mix it exactly as the label says, and clean up before it sets. Sand any dried nibs at 120 grit before you apply your next coat, and respect both drying time and cure time.
If you want a satin, matte, or gloss sheen, make sure the PVA primer is fully dry first. A low VOC finish helps in closed rooms, and PVA should never take the place of stain, varnish, or polyurethane on exposed wood.
When Not to Use PVA: Exterior and Damp Spots
PVA has no place on exterior walls, patios, driveways, or any spot that stays damp. Once rain hits a PVA film, the work turns to goo because that film is water soluble.
On a dry interior wall, PVA can work as a primer under a topcoat. Sand with the right grit, lay a drop cloth, set painter’s tape, and keep a wet edge to avoid lap marks and visible brush strokes.
Outdoors, UV light breaks PVA down fast, and constant damp spots break its bond. PVA also lets vapor pass through, so it never forms a true moisture barrier on exterior walls, patios, or driveways. Application temperatures must stay between 50°F and 90°F for water-based damp-proof paints to cure properly, but PVA’s water solubility makes it unsuitable regardless of weather.
In a damp basement or bathroom, that vapor movement defeats the sealing job and leads to peeling and mold. For those areas, use an SBR sealer instead, even though it costs a few more dollars per litre.
You can treat PVA like white glue that loves dry interior concrete and plasterboard. Check drying time and cure time on the label, and keep PVA inside where the surface stays dry.
Mixing and Applying PVA for Priming and Bonding
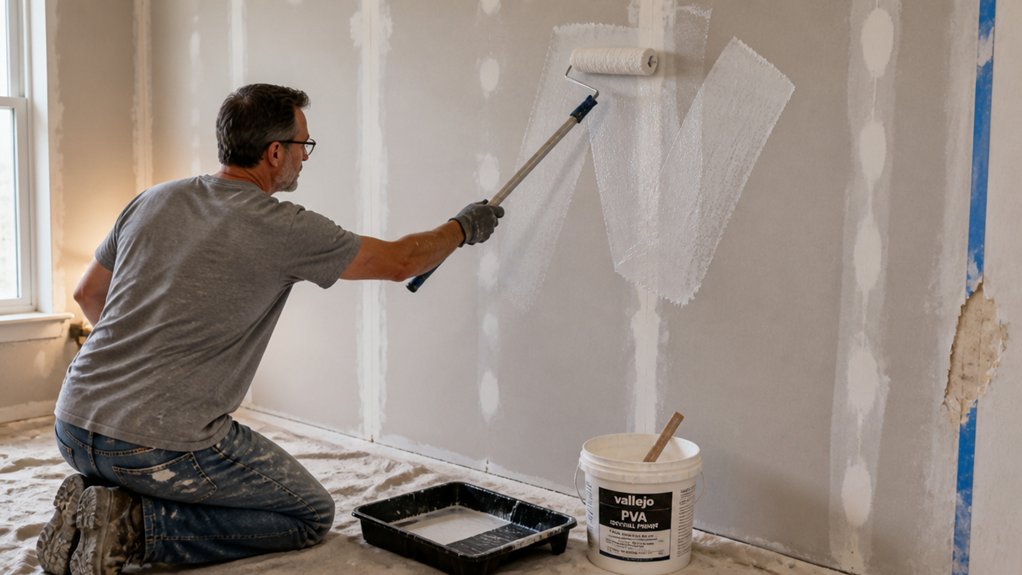
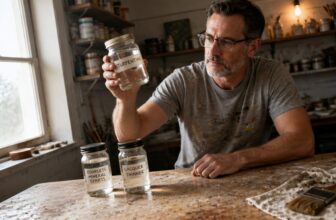
Two parts water to one part PVA is my usual mix for priming most interior walls, and you will see that ratio on nearly every can. Treat those ratios as starting points and adjust for the surface.
Porous plasterboard may take a thinner 3:1 mix, while a dusty old ceiling may need it closer to 1:1. Sand dusty plaster with 120 grit, then wipe off the dust before you prime.
Lay a drop cloth and set painter’s tape before you start. Stir the mix thoroughly, then brush or roll it on, keeping a wet edge to avoid lap marks.
Watch your brush strokes and roll in small sections so the primer levels out. Let the primer dry completely before the topcoat, and check the label for drying time versus cure time.
Choose a topcoat sheen such as matte or satin after the primer is dry, and use a low VOC product if indoor fumes matter. For bonding coats, apply PVA neat and undiluted, then get your plaster or render on while it is still tacky.
If you miss that window, the PVA can dry to a glossy skin that nothing will stick to. Test a small patch first every time, and let it set before you commit to the full area.
Use stain, varnish, or polyurethane where those finishes belong, and keep PVA for priming and bonding. If the test patch holds, go ahead with the full area.
For outdoor projects, consider a water-based silicone formulation instead, as it penetrates wood fibers to provide damp defense without the peeling issues of film-forming products.
PVA Coverage and Drying Times: What to Expect
Coverage and drying times are easier to handle once you know how your floor takes paint or finish. I start with the coverage rate on the label and then adjust for bare wood, old finish, and how much sanding grit I used.
On bare wood, primer can soak in and change how far your topcoat goes. That is why I run a test patch before I buy the full amount.
Drying time and cure time are different, and both depend on temperature, airflow, humidity, and film thickness. A thin coat of polyurethane, varnish, or stain may feel dry in hours, but I wait longer before I sand or add another coat.
Your application method changes coverage and drying too. A brush can leave brush strokes and lap marks if you let the wet edge dry, while a roller or sprayer lays down a different film and may need more or less product.
Use painter’s tape and a drop cloth to protect edges and floors, and keep your sanding grit consistent between coats. Check the sheen you want, whether gloss, satin, or matte, and pick a product with a VOC level you can handle.
For roller application, a 3/8-inch nap deposits 15–20% more paint than a 1/4-inch version while still filling minor surface imperfections evenly.
Coverage Rate Basics
Coverage rates are where PVA primer gets practical. Most jobs do not have one universal number because how porous the surface is changes how much primer or paint sinks in.
On smooth, sealed concrete, a 1:4 dilution often covers 45 to 60 square meters per liter. Porous brick or render can drop that to 20 to 35 square meters per liter, and dusty rough terrazzo at 1:5 may cover only 15 to 25 square meters per liter.
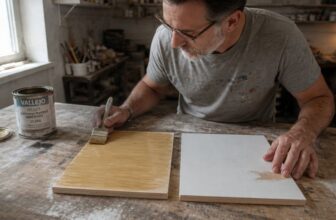
Use these numbers as a starting point, then brush or roll a small test patch and check the wet edge. A test patch shows whether you need a primer coat, a second topcoat, or a different sanding grit before you finish.
The same test patch method helps when you use a topcoat, stain, varnish, or polyurethane, and the sheen you choose (gloss, satin, or matte) can make lap marks or brush strokes easier to see. Keep a wet edge on large areas and work in one direction to reduce those marks.
Check drying time before you sand or recoat, and give the finish the full cure time before you call the job done. Set out a drop cloth, tape edges with painter’s tape, and keep the space ventilated if the VOC level matters to you.
Assume the low end of the range and buy an extra liter. Test first, then thank yourself when the second coat goes on without a surprise. Using a tray with deep wells holds more paint to minimize refill interruptions on large wall sections.
Drying Time Factors
Three factors decide how long your PVA sealer takes to dry. Drying time means water is leaving the film, and the film starts white and clears as it cures.
Humidity is the biggest factor. A muggy day can turn a coat that normally dries in one hour into a wait of four hours or more.
Substrate porosity matters too. A dense floor holds moisture longer than a rough surface that pulls water in fast.
Thicker coats take longer to dry. You’ll get about eight hours before foot traffic, but I’d wait a full day before applying a topcoat.
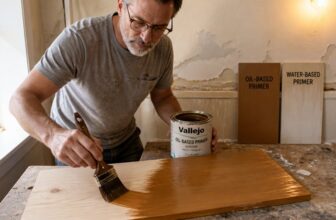
PVA sealer can serve as a primer under stain, varnish, or polyurethane. Follow the can for drying time and cure time, because a film that feels dry may still be soft.
Before you start, sand the surface with the right sanding grit and wipe away dust. Use a drop cloth and painter’s tape to protect the area.
Keep a wet edge when you apply the sealer to avoid lap marks and brush strokes. A satin or matte sheen in the topcoat can hide small flaws, and the VOC label will tell you how to ventilate.
Check the weather and test your surface before you start. That keeps you from staring at a white film while the primer dries. Using a silicone funnel with a nylon mesh can help filter any dried bits from your sealer before application.
Application Method Impact
No two coats of PVA sealer behave the same, and the method you use changes both coverage and drying time. Brushing and rolling give you control because you can see puddles and fix them, but they take more time and leave brush strokes or lap marks if you let the wet edge dry.
Spray application moves fast over large floors, but it uses more sealer because of overspray and mist loss. I have watched a 5 liter pail disappear in half an hour.
For brush work, expect about 30 to 40 m² per liter when mixed one part sealer to four parts water, with a drying time of 1 to 2 hours. Spray application can cover about 50 to 60 m² per liter, but the drying time runs 3 to 4 hours and thick patches stay wet longer.
Spray then back roll with a roller to even the film and cut waste, especially on big floors. For touch ups, just roll, and match the tool to your patience.
Sanding with 120 grit before the sealer helps it bond, and a drop cloth plus painter’s tape keeps the edges clean. PVA sealer works as a primer under your topcoat, so check the VOC label if indoor air matters and let the sealer reach full cure time before you sand lightly and apply the topcoat in the sheen you want: gloss, satin, or matte. Unlike gypsum-based compounds that can crack outdoors, polymer-modified formulas resist moisture and bond to concrete, making them a better primer choice for exterior-grade floors.
PVA Selection Guide by Task
D2, D3, and D4 are quick labels for how much water resistance and grip you get from a bottle of PVA. For dusty interior concrete, use D2 as a primer because it is cheap and works well under a topcoat.
For bonding plaster to a wall, choose D3 since it handles dampness once dry. For heavy shop shelving that needs fast strength, use D4.
Store PVA sealed and above freezing, and use it within a year of opening because shelf life drops after the seal is broken. Before you start, lay a drop cloth, tape edges with painter’s tape, and sand rough spots with 120 grit.
Match the grade to wetness and weight, keep a wet edge as you work, and let drying time and cure time guide when you apply a stain, varnish, or polyurethane topcoat. Choose products with low VOC for indoor work, and sand between coats to keep lap marks and brush strokes out of your matte, satin, or gloss sheen. For tasks involving harsh chemicals or heavy-duty cleanup, consider thicker protective gear rated for puncture resistance.
PVA vs. SBR: When to Switch
PVA works as an interior primer or sealer. It turns into a milky mess when it meets constant outdoor dampness or a damp concrete slab.
I have watched crews brush PVA onto an exterior wall with clean brush strokes and a wet edge, then come back after rain to find lap marks and a soft film that washed away. PVA does not hold up to rain, humidity, or groundwater contact.
If your project faces those wet conditions, switch to a sealer made with SBR. It flexes with the surface and handles wet exposure, and you can apply your topcoat after the sealer reaches its cure time.
Interior-Only Limitations
PVA works well indoors as a sealer and primer. For a dusty garage floor, one coat at 1:5 dilution tames loose dust for about $20 per 5 L.
On plasterboard, PVA primer dries tacky in about an hour, so you can move to topcoat without sanding at 120 grit. For fresh render, apply PVA neat and it grabs like a guilty dog.
That grip helps the next coat bond, but check drying time before you recoat and allow full cure time before you judge the finish. Step outside and switch to SBR.
My rule is simple: PVA lives indoors. Use SBR on patios and other outdoor work so the surface does not flake, and keep your topcoat sheen even.
Exterior Moisture Risks
PVA fails in wet exterior conditions. Rain splash dissolves the film again and leaves a sticky residue.
Damp ground keeps the film wet and breaks bond strength. Freeze and thaw cycles expand trapped water and crack the sealer layer.
UV light degrades the polymer and turns it chalky. Vapor drive pushes ground moisture up through concrete and blisters the coating.
For patios, driveways, and retaining walls, use an SBR sealer made for wet conditions. Keep PVA inside for primer and topcoat work, and read the label for drying time and cure time.
On interior trim, sand with the right grit, keep a wet edge, and watch lap marks and brush strokes. Choose the sheen you want, from matte to satin to gloss, and check VOC limits before you open the can.
Lay a drop cloth and mask edges with painter’s tape before you apply the topcoat. Use stain, varnish, or polyurethane when the job calls for it and follow the label.
When SBR Wins
I have wasted more than a few gallons of PVA on jobs where it did not belong, so I know when to switch to SBR. SBR earns its place on exterior walls, damp garages, and any surface that sees water.
PVA turns soft and sticky when it gets damp. SBR stays flexible and holds its bond in humid conditions.
Use SBR for exterior work where rain and wet weather are normal. PVA can soften outdoors, while SBR keeps its bond.
Use SBR on damp concrete, masonry, and other wet surfaces. PVA can peel from those surfaces like a cheap sticker.
Use SBR for demanding bonds such as cement overlays. Those loads can pull a PVA layer apart.
SBR costs about 30% more per litre, but it gives you a dependable bond. Follow the label for mixing, drying time, and cure time, and check the VOC level if indoor air quality matters.
Prep still matters: lay a drop cloth, tape edges with painter’s tape, and scuff areas with a gloss finish using 80 grit sandpaper. If the surface will get a primer and topcoat, confirm the SBR product is compatible before you start.
On a topcoat, keep a wet edge to avoid lap marks and brush strokes. Match the sheen you want, whether gloss, satin, or matte, after the repair is sound.
SBR is for bonding and priming. Use stain, varnish, or polyurethane only for the finish coat when the system calls for it.
Use SBR when water is in the picture. Make the switch and save yourself a callback.
Frequently Asked Questions
Can I Paint Over a PVA Sealer Once It’s Dry?
Yes, you can paint over dry PVA sealer, but you must prime first. Let the sealer cure for at least 24 hours, then sand lightly with 180 grit to knock down ridges and dust.
This step improves mechanical grip and helps prevent a weak bond. After sanding, remove all dust with a damp cloth or vacuum.
Apply a compatible PVA sealer primer, then let it dry fully before your topcoat. A thin, even primer coat is better than a heavy one.
If the PVA film feels slick or glossy, scuff it again before priming.
How Long Does PVA Last in an Unopened Container?
PVA in an unopened container typically lasts 1 to 2 years when kept from freezing. Treat it like a time capsule: stable cool, dry storage protects the emulsion and keeps it usable.
Before you open it, check the date on the lid and stir a small sample; if it smells sour or shows lumps, discard it. For everyday woodworking, decant only what you need and reseal the rest promptly to limit skinning.
If you are searching for white glue shelf life, remember that freezing and heat are the real enemies. Store PVA above 50°F and below 80°F, and test a drop on scrap before committing to a finish schedule.
Can I Use PVA Sealer to Stop Concrete Floor Dust Permanently?
No, PVA sealer will not stop concrete floor dust permanently. It forms a temporary dust proofing film for interior slabs, and traffic or moisture will wear it back to a dusty surface.
For a test patch, apply two thin coats at the maker’s stated drying time, usually 2 to 4 hours between coats. Let that cure for 24 hours before walking on it, then check for dusting after a week.
If the floor still dusts, use a concrete densifier or acrylic concrete sealer for longer service. Recoat PVA only when the surface starts releasing dust again, not on a fixed yearly schedule.
Is PVA Sealer Safe to Use Around Children and Pets?
PVA sealer is safe to use around children and pets once it has dried and fully cured. As a painter and finisher, I treat water based PVA sealers as low odor products, but I still read the label for a non toxic or low VOC certification.
A practical rule is to apply two thin coats and keep kids and pets out of the room until the film is fully cured, typically 24 hours after the final coat. Check for a tack free surface with the back of your hand before allowing access, and remember that a PVA primer or sealer on porous concrete may need a longer cure.
Can I Apply PVA Sealer Over Previously Painted Surfaces?
Yes, you can apply PVA sealer over previously painted surfaces, but only when the old coating is sound, rough, and porous. Adhesion testing first is nonnegotiable: press and peel a strip of tape on a clean patch, and if paint lifts, stop and remove it.
For slick or glossy paint, scuff with 120-grit sandpaper until dull, then dust off before sealing. Smooth paint will not bond reliably, so treat PVA as a bonding primer only on porous or well-sanded surfaces.
Apply one thin coat and let it dry per label, usually about one hour, before topcoating. Skip it on tight, glossy paint and fix the surface instead.
Rounding Up
PVA sealers are interior primers and dust sealers for dry surfaces, not weather exposed work. Check that your surface is dry and inside before you prime or dust seal.
Write down whether the project will see weather, then skip PVA for anything exposed. Compare PVA with SBR before bonding fresh concrete to old concrete.
Keep a jug for interior projects and ask whether the job is temporary or structural, like painter’s tape. For a $30 gallon that preps a garage floor, PVA is unbeatable.
Related topic to read next: SBR concrete bonding.