How to Apply Decking Oils: Step-by-Step Guide
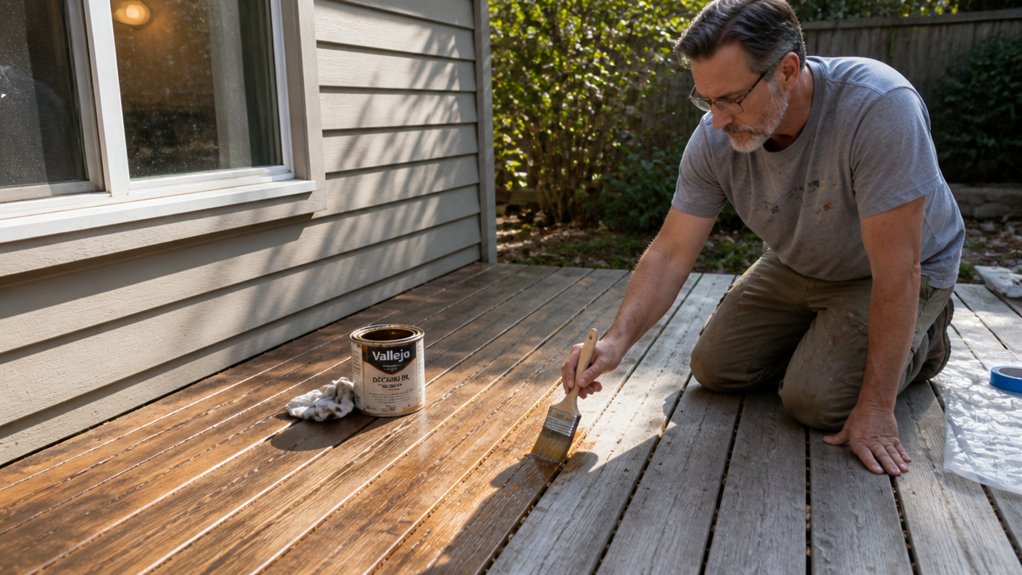
Applying decking oils can feel like a gamble when you’re unsure if the wood is ready. The real secret is surface prep, not the product, and it starts with a moisture meter reading under 15%.
Sand to 120 grit, vacuum the dust, and lay down thin, even coats with a synthetic brush for a flawless finish. Skip this, and you’ll see blotches appear after the cure time, which is a frustrating waste of effort.
This guide walks you through every step, from temperature checks to the full 48 hour drying period. You’ll get the exact process to avoid patchy results and achieve a rich, even sheen on your deck.
Let’s start with the tools you need and how to prep the surface properly.
Quick Answer
- Clean and strip the deck to bare timber before applying any oil finish.
- Confirm wood moisture is 15% or lower using a meter before starting.
- Apply two thin coats with a synthetic brush, keeping a wet edge.
- Sand lightly with 120 grit between coats and wipe away all dust.
- Allow 24-48 hours to cure, and avoid foot traffic for at least four hours.
Why Prep Matters Before Oiling Your Deck
Deck prep is the difference between a rich, even finish and a blotchy mess, so do it right. A quick wash without removing old coatings is like painting over a dirty windshield, it looks bad and fails fast.
Clear everything off the deck, pull planters, and sweep away leaves and dirt. Then scrub the boards with a stiff-bristle brush and a mild detergent to lift embedded grime.
For grey, weathered wood, use a specialized deck cleaner mixed 1:4 with water, and let it sit before rinsing. If the deck has old paint or stain, sand or strip it down to bare timber using 80 to 100 grit paper, no shortcuts.
These steps matter because a clean, bare surface lets your oil soak in evenly instead of beading up. Use a satin or matte oil finish for a natural look, and watch your wet edge to avoid lap marks.
You will avoid brush strokes and blotches, and the finish will last longer because the wood can breathe. Apply the oil in thin coats and respect the drying time, not the cure time, before walking on it. Remember that most decking oils require bare wood to prevent peeling and ensure proper adhesion, especially if the prior stain was water-based.
Set up a drop cloth and painter’s tape to protect nearby siding and railings. That prep work is what makes the final coat look like you knew exactly what you were doing, and the payoff is a deck that looks strong for years.
Is Your Deck Dry Enough for Decking Oil?

Your deck might look dry, but if it is holding dampness, the oil will sit on top like a greasy puddle on a gym floor. You will end up with a blotchy, bubbled mess that peels within weeks.
I always check with a moisture meter before I open a tin. You want a reading of 15% or lower, and anything above that means you wait.
Drying time ranges from one to four days, and weather matters more than most people think. Avoid humid or rainy spells, because those slow down moisture leaving the wood.
Timber type plays a big role here, too. Dense hardwoods like teak or ipe hold moisture longer than soft pine boards, so they need extra patience. In fact, softwoods absorb three coats where hardwoods require only one, which further impacts how quickly each species dries.
If you are unsure, use the plastic bag test. Tape a square of cling wrap over the deck for four hours, and if condensation appears on the inside, the wood is still too wet.
Painters and finishers learn this lesson the hard way with stain, varnish, and polyurethane alike. The same rule applies whether you are applying a primer, a topcoat, or a satin deck finish.
Respect the drying time, not the cure time, because they are different. Drying time is when the surface feels ready, but cure time is when the finish actually hardens and bonds.
Working too early also creates lap marks and brush strokes you cannot fix later. A quick sanding with 80 grit before you oil can smooth raised grain, but only if the board is truly dry.
Use painter’s tape to protect nearby trim and spread a drop cloth over the surrounding area. Keep an eye on the gloss or matte sheen you pick, because low sheen hides flaws better than high gloss.
Wait for a clear, dry stretch of weather and forget about rushing. Patience beats a peeling deck every time, and a little waiting saves you a full refinish job in a few weeks.
Sanding and Repairing for a Flawless Finish
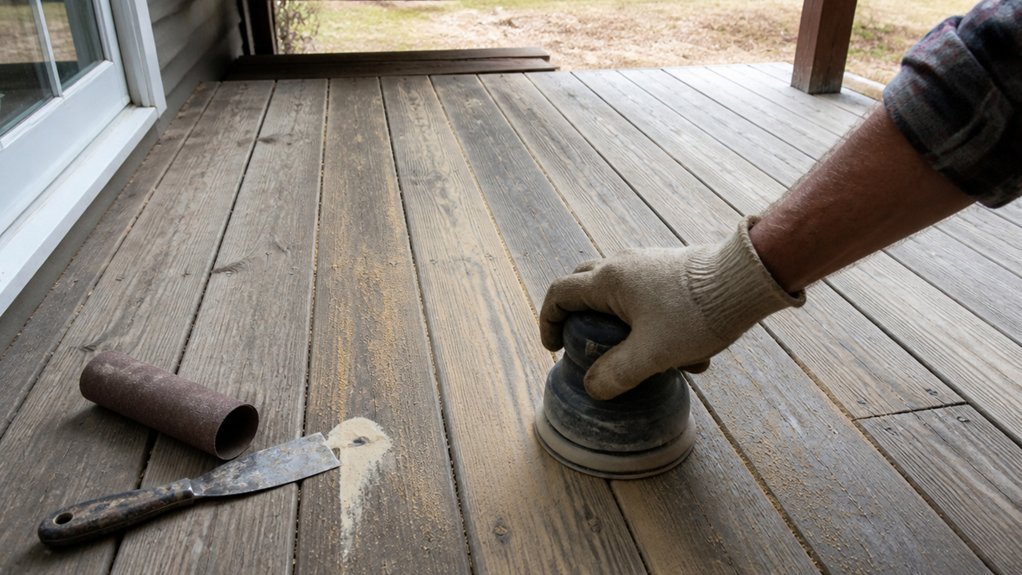
Once the deck is properly dry, sanding is where you get a smooth base. Start with 40–80 grit to strip the weathered wood, then switch to 120 grit for a silky surface. For aggressive stripping, aluminum oxide discs with a stearate coating help reduce clogging.
Rough timber drinks oil unevenly, so skipping this step leaves blotchy patches you will regret later. Hammer down any nail popping before you sand, because a proud nailhead will scratch your applicator and ruin your topcoat.
Fill cracks with timber putty, let it dry fully, then sand flush for an easy fix with a big payoff. Vacuum all dust afterward, since every speck shows up like a pimple on a first date.
A clean, smooth surface lets the oil absorb evenly, and the finish will look even and consistent. You want to keep a wet edge while applying the stain or varnish to avoid lap marks.
Check your drying time versus cure time before you add a polyurethane topcoat, because rushing it causes brush strokes and hazy spots. Use a drop cloth and painter’s tape to protect nearby areas, and pick a satin or matte sheen if you want a natural look.
Lower VOC products are easier on your lungs and still give a durable finish. Get this prep right, and the oil goes on like butter, no blotches, no streaks, just clean color.
Choosing the Right Decking Oil Brush
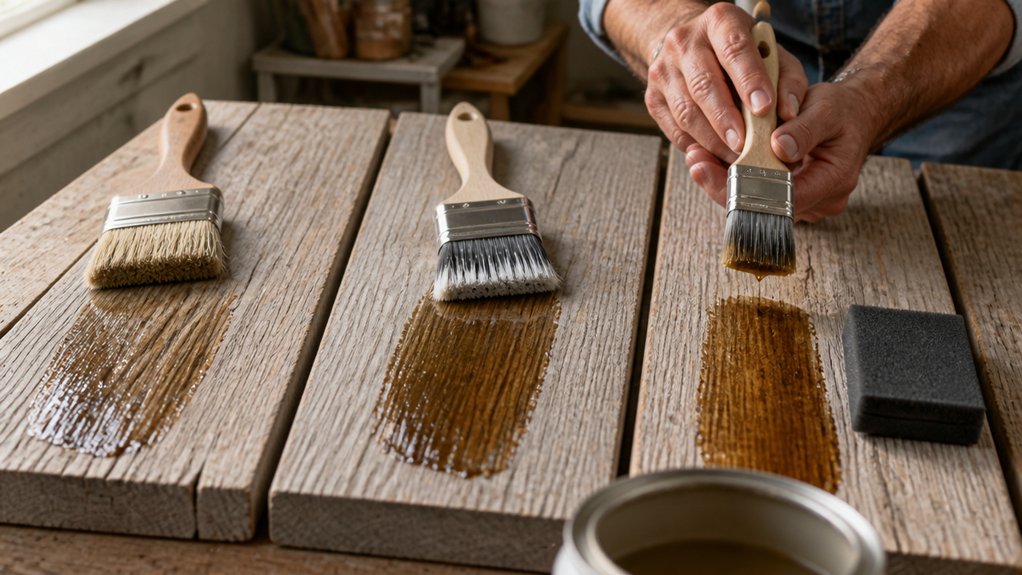
The brush you choose makes the difference between a professional-looking finish and a messy, streaky mess. A cheap, stiff brush will leave lap marks and shed bristles into your fresh oil, ruining the topcoat.
You want a synthetic-bristle brush, about 4 to 5 inches wide, with flagged tips. Those split ends help spread the oil evenly and cut down on visible brush strokes. This size also keeps a wet edge, so you avoid uneven drying spots on the deck boards. Double-crimped aluminum ferrules prevent shedding and keep bristles secure during heavy application.
Cleaning the brush is simple. Rinse it with mineral spirits right after use, then hang it to dry, and it will last for years. Never let oil dry in the bristles, or the brush becomes useless for a smooth satin or matte finish.
Other applicators have their place. Lambswool pads work well on flat boards but miss the gaps between planks, and rollers are only good for solid stains, not penetrating oils.
For deep penetration into the wood grain and between boards, nothing beats a proper deck brush. Grab a mid-range synthetic model in the $15 to $20 range, and your deck will look like a pro handled the sanding, priming, and finishing.
Apply Decking Oil in Long, Even Strokes
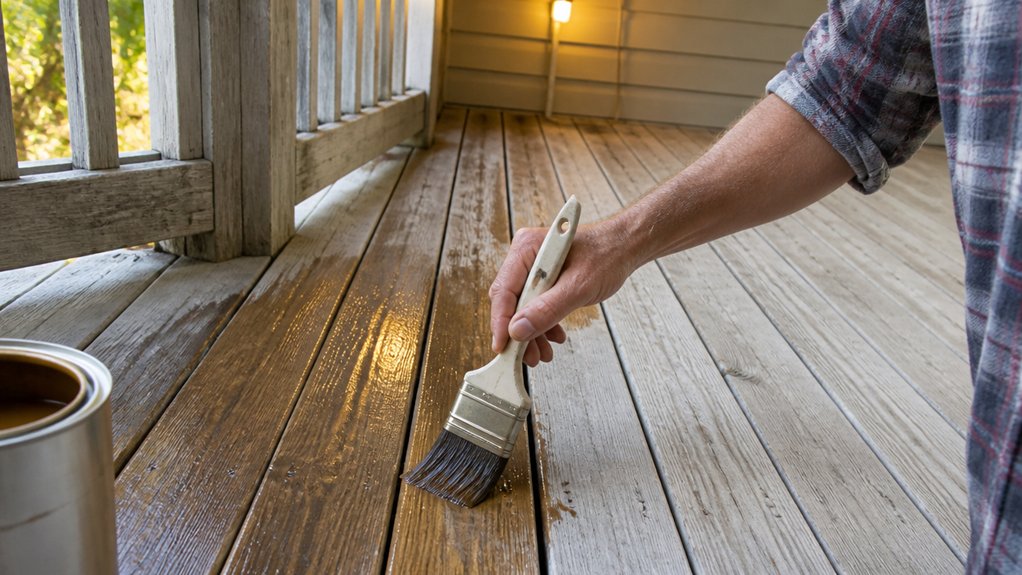
Load the brush, but shake off the excess before you touch the timber. A soaked brush leaves puddles that dry uneven and ruin the finish.
Sweep the bristles along the grain in long, even strokes, covering two to three boards at a time. You are laying down a consistent film, not scrubbing the oil in; the timber will absorb what it needs.
Keep every stroke parallel to the board length, not across it, to avoid lap marks where overlapping wet oil dries darker. Work in sections of three to four meters so the wet edge stays fresh and blends into the next pass. Recoat times for most oil-based primers are around one hour, so timing your decking oil layers with similar patience ensures a smooth, uninterrupted cure.
Check the forecast before you start. If the air is above 35°C or below 10°C, the oil turns sticky and won’t level out, so pick a mild, dry day instead.
Re-stir the can every few minutes, because the pigment settles and leaves streaky patches if you skip this. Overlap each stroke by half a brush width, and keep the pressure even from start to finish.
Aim for a uniform satin sheen, not a thick coat. Two thin layers beat one heavy one, and a light sanding with 120 grit between coats helps the topcoat grip.
You will know you have done it right when the wood looks rich and even, with no dull spots or visible brush strokes. Clean your brush with mineral spirits right after, because oil-based finishes do not wash out with water.
How Long Does Decking Oil Take to Dry?

Applying decking oil is simple. Waiting for it to dry is the real test, and that’s where most DIYers go wrong.
Drying happens in two stages: touch dry and fully cured. Touch dry takes about three hours, so light foot traffic is fine after four, but that’s only the surface feel, not the true cure time.
Oil-based formulas need a full 24 to 48 hours to cure, and longer in cool, damp weather. Water-based decking oil dries faster, often within six hours, but I still wouldn’t place furniture on it yet.
Oil-based decking oil needs 24 to 48 hours to cure—longer in damp cold; water-based dries faster, but still skip the furniture.
Give it a full day before normal walking, and a full week before dragging chairs or planters across the boards. Rushing it creates a sticky, tacky mess that grabs dirt and ruins the finish.
Wet edge is your friend here, too. If you recoat too soon, you’ll lift the stain and leave brush strokes and lap marks that are hard to fix.
For best results, use a quality brush or roller, keep a wet edge as you go, and check the label for specific drying time vs cure time.
In cool weather, add an extra day before the topcoat step if you’re sealing with a clear satin or matte finish.
Keep drop cloths off the deck during curing, and watch for dew forming overnight, which can cloud the sheen.
If you’re working near a house wall, painter’s tape protects the siding from splatter.
Patience here isn’t just a virtue, it’s the whole job.
Plan your coat schedule around the weather, and you’ll get a hard, durable surface that handles foot traffic without sticking.
When in doubt, wait another day. That extra time saves you from sanding down a gummy layer with 80 grit and starting over.
For paste-based wood treatments, full dry time ranges from 2 to 24 hours depending on conditions, so apply a thin layer and allow proper absorption before buffing.
When and How to Recoat Your Deck

That first coat never stays perfect for long. The sun, rain, and foot traffic wear the oil finish unevenly, so you’ll see patchy spots or water beading up on the surface instead of soaking in.
That beading is your signal to recoat. For a deck in full sun and weather, plan on recoating every six to twelve months, while a sheltered porch can go twelve to twenty-four months.
Do a water test each spring: splash a little water on the wood, and if it forms beads or runs off, the finish is still working; if it soaks in fast, you are overdue.
Weather matters more than the calendar, so pick a day between 10 and 35°C with no rain forecast for the next 24 hours, and avoid direct hot sun on the wood.
My recoat routine starts with a thorough sweep, then a wash with soapy water using a stiff brush, and a rinse.
Let the deck dry fully, which often means waiting overnight, because trapped moisture under a fresh coat will cause peeling and blotches.
Once dry, lightly sand any scuffed or grey areas with 120 grit sandpaper, just enough to open the pores and rough up the surface, then wipe off all dust with a tack cloth.
Stir the stain or varnish well, then apply one thin coat with a brush, working along the grain and keeping a wet edge to avoid lap marks and brush strokes.
Wipe off any excess with a clean rag within a few minutes, and do not walk on it until the drying time has passed, even though full cure takes a few days.
Using a satin or semi-gloss sheen will show less wear than matte, and a low-VOC oil or water-based polyurethane will keep fumes down.
If you recoat before the old finish breaks down, you skip the heavy stripping and sanding that a neglected deck demands.
Check that water test every year, and your deck stays protected without extra work. Flexible elastomeric sealers are another option for surfaces that endure extreme temperature swings, as they prevent cracking on wood reaching 150°F.
Frequently Asked Questions
Can I Apply Decking Oil in Direct Sunlight?
No, you should not apply decking oil in direct sunlight. The intense heat accelerates solvent evaporation, which forces the finish to dry before it can properly penetrate the wood, leading to patchy colour and a sticky, uneven film.
Wait for the deck to be in full shade, ideally during early morning or late afternoon, and check that the surface temperature is below 20°C. For a quick test, press the back of your hand on the boards; if it feels hot, it is too warm to proceed.
Aim for a dry day with humidity under 70%, and allow at least 4 hours between coats in these conditions. If you cannot avoid a sunny spot, apply a thin first coat and sand lightly with 120 grit between layers, but know that a shaded application will always give you a more uniform stain and longer-lasting protection.
How Do I Dispose of Oily Rags Safely?
To safely dispose of oily rags, spread them flat outdoors to dry completely, then soak them in water inside a sealed metal container. This prevents spontaneous combustion, which can ignite when rags are piled up, even in a trash can.
For a typical linseed oil or stain rag, allow at least 24 to 48 hours of direct sun and airflow until they feel stiff and crusty, not just dry to the touch.
Once dried, submerge them in a bucket of water with a tight-fitting lid, or place them in a metal can filled with water and seal it. Never mix them with regular household trash until they’re fully waterlogged.
I always keep a dedicated steel paint can for this, and I label it “wet rags only.” If you’re using a water-based finish, you can skip the soak and let them dry flat before tossing, but for oil-based products, the water soak is non-negotiable.
Store the sealed container away from heat sources and out of direct sunlight, then take it to your local hazardous waste drop-off. This same rule applies to rags used with varnish, shellac, or any oil-based primer.
What Happens if It Rains After Oiling?
If it rains after oiling, the outcome depends entirely on whether the finish has fully cured, not just dried to the touch. A sudden downpour within the first 24 hours can cloud or blotch the oil film, trapping moisture beneath the surface. For most penetrating oils, you need a solid 48 to 72 hours of dry, warm weather before rain is safe.
Once the oil has cured completely, a light rain won’t ruin the finish, but it can leave water spots or a dull haze. Check for blotching by wiping the surface with a dry cloth and inspecting under indirect light. If you see uneven patches, lightly sand with 320 grit and apply a fresh, thin coat to even things out.
For decking or outdoor furniture, always schedule oiling after checking a 5 day forecast. Use a water repellent sealer as a topcoat if you expect frequent showers, since that adds a sacrificial layer. This way, you protect your work and avoid redoing the job entirely.
Can I Oil Over a Previously Oiled Deck?
Yes, you can oil over a previously oiled deck, provided the old finish is still sound and not peeling. I’d first confirm the coating type by wiping a small area with mineral spirits; if it soaks in, it’s oil-based and ready for recoating.
Wash the deck with a deck cleaner and a stiff brush, then let it dry for a full 48 hours in good weather. Lightly scuff the surface with 80 grit sandpaper to open the wood pores, and remove all dust with a tack cloth.
Test a small corner with your new oil and wait 24 hours to check adhesion. If it beads up, you’ll need to strip or sand more, but typically a thin first coat at 300 square feet per gallon works well.
For best results, apply two thin coats rather than one thick one, allowing 24 to 48 hours between them. Searching for “refinishing oil-based deck” will give you extra product-specific guidance, too.
How Much Decking Oil Do I Need per Square Metre?
You will need roughly one litre of decking oil for every 10 square metres per coat, though this varies with timber porosity. For a standard 20m² deck, that means 2 litres per coat, and you will typically apply two coats for proper protection.
Check the specific coverage rate on your chosen tin, as hardwoods like teak will drink more than softwoods. I always calculate for the full job, then buy 10% extra to cover touch-ups and uneven absorption.
Use an online decking oil calculator with your exact dimensions to avoid guesswork. For a concrete tip, test a small hidden area first, and remember that freshly sanded wood with 80 grit will soak up more oil than a smoother surface. A related term to search is “timber stain coverage” if you are using a tinted product.
Rounding Up
Applying decking oils is a straightforward finishing job when you prioritize surface prep and even application. To get that rich, wet color and fresh sawdust smell, work the oil into the grain with a decent brush, then step back to inspect for streaks.
Clean off any blotchy patches from previous botched coats, as these show up immediately once oil is down. Compare your brush strokes while applying, and test one board first to confirm the finish level before committing to the whole deck.
Check your rags and brush for excess oil, since drips will dry unevenly. The effort rewards patience, with every hour shown in the glow.
Read next: cleaning a deck before oiling.