How to Apply Exterior Masonry Sealers: Step-by-Step Guide
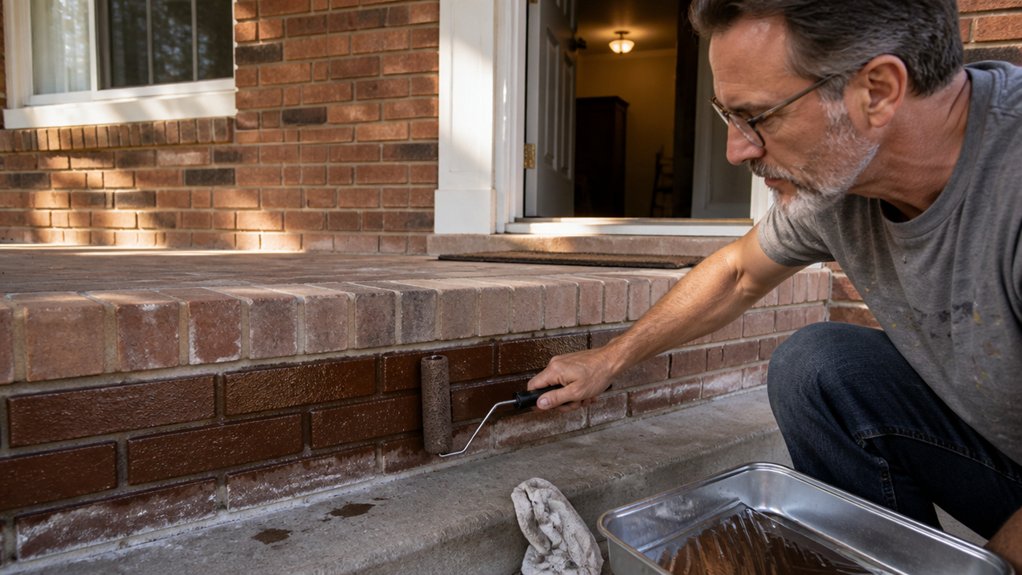
Applying exterior masonry sealers is a waste of money if the surface isn’t clean and dry first. Most failures come down to skipping surface prep or ignoring cure time, not the sealer itself.
I’ll walk you through the exact order of work, from patching cracks to choosing the right day for the job. You’ll also learn the spray and roll method that keeps coverage even and avoids glossy streaks.
By the end, you’ll know how to seal a wall once, properly, and not have to touch it again for years. Let’s start with the prep checklist that makes everything else easier.
Quick Answer
- Test surface dryness and pH before sealing; damp or alkaline masonry blocks sealer adhesion.
- Apply only in temperatures between 50°F and 80°F, avoiding direct sunlight for optimal curing.
- Use a sprayer under 30 psi or roller, working in small sections to maintain a wet edge.
- Apply two thin, wet-on-wet coats, back-rolling each pass to push sealer into pores evenly.
- Allow full cure of 5–7 days before heavy traffic; check label for exact drying times.
Prep Work: Repair, Clean, and Dry Masonry First
Prep is the part you can’t skip, even though it’s dull. Sealing over a dirty or cracked wall just traps the problem, and you’ll see every blotch through your topcoat.
Prep isn’t glamorous, but skip it and every dirty crack shows through your topcoat.
First, fix any cracks and repoint crumbling mortar with a solid masonry repair caulk. Then clean the whole surface, because dust and grime will block your sealer from bonding.
A quick wet rag test tells you if you’re ready. Wipe your hand across the masonry, and if the rag comes back dirty, wash it again and let it dry fully.
For new concrete pours, run a pH test before you seal anything. A reading above 9 means the sealer won’t grip, so wait or neutralize it first. Humid zones specifically need vapor-permeable chemistry to prevent trapped moisture and mold growth.
Efflorescence, that white powder on old brick, also stops penetration. Scrub it off with a stiff brush and water, then rinse well.
Skipping these steps costs you time and money, especially when a gallon of sealer runs $50 or more. Use a good primer or sealer made for masonry, and apply it with a roller in a smooth, even coat.
Paint and finishing work rewards patience, so keep your wet edge moving to avoid lap marks. Let the sealer dry fully before you add a topcoat, and check the label for drying time versus cure time.
Finally, lay down a drop cloth and tape off anything you don’t want coated. A little prep now saves you from sanding or stripping later, so do it right the first time.
Check Temperature, Rain Forecast, and Surface Dryness

Check the surface dryness before you open the sealer. A damp wall rejects sealer the way a cat rejects a bath, and you end up with wasted product and blotchy patches.
Wipe the wall with a dry cloth or tape a square of plastic sheet to it and check for trapped moisture after a few hours. Sealer will not bond to a damp surface, so give the wall the drying time it needs before you start.
Then check the rain forecast and plan a dry window of at least 24 hours. A sudden shower can wash fresh sealer off the wall and undo your work. Coverage decreases on bone-dry substrates, so budget extra product for porous walls.
Walk the whole job before you commit: dryness first, forecast second, then start. That order saves product and keeps the finish even.
Verify Surface Dryness
Sealing a damp wall is like waxing a wet car, a total waste of time and you’ll only regret it later. I’ve made that mistake myself, so take it from me.
Grab a moisture meter, a cheap little tool around $20, and it gives you a percentage reading. If it shows anything above 15%, stop right there and wait, no exceptions. Pinless meters can scan surfaces without puncturing them, which is ideal for checking masonry before sealing.
No meter on hand? Try the plastic sheet test instead. Tape a 2×2 foot piece of plastic to the wall, seal every edge with painter’s tape, and leave it overnight.
If you see condensation underneath in the morning, that’s your answer, plain and simple. The wall is still holding moisture, so the primer and topcoat won’t bond right, and you’ll get peeling later.
Wait at least two full days after any rain or washing before you even think about sanding or rolling. I know it’s tempting to rush, but you’ll just waste sealer, your Saturday, and a good batch of polyurethane.
A dry surface means the stain or varnish soaks in evenly, and the sheen, whether satin or matte, comes out smooth without blotches. Dry surface, happy outcome, that’s the whole game.
Monitor Rain Forecast
A forecast is only a guess, but it’s the best tool you have before you open that sealer bucket. I check the rain forecast a full week out, not just a quick look at tomorrow’s app.
You need dry weather for at least 24 hours after putting on paint or finish, but I always aim for a 48-hour window. Some products are far more sensitive than others, and a surprise shower will ruin your work fast.
Look for days with clear skies and check the hourly breakdown, not just the daily high. The best windows are early mornings when temperatures sit between 50°F and 80°F and humidity is low. Minimum 35°F application temperatures are required for proper film formation, so don’t push the limits on a cold morning.
If the surface feels cool or damp, I stop right there. Tape a plastic sheet to the surface and check for condensation after an hour; if water shows up, the wood is still too wet.
That test is your hard truth before you mix a drop of primer or stain. A damp surface will cause lap marks and brush strokes to stand out, and it can mess up the dry time versus cure time for your topcoat.
Always use a drop cloth and painter’s tape to protect the area, and pick a sheen that fits the job, like satin for trim or matte for a flat wall. Low VOC products still need the same dry window, so don’t let the label fool you.
A quick check of the ground, the sky, and that plastic sheet beats any app. If the forecast looks shaky, wait for a better day, because sanding down a ruined finish is far more work than waiting.
Tools: Sprayer, Roller, and Drop Cloths
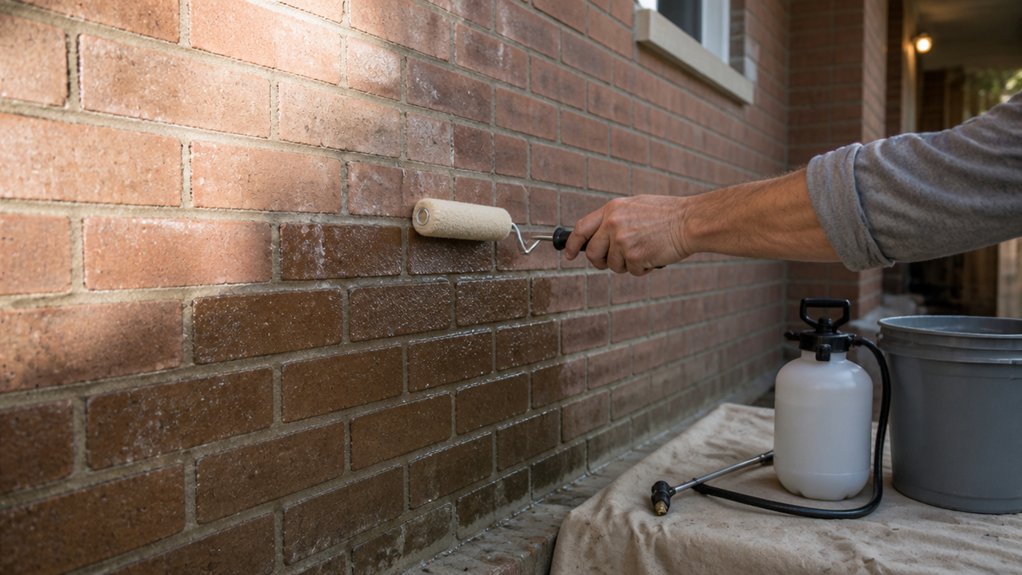
Right, let’s talk about the gear you’ll actually use, because painting a sealer with the wrong tools turns a weekend job into a sticky, streaky mess. My go‑to setup is an airless sprayer set under 30 psi with a 0.015 to 0.021 inch nozzle, which gives a fan pattern that lays down smooth and even.
For touch‑ups, grab a roller with a 3/8 inch nap, and lay down drop cloths to protect floors and furniture from overspray. Skip the brush for tight joints; it’s slow and leaves visible brush strokes, especially on a clear coat like varnish or polyurethane.
When you finish spraying, roll over the wet edge to blend any heavy spots before the sealer starts to set, and keep a wet edge the whole time to avoid lap marks. For storage, reseal the can tightly and turn it upside down, so the sealer forms a skin on the bottom instead of the top, which keeps it fresh for the next coat.
Use low‑VOC sealer if you’re indoors, and let each coat dry completely before sanding with 220 grit, then wipe off the dust before the next layer. Spray, roll, protect, and don’t cheap out on tarps; a cheap drop cloth beats scrubbing dried mist off your windows for a week.
For larger walls, opting for a model with a 1200W unit ensures the thicker sealer flows without thinning, cutting application time down to just a fraction of what a roller would take.
Apply Masonry Sealer to Vertical Walls Without Runs
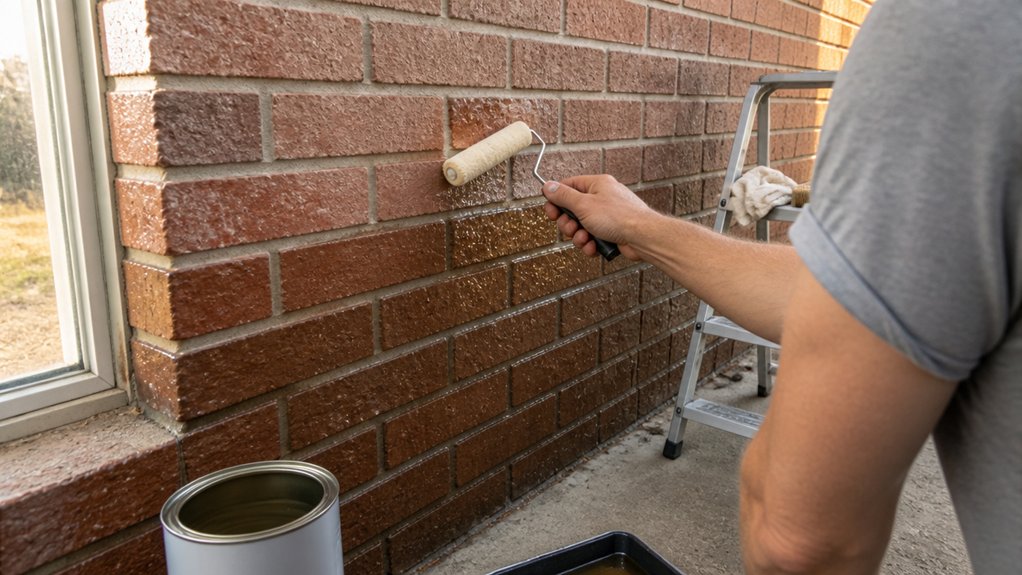
Spraying sealer onto vertical masonry is where gravity turns a quick job into a mess, because puddles dry into dark streaks that look like a rookie mistake.
I learned this the hard way on my own garage, so work fast and use a smart sequence to keep the wall even.
Start at the bottom and spray upward, keeping a controlled runoff of 3 to 5 inches below the wet edge as your signal that you have enough product on the surface.
That runoff is your visual cue, not a problem, so adjust your speed or pressure to maintain that narrow band without letting it grow.
Reduce spray pressure if you see overspray, because fine mist settles on dry areas and causes drips before you can roll them out.
If the wall is hot from sun exposure, cool it by timing your work for early morning, since heat makes the sealer set too fast and leaves lap marks.
Apply two wet on wet coats instead of one heavy pass, because the second coat soaks into pores that the first coat opened up for better penetration.
Immediately follow each spray pass with a roller back rolling to spread excess evenly and push sealer into small voids.
Use a low-VOC, water based sealer with a satin sheen for easier cleanup and fewer fumes, and keep a drop cloth at the base to catch runoff.
Avoid direct sunlight altogether and check the drying time on the label, because full cure takes longer than a dry touch.
Start with painter’s tape along edges to protect trim, and work in sections that you can finish before the wet edge disappears.
If you see a streak forming, roll it out right away with a dry roller, since waiting lets the sealer flash off and harden unevenly.
Using this method, you can coat a wall in about 124 words of planning and a steady hand, and you will end up with a clean, even finish every time.
Moisture exposure during the first 24 hours after application can ruin the curing film, causing peeling like old wallpaper.
Seal Floors and Patios Without Ponding or Puddles

Floors and patios are flat, so sealer tends to sit instead of drain. That creates puddles that dry into cloudy spots. I work in small sections and lay down a thin, even coat with a roller or sprayer. You want the surface to glisten, not look glossy like a wet mirror.
> Flat surfaces hold sealer, so work in small sections with a thin, even coat—glisten, don’t flood.
As soon as the sealer is down, I broom out the excess. Push it into the pores and spread it around so nothing pools on top. If the concrete is porous and drinks the first coat fast, wait 30 minutes and apply a second wet coat. That builds the film without leaving standing liquid. For porous surfaces, a silane/siloxane penetrating formula with higher active ingredients can reduce water absorption by about 95%.
Keep a wet edge as you move forward so you don’t get lap marks where dry sealer overlaps fresh sealer. Trust the penetration rather than relying on thick pooling to fill the surface. A satin or matte finish hides minor unevenness better than a high gloss, and you can always add another topcoat later if needed.
Work in manageable patches, about arm’s length at a time. Use a brush to cut in near walls and edges, then roll the middle to blend brush strokes. Check your drying time on the label and stay off the surface until it cures. Patience beats perfection, so keep moving steadily and fix drips as you go.
Masonry Sealer Drying Time, Coverage, and Cure Schedule
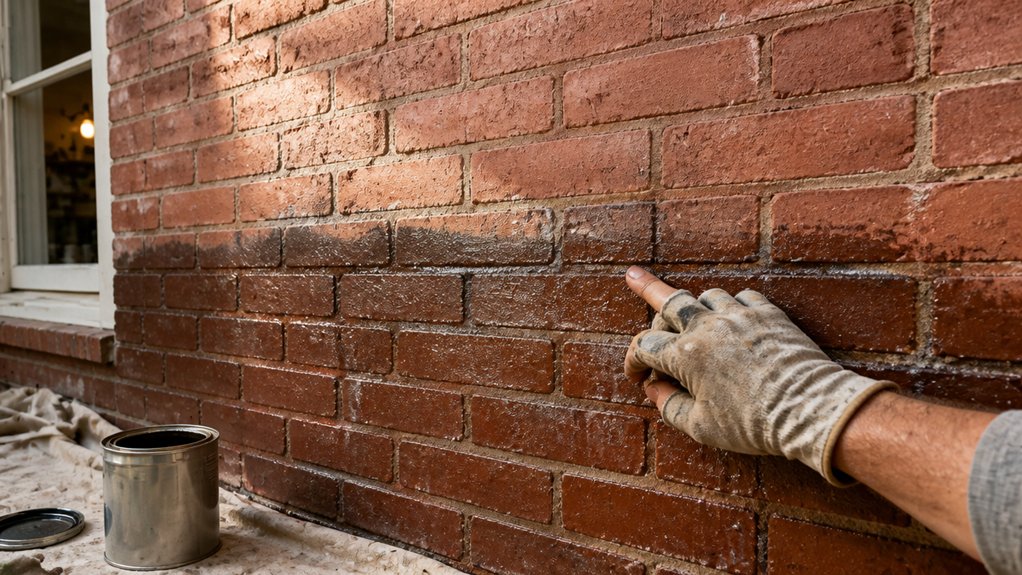
Drying time and coverage are where most DIYers get tripped up, so let’s set the schedule straight. The surface will look dry to the touch in a couple of hours, but that’s only the top film, not the sealer underneath.
Full cure takes five to seven days, so treat it like fresh paint and keep foot traffic, furniture, and vehicles off that area. If you rush it, you’ll see lap marks and uneven sheen where the early traffic pressed through the wet edge.
Plan your application to match the coverage rate on the label, usually around 150 to 200 square feet per gallon for masonry. A drop cloth and painter’s tape will protect adjacent surfaces, and a low-VOC sealer keeps the fumes manageable while you work.
Use a roller with a medium nap to lay down an even coat, and keep a wet edge by working in continuous sections. Once the topcoat is done, wait the full week before washing or sealing over it with any polyurethane or varnish. Silane-siloxane blends provide deep penetration that resists freeze-thaw damage and efflorescence, making them ideal for exterior masonry.
Masonry Sealer Drying Time
Two coats of sealer can look dry in a couple of hours, but that’s only the surface losing its tack. Real drying takes patience, and cool days or high humidity stretch it to 24 hours easily.
You are not waiting for touch-dry; you are waiting for the film to fully set so dampness cannot sneak underneath. Think of it like a topcoat on a varnished table, the gloss may feel hard, but the cure time is what locks in durability.
Check after 3 hours for light foot traffic, that is your “not sticky” signal. Do not trust it for anything heavier, because a drop cloth or painter’s tape can still pull up a soft film.
Wait 3 full days before letting vehicles roll over it, since premature pressure causes blush and leaves a milky haze. That haze is a classic sign you rushed the drying time, and it forces a full sanding and recoat to fix.
Plan your sealer reapplication window around a 5 to 7 day full cure. Rushing this step kills long term durability, so you end up recoating sooner than needed.
I have learned this the hard way on masonry patios and garage floors, where rushed jobs meant redoing work with a heavier sanding grit. Trust the clock, not your eyes, and keep your wet edge moving only after the cure window passes. Film-type sealers restrict vapor diffusion to under 1g/m² per day, so ensuring the cure completes prevents trapped moisture from blistering the coating.
Coverage Rates & Cure Schedule
Coverage math is where most sealer jobs go wrong, so figure it out before you buy a single gallon. Plan for 80 to 150 square feet per gallon with two coats, but treat that as a starting guess, not a promise.
Porosity changes everything. Dense brick sips sealer slowly, while old, crumbly concrete can soak it up fast, like a sponge.
Saturation varies from surface to surface, even on the same wall. I’ve watched one section drink twice the product its neighbor did, with no warning signs.
To stay safe, test a small patch first and measure how much sealer it uses. Then multiply that by the total area and add 10 percent for waste, brush strokes, and uneven spots.
Use a low-VOC sealer if you’re working indoors, and keep a wet edge so you don’t leave lap marks. For rough concrete, a thicker nap roller helps push product into the pores.
Let the first coat dry fully before the second, and remember drying time is not cure time. Wait the full cure period before heavy foot traffic or rain.
Lay down a drop cloth and tape off anything you don’t want sealed. A little prep beats scrubbing sealer off a window frame. Application temperature range must stay between 50°F and 90°F for water-based damp-proof paints, while temperatures below 41°F or above 95°F risk incomplete curing or a porous, weak coating mess.
Frequently Asked Questions
Can I Seal Masonry That Was Painted Before?
Yes, you can seal masonry that was painted before, but only after proper surface preparation. Sealing directly over old paint will fail because the new sealer cannot penetrate the existing coating.
First, perform a sealer adhesion test in a small, hidden area to see if the paint is even stable enough to coat. If the paint is peeling or chalking, you must strip it completely using a heavy-duty paint stripper or grind it off with a 40 grit disc.
For sound paint, etch the surface with a concrete etcher and rinse thoroughly. Then apply a penetrating silane or siloxane sealer; it bonds chemically to the masonry beneath, not the paint film.
Expect to apply two coats for porous concrete, waiting 24 hours between them. For best results, choose a water-based breathable sealer to avoid trapping moisture. Search for “painted concrete sealer prep” to find more detailed stripping guides.
What Happens if It Rains After Sealing?
If it rains after sealing, you risk rain damage before the coating has fully cured. This often shows up as streaking, a cloudy blush, or even complete sealer washout on porous surfaces.
The safest approach is to check the forecast and wait the full 24 to 48 hours for water-based sealers, though solvent-based options may need up to 72 hours in cool weather. For a concrete driveway, a light sprinkle after 12 hours can still soften the film, so delay foot traffic and cover with a tarp if a storm sneaks in.
I always recommend applying sealer only when the overnight low stays above 50°F with zero rain chance. If you do get caught, test a small corner for adhesion, and be ready to strip and reapply with a 400-grit sanding pass before recoating. That extra patience protects your hard work and avoids a costly reapplication.
How Do I Remove Sealer Mistakes or Overspray?
To remove sealer mistakes or overspray, use a chemical stripper only as a last resort, since leaving it on too long can etch up to 30% of your masonry’s surface. For light overspray, start by sanding with 120 grit sandpaper, which will knock down the mist without cutting into the concrete.
After sanding, clean the area with a mild detergent and rinse thoroughly, then let it dry for at least 24 hours. Apply a reapplication coat in thin, even layers, using a brush for edges and a roller for open areas.
Aim for two thin coats rather than one heavy pass, and wait 4 hours between them. If this is a solvent-based sealer, you can also use a diluted solvent wipe as a softening aid, but never pour it directly on the surface.
Can I Walk on the Sealer While It Cures?
Yes, you can walk on the sealer while it cures, but only after a minimum of 3 hours for light foot traffic, and even then, only in socks or soft-soled shoes. For full hardness, you must wait 5 to 7 days before moving furniture or rugs back into place. The finish remains vulnerable to scuffs and imprints during that window, so protect your investment by keeping pets and kids off the area entirely.
A practical trick is to place a few clean cardboard sheets over the sealer path if you must cross it before the 3‑hour mark. This distributes your weight and prevents tack marks. Remember that humidity and temperature slow curing, so check the product label for specific recoat and drying times. If you rush it, you risk trapping dust or leaving permanent footprints, which defeats the purpose of a smooth, durable coat.
Will Sealer Change the Masonry’s Color Permanently?
No, applying sealer will not permanently alter your masonry’s color, though you will notice a temporary darkening effect. That wet look, similar to rain on stone, typically fades within two to three weeks as the solvent evaporates and the film cures.
During this time, the surface may appear richer or deeper, but the original pigment remains fully intact underneath. For a more subdued finish, choose a matte or satin sealer instead of a high-gloss product, which emphasizes the darker wet appearance.
To speed up the cure, keep foot traffic off the area for at least 24 hours and ensure good airflow. If you’re testing, apply sealer to a small, hidden patch first and check it after a full week to confirm the color matches your expectation. This related term, “color enhancement sealer,” refers to products that intentionally darken, so avoid those if you want zero change.
Rounding Up
Apply exterior masonry sealers by covering the surface evenly and letting it dry fully before exposing it to weather.
Your first practical takeaway is to check the manufacturer’s drying time and set a timer, because rushing this step causes peeling and water damage.
Your second action is to compare your wall’s square footage against the coverage rate on the label, so you buy enough sealer for one complete coat.
Test a small, hidden patch first to confirm the sealer doesn’t darken or slick the surface unevenly.
Ask your supplier for a breathable sealer that matches your masonry type, whether brick, block, or stone.
If you skip these steps, you’ll redo the job yearly instead of enjoying a single, lasting application.
Read next about repairing cracks before sealing, since that prep work determines how well the sealer bonds.