How to Apply Skim Coat Compounds: Step-by-Step Guide

Skim coating sounds technical, but it is really just controlled mudding to fix rough walls and hide damage. The trick is knowing how to check the surface and manage your drying time before you even mix a batch.
You want to test for moisture and hollow spots first, because a weak base will ruin any skim coat no matter how clean your trowel work is. Then you mix your compound thin, apply light layers, and feather every edge flat while the mud is still workable.
This guide walks through the full process, from surface prep to sanding and recoating, so you get a smooth finish without peeling or cracking.
Stick with it and you will have your walls ready for primer and that final coat of paint.
Quick Answer
- Test substrate with moisture meter (below 12%) and tap for hollow sounds before coating.
- Mix powder with cool water at 3:1 volume ratio until lump-free, using drill paddle for 2-3 minutes.
- Apply thin layers under 1/2 inch with flat trowel, feathering edges and overlapping strokes.
- Work in small sections within 10-20 minute pot life, maintaining a continuous wet edge.
- Sand dried layers with 120-grit after 24 hours; recoat feather edges within 20 minutes.
Pre-Start Substrate Checks
Check the moisture level in the slab before you mix a single batch. Use a cheap moisture meter, test a few different spots, and make sure the readings stay below 75% relative humidity.
If the concrete feels damp, you are not prepping a floor, you are patching a leaky problem. Also tap the surface with a hammer or a coin and listen for hollow sounds, because that means delamination and the top layer is already lifting from the base.
Coating over that is just asking for bubbles and peeling later. Fix any cracks wider than a dime, and fill non-moving joints so they sit flush with the surrounding concrete.
Check the room temperature too, and keep it between 50 and 86 degrees Fahrenheit for the primer and topcoat to cure properly. Twenty minutes of checking now beats two hours of scraping with a putty knife later, so treat this as the cheapest insurance you will buy for your finish. For environments where humidity fluctuates, use a device with accurate humidity monitoring to track conditions before and during the cure, as sustained readings above 75% RH will compromise the bond.
Calculate Skim Coat Coverage and Waste
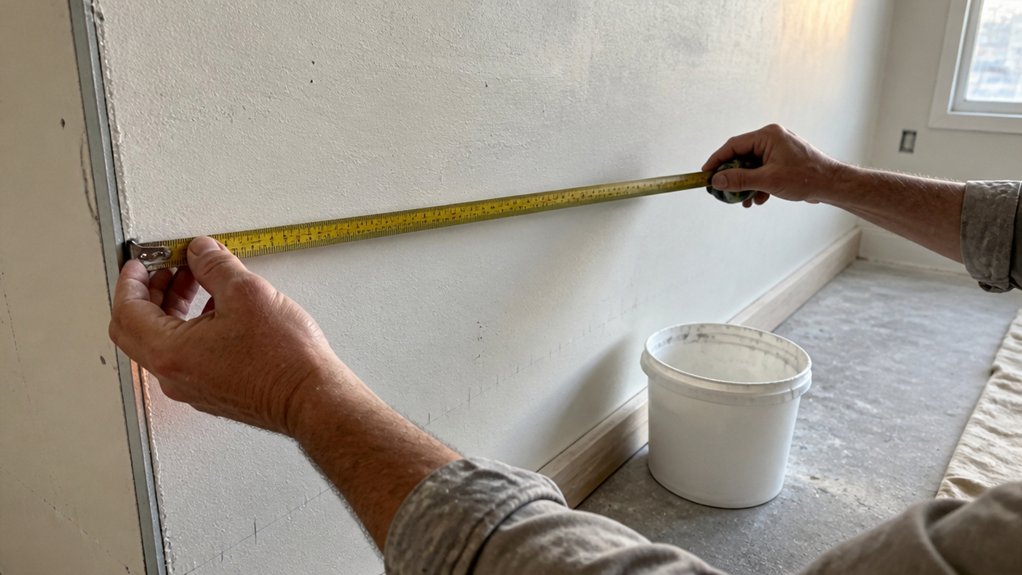
Measure the room first, length times width, and don’t round up to make the number feel better. That gives you the base square footage, but it’s only the starting point for skim coat coverage.
Rough, porous concrete will drink up more compound than a smooth, sealed slab. For every 100 square feet, I add a 10 to 15 percent buffer to cover trowel drips, feathered edges, and the batch that sets up too fast.
Rough, porous concrete drinks up more compound than sealed slab, so add 10–15% buffer to cover drips and feathered edges.
So a 200 square foot floor needs about 230 square feet of material. At 35 square feet per bag at an eighth of an inch, that’s seven bags, not six.
Trust the numbers over hope, because a second trip to the store wastes your afternoon. Before you mix anything, check the surface for cracks and dust, then apply a primer if the concrete is thirsty.
That primer seals the pores and gives the skim coat a consistent grip, so you won’t burn through extra compound. For low-shrinkage results, polymer-modified compounds reduce cracking by up to 70% compared with traditional gypsum, making them a safer bet for thin coats. Keep a wet edge as you work each section, and use a wide trowel to smooth out laps before they flash.
Drying time is not the same as cure time, so wait a full day before sanding with 120 grit. If you’re finishing over the skim coat later, a satin or matte topcoat will hide minor imperfections better than a high gloss.
Use painter’s tape along baseboards and a drop cloth to catch the inevitable splatter. Measure twice, buy one extra bag, and you’ll finish without running dry.
That extra bag is cheap insurance against a bad pour or a deep spot you didn’t see.
Mix Skim Coat Powder Correctly

Mix the skim coat in a clean 5-gallon bucket using 2 quarts of cool water for every 10-pound bag of powder. Stir with a drill paddle for 2 to 3 minutes until the mix is smooth and lump-free, like a thick primer.
Don’t add extra water to make it easier to spread, since that weakens the coat and kills your set time. Keep the water around 70°F; if the room is hot, your pot life shrinks fast, so mix smaller batches to avoid a flash set.
| Mixing Ratios | What You’ll Get |
|---|---|
| 2 qt water / 10 lb bag | Standard, spreadable |
| 3:1 powder:water by volume | Thicker, hand-mix |
| Overwatered | Weak, never sets right |
| Cold water under 60°F | Slower set, clumpy |
| Hot water over 80°F | Flash set, panic mode |
Check the temperature before you start, because cold water below 60°F gives you clumps and a sluggish set, while hot water above 80°F turns the mix into a panic mode that hardens before you can trowel it. This matters the same way your topcoat sheen does; a satin finish needs consistent mixing, and so does skim coat. A helix or spiral blade on your drill paddle prevents air bubbles for a uniform texture, just like it does with epoxy or latex.
Stick to these ratios and you’ll get a coat that sands cleanly at 120 grit and leaves a flat, even base for your primer or paint. Keep your tools wet and your strokes tight to avoid lap marks, just like you would with a varnish or polyurethane topcoat.
Use a drop cloth and painter’s tape to protect your edges, and work in manageable sections to keep a wet edge. Mix only what you can apply in 20 minutes, because the clock starts the second powder hits water.
Apply Skim Coat With Flat-Edge Trowel

Press the flat edge of your steel trowel firmly into every crack and seam, using overlapping strokes to push the skim coat into the surface. Feather the edges thin so they blend with the surrounding drywall, and keep each layer under 1/2 inch thick.
Anything thicker will sag, crack, or leave you sanding for hours, so resist the urge to pile it on. Work in small sections and keep a wet edge between passes to avoid lap marks that show up after the primer goes on.
For a smooth base before your topcoat, let each layer dry completely, then knock down any ridges with 120-grit sandpaper. If you are finishing over old paint or stain, wipe the area with a damp cloth first to remove dust, and use a low-VOC primer afterward to seal the repair. Choosing a low-shrinkage compound can reduce the need for touch-ups and extra sanding passes.
A flat trowel gives you the control a curved one lacks, so keep your wrist straight and pull the blade at a slight angle. Move with even pressure, and check your work with a bright light from the side to catch low spots early.
Once the skim coat is dry and sanded, you are ready for paint or a clear finish like varnish, depending on the surface. Use a drop cloth underneath and painter’s tape on trim to keep the mess contained.
Flat-Edge Trowel Technique
The flat-edge trowel is your best friend for this job. Think of it as the steering wheel for a very messy car, guiding the material exactly where you need it.
I keep my steel trowel angle low, around 10 to 15 degrees, so the flat edge presses material into defects without gouging the surface. Hold the blade tight to the floor and pull it in smooth, overlapping strokes, much like you would a wet edge on a fresh coat of primer.
Don’t overwork the material, since that creates ridges and leaves a floor that feels like a washboard. The pressure and angle matter more than speed, so match your passes to the table below for a clean, even finish.
For the first pass, use a 10 to 15 degree angle with firm pressure to fill any low spots. On the second pass, drop to 5 to 10 degrees with medium pressure to smooth the surface without dragging up fresh material.
The third pass uses a near flat blade with light pressure, and the final pass is completely flat with a feather-light touch. This progression mirrors how you’d knock down brush strokes in a varnish coat, starting with full coverage and ending with barely any contact.
Keep your strokes consistent, and don’t let the blade chatter or skip, since that leaves lap marks you will have to sand out later. If you catch a rough patch, stop and let it set, then come back with a light skim coat rather than scraping the area again.
A steady hand and low angle let the flat edge do the steering work for you. You get a smooth, defect-free surface without the need for extra sanding grit or a second full skim. Using beveled edges and rounded corners helps prevent scratches and gouges in the fresh plaster.
Feather Edge Application
Most skim coats are only a thin layer to patch a low spot or blend a repair into the surrounding floor. I load a dollop on the flat-edge trowel and drag it across the seam, pressing hard at the high point and letting off near the edges.
The trick is to taper it to nothing so you don’t leave a ridge. Feather edge durability is surprisingly good for the thinness, but it’s not armor once it’s cured.
It handles foot traffic fine, but I wouldn’t test it with a dropped hammer. As for cost, expect about a quarter bag per ten square feet at this skim, which works out to pennies versus a full replacement.
This approach keeps low spots level without piling up material, and it saves money because you’re not wasting product. It also looks better if you blend the patch early, before the surrounding floor has its primer and topcoat.
I always sand with a finer grit after it dries, then wipe off the dust before applying a stain or a polyurethane finish. Feathering thin and letting the skim coat dry fully is what gives you a smooth base for the next coat. A fine 3/8-inch nap roller cover is the right match for the smooth, semi-smooth finish this feathered skim coat provides.
Once you’ve got that wet edge to work with, you can lay down your satin or matte finish without worrying about lap marks. Just feather it thin, let it dry, and you’re ready to move on.
Layer Thickness Control
No two trowel passes ever lay down the same skim coat, so layer thickness control is where I earn my keep. You cannot eyeball this, trust me.
I rely on layer thickness tools like a depth gauge or a straightedge with a feeler gauge, because they do not lie. Your acceptable deviation limits are typically ±1/16 inch per pass, and beyond that you are sanding forever.
I press the flat-edge trowel tight at a low angle, maybe 10 degrees, pulling a consistent, wet edge. A thick pass cracks, and a thin one tears, so I keep the pressure steady and the mud soft.
I check my work after each swipe whilst it is still soft, and I fix it then or I will be grinding later. Measure, don’t guess, and your wrists will thank you. Choose a low-shrink spackle to minimize cracking and reduce the need for repeated filling passes.
Before I finish, I wipe the edge clean with a damp rag so the next pass bonds without lap marks. Once the skim coat dries, I hit it with 120 grit sandpaper before any primer or topcoat goes on.
Pot Life: 10–20 Minutes of Workable Time

Once your mix is lump-free, the working clock starts ticking and it is a short one. Plan for 10 to 20 minutes of workable time, but temperature shifts that window in a big way.
Plan for 10 to 20 minutes of workable time once your mix is lump-free, but temperature shifts that window in a big way.
On a hot day above 73°F, that window shrinks fast, while a cooler room buys you a few extra minutes. Your mix consistency right now matters more than speed, so get it right before you start.
If the patch is too thick, you will fight the trowel, and if it is too thin, it will slump on the vertical spots. I have learned the hard way that scrambling mid-batch is no fun, so set your patch area and keep your tools within arm’s reach.
Do not answer your phone once you start, because when the material stiffens, you are done. Mix small batches, work steady, and you will beat the clock without creating lap marks or brush strokes you have to sand out later.
Think of the wet edge on a primer coat: you keep moving to stay ahead of the drying film. The same rule applies here, so lay down your filler and smooth it once, then stop.
If you need to sand after it cures, use 120 grit for the first pass and follow with 220 grit for a clean surface before your topcoat. The drying time before sanding is shorter than the full cure time, so read the label and give it the hours it asks for. For a smoother finish on that final pass, opt for an open mesh screen that resists clogging and lets dust fall through.
Recoat, Sand, and Walk Times

Recoat timing depends on how thick you laid it down. A light feather edge can take another pass in about 20 minutes, but a heavier coat needs a full 24-hour wait to avoid wrinkling or lap marks.
Sanding is more forgiving, since you can knock down ridges with 220-grit after just 1 hour. For a smooth, dust-free finish, though, give the topcoat a full 3-day cure before you touch it with sandpaper.
You can walk on the floor after 16 hours for a quick check, but that’s only for light traffic. Hold off on moving furniture or dropping heavy objects for a full week, or you’ll leave embarrassing craters in your polyurethane or varnish.
Keep a wet edge while you work, and use a drop cloth and painter’s tape to protect the trim. If you’re using a satin or matte sheen, remember that thicker layers dry slower, so plan your passes around that narrow recoat window.
Drying time is not the same as cure time. The surface feels dry in hours, but the solvent and VOC release continues for days, so resist the urge to rush the final walk-on or sanding step. Tape-prime new roller covers with painter’s tape to remove loose fibers before applying compound, ensuring a streak-free finish.
Recoat Windows & Timelines
My first skim coat taught me that patience is a schedule, not a virtue. Recoat windows are the backbone of your timeline, not loose suggestions.
For a feather edge, you can recoat in about 20 minutes, but don’t rush a second coat if the first feels tacky. Tacky paint will drag and leave brush strokes you’ll have to sand out.
Set a timer and walk away, do something else until that window opens. At 70°F, pot life is only 10 to 20 minutes, so mix small batches each time. Full cure for most sprays takes 24 hours, so plan your day accordingly.
Direct sunlight is your enemy. Drafts and heat mess with set times, so check the surface every 10 minutes and feel it with your palm.
If it’s dry to the touch but not hard, you’re in the golden zone for a wet edge. Miss that window, and you’re sanding a rough mess with 120 grit and cursing your timing.
Plan your recoat times before you mix, and treat them like a topcoat schedule. Primer, varnish, or polyurethane, the same rule holds: dry time is not cure time.
Write your mixing time and recoat window on the bucket lid with a marker. That simple habit saves you from lap marks and regret.
Sanding & Full Cure Steps
The skim coat may feel dry, but a dry touch only means the surface skinned over. Full cure takes days because the chemical reaction needs time to finish inside the material.
Sanding after one hour gives you a smoother texture for another skim coat. If you plan to paint or prime, wait a full week before touching it with a roller or brush.
Use a cheap moisture meter to check dampness. If it reads above 12%, stop and wait, because any topcoat will trap that moisture.
Walk times vary, so keep them separate in your mind. Polyurethane adhesive sets for foot traffic in 16 hours, but most sheet flooring or tiles only need 15 minutes after the adhesive tacks up.
My rule is simple: sand early, wait long, test often. For feather edges, recoat at 20 minutes while the wet edge still blends.
Full cure demands patience. Turn off the HVAC during setting, and block direct sunlight to avoid uneven drying.
Skipping these steps causes bubbles, cracks, or peeling in your primer and topcoat. Play it safe, follow the cure time on the label, and never trust a dry touch alone.
Frequently Asked Questions
Can Skim Coat Be Applied Over Painted Surfaces?
Yes, skim coat can be applied over painted surfaces, but only after thorough surface preparation.
The bond depends entirely on how well you clean and etch the existing paint. Scrub the wall with a degreaser, then sand glossy enamel with 120 grit to dull the sheen.
Next, prime the area with a bonding primer made for slick finishes. This step is critical, especially over semi gloss or high gloss paint.
Don’t skip checking for loose or chipping paint, tap test every suspect spot. If any paint peels away, scrape it off and patch the bare area before troweling on the first coat.
For a practical example: use a 1.5 mm nap roller to apply a thin, 1/8 inch skim coat, then let it dry for 24 hours before sanding.
Related to this, a “bonding agent” works well on old, failing paint to improve grip. Remember, two thin coats beat one thick pull.
How Do I Fix Air Bubbles After Application?
To fix air bubbles after application, you’ll need to perform a pinhole repair once the first coat has set. Let it dry until it’s no longer tacky, typically 30 to 60 minutes for most epoxies or floor coatings, then apply a tight second coat. Increase your trowel pressure significantly and work in short, overlapping strokes to force material into the voids. Don’t just spread the product; you’re actively pushing it down to displace trapped air and seal the surface.
For stubborn bubbles, use a squeegee or a rubber grout float instead of a standard trowel to apply more focused, even pressure. This method works well for self-leveling compounds and resin finishes alike.
If bubbles persist after the second coat, lightly sand the cured surface with 120 grit paper, vacuum the dust, and apply a third thin skim coat. Always check your material’s working time to avoid overworking, which can reintroduce air. A small propane torch passed quickly over wet coating also pops surface bubbles before they cure, but only on non-flammable substrates.
What if the Mixture Becomes Too Stiff Before Use?
If the mixture becomes too stiff before use, simply add a small amount of clean water and remix thoroughly to restore a workable consistency. This is a common fix for water based compounds like joint compound or certain adhesives, so don’t scrap the batch yet.
Add water in tiny increments, roughly a tablespoon per quart of material, and stir slowly to avoid trapping air bubbles.
Let the rehydrated mix sit for five minutes, then remix once more; this allows the water to penetrate evenly. For a faster next time, work in smaller batches and keep the container covered between applications.
If you’re using a setting type compound, remember that rehydration won’t work once the chemical cure starts, so check the label for its working time. Searching for “reconditioning dried joint compound” can give you more targeted advice.
Is a Primer Required Before Starting to Skim Coat?
A primer is not strictly required before skim coating, but it is highly recommended for professional results. Priming controls the surface porosity so your topping compound dries evenly instead of flashing in patches.
Without a primer, fresh drywall and old painted surfaces will suck moisture out at different rates, causing rough spots and extra sanding. Use a high bonding primer on glossy or stained areas, then sand with 120 grit once it is dry.
For the best skim coat, apply two thin coats of topping compound, letting each dry overnight. Search for “surface preparation for drywall finishing” for more details. Trust me, skipping primer means more coats and more work, so do it right.
Why Does My Skim Coat Crack During Drying?
Your skim coat cracks because crack propagation happens when the moisture loss rate is too fast, usually from hot, drafty air pulling water out quicker than the compound can cure. To prevent this, always dampen the wall surface lightly before applying the coat, and avoid fans or open windows that create airflow.
A concrete fix is to mist the fresh skim coat with water every 30 minutes for the first two hours, which slows drying and reduces shrinkage stress. I also recommend working in sections no larger than 10 square feet, so you can keep the edges wet and blend smoothly.
For a related term, look up crazing if you see fine spiderweb lines, that signals the same rapid drying issue. If cracks still appear, sand with 120 grit, then apply a second thin coat at 1/16 inch, and let it cure for 24 hours before painting.
Rounding Up
Apply skim coat compounds by planning, priming, patching, and polishing the wall in that exact order. Mix smaller batches, trowel flatter, and do not rush the sanding, because these three habits separate a smooth finish from a lumpy mess.
Grab a $15 taping knife and test your mixing technique on a small patch today. Compare your trowel angle against a straightedge to see where the high spots form.
Check your sanding progress with a light held at a shallow angle before moving to the next section. Ask a friend to run a hand over the dried coat to catch any ridges you missed.
Read about repairing cracks in plaster next. Do it right once, and your future self will thank you.